Supported types
Currently, consensus scoring is supported for the following asset and annotation types:Set up consensus scoring
When adding data rows to an Annotate project, use the Queue batch option to enable consensus scoring and configure additional settings. You can’t change these settings after submission.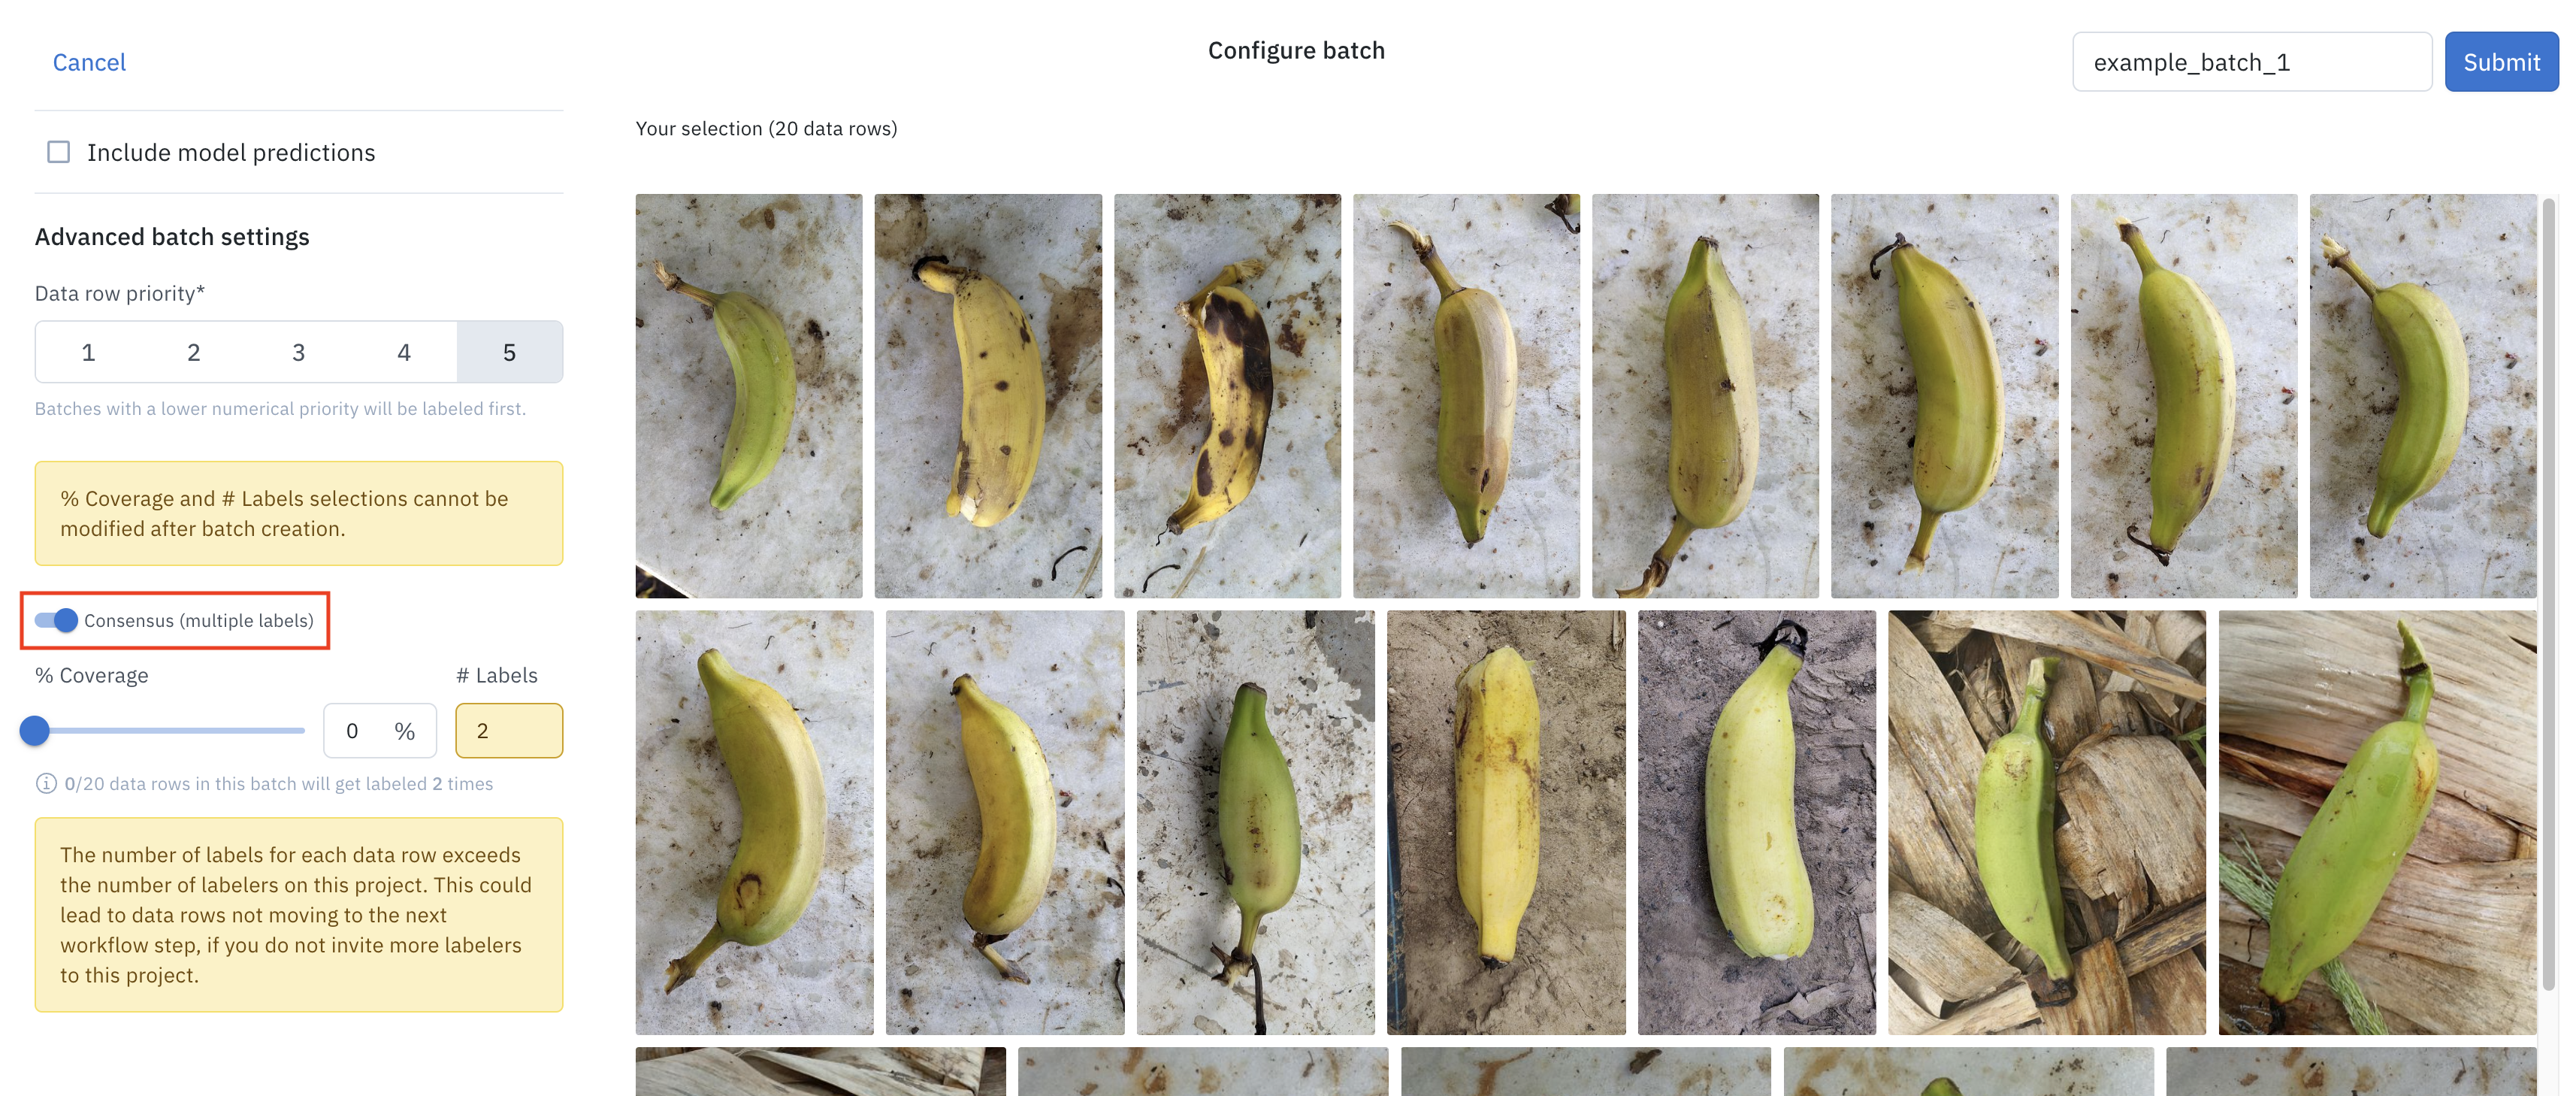
Consensus calculation can take up to five minutes
Select consensus winners
After a data row is labeled and enters the review stage, the first set of annotations entered for a data row represents consensus by default. Reviewers can reassign consensus to another set of annotations once the data row has more than one label. If your data row has been labeled more than once, you’ll view all of the label entries on that data row in the data row browser. The following example shows a data row with two sets of labels. The green trophy icon indicates that the first set of annotations is considered “consensus.” To change consensus, click the trophy icon next to the preferred annotations.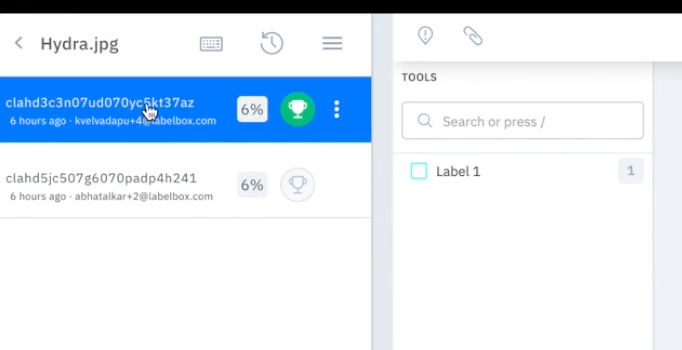
Set consensus winners as benchmark references
You can designate consensus winners as benchmarks. See Set up benchmarks.Search and filter data using consensus scores
The Consensus agreement filter helps you find qualified data rows based on consensus scores. You can apply this filter in the following locations: When using the filter, you can configure the following options:- Scope: Specify the type of agreement to measure:
- Feature-level measures the agreement on a specific feature schema in the ontology for each data row. If you select this option, further specify one or more feature schemas in the ontology using the dropdown menu.
- Label-level evaluates the overall agreement across all annotations within a single data row.
- Calculation: Choose whether to calculate the agreement as an absolute or average score.
- Range (0-1): Set the score range from 0 to 1, where 0 indicates no agreement among annotators and 1 indicates complete agreement.