> ## Documentation Index
> Fetch the complete documentation index at: https://docs.labelbox.com/llms.txt
> Use this file to discover all available pages before exploring further.
> Use issues and comments to provide direct labeling feedback or raise questions.
# Using issues to share feedback
When you're working on a labeling project, clear communication is key. The **Issues** feature in Labelbox is designed to help you and your team members communicate effectively. You can use it to give feedback, point out errors, or ask questions directly on the data you're labeling.
This guide will walk you through how to use this feature to improve your team's collaboration.
## How it works
Imagine a common scenario between a labeler and a reviewer:
1. A labeler finishes labeling an asset and submits it.
2. The reviewer looks at the label and notices something that needs to be corrected.
3. The reviewer then creates an "issue" on that specific label to flag the problem.
4. The labeler can see all the issues assigned to them in the **Issues** tab.
5. When the labeler clicks on an issue, they are taken directly to the label that needs fixing.
6. The labeler can then either fix the label and "resolve" the issue, or they can reply with a comment to ask for more clarification from the reviewer.
It's important to know that issues and comments are specific to each project, not your entire organization. Also, what you can do with issues and comments depends on your role in the project.
| Role | Permissions |
| ----------------- | --------------------------------------------------------------------------------------------------------------------------- |
| Labeler | Can create, update, delete, resolve, and reopen their own issues on assets they have labeled. |
| Reviewer or Admin | Can create and resolve issues on any labeled asset. They can also delete their own issues and manage comments on any asset. |
## How to create an issue
For an issue to be visible to your team, the data row you're working on needs to be submitted or skipped. If the data row is still in the **To label** step, the issue won't appear in the **Issues** tab.
Here’s how to create an issue:
1. First, open the labeling editor by selecting an asset from any of the workflow steps (like “To label” or “To review”).
2. In the top-left corner of the editor, click on the **issues** icon to activate the tool.
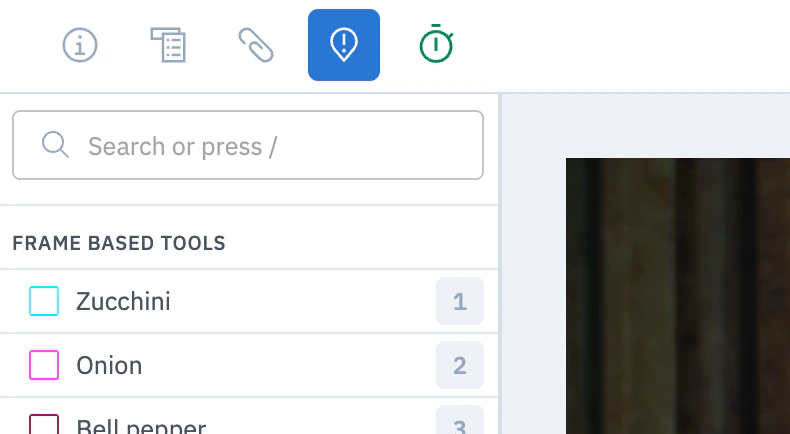 3. Click on the specific spot on the asset where you want to place the issue.
4. A panel will appear on the right where you can type your **message**, such as a description of the problem or a question.
5. (Optional) You can add a **category** to the issue. This is helpful for organizing and filtering issues later on. You can either use an existing category or create a new one with a name and description.
6. Finally, click **Create issue** to save it.
## How to reply to an issue
To reply to an issue, go to the **Issues** tab and select an issue, or click on an issue directly in the editor. Type your response in the **Reply** text box and click **Submit**.
This is what a typical flow looks like from a labeler perspective:
1. **Labeler gets the rework task:** From the project overview, the labeler starts the **Rework** task (e.g., “Start reworking”), which opens the editor on a rejected data row. The issue marker is visible on the asset once it’s out of “To label.”
2. **Labeler opens and reads the issue:** In the editor, the labeler clicks the **issue icon/marker** to open the issue thread and read the reviewer’s feedback. Alternatively, they can go to the project’s **Issues tab**, find issues on assets they labeled, and click one to jump directly into that label + issue context.
3. **Labeler responds via comments and/or fixes the label:** If the instructions are clear, the labeler **edits the label** to address the problem, then **submits** the data row again from the editor; this moves it back into review. If they need clarification, they \*\*reply on the issue \*\*by typing a response in the **Reply** box on the issue and click **Submit** to add a comment to the thread.
## How to view all issues for a project
To see all the issues in a project, simply go to the **Issues** tab. From there, you can filter the issues to see which ones are **All**, **Open**, or **Resolved**.
You can also manage your issue categories from this tab. Just select **Issue categories** to create new ones or edit existing ones.
## How to update an issue
Once an issue is created, users on the project can interact with it in a few ways:
* **Leave a comment:** Go to the **Issues** tab in your project dashboard and select an issue from the list. This will open the data row in the browser along with the posted issue. Enter your comment in the **Reply** box and click **Submit** to save your comment.
* **Edit, resolve, or delete an issue:** To resolve an issue, simply click the **Resolve** button at the bottom of the issue. You can also access an options menu to **Edit** the content of the issue, **Resolve** it, or **Delete** it entirely. The actions you can take will depend on your user role.
* **Move an issue:** If you're the one who created the issue, you can also click and drag it to a different location on the asset.
3. Click on the specific spot on the asset where you want to place the issue.
4. A panel will appear on the right where you can type your **message**, such as a description of the problem or a question.
5. (Optional) You can add a **category** to the issue. This is helpful for organizing and filtering issues later on. You can either use an existing category or create a new one with a name and description.
6. Finally, click **Create issue** to save it.
## How to reply to an issue
To reply to an issue, go to the **Issues** tab and select an issue, or click on an issue directly in the editor. Type your response in the **Reply** text box and click **Submit**.
This is what a typical flow looks like from a labeler perspective:
1. **Labeler gets the rework task:** From the project overview, the labeler starts the **Rework** task (e.g., “Start reworking”), which opens the editor on a rejected data row. The issue marker is visible on the asset once it’s out of “To label.”
2. **Labeler opens and reads the issue:** In the editor, the labeler clicks the **issue icon/marker** to open the issue thread and read the reviewer’s feedback. Alternatively, they can go to the project’s **Issues tab**, find issues on assets they labeled, and click one to jump directly into that label + issue context.
3. **Labeler responds via comments and/or fixes the label:** If the instructions are clear, the labeler **edits the label** to address the problem, then **submits** the data row again from the editor; this moves it back into review. If they need clarification, they \*\*reply on the issue \*\*by typing a response in the **Reply** box on the issue and click **Submit** to add a comment to the thread.
## How to view all issues for a project
To see all the issues in a project, simply go to the **Issues** tab. From there, you can filter the issues to see which ones are **All**, **Open**, or **Resolved**.
You can also manage your issue categories from this tab. Just select **Issue categories** to create new ones or edit existing ones.
## How to update an issue
Once an issue is created, users on the project can interact with it in a few ways:
* **Leave a comment:** Go to the **Issues** tab in your project dashboard and select an issue from the list. This will open the data row in the browser along with the posted issue. Enter your comment in the **Reply** box and click **Submit** to save your comment.
* **Edit, resolve, or delete an issue:** To resolve an issue, simply click the **Resolve** button at the bottom of the issue. You can also access an options menu to **Edit** the content of the issue, **Resolve** it, or **Delete** it entirely. The actions you can take will depend on your user role.
* **Move an issue:** If you're the one who created the issue, you can also click and drag it to a different location on the asset.