> ## Documentation Index
> Fetch the complete documentation index at: https://docs.labelbox.com/llms.txt
> Use this file to discover all available pages before exploring further.
# Save a filter as a slice
> Create, explore, and updates slices in Catalog.
Think of a "slice" as a saved search. It's a dynamic, saved collection of your data that you've grouped together using one or more filters. For example, you could create a slice of all images that have a "dog" label and were uploaded in the last week.
Because slices are dynamic, they automatically update. Any new data you add to Labelbox that matches your saved filters will automatically appear in that slice.
## How to create a slice
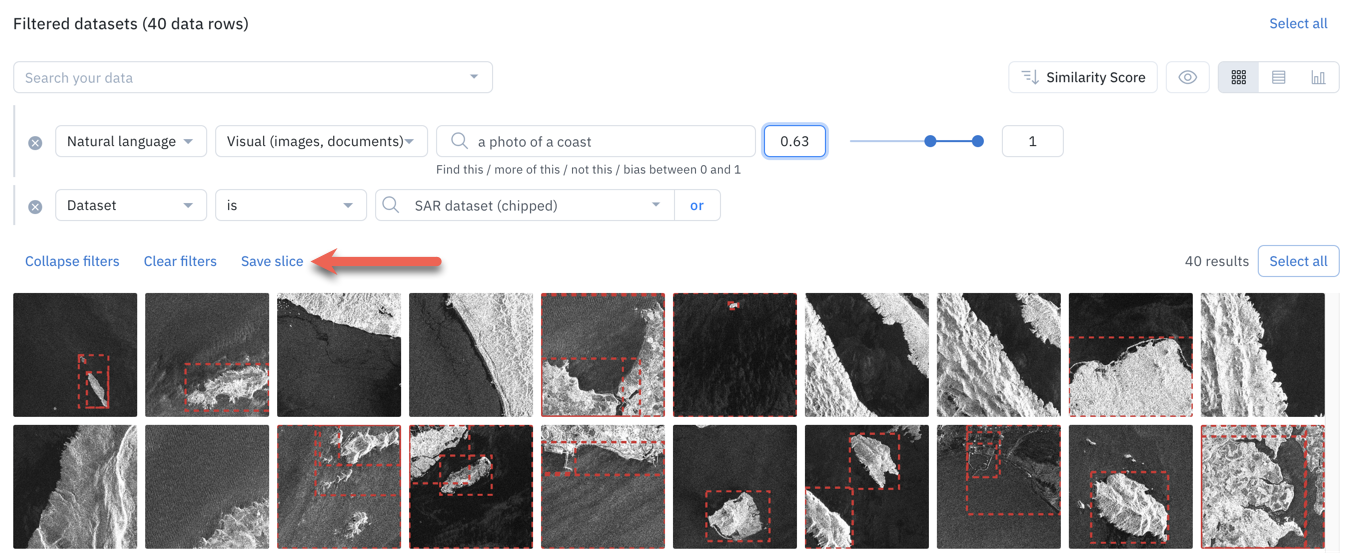
1. **Start with a search**: In the **Catalog**, use the [filter](/docs/filtering-and-sorting) options to narrow down your data. You can filter by metadata, annotations, dataset, and more.
2. **Save your search**: Once you're happy with your filtered results, click the **Save slice** button.
3. **Name your slice**: Give your slice a descriptive name (between 3 and 30 characters) and add an optional description.
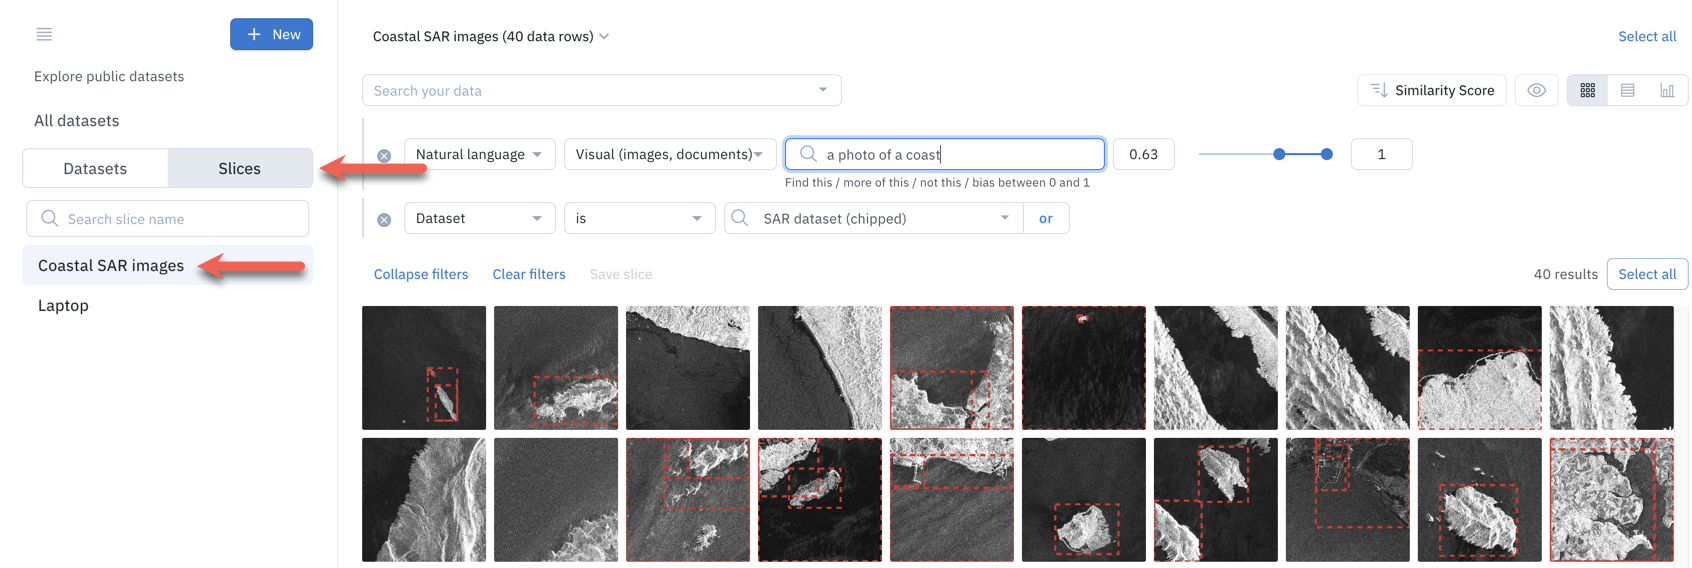
 4. **Find your slice**: Your newly created slice will now appear in the **Slices** list on the left-hand panel of the Catalog.
After you create a slice, the slice will show up in your list of **Slices** in the left side panel of Catalog.
**Limits**
See [this page](/docs/limits) to learn the limits for creating slices.
## Explore your slices
To explore a slice, go to the left side panel of the Catalog, click on **Slices**, and click on the slice name you want to explore.
The filters associated with the slice will appear instantly. All data rows matching the filters will also appear, including data rows uploaded after the slice was created.
4. **Find your slice**: Your newly created slice will now appear in the **Slices** list on the left-hand panel of the Catalog.
After you create a slice, the slice will show up in your list of **Slices** in the left side panel of Catalog.
**Limits**
See [this page](/docs/limits) to learn the limits for creating slices.
## Explore your slices
To explore a slice, go to the left side panel of the Catalog, click on **Slices**, and click on the slice name you want to explore.
The filters associated with the slice will appear instantly. All data rows matching the filters will also appear, including data rows uploaded after the slice was created.
 Once you are done exploring a slice, you can:
* Click on a different slice name to explore a different slice.
* Click on **Datasets** and a dataset name to explore a dataset.
* Click on **All datasets** to explore your complete Catalog.
## Update a slice
Over time, you might need to adjust the filters associated with a slice. Upon navigating to a slice, you can modify, add, or delete attributes of the filters.
**To update a slice:**
1. Navigate to the slice you want to change.
2. Modify, add, or delete filters as needed.
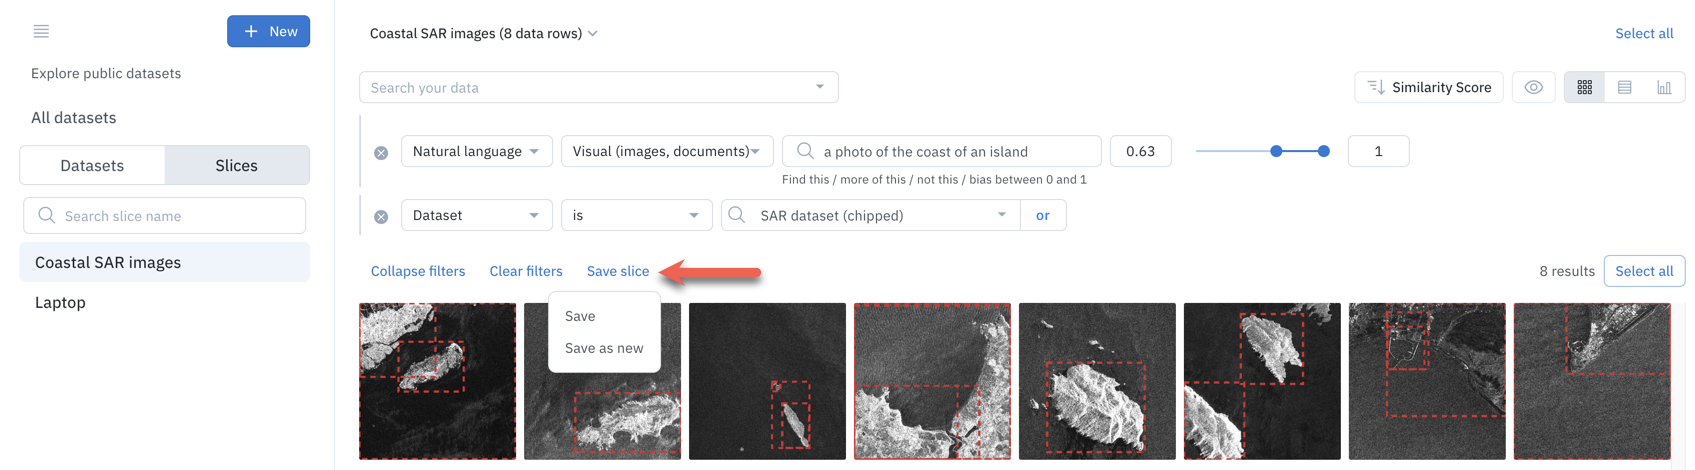
3. Click **Update slice**. You'll be prompted to select one of the following options.
* **Save** the changes to the current slice to (update it with the newly configured filters).
* **Save as new** a distinct slice with the newly configured filters.
Once you are done exploring a slice, you can:
* Click on a different slice name to explore a different slice.
* Click on **Datasets** and a dataset name to explore a dataset.
* Click on **All datasets** to explore your complete Catalog.
## Update a slice
Over time, you might need to adjust the filters associated with a slice. Upon navigating to a slice, you can modify, add, or delete attributes of the filters.
**To update a slice:**
1. Navigate to the slice you want to change.
2. Modify, add, or delete filters as needed.
3. Click **Update slice**. You'll be prompted to select one of the following options.
* **Save** the changes to the current slice to (update it with the newly configured filters).
* **Save as new** a distinct slice with the newly configured filters.
 ## Other actions
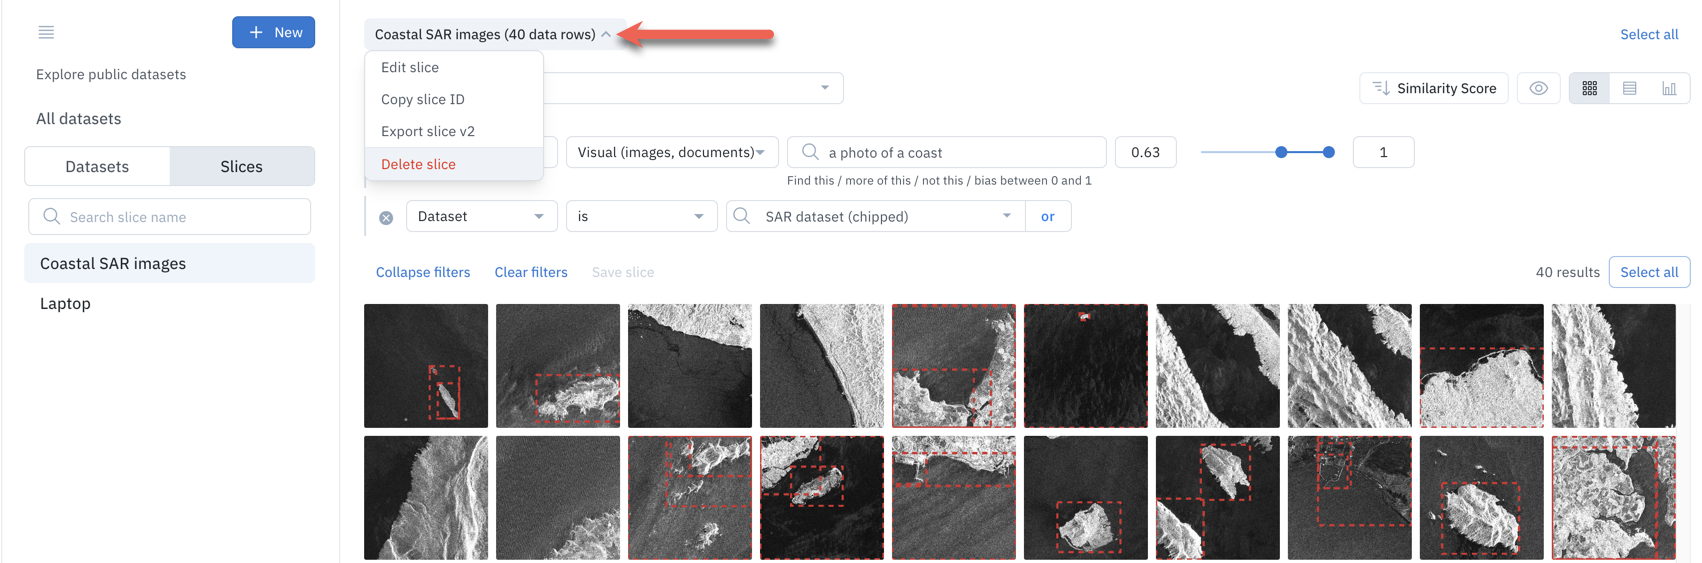
When you select a slice, you can access its dedicated menu to:
* **Edit** the slice (aka, change its name or description).
* **Copy** the slice ID that you can use with the Python SDK (see [link](/reference/slice)).
* **Export** the slice (see [Export data rows from Catalog](/reference/export-overview#export-data-rows-from-catalog)).
* **Delete** the slice. Be careful. This can't be undone.
## Other actions
When you select a slice, you can access its dedicated menu to:
* **Edit** the slice (aka, change its name or description).
* **Copy** the slice ID that you can use with the Python SDK (see [link](/reference/slice)).
* **Export** the slice (see [Export data rows from Catalog](/reference/export-overview#export-data-rows-from-catalog)).
* **Delete** the slice. Be careful. This can't be undone.