Videos
Guide for labeling video data.
Overview
When you attach a video to a project, Labelbox will automatically adjust the editor interface for video labeling.
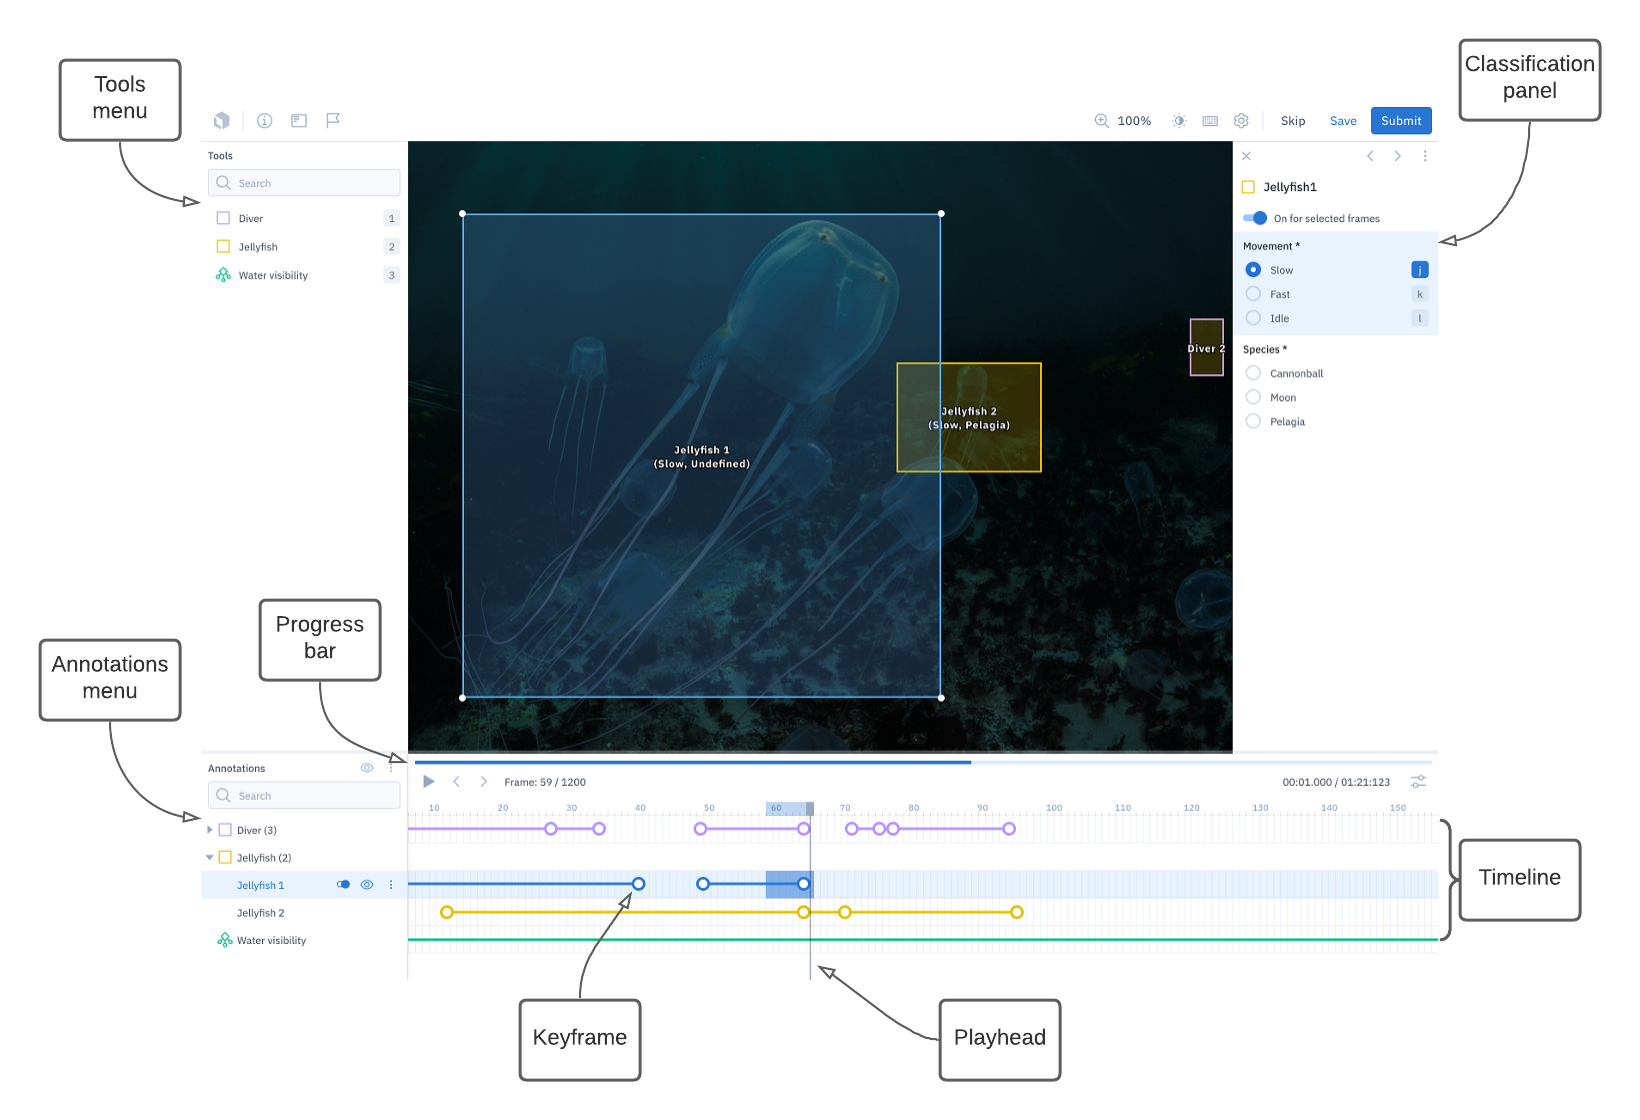
This is what the editor will look like when you are labeling video data.
Import video data
To learn how to import video data to Labelbox, visit the documentation on importing video data.
Data row size limit
To view the maximum size allowed for a data row, visit our limits page.
Supported annotation types
Below are the annotation types you may include in your ontology when you are labeling video data.
| Feature | Import annotations | Export annotations |
|---|---|---|
| Bounding box | See payload | See payload |
| Polyline | See payload | See payload |
| Point | See payload | See payload |
| Segmentation mask | See payload | See payload |
| Radio classification | See payload | See payload |
| Checklist classification | See payload | See payload |
| Global free-form text classification | See payload | See payload |
Scope of classifications
Classifications in the video editor can be applied at the global or frame level. Classifications support nested classifications, but nested classifications are not yet supported for object tools in the video editor.
Bounding box
To create a bounding box, use your cursor to place the top left and bottom right corners of the shape. By default, the shape will be created in the current frame and all frames following. You can use the annotation toggle (or the hotkey T) to adjust the length of the object instance.
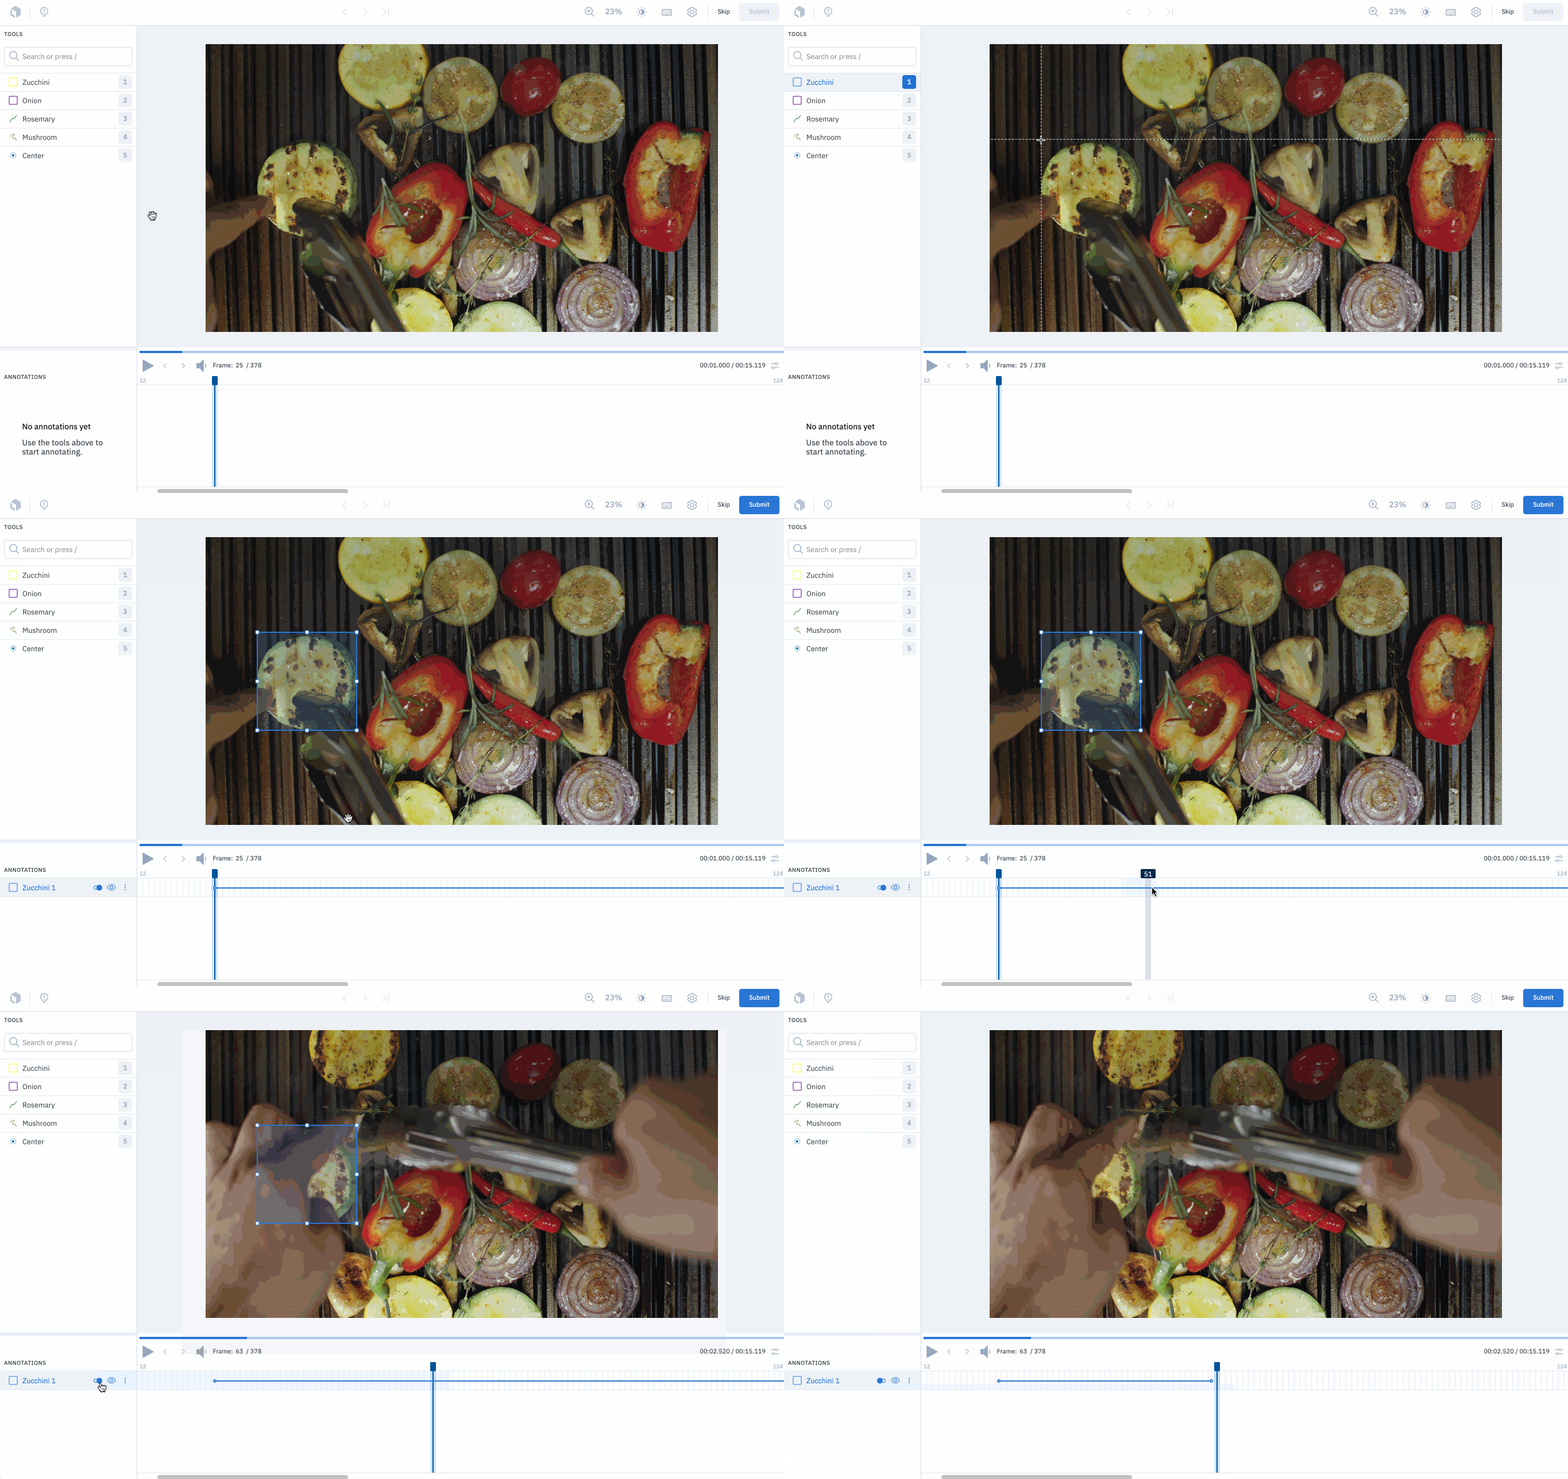
To reposition the bounding box, simply click and hold, then use your mouse or trackpad to reposition the annotation on the frame. You can also click and drag the corners to resize the bounding box. Whenever an object is created or edited on a video frame, a keyframe is created, and all frames between keyframes will interpolate.
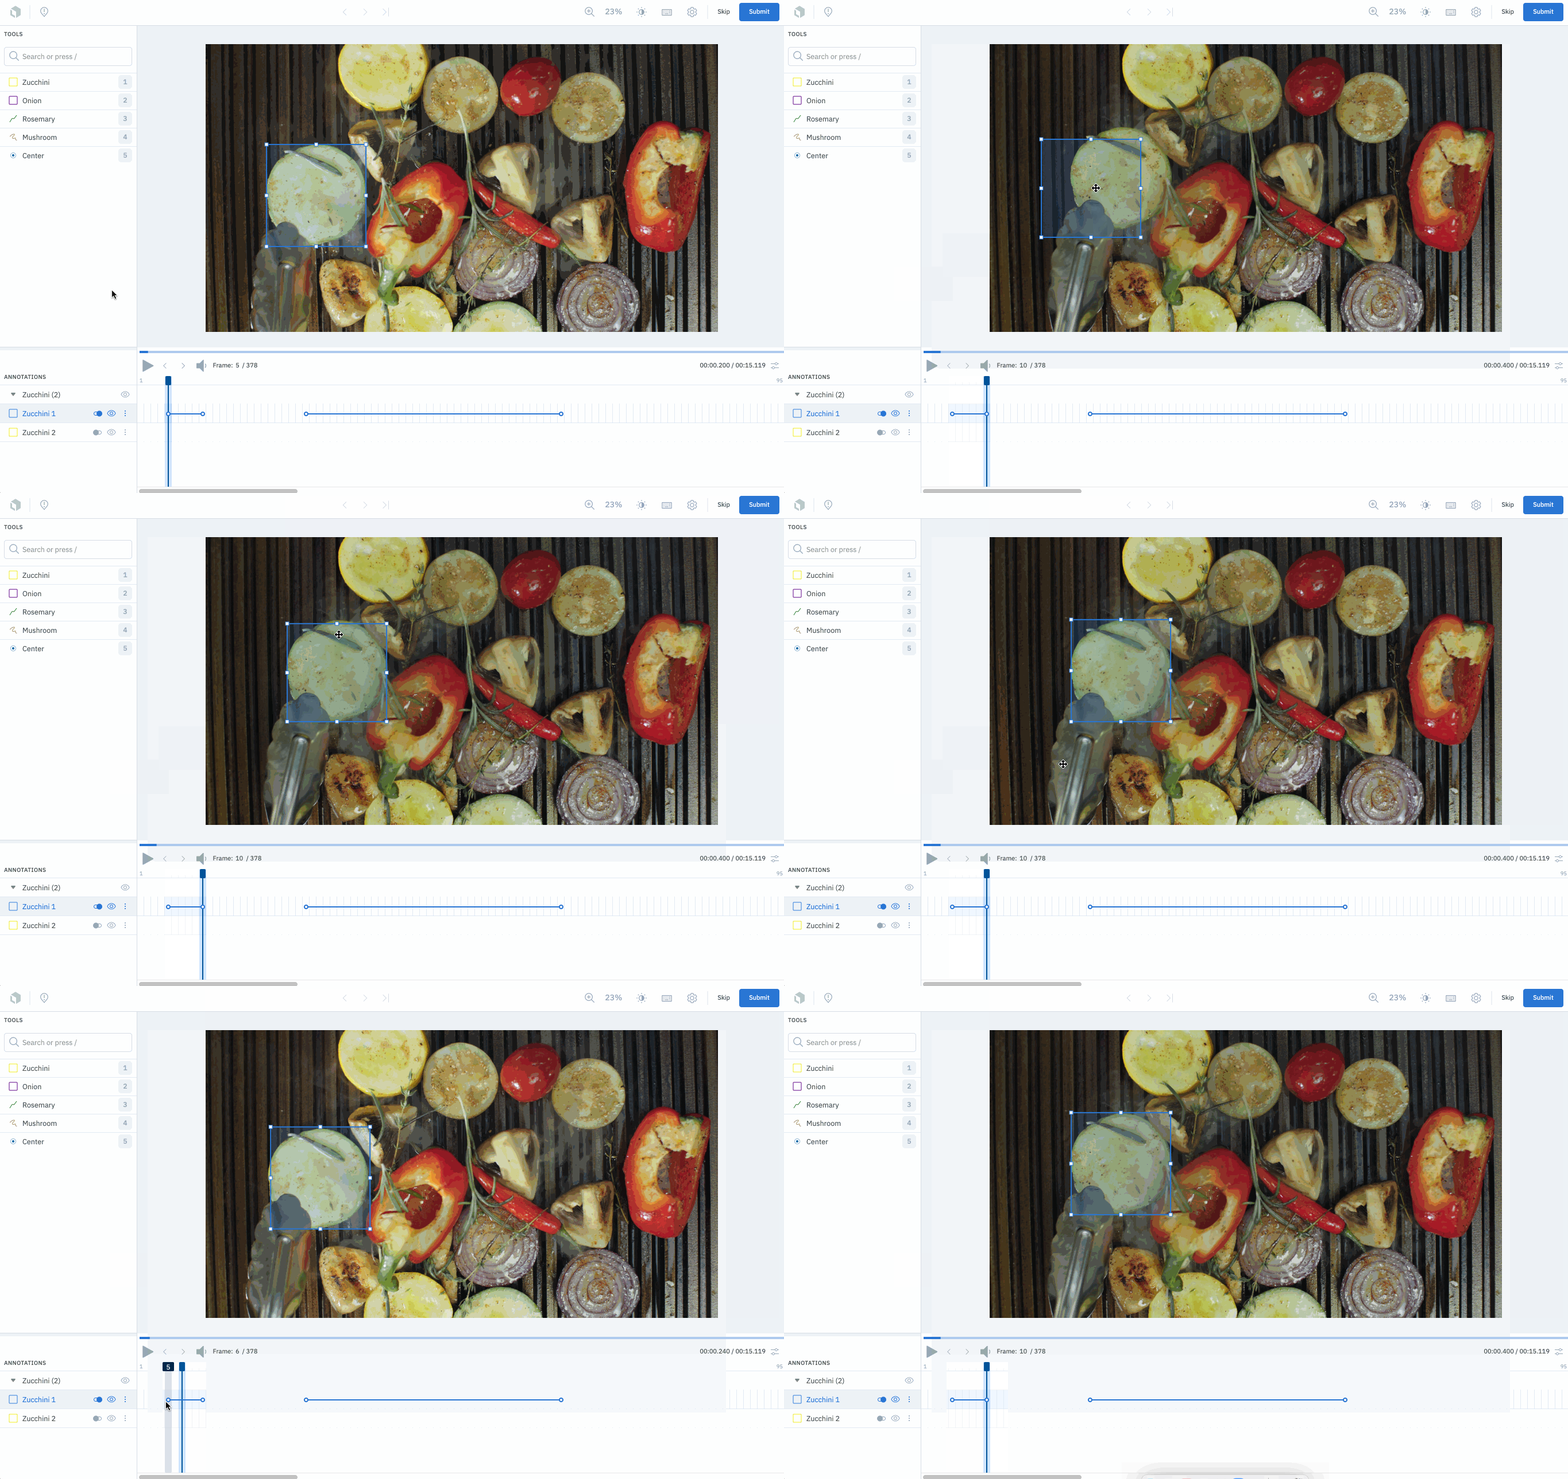
AI-based bounding box tracking
To track an object automatically, simply draw a bounding box around the object and then press the Track Object button that appears right above the timeline.
By default, it tracks for 10 frames at a time, but you can change it to a higher number or track until the end of the video by pressing the settings button next to Track Object.
Watch this video to better understand how to use bounding box tracking:
Polyline
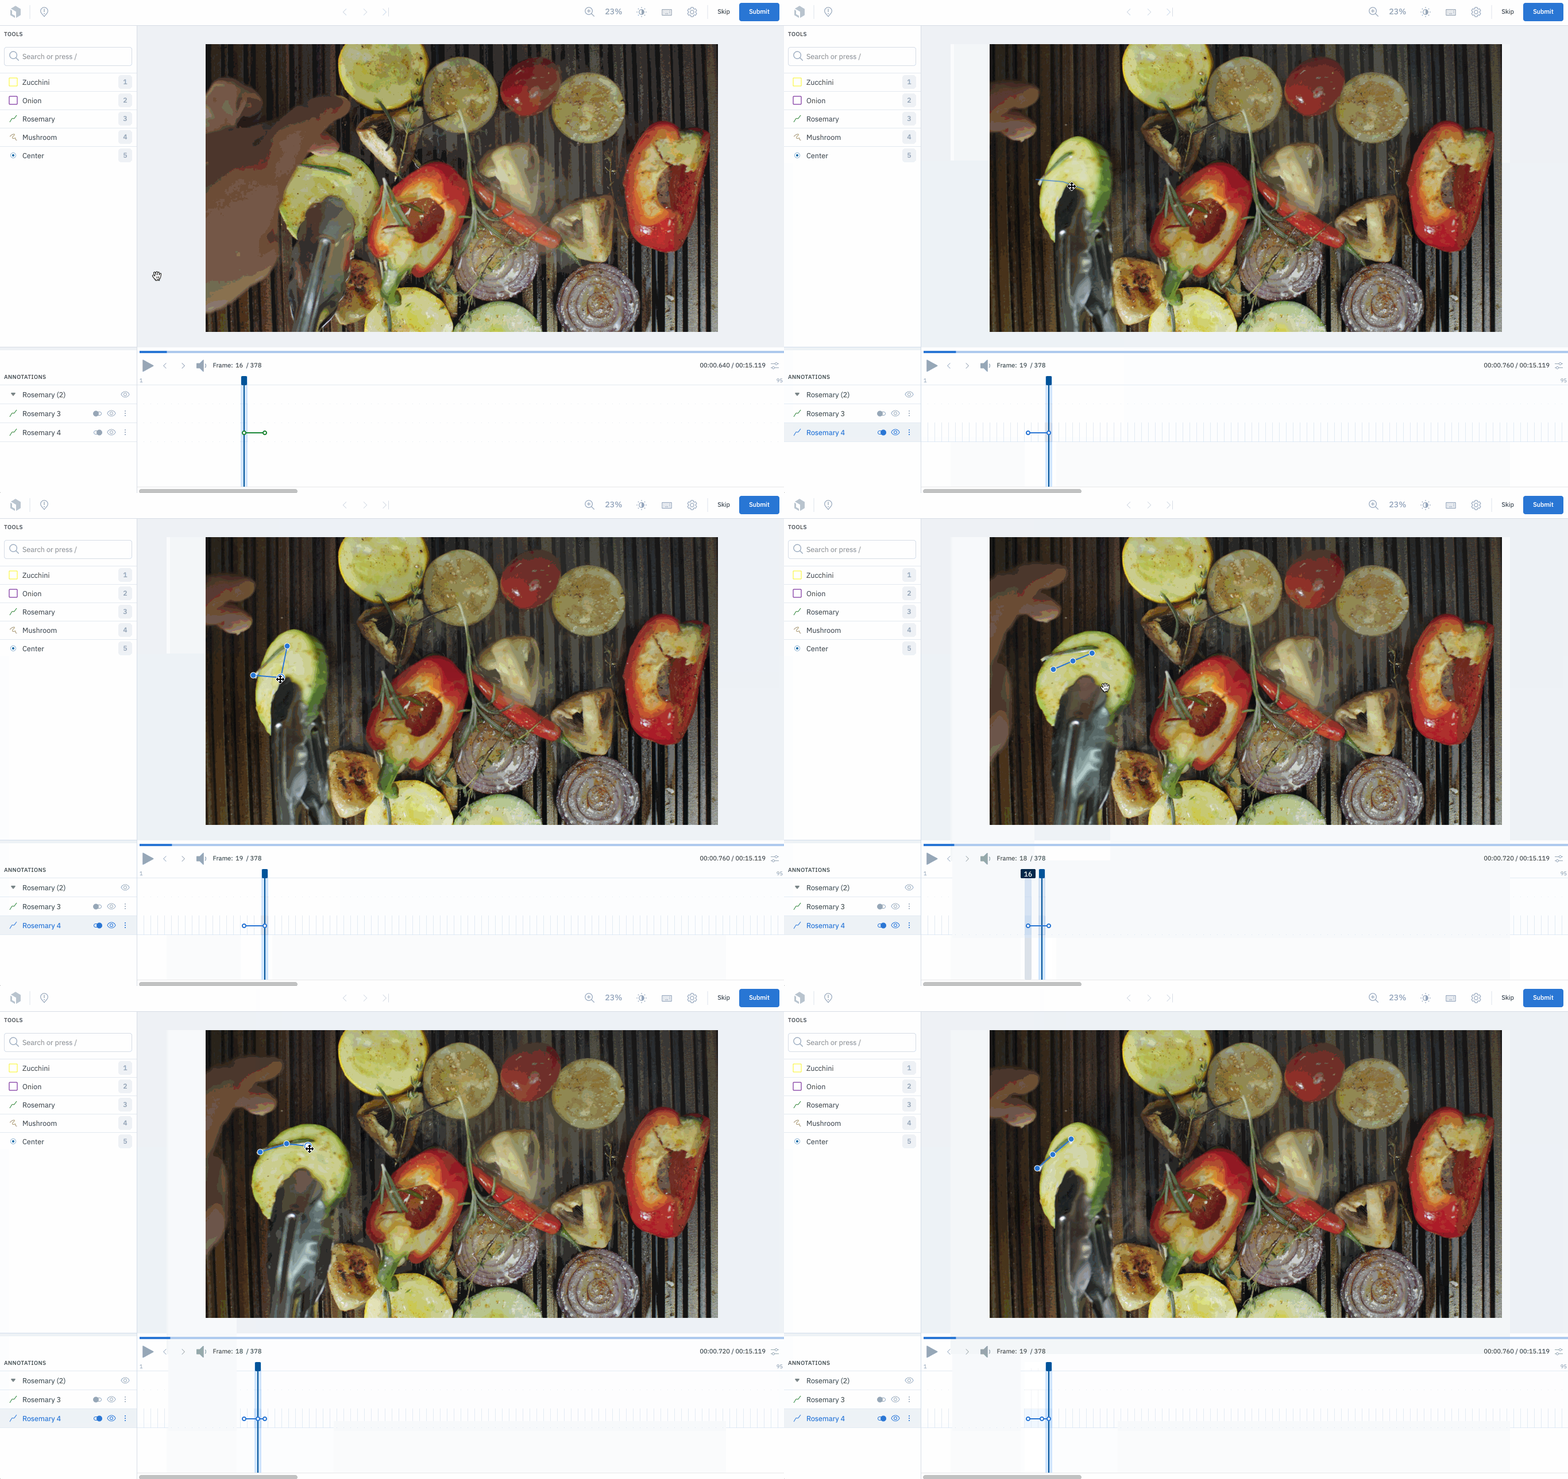
To create a polyline, use your cursor to place each vertex of the line and click the last point again (or press F to end the shape. By default, the shape will be created in the current frame and all frames following. You can use the annotation toggle (or the hotkey T) to adjust the length of the object instance.
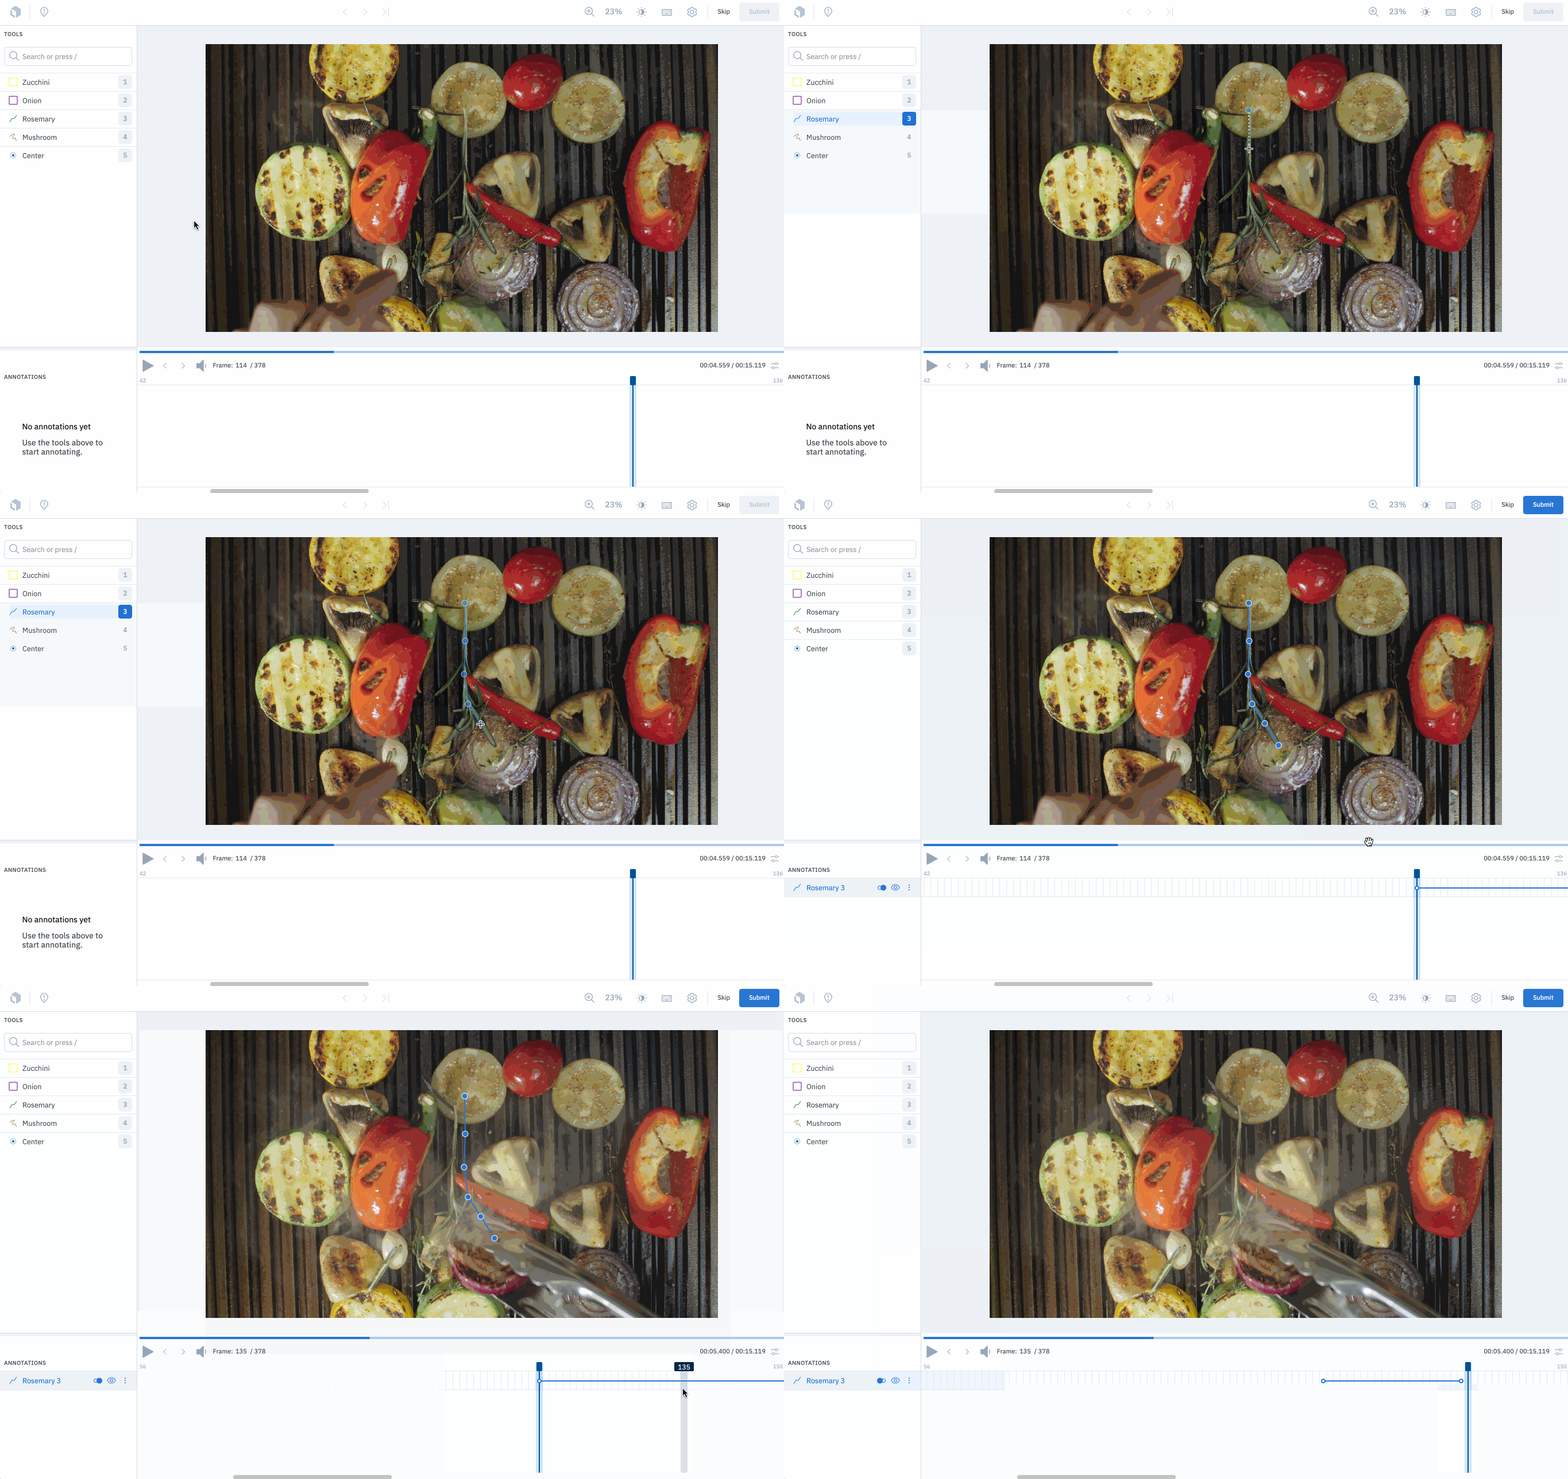
To reposition the polyline, simply click and drag each vertex to reposition it on the frame.
You can also click and drag the polyline to change its position. Whenever an object is created or edited on a video frame, a keyframe is created, and all frames between keyframes will interpolate.
Point
To create a point, put your cursor where you want to place the point and click and release to create it. By default, the shape will be created in the current frame and all frames following. You can use the toggle Annotations menu (or the hotkey T) to adjust the length of the object instance.
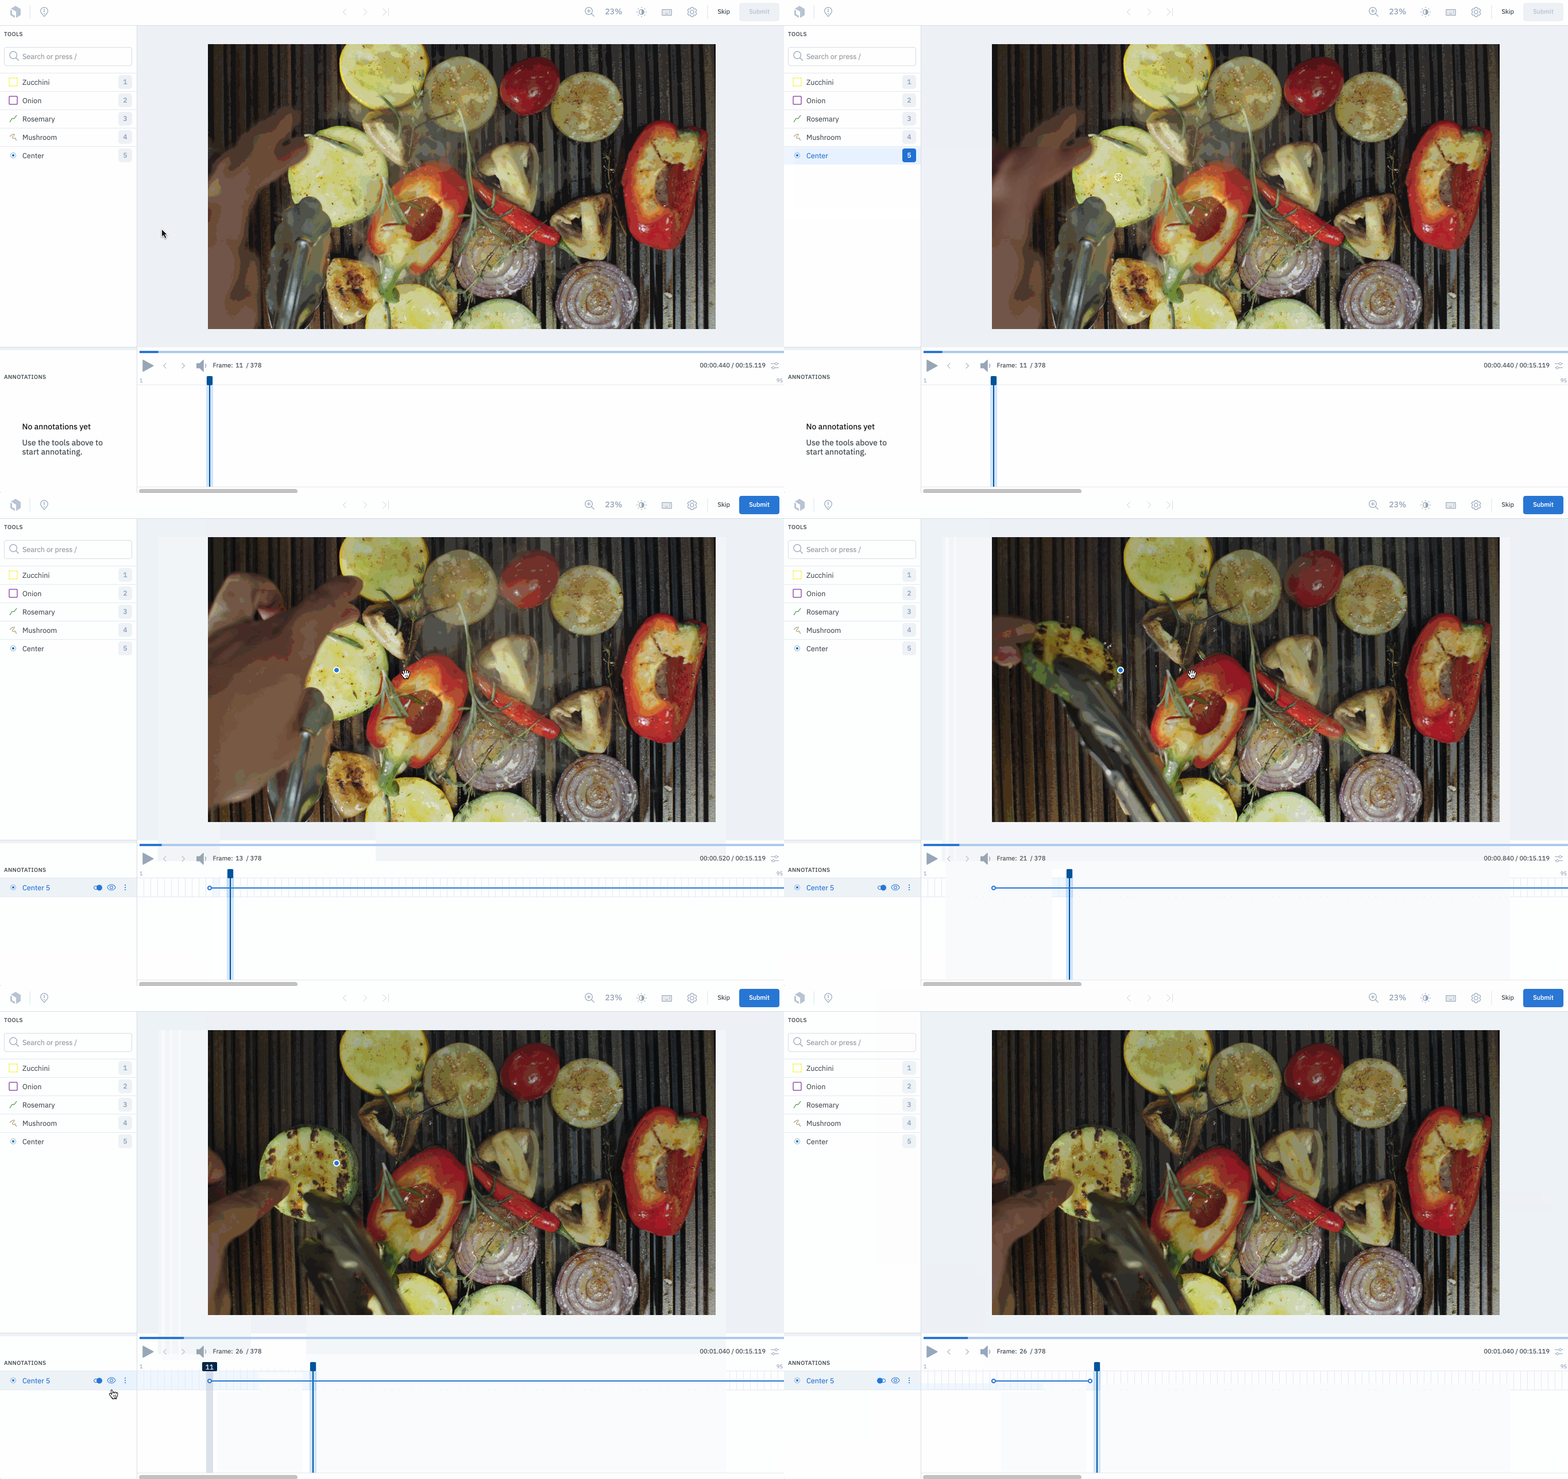
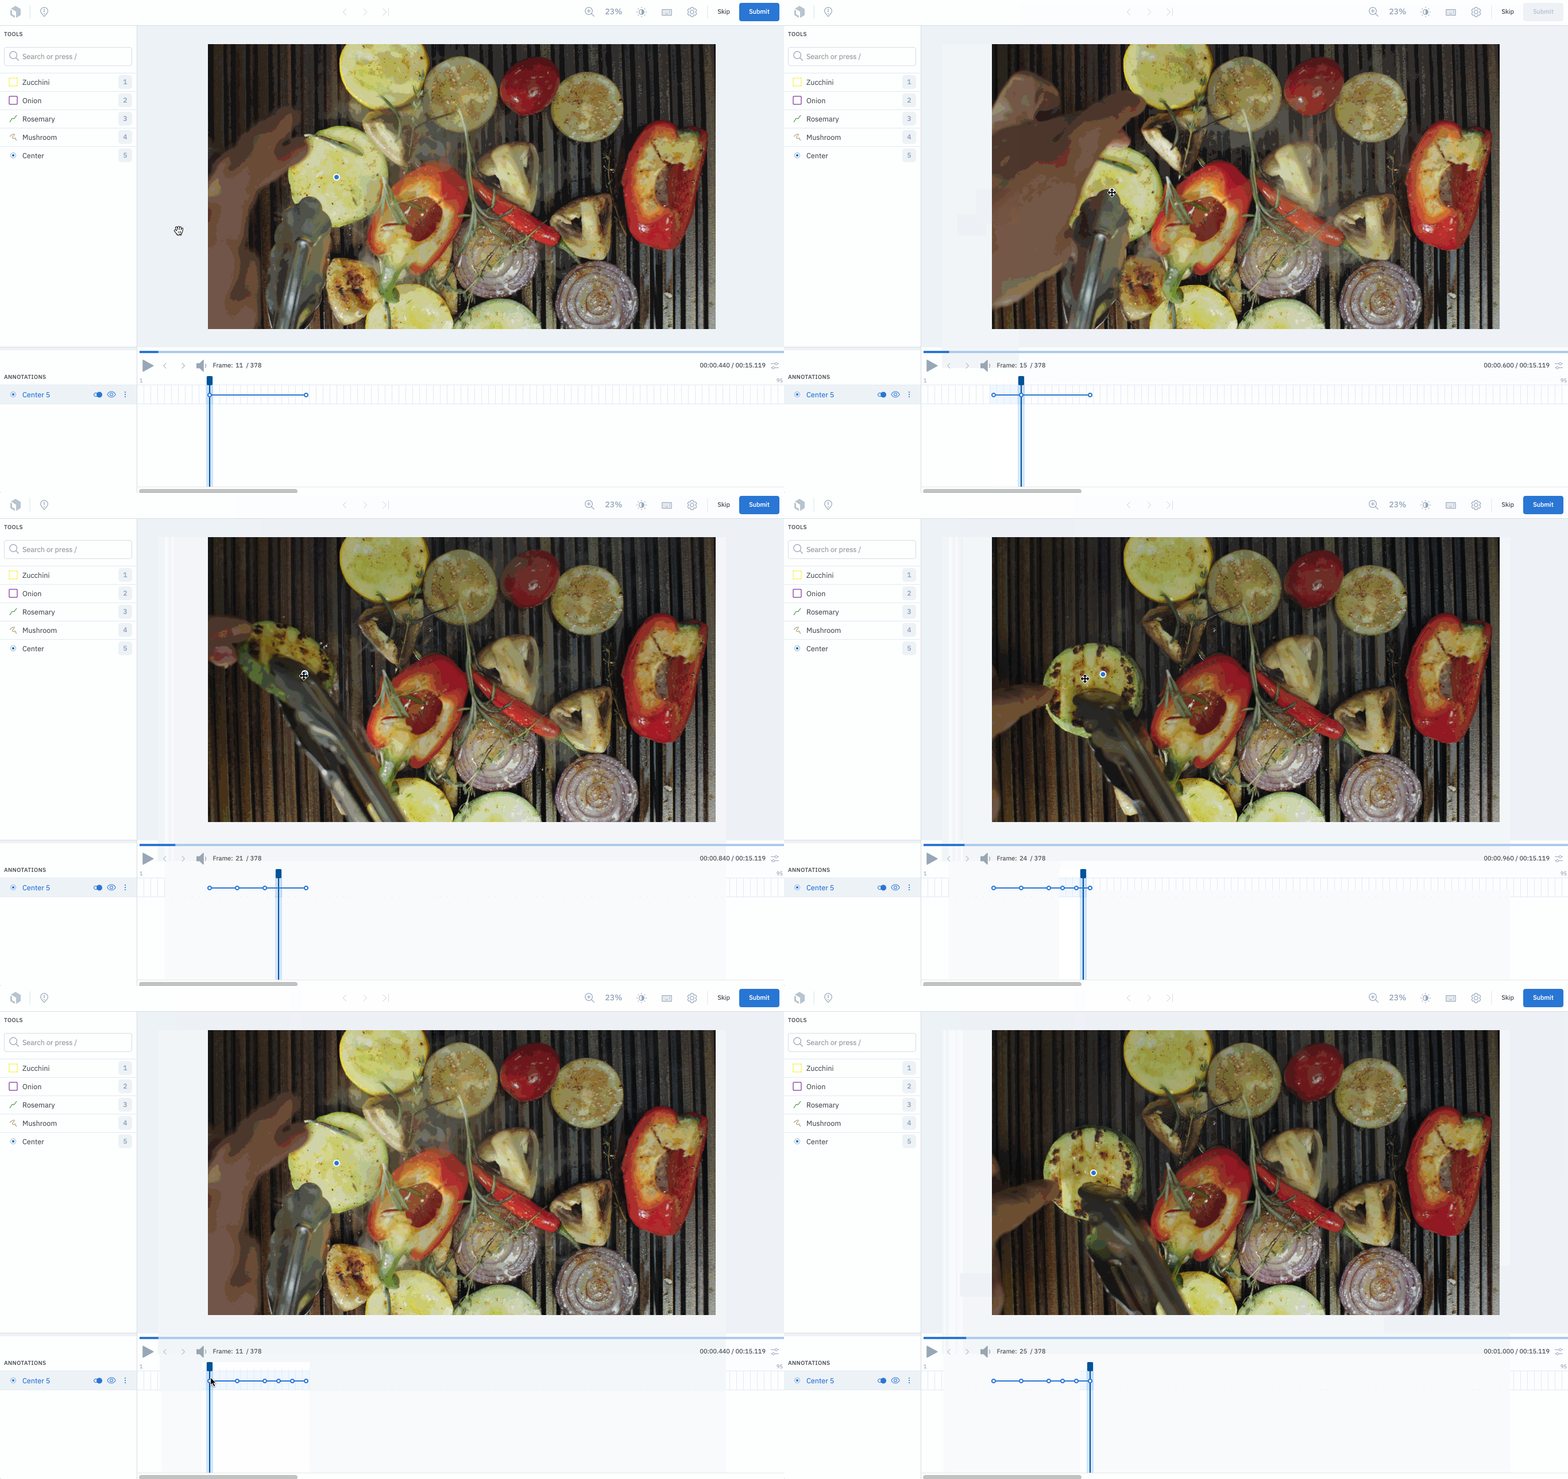
To reposition the point, simply click and drag it to reposition it on the frame. Whenever an object is created or edited on a video frame, a keyframe is created, and all frames between keyframes will interpolate.
Segmentation mask
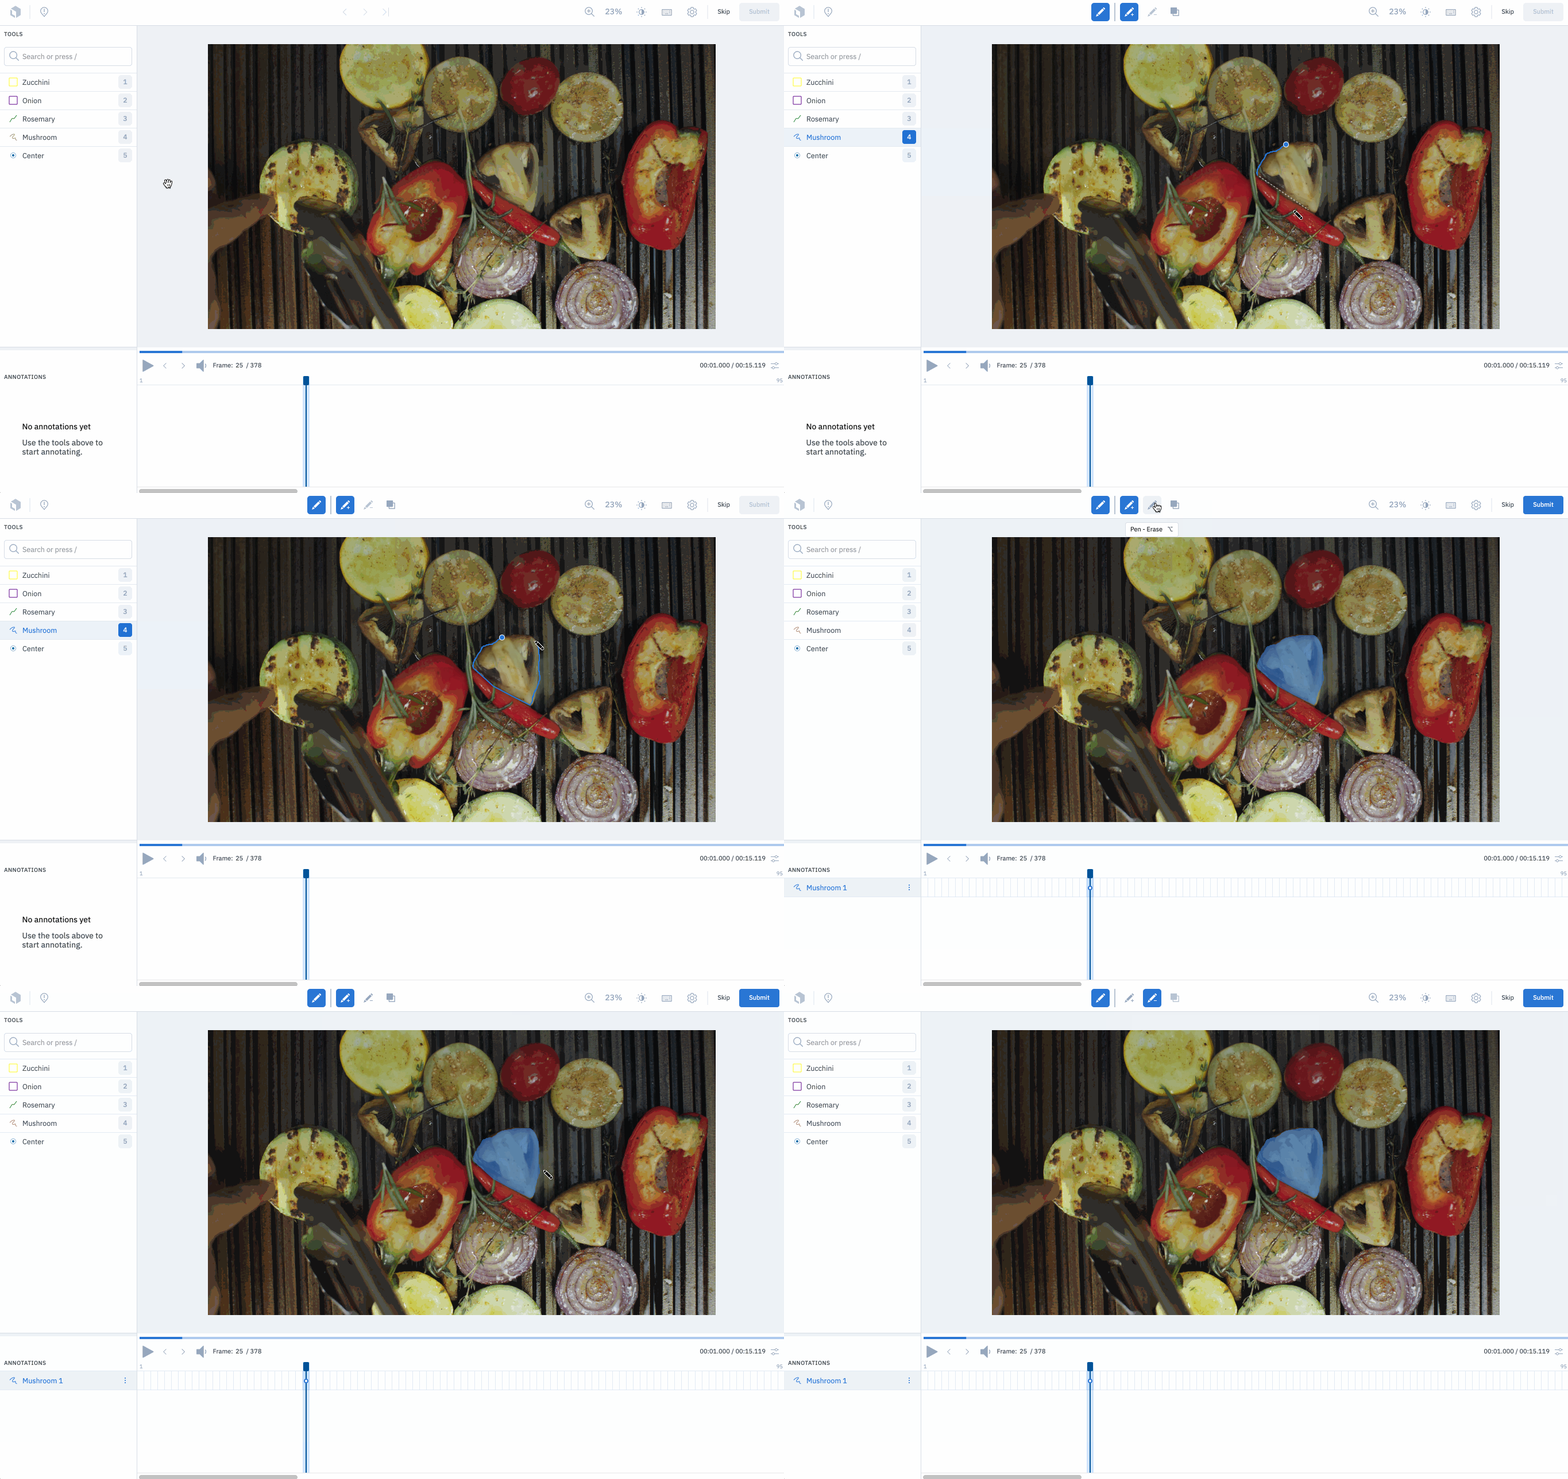
Unlike other tools, segmentation masks can only be created on individual frames. Multiple masks may be created on the same frame.
To edit a segmentation mask, you can use the add/remove tools in the top navigation bar to add to and remove from a segmentation mask. Segmentation masks cannot be repositioned.
Pen tool
To create a segmentation mask, click and drag to free-hand draw a shape. You can also click and release to place vertices with straight edges in between.
Brush tool
With the brush tool, you can use brush strokes to quickly draw a mask. You can change the brush size using the slider at the top. You can select a circle or square shape for the brush tool.
Limited view during playback
Please note that segmentation masks currently will not display during video playback due to performance constraints. Please use the arrow keys or navigate to a frame directly to review a mask.
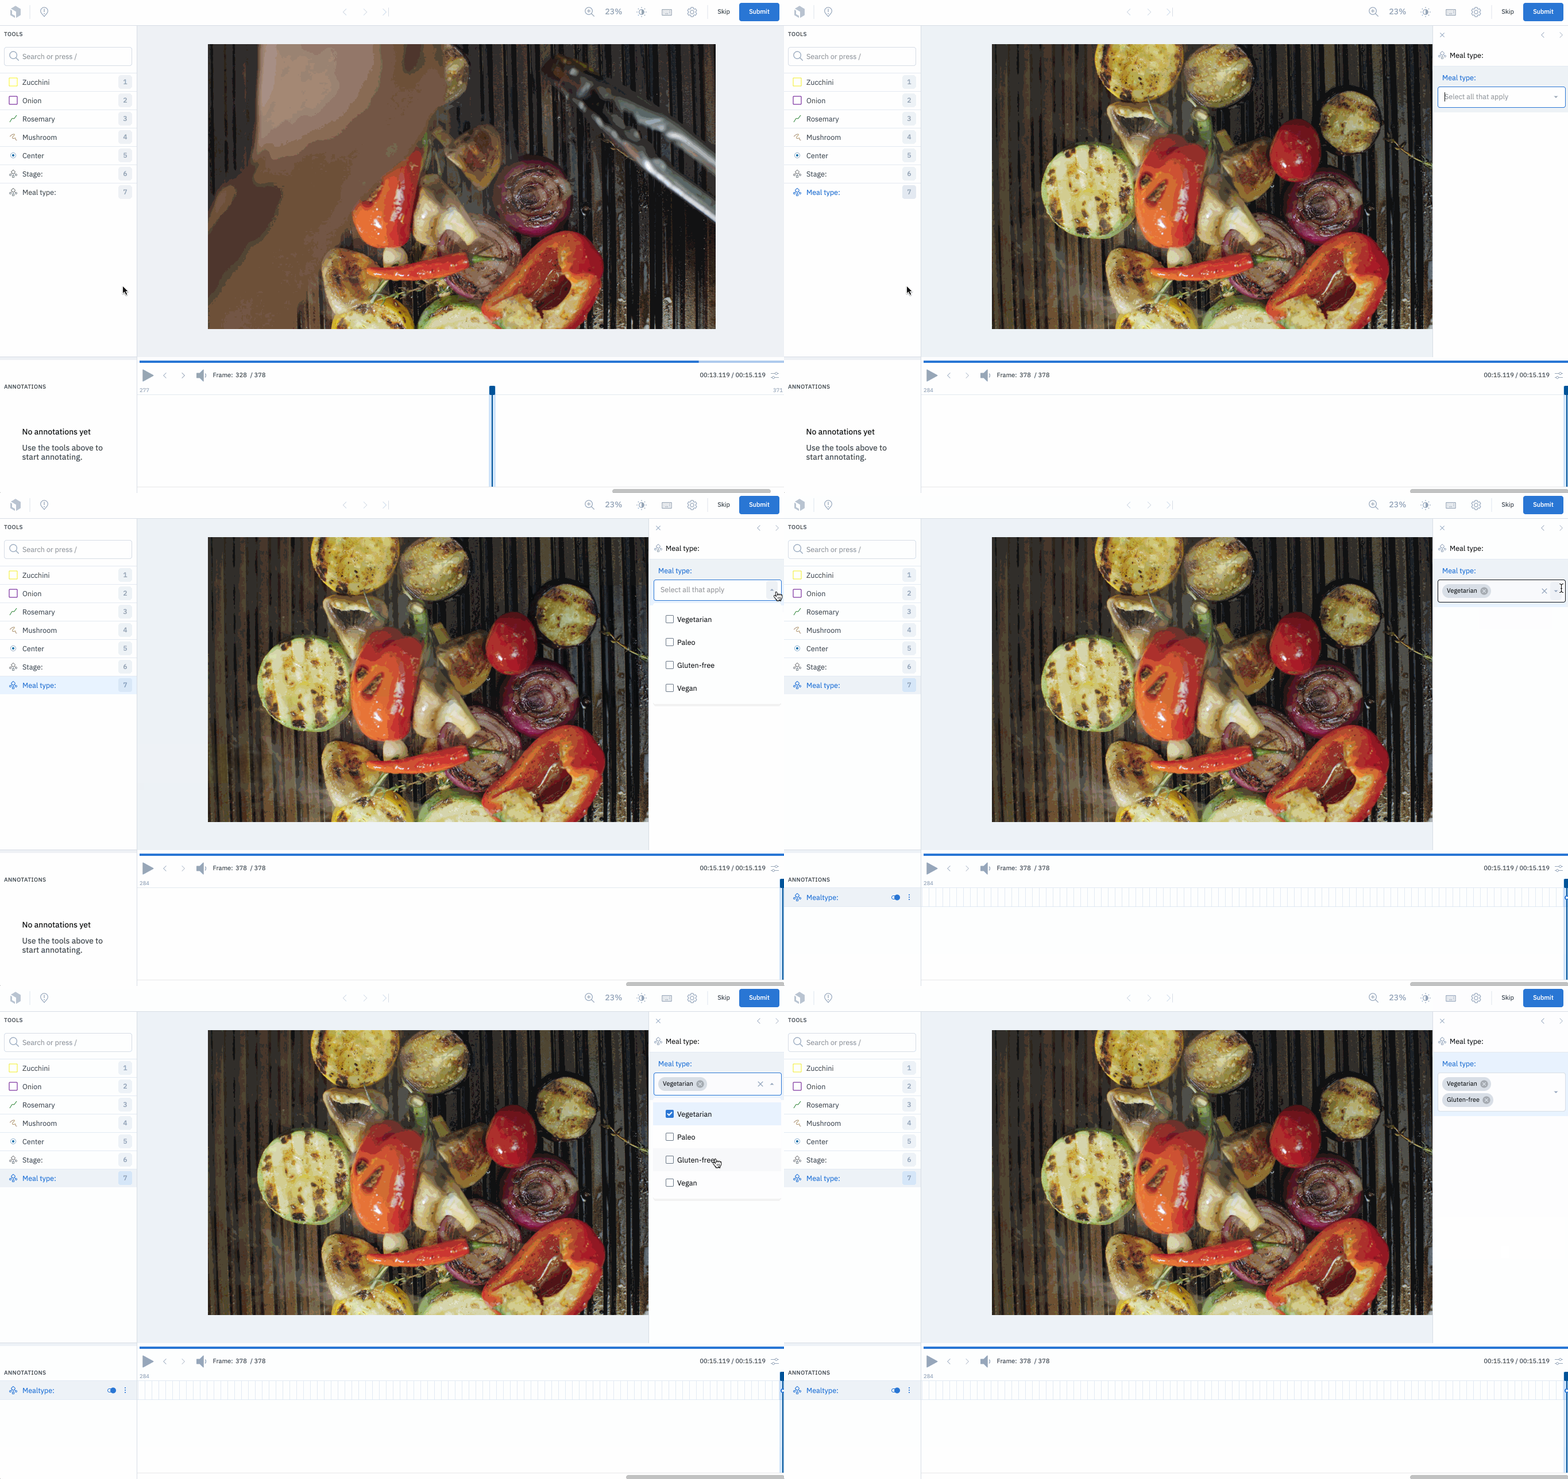
Frame classification
Create a frame classification by activating the classification question and inputting the answer value(s).
Only radio and checklist classification types are supported.
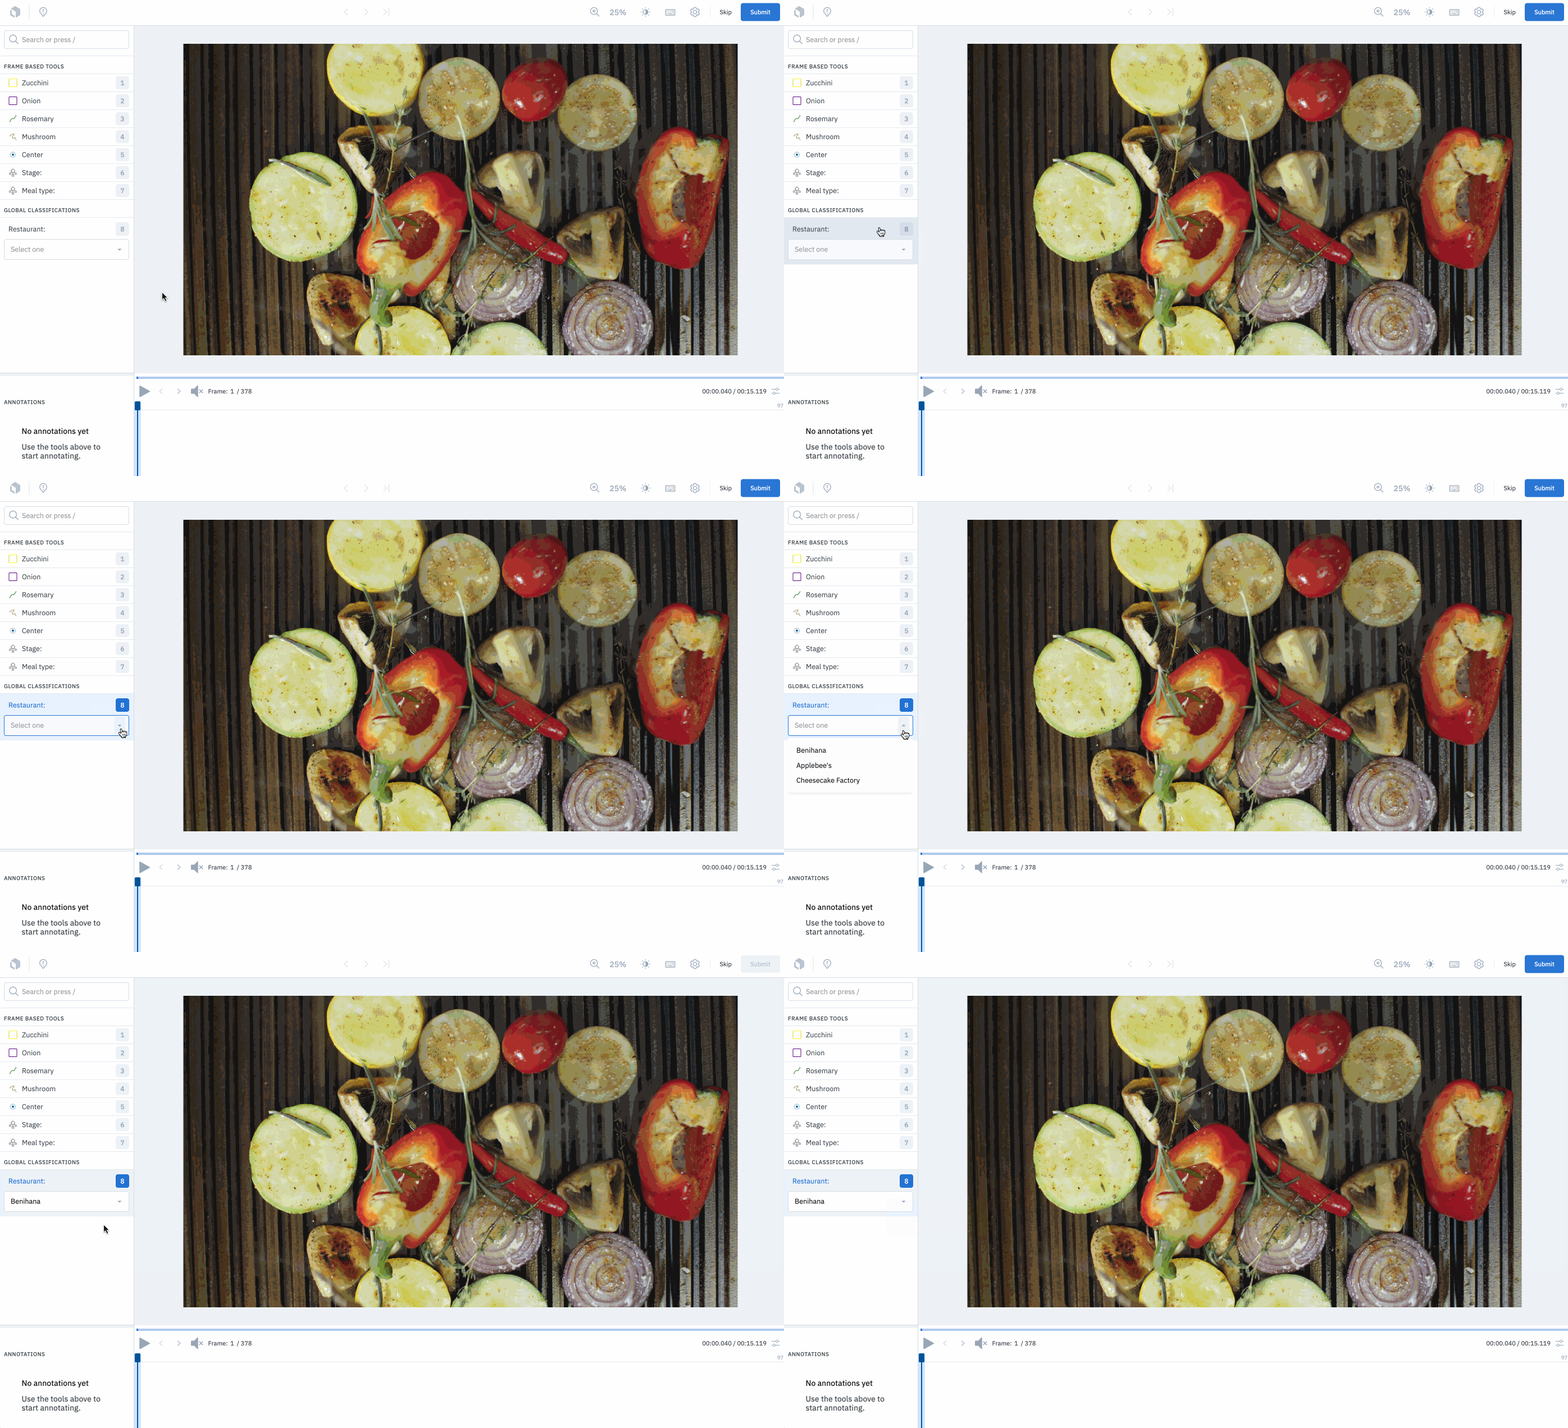
Global classification
Create a global classification by activating the classification question and inputting the answer value(s). Global classifications are values that apply to the entire video rather than at the frame level, so they do not show in the timeline.
Radio, checklist, and free-form text classification types are supported.
Video editor components
| Component | Description |
|---|---|
| Tools menu | Contains the list of annotation classes (AKA ontology) for your project. |
| Annotations menu | Lists all of the annotations that have been created so far. |
| Progress bar | A visual indicator of the temporal progression of the frame sequence. You can hover over the progress bar to quickly preview any frame in the video. |
| Classification panel | Appears only for frame classification-type annotations (e.g., radio). Here you can apply select answer(s) on a classification question and toggle the classification on/off. |
| Timeline | Displays a temporal visualization of all created annotations on the video clip. Indicates the frames on which the annotation was created. You can hover over the timeline to preview any frame in the video. |
| Keyframe | A keyframe is a frame in the sequence where an annotation starts, ends, or is modified in some way. A keyframe is indicated on an annotation track as a small circle. The frames between two keyframes are called interpolated (tweened) frames. This is because Labelbox uses interpolation to incrementally adjust the size and position of an annotation on frames in between keyframes. Note: interpolation is not applied to classifications. |
| Volume | Sometimes, to make a certain classification in a video, you need to be able to hear and see the content in the frame sequence. When a video has audio, your labeling team will be able to hear the audio during video playback (but not when hovering or stepping through with arrow keys). Labelers can adjust the volume level and click the volume button to mute/unmute audio playback. You can use the video editor to classify videos with both audio and visual content or audio content alone. To use the video editor to label audio only, please reach out to support for details. |
Navigating the video editor
Use the progress bar to navigate the video in its entirety, or use the timeline to navigate the current window of the video. The width of the current window can be adjusted from the player's settings to the right of the timestamp.
You can scrub a preview of any part of the video by hovering over a certain part of the progress bar or timeline. Clicking within the progress bar or timeline will bring the playhead to the clicked position.
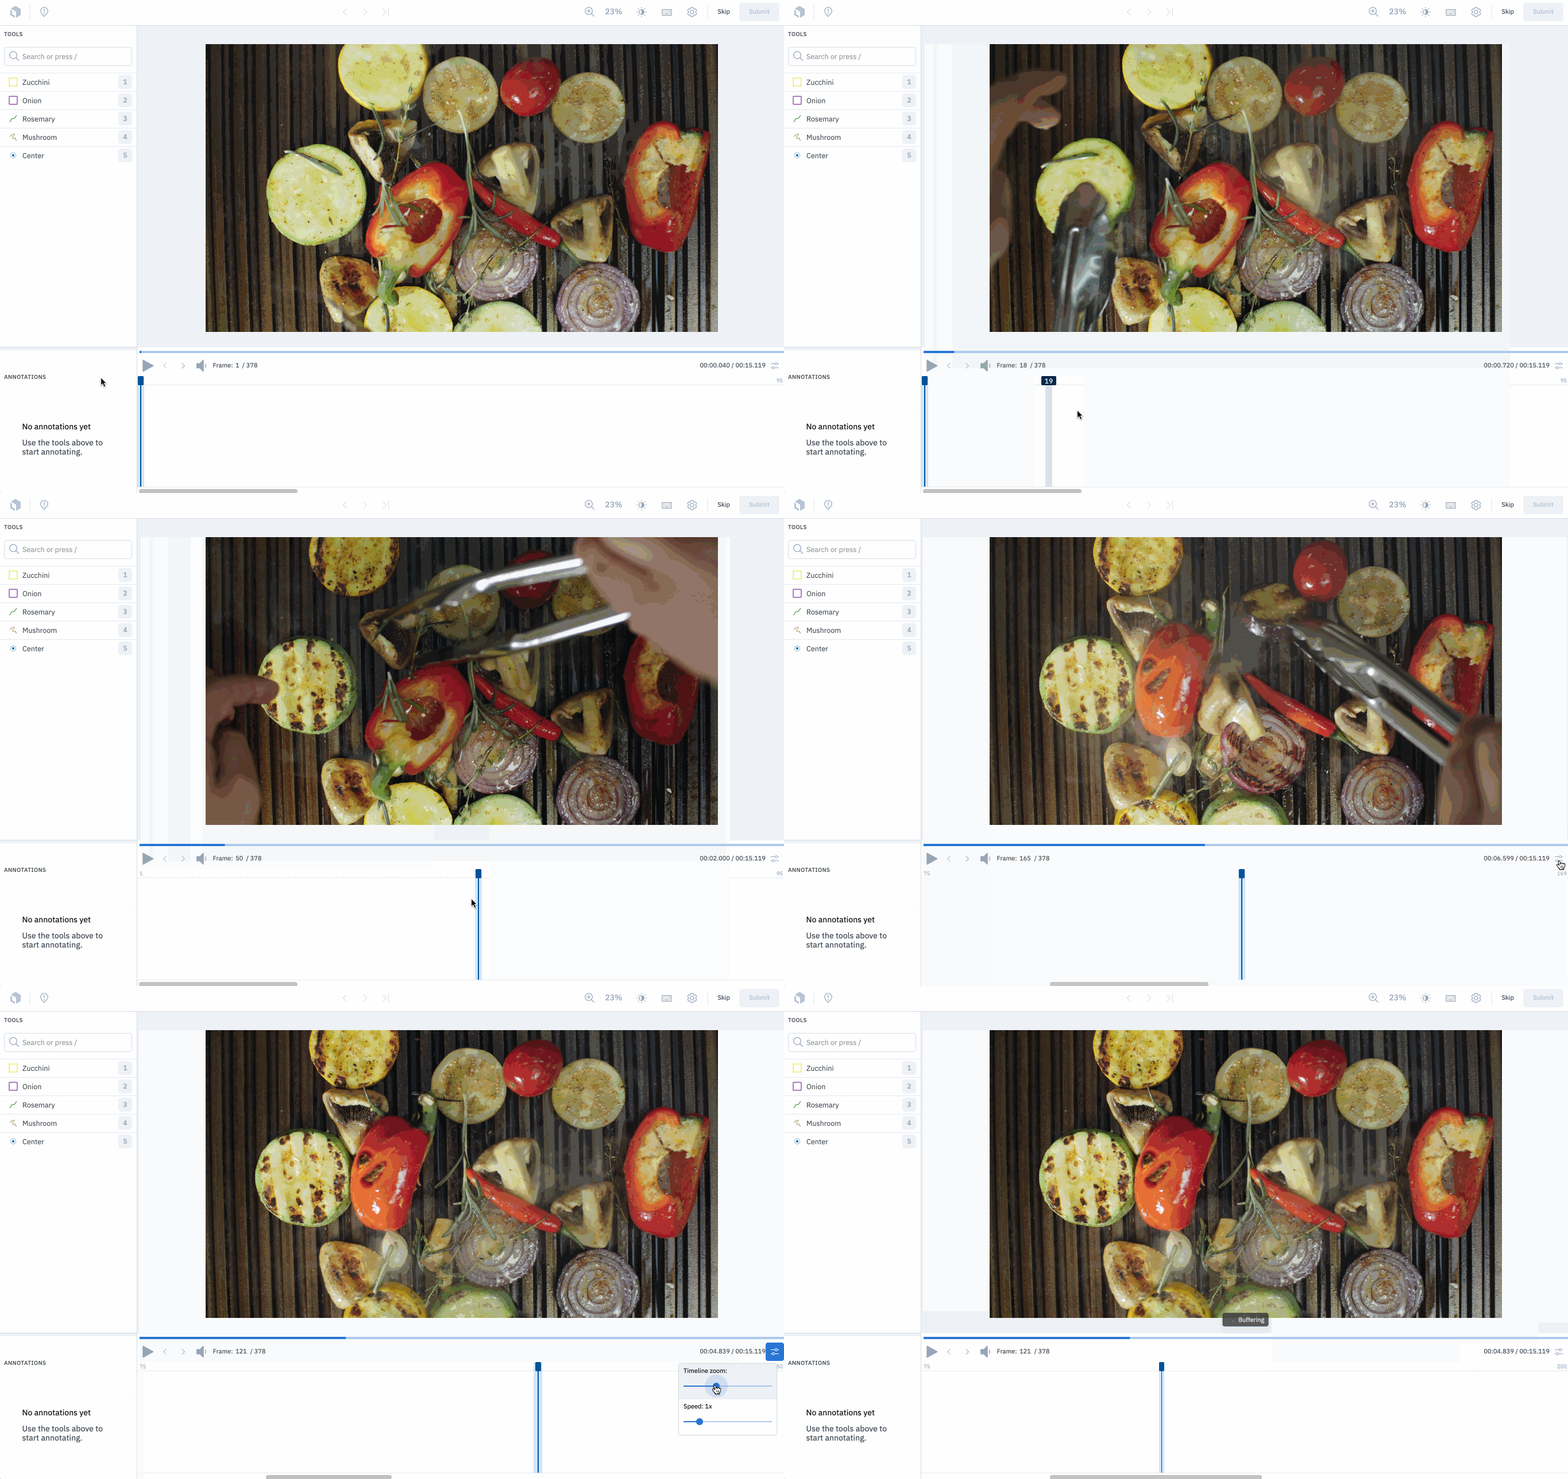
Press play/pause or use Shift + Space to control the playback of the video. The left and right arrow keys can be used to move backward one frame and forward one frame, respectively.
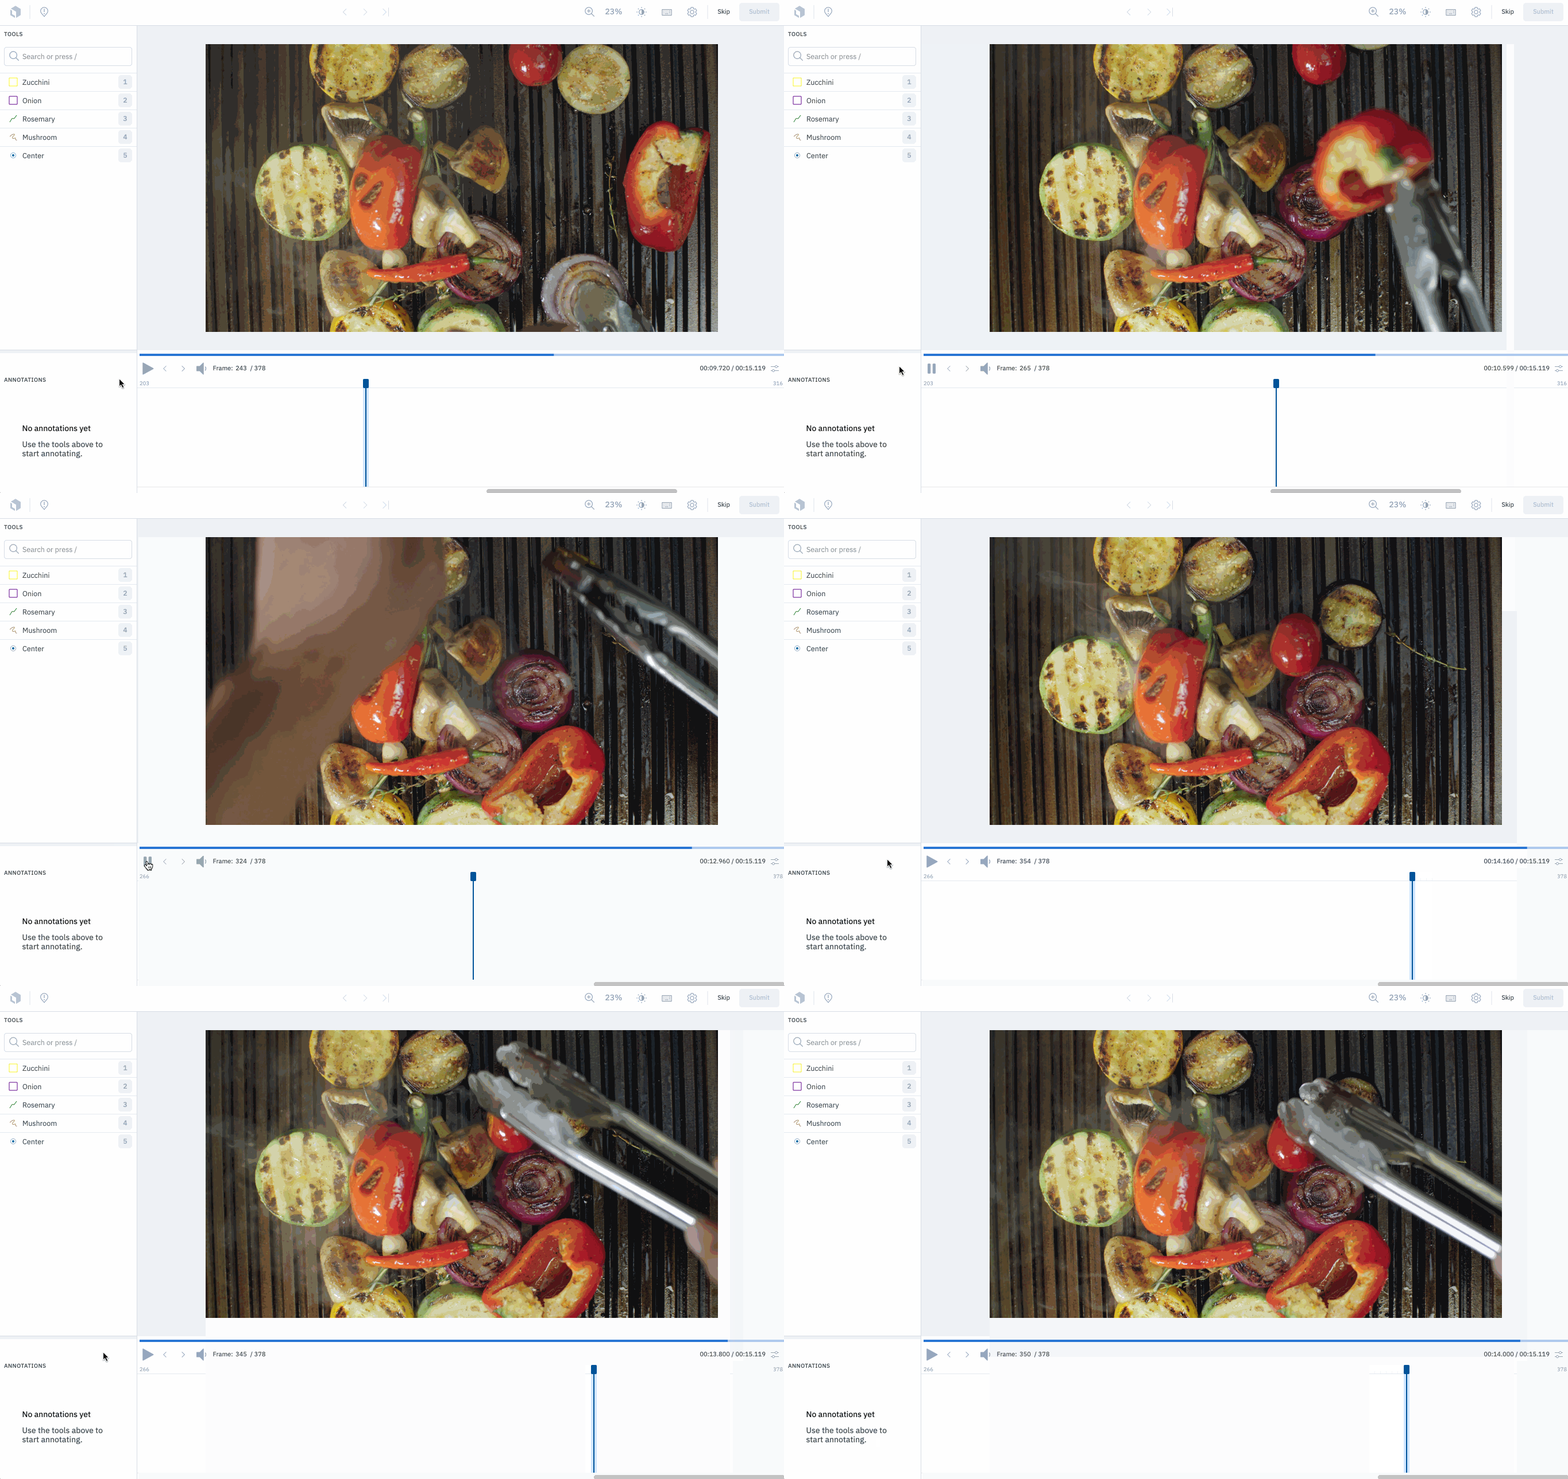
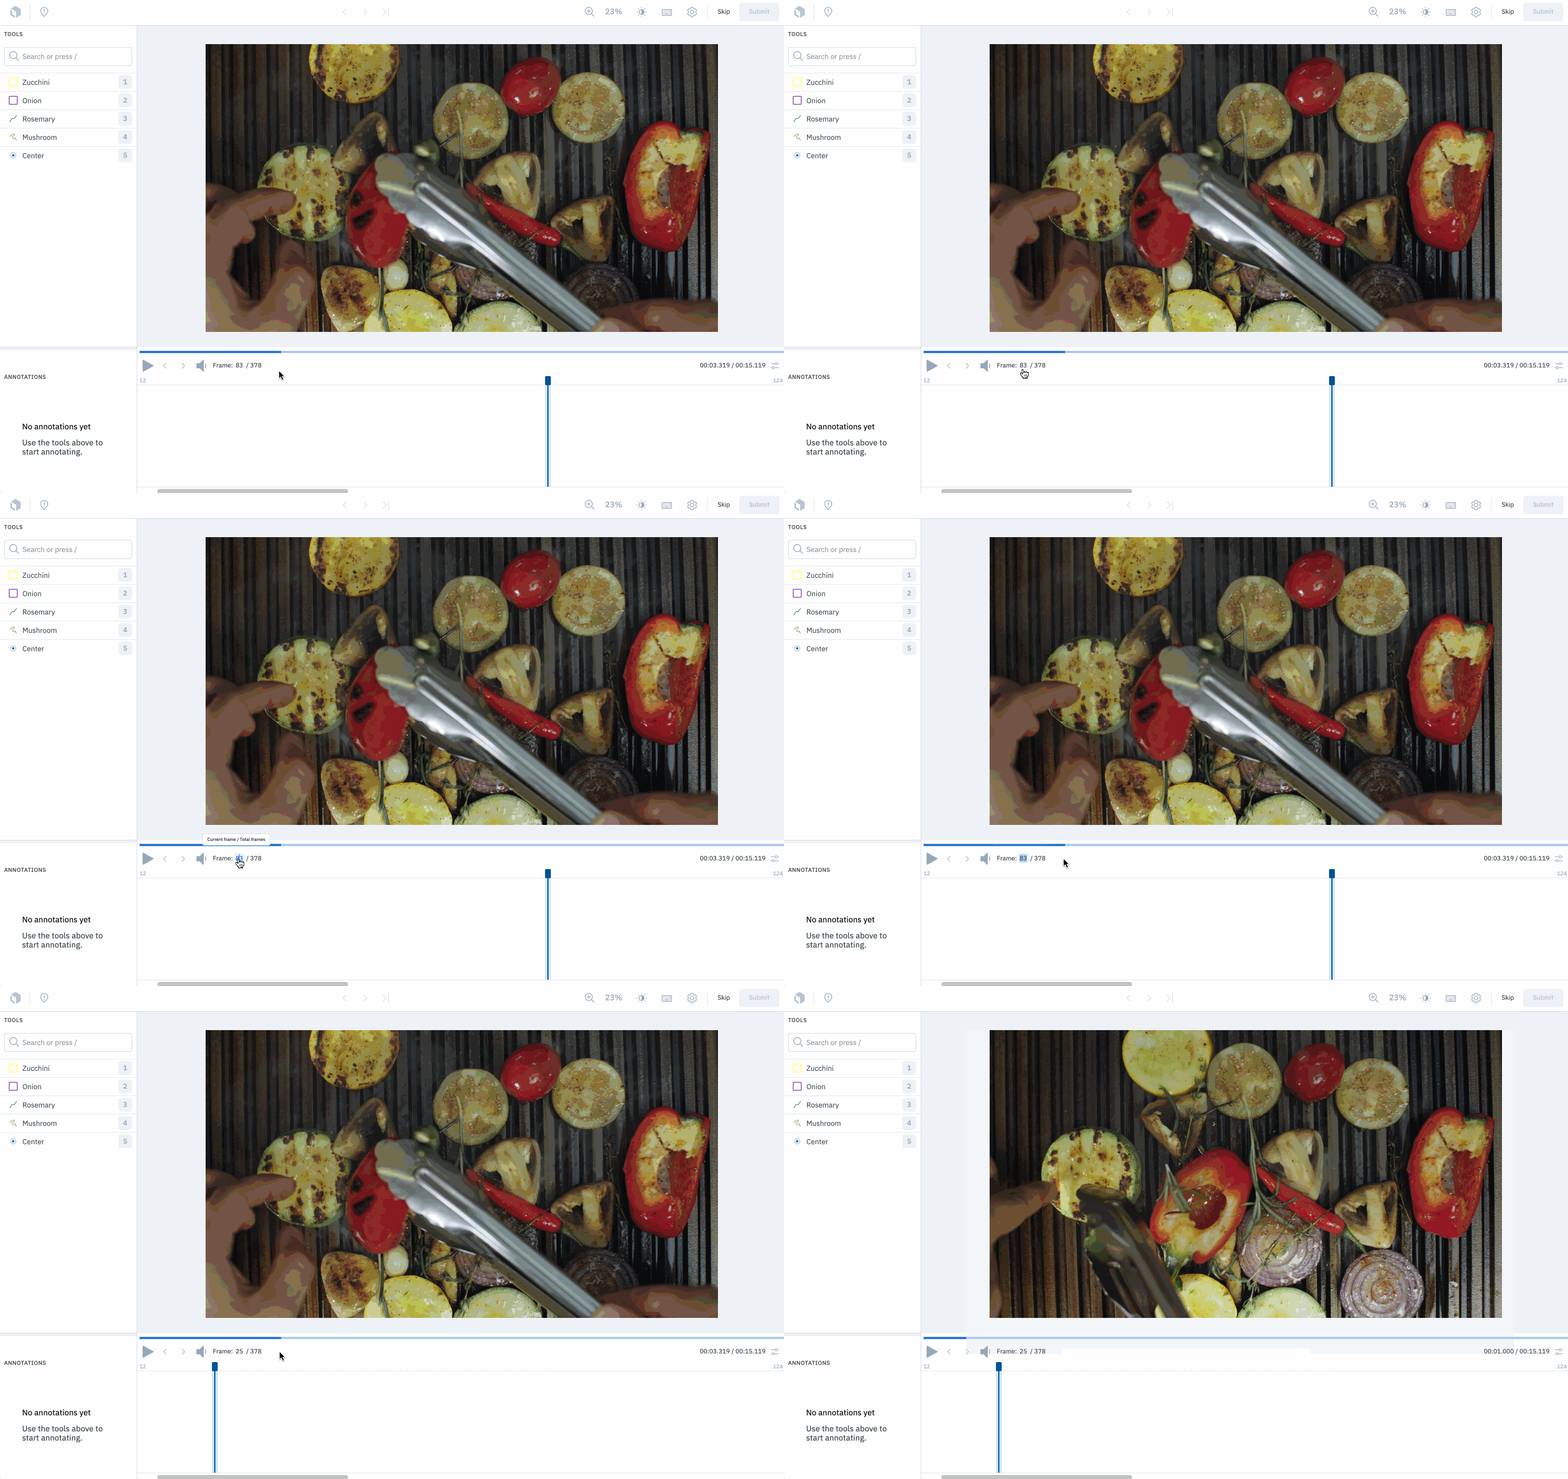
To navigate to a specific frame, click on the current frame number, replace it with the frame number you want to navigate to, and press Enter.
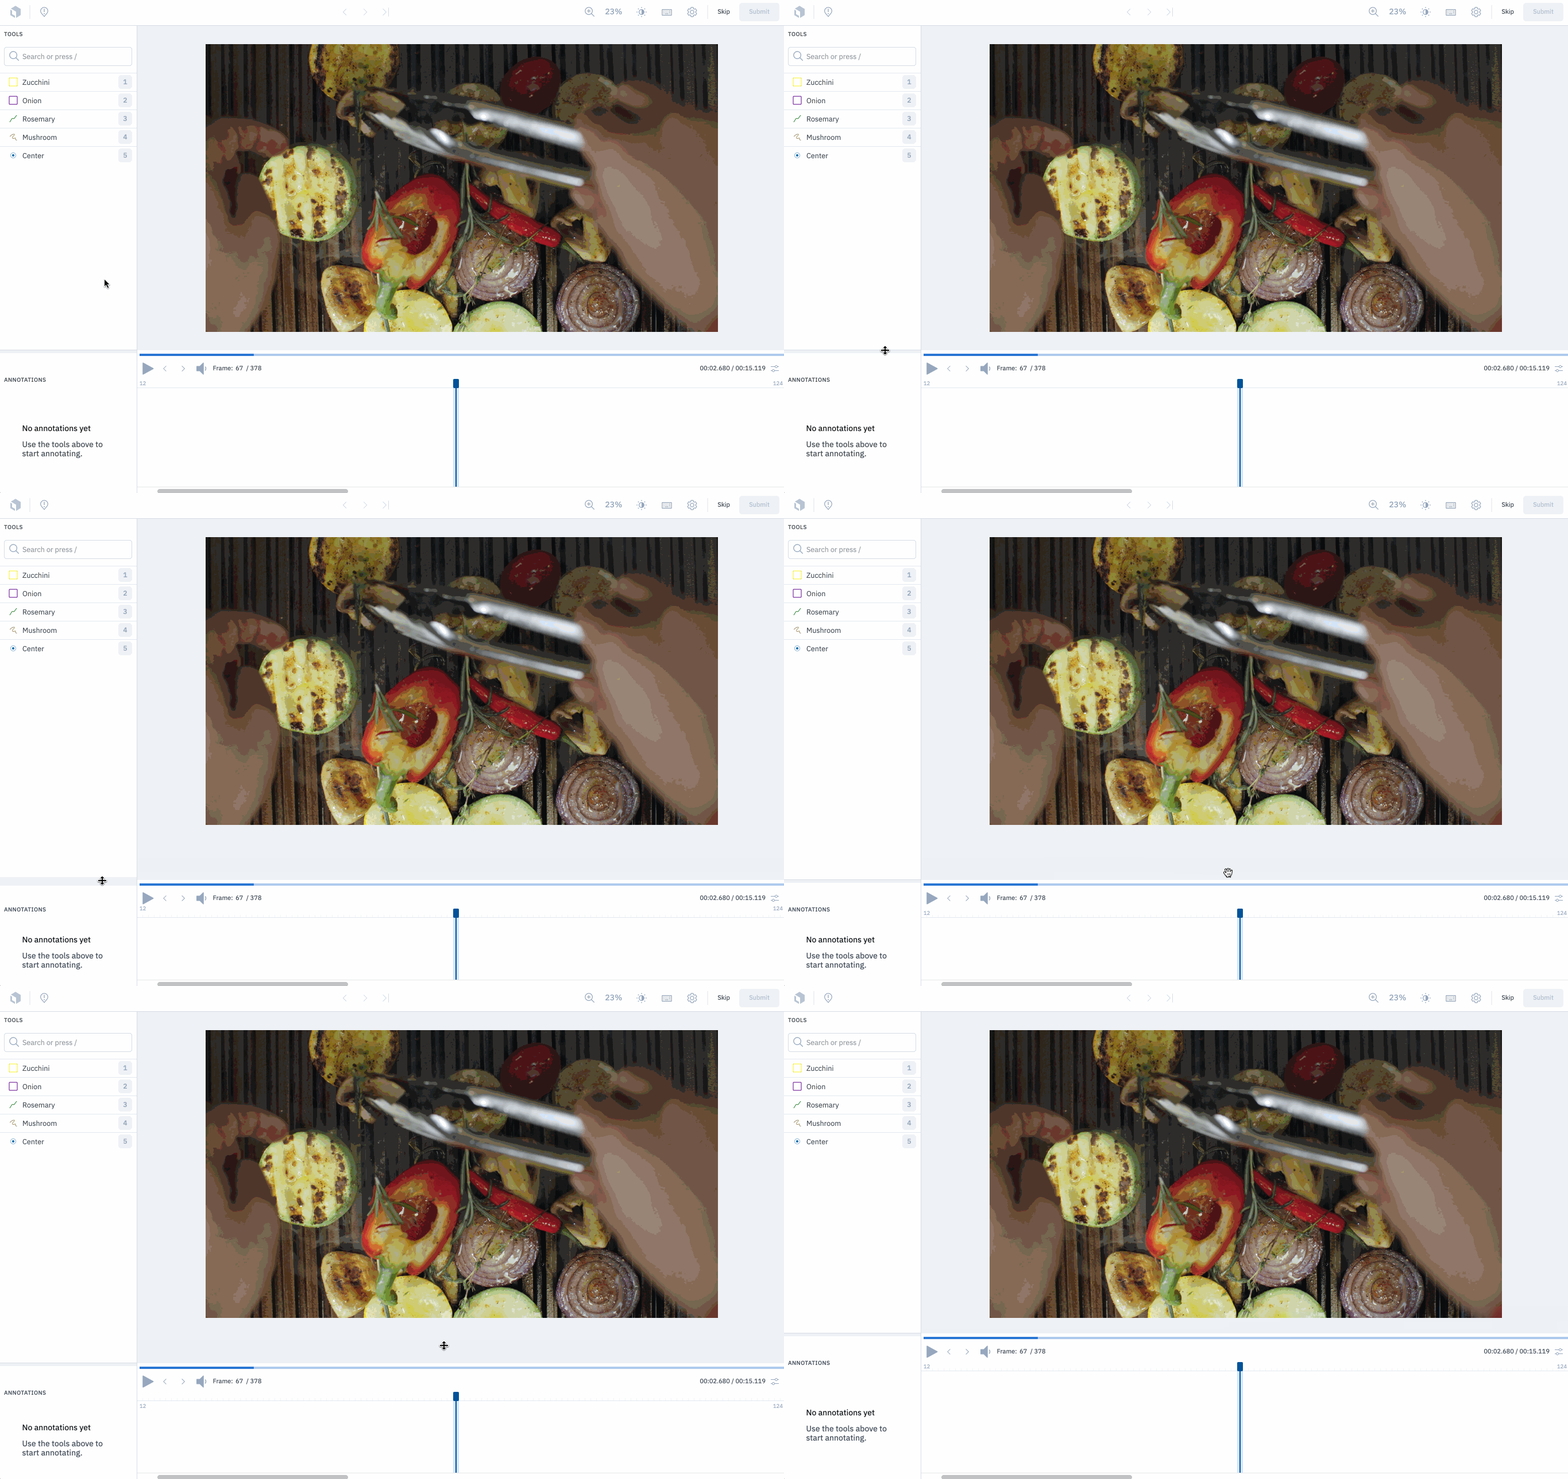
Hover over the top edge of the timeline or annotations menu, and click and drag to change the height of the timeline.
Video-specific hotkeys
| Function | Hotkey | Description |
|---|---|---|
| Play/Pause | Shift + Space | Play or pause the video playback. |
| Move backward one frame | Left | Move back one frame in the sequence. |
| Move forward one frame | Right | Move forward one frame in the sequence. |
| Add/remove a keyframe | K | Add/remove a keyframe for the selected annotation on the selected frame. |
| Add/remove an object | T | Toggle the presence of an object on or off in the video timeline. |
| Select multiple contiguous frames | Shift + Select | Select multiple, contiguous frames in the video. |
| Select multiple discontiguous frames | Shift + Cmd + Select | Select multiple, discontiguous frames in the video. |
| Advance to the previous keyframe | Opt + Left | Jump to the previous keyframe on an annotation instance track. |
| Advance to the next keyframe | Opt + Right | Jump to the next keyframe on an annotation instance track. |
Updated 16 days ago