> ## Documentation Index
> Fetch the complete documentation index at: https://docs.labelbox.com/llms.txt
> Use this file to discover all available pages before exploring further.
# Model run slice
> Developer guide for interacting with model slices using the Python SDK.
[Model slices](/docs/slices) operate much like [Catalog slices](/docs/slices), both essentially functioning as saved searches that help filter large datasets into more manageable units. While Catalog slices function support **Catalog**, Model slices work within model runs. Model slices let you filter model run data rows into manageable units.
Here, we show how to use the SDK to:
* Create an experiment and a model run.
* Create a slice from model run data.
## Example: create and retrieve model slice
### Before you start
You must import these libraries to use the code examples in this section.
```python Python theme={null}
import labelbox as lb
import uuid
```
Replace the value of `API_KEY` with a valid [API key](/reference/create-api-key) to connect to the Labelbox client.
```python Python theme={null}
API_KEY = None
client = lb.Client(API_KEY)
```
## Create a model experiment and a model run
To interact with model slices, you must create a model experiment with a model run and then create a model slice through the platform. The steps below go over this process. See Slices [Slices](/docs/slices)for more information
### Create a model experiment
To create a model experiment, you will need to create an ontology. See [Ontology](/reference/ontology) for more information
```python Python theme={null}
#Create an ontology
classification_features = [
lb.Classification(
class_type=lb.Classification.Type.CHECKLIST,
name="Quality Issues",
options=[
lb.Option(value="blurry", label="Blurry"),
lb.Option(value="distorted", label="Distorted")
]
)
]
ontology_builder = lb.OntologyBuilder(
tools=[],
classifications=classification_features
)
ontology = client.create_ontology(
"Ontology from new features",
ontology_builder.asdict(),
media_type=lb.MediaType.Image
)
```
Attach the ontology during model creation.
```python Python theme={null}
model = client.create_model(
name="Model Slice Demo",
ontology_id=ontology.uid
)
```
### Create a model run from a model experiment
In this step, you will need to create a dataset to attach data rows to our model run.
```python Python theme={null}
# create a sample dataset to send to your model
global_key = str(uuid.uuid4())
test_img_url = {
"row_data":
"https://storage.googleapis.com/labelbox-datasets/image_sample_data/2560px-Kitano_Street_Kobe01s5s4110.jpeg",
"global_key":
global_key
}
dataset = client.create_dataset(name="foundry-demo-dataset")
task = dataset.create_data_rows([test_img_url])
task.wait_till_done()
print(f"Errors: {task.errors}")
print(f"Failed data rows: {task.failed_data_rows}")
# Create a model configuration
model_run_name = "Model Slice Demo"
example_config = {
"learning_rate": 0.001,
"batch_size": 32,
}
# Create a model run
model_run = model.create_model_run(name=model_run_name, config=example_config)
# Send the data rows to your model
model_run.upsert_data_rows(global_keys=[global_key])
```
## Create a model slice
Use the Labelbox app to create a model slice.
From **Model**, select **Experiment** and select your model experiment.
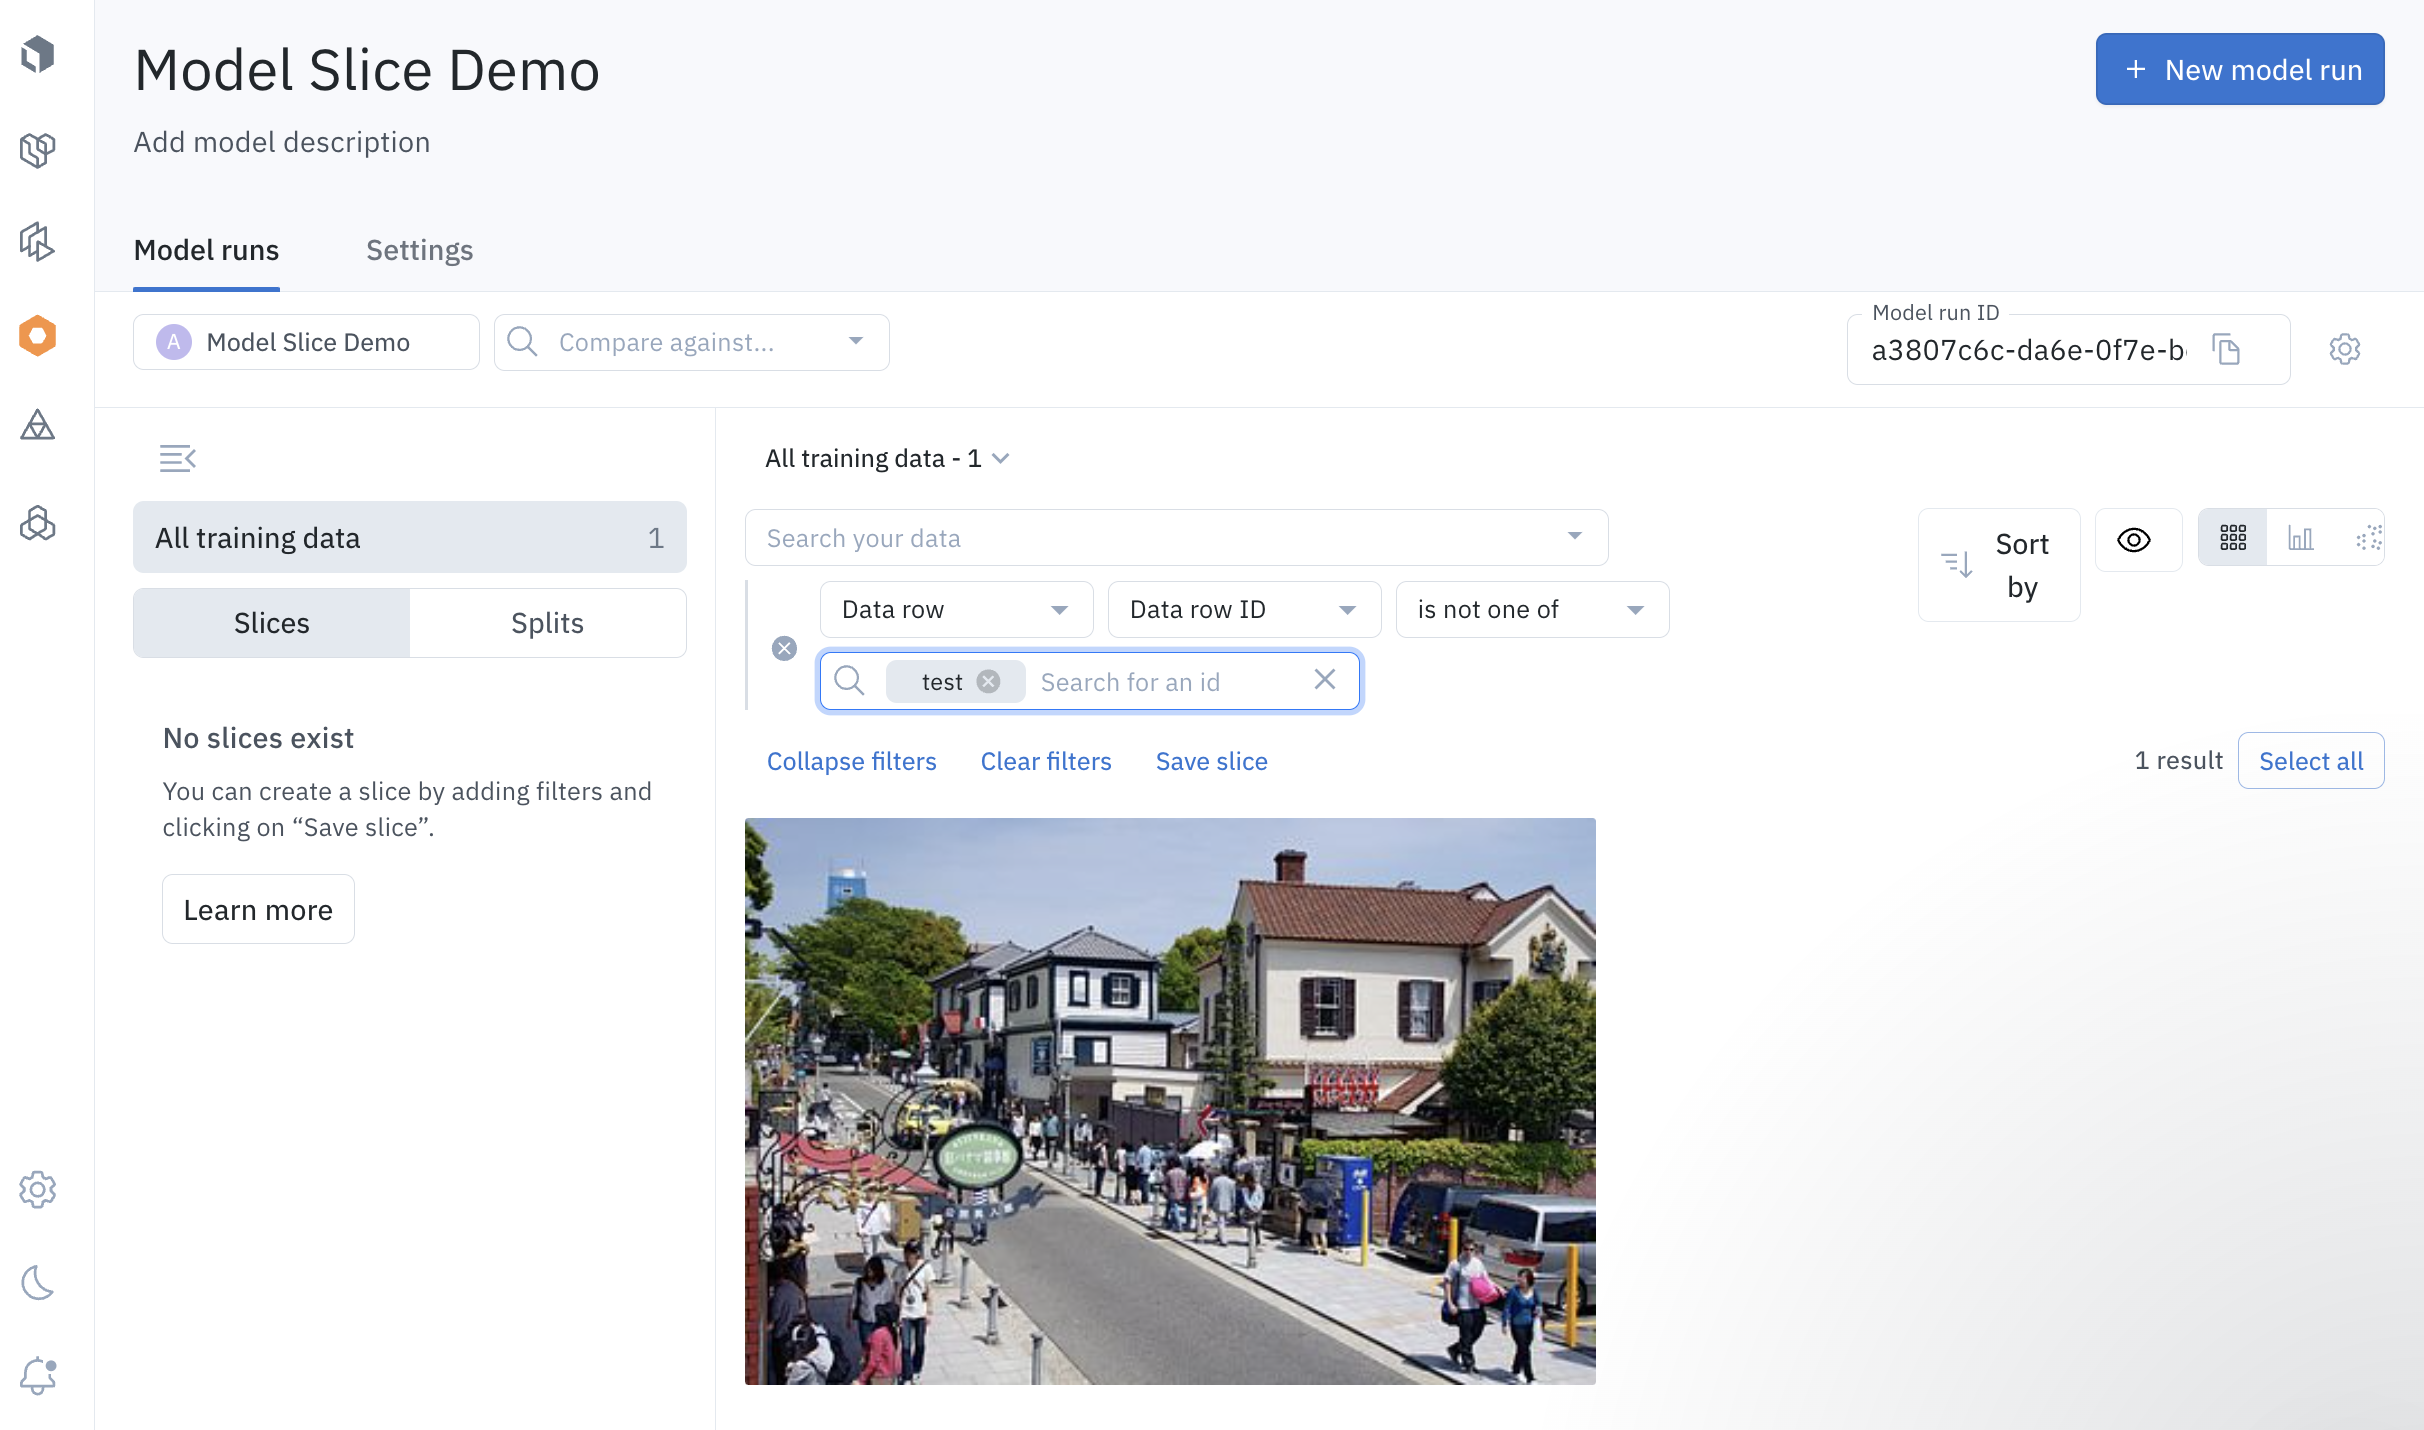
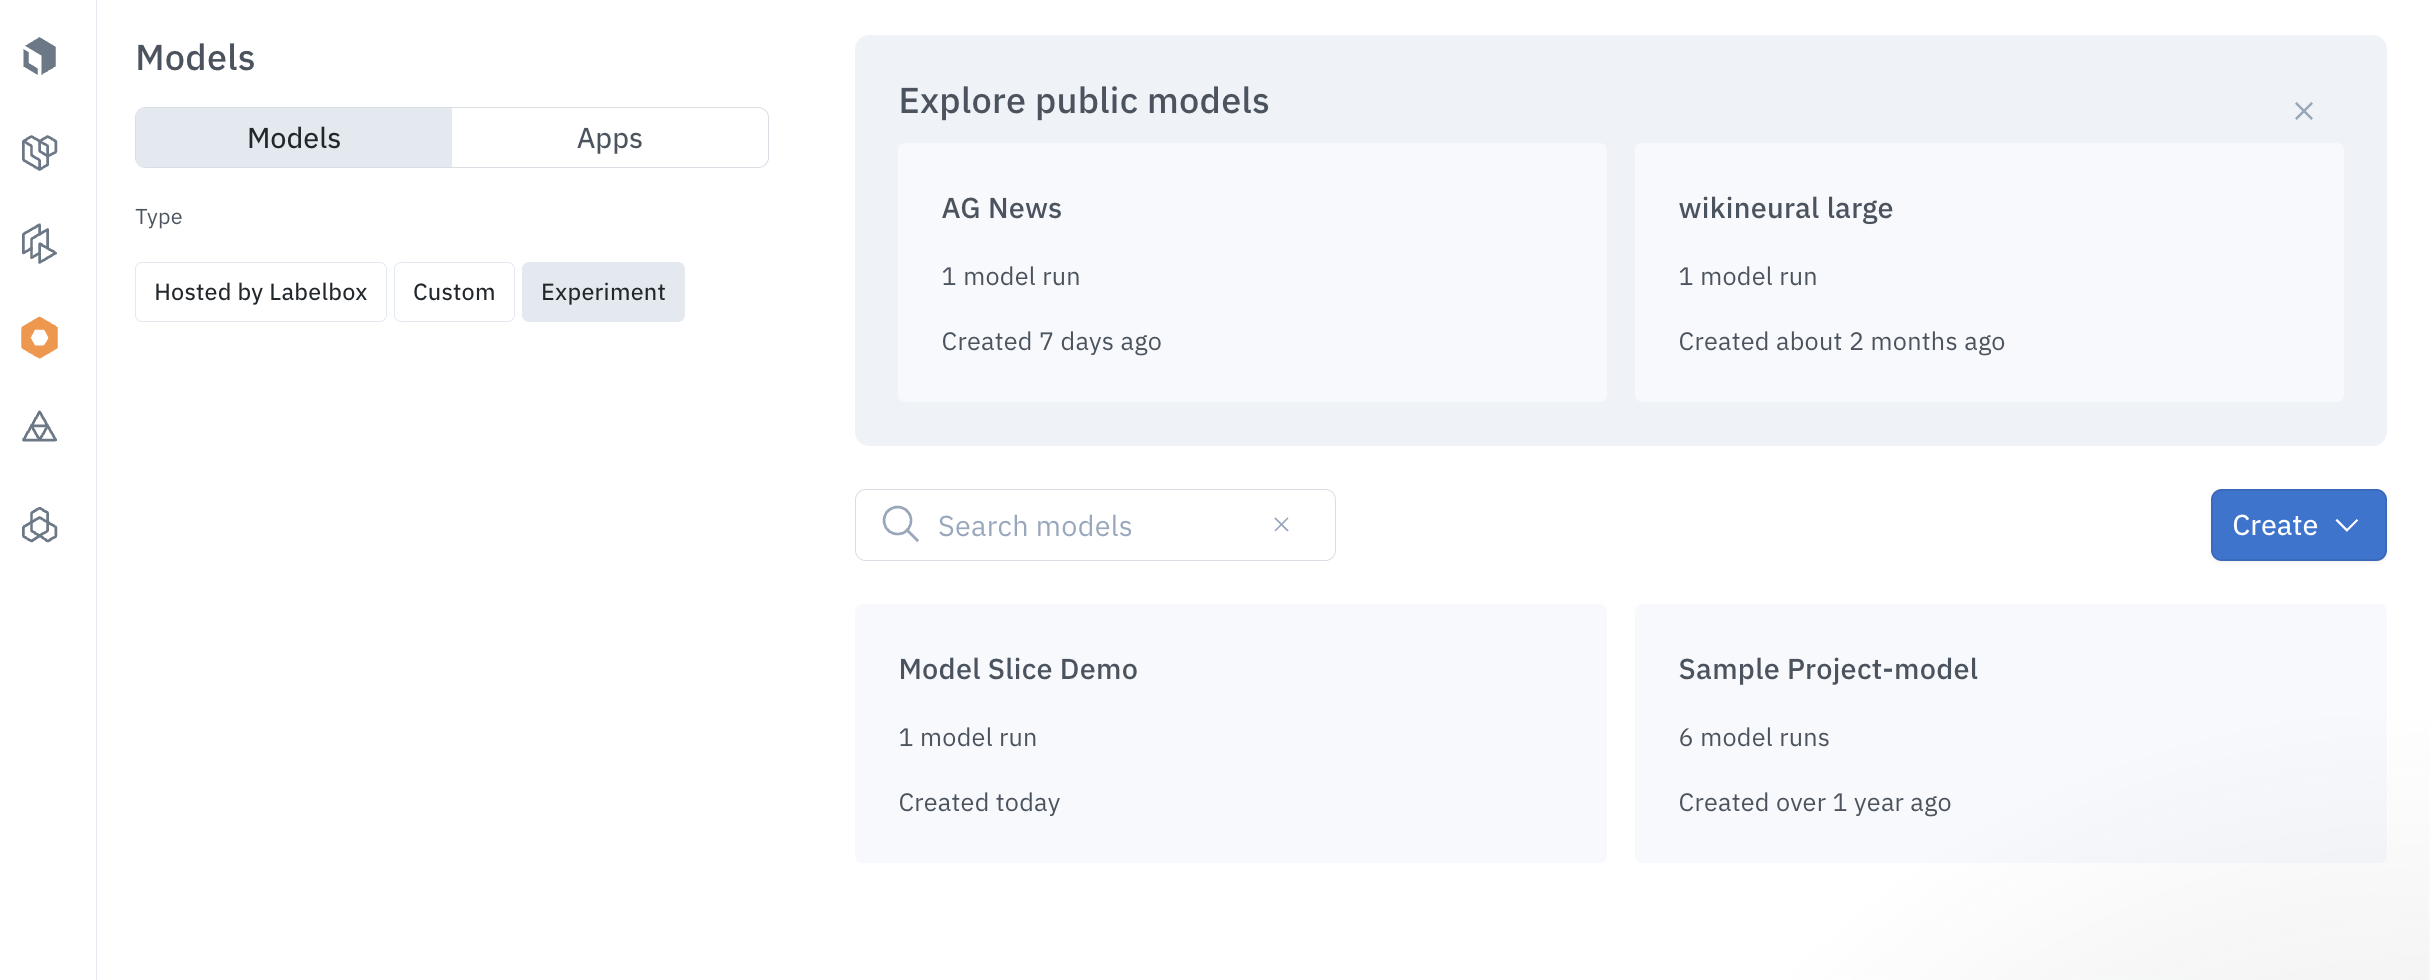 A filter must be active to create a slice. From the **Search** menu, select **Data row** and then set the **Condition** menu to **is not one of**.
Set **Search for an id** to *test* and then press *Enter* to activate the filter. You can add additional filter conditions as needed.
A filter must be active to create a slice. From the **Search** menu, select **Data row** and then set the **Condition** menu to **is not one of**.
Set **Search for an id** to *test* and then press *Enter* to activate the filter. You can add additional filter conditions as needed.
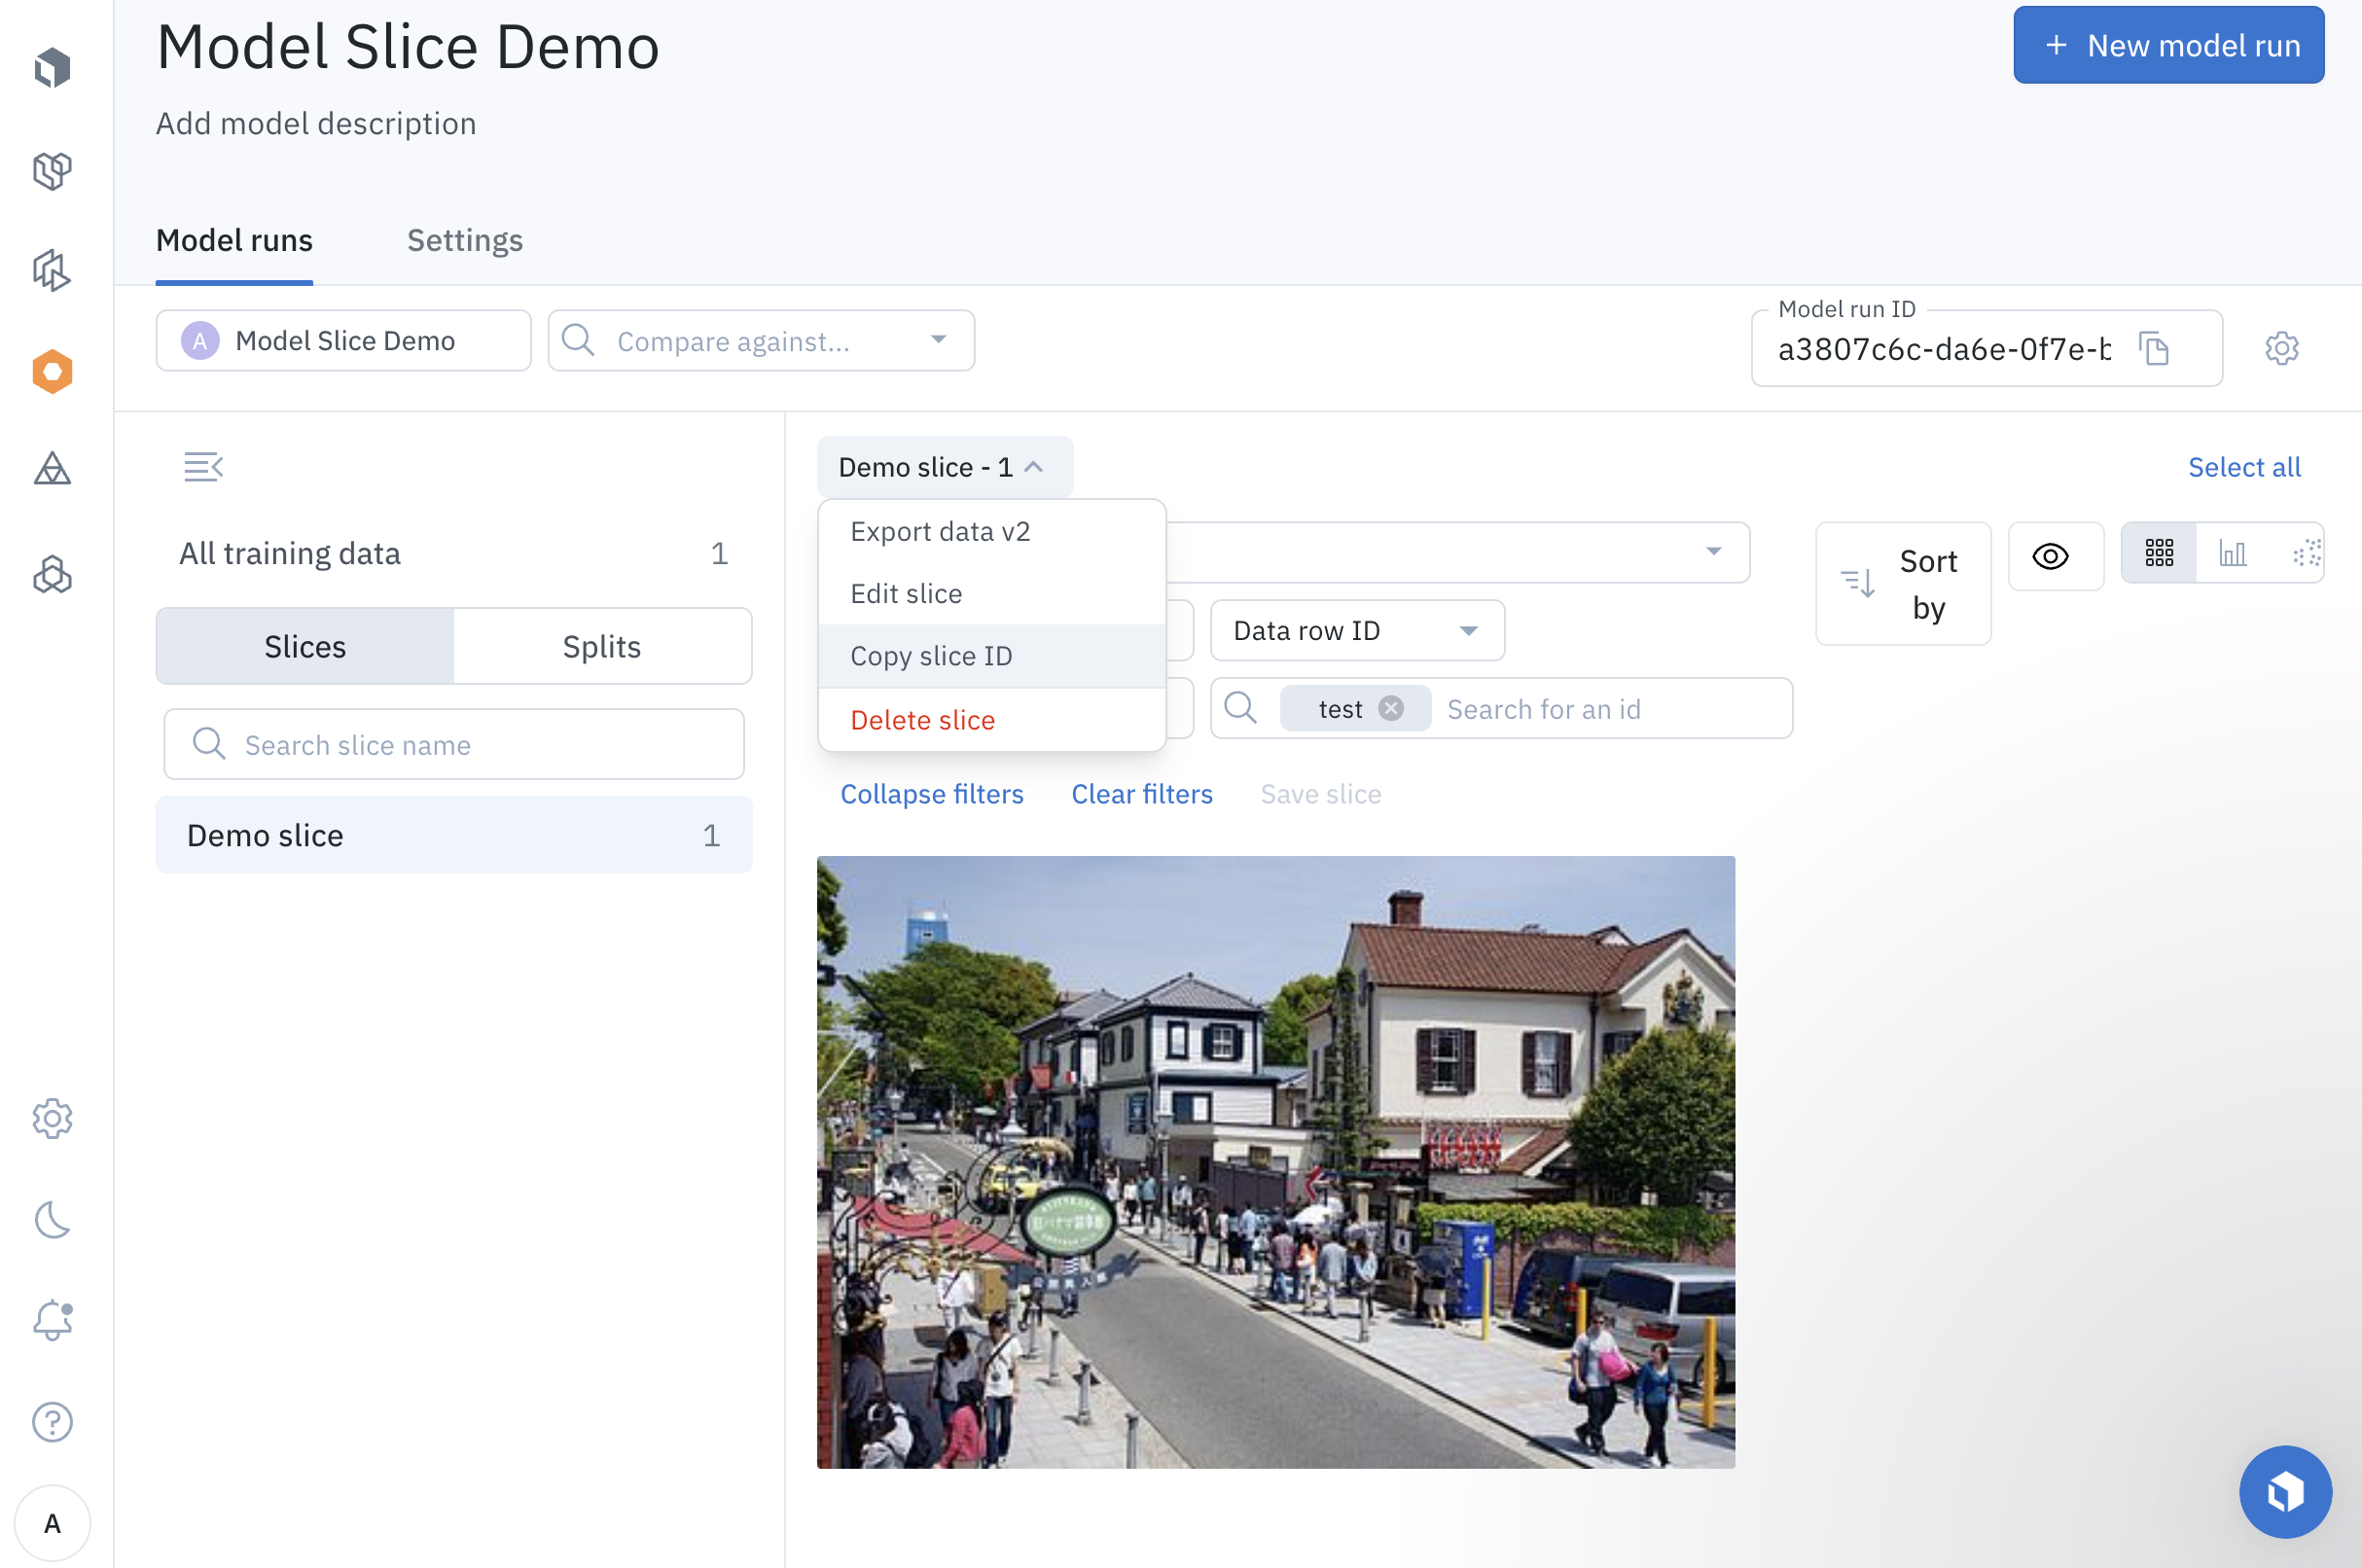
 Select **Save slice**, name your slice, and then select **Save**. When you do this, the **Slice** menu displays the name of your slice and the number of matching data rows.
From the **Slice** menu, select **Copy slice ID**.
Select **Save slice**, name your slice, and then select **Save**. When you do this, the **Slice** menu displays the name of your slice and the number of matching data rows.
From the **Slice** menu, select **Copy slice ID**.
 Paste the **Slice ID** into your your code:
```python Python theme={null}
SLICE_ID = ""
```
### Get model slice
```python Python theme={null}
model_slice = client.get_model_slice(SLICE_ID)
```
### Obtain data row IDs from model slice
Data row identifiers are objects that contain both data row IDs and global keys.
```python Python theme={null}
data_row_identifiers = model_slice.get_data_row_identifiers(model_run.uid)
drids = [dr for dr in data_row_identifiers]
# get both global keys and data row ids
# and utilize the hash method to combine both global keys and data row ids into a dictionary
for dr in drids:
print(f"Data row: {dr.id}, Global Key: {dr.global_key}, dr_gk: {dr.to_hash()}")
```
### Obtain data row identifiers
```
data_rows = model_slice.get_data_row_identifiers(model_run.uid)
for data_row in data_rows:
print(data_row)
```
### Model slice attributes
```python Python theme={null}
# name (str)
model_slice.name
# description (str)
model_slice.description
# updated at (datetime)
model_slice.updated_at
# created at (datetime)
model_slice.created_at
# filter (list[dict])
model_slice.filter
```
Paste the **Slice ID** into your your code:
```python Python theme={null}
SLICE_ID = ""
```
### Get model slice
```python Python theme={null}
model_slice = client.get_model_slice(SLICE_ID)
```
### Obtain data row IDs from model slice
Data row identifiers are objects that contain both data row IDs and global keys.
```python Python theme={null}
data_row_identifiers = model_slice.get_data_row_identifiers(model_run.uid)
drids = [dr for dr in data_row_identifiers]
# get both global keys and data row ids
# and utilize the hash method to combine both global keys and data row ids into a dictionary
for dr in drids:
print(f"Data row: {dr.id}, Global Key: {dr.global_key}, dr_gk: {dr.to_hash()}")
```
### Obtain data row identifiers
```
data_rows = model_slice.get_data_row_identifiers(model_run.uid)
for data_row in data_rows:
print(data_row)
```
### Model slice attributes
```python Python theme={null}
# name (str)
model_slice.name
# description (str)
model_slice.description
# updated at (datetime)
model_slice.updated_at
# created at (datetime)
model_slice.created_at
# filter (list[dict])
model_slice.filter
```