Import HTML data
To learn how to prepare and format your HTML data for importing to Labelbox, see Import HTML data. You have two options for uploading to Labelbox:- Store your HTML files in your cloud storage and send Labelbox a JSON file containing URL links to the HTML files (recommended)
- Upload the HTML files directly to Labelbox
Note: To label a webpage, you must save it as an HTML file. Direct linking to web pages via a URL is not supported.
Supported annotation types
Create (or reuse) an ontology for your labeling project. The table below shows the annotation types that are supported for labeling HTML data. Click through the links in the table to view the import and export formats for each classification type. Note: You can use Model-assisted labeling to import classifications as prelabels to your HTML data rows.| Feature | Import format | Export format |
|---|---|---|
| Radio classification | See payload | See payload |
| Checklist classification | See payload | See payload |
| Free-form text classification | See payload | See payload |
Custom HTML editor configurations
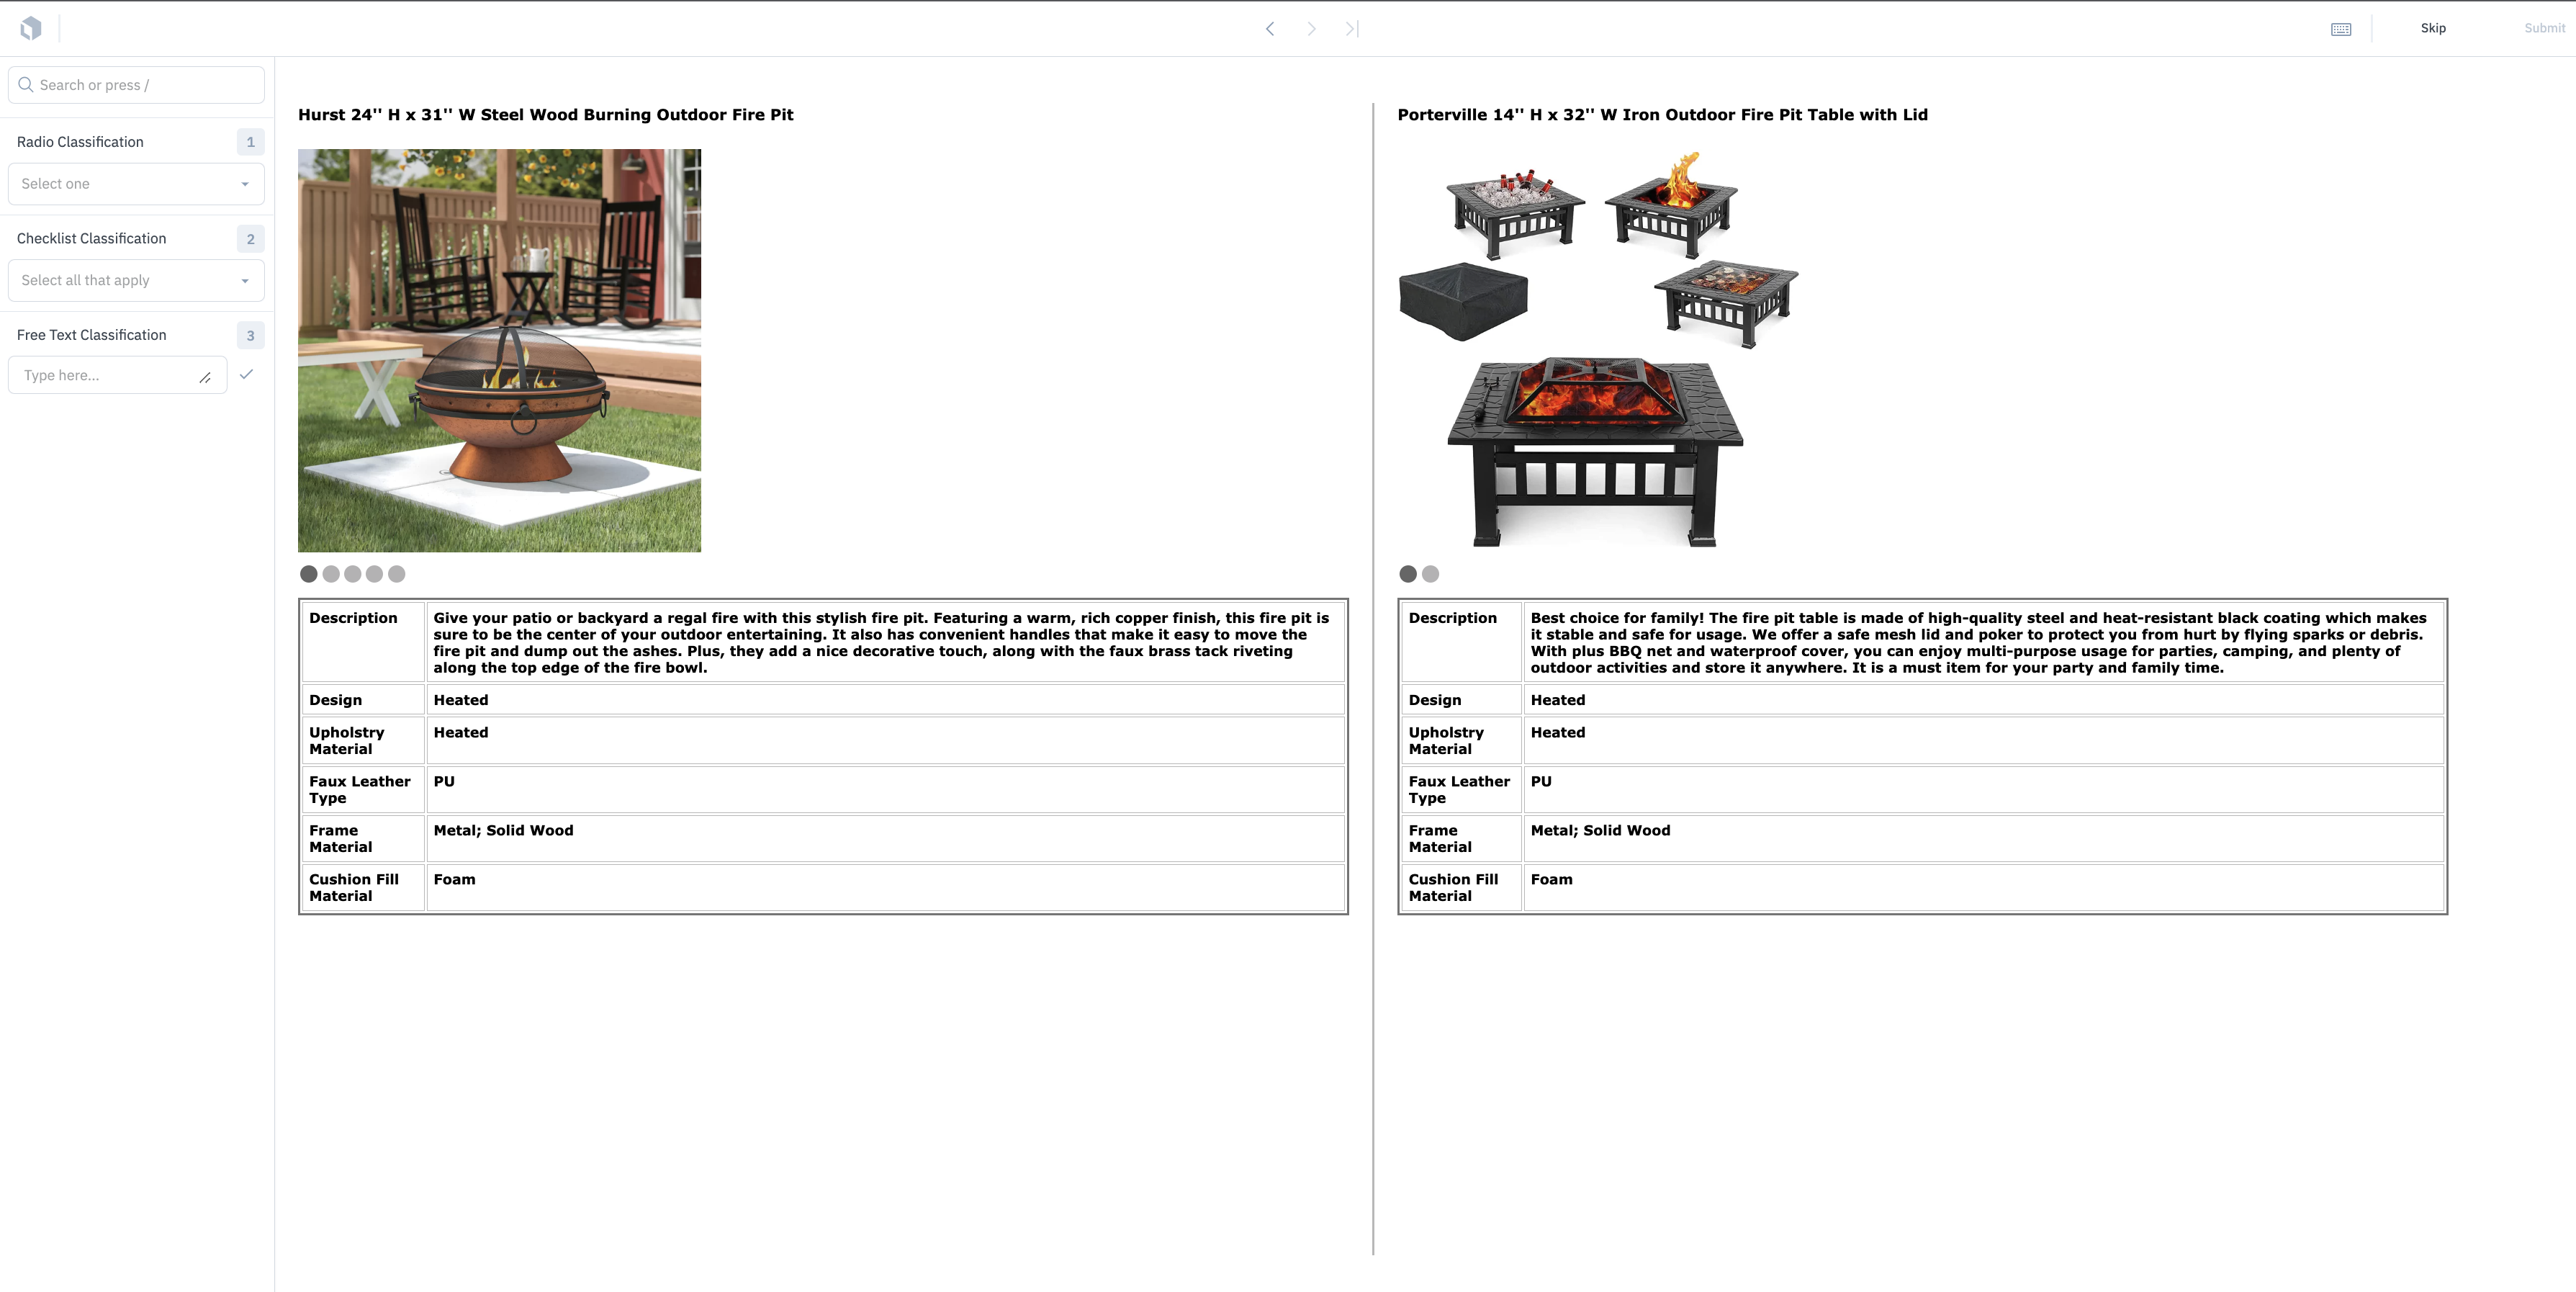
You can leverage the HTML format to customize the way your data appears in the labeling interface. Here are some common configurations our customers set up using the HTML editor.Compare and rank products
Add CSS to your HTML file to display objects side-by-side in a grid container. This is helpful for ranking or comparing multiple products in the labeling interface. To do this, ensure your CSS display property is set togrid.