View queued data rows
To view your assets queued for labeling, go to the data row tab in your project and click on the To label filter in the left-side panel. In this tab, you can easily explore your queued data to see what remains in the labeling queue. You can visualize the queued data using the gallery view.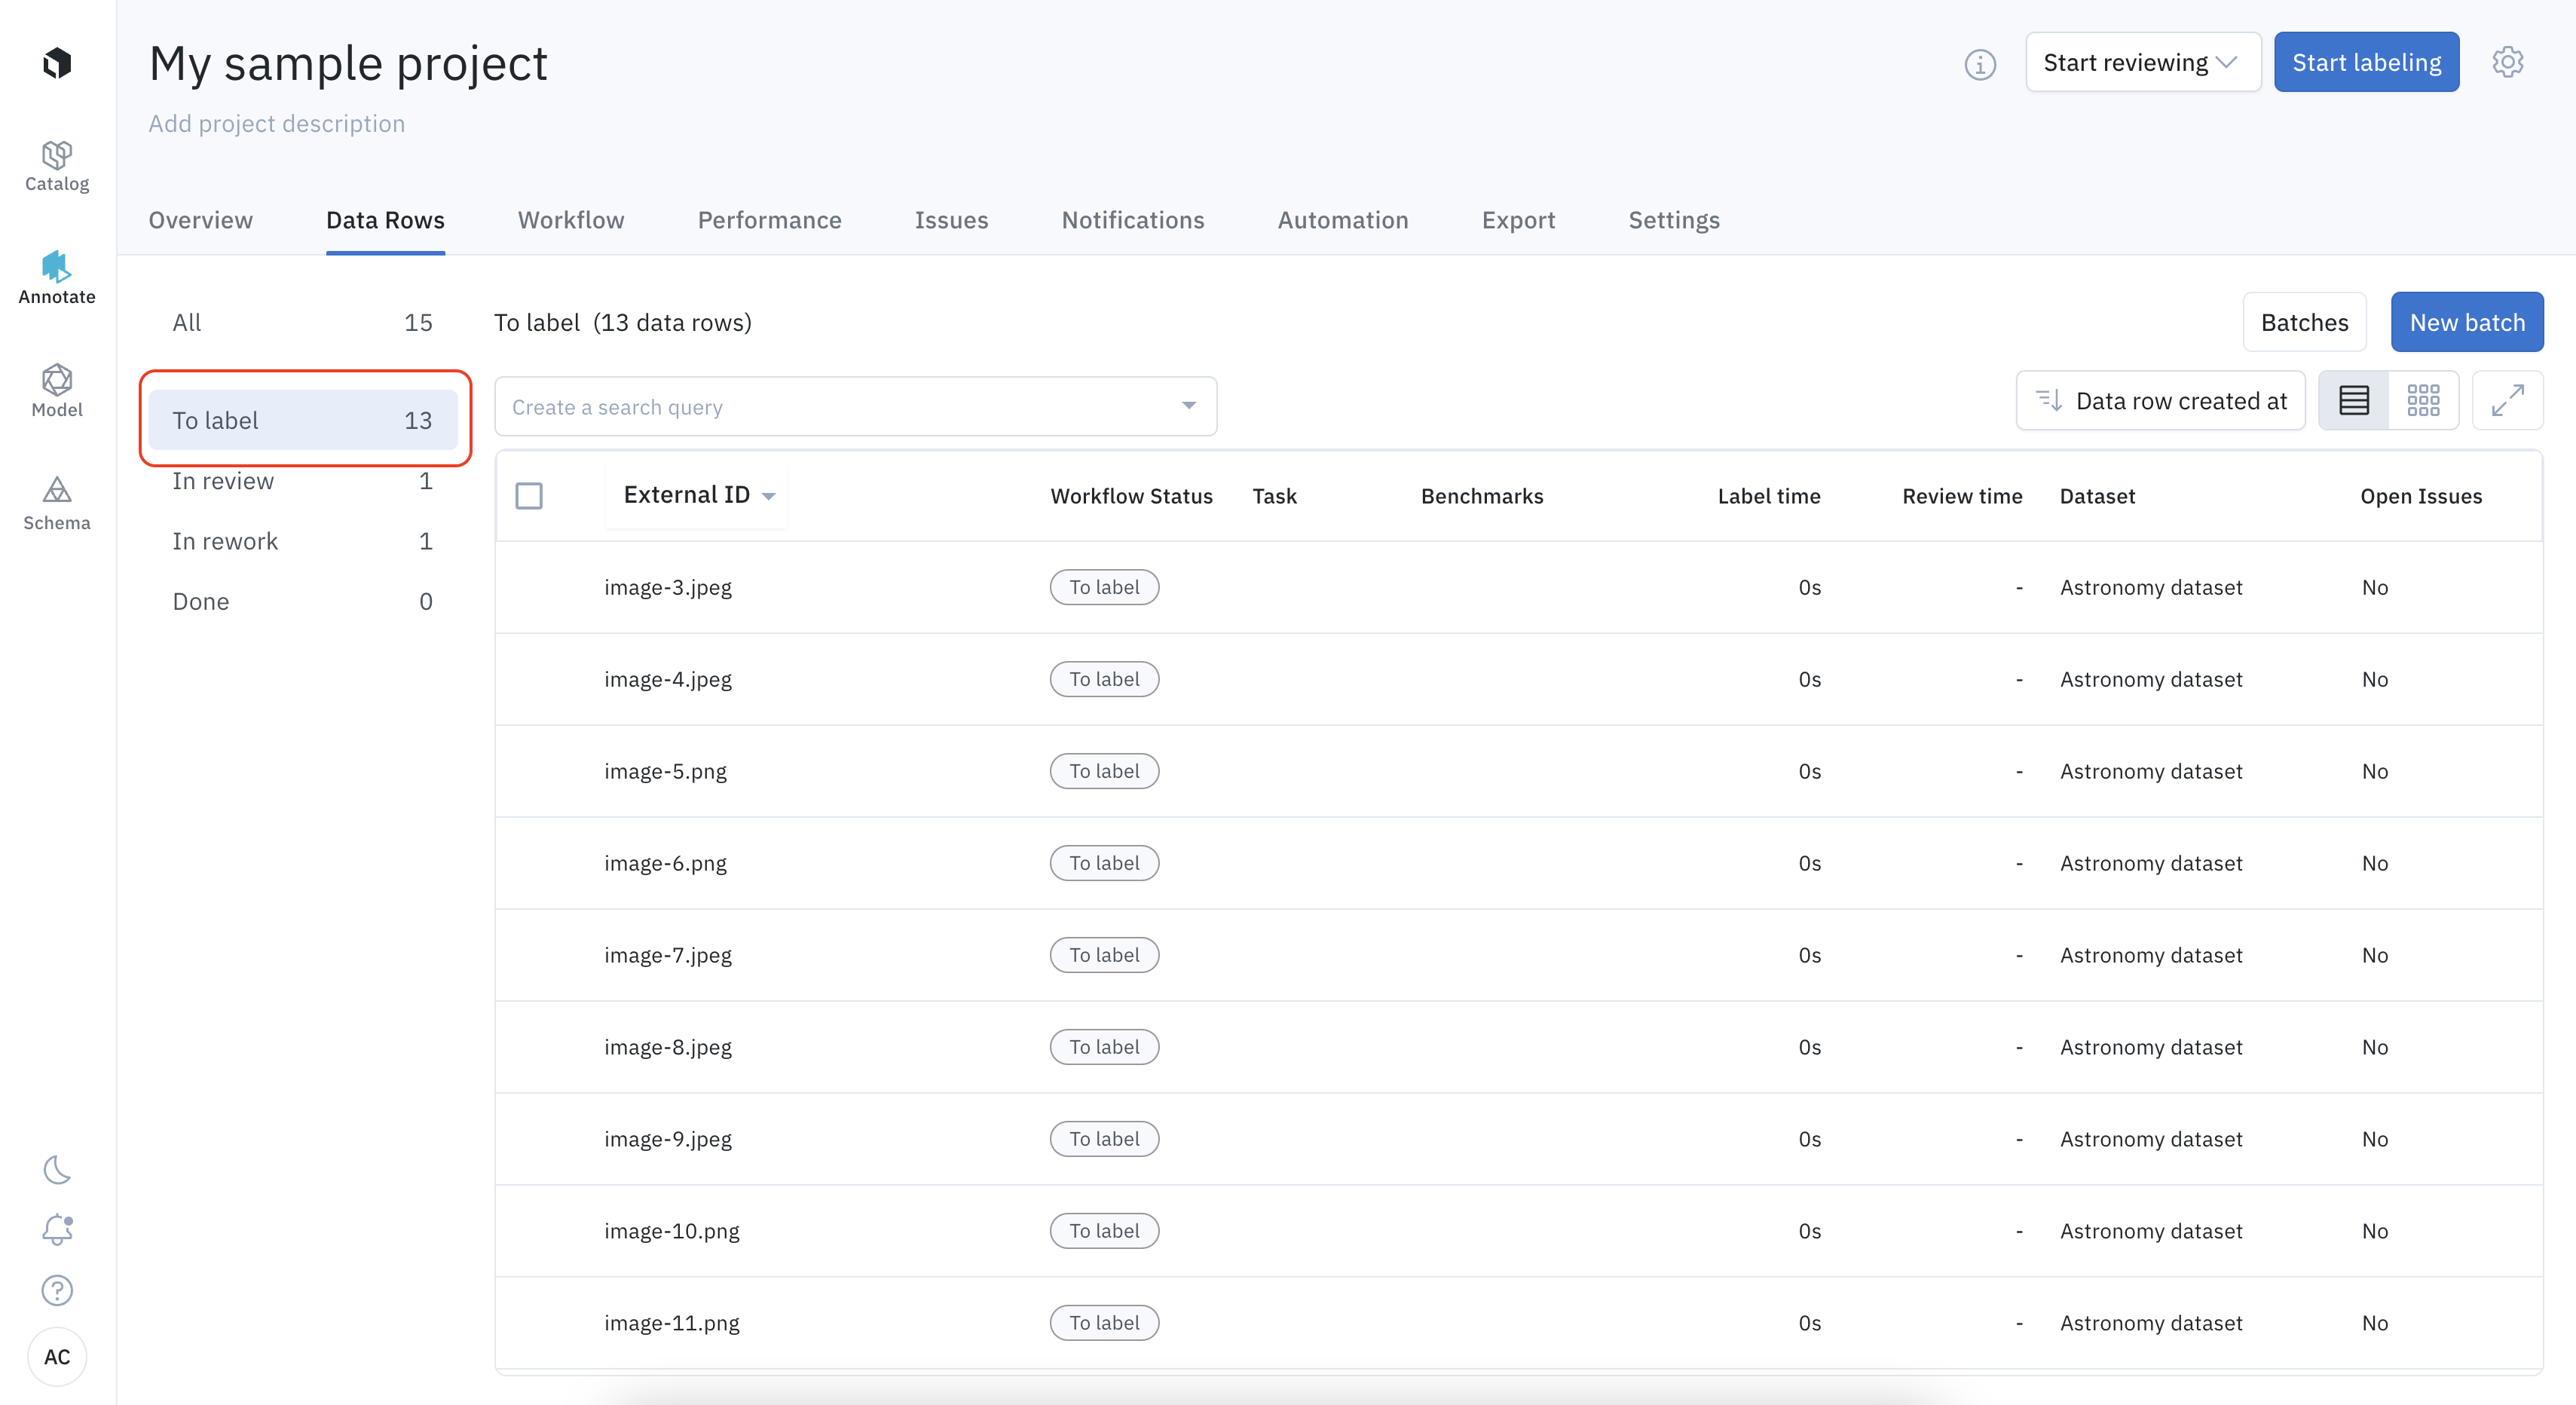
Set priority for queued data rows
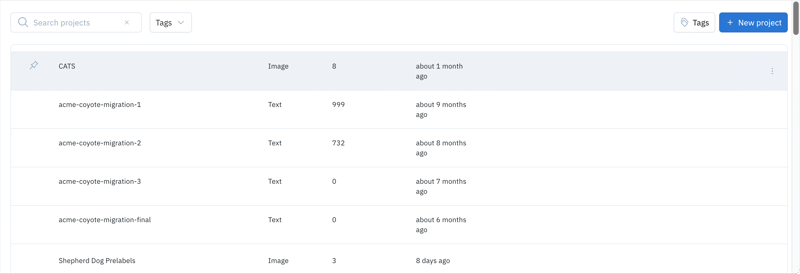
You can set the priority of the data rows queued in your labeling project. To do so:- Use Annotate to open your project and then select your project.
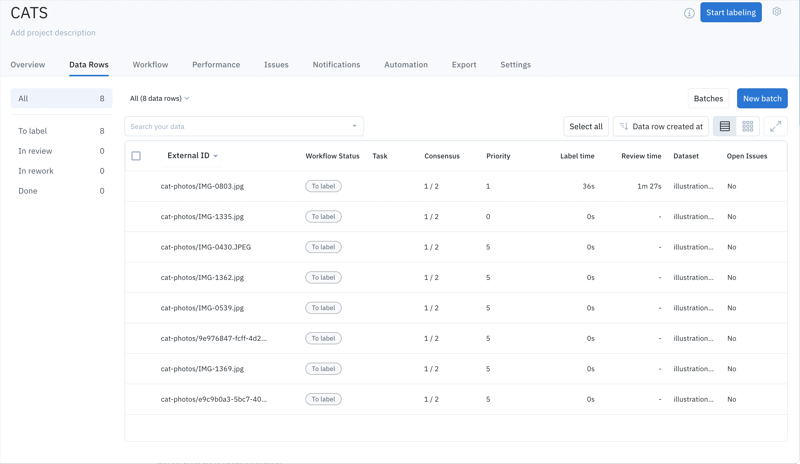
- When the project overview appears, select the Data Rows tab to display a list of data rows queued for your project. The current priority for each row is displayed in the Priority column.
- Select the row (or rows) you want to change. When you do this, the Selection menu displays the number of selected data rows.
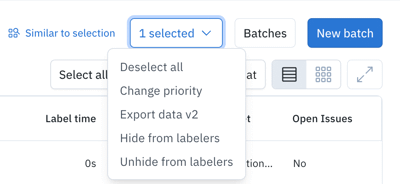
- From the Selection menu, choose Change priority, which displays the Change data priority dialog. When you create a batch in the UI, you are limited to 1-5. You can adjust it later via the SDK (see the Batches developer guide).
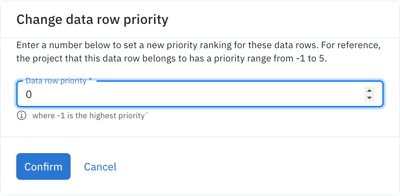
- Set the Data row priority field to the desired priority value and select the Confirm button.

-2,147,483,648 to 2,147,483,647. (For practical purposes, we recommend against using large priority values.)
The Change data row priority dialog considers lower values to be more important than higher values. That is, a priority value of 1 is considered higher priority than a value of 10. This means that negative values are considered more important than positive values. (In practice, you’re free to interpret the values in any way you see fit.)
You can also control data row priorities by:
- Setting the priority when you create a batch to be sent to a project.
- Using the SDK to set or update the priority for individual data rows.
Set priority at batch creation
While setting up a batch to label, you can set the priority of data rows from 1 through 5. Note that a lower value of priority means it will get labeled earlier.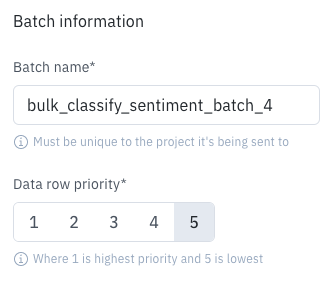
Update priority via the Python SDK
Even after data rows have been added to a project, the priority can be modified. The priority here can take all integer values. Currently, the modification of priority is supported via the SDK. See Project for instructions.Reserve data rows for labelers
By default, once a labeler starts labeling, Labelbox reserves 5 data rows for the labeler, and these reservations expire after 4 hours of idle time. The labeling queue replenishes reservations for labelers once they finish labeling a reserved data row. This approach ensures that labelers have sufficient work available and avoids unintended downtime due to latency spikes or data queue changes. Once a reservation expires, the associated data rows become available to other labelers, but the reservations still show in the original project settings queue until other labelers claim the data rows.Claim reservation-expired data rows
To claim a reservation-expired data row, simply open the project and begin labeling the data row.Set reservation count and duration
On the project Settings > Queue > Queue parameters page, you can change the following reservation settings:- Reservation count: The number of data rows reserved for each labeler, ranging from 1 to 5. Set a lower number for smaller projects and a higher number for maximum performance.
- Timeout duration: The time allocated for each labeler to work on a data row in a given queue, ranging from 1 to 24 hours. After the allocated time per task has expired, the reservation is released, and any unsaved or pending work on a data row will be discarded.
Clear reservations
You can manually clear out reservations for a user by navigating to project Settings > Queue. Find the user in the queue for whom you wish to clear the reservations, and select Clear reservations.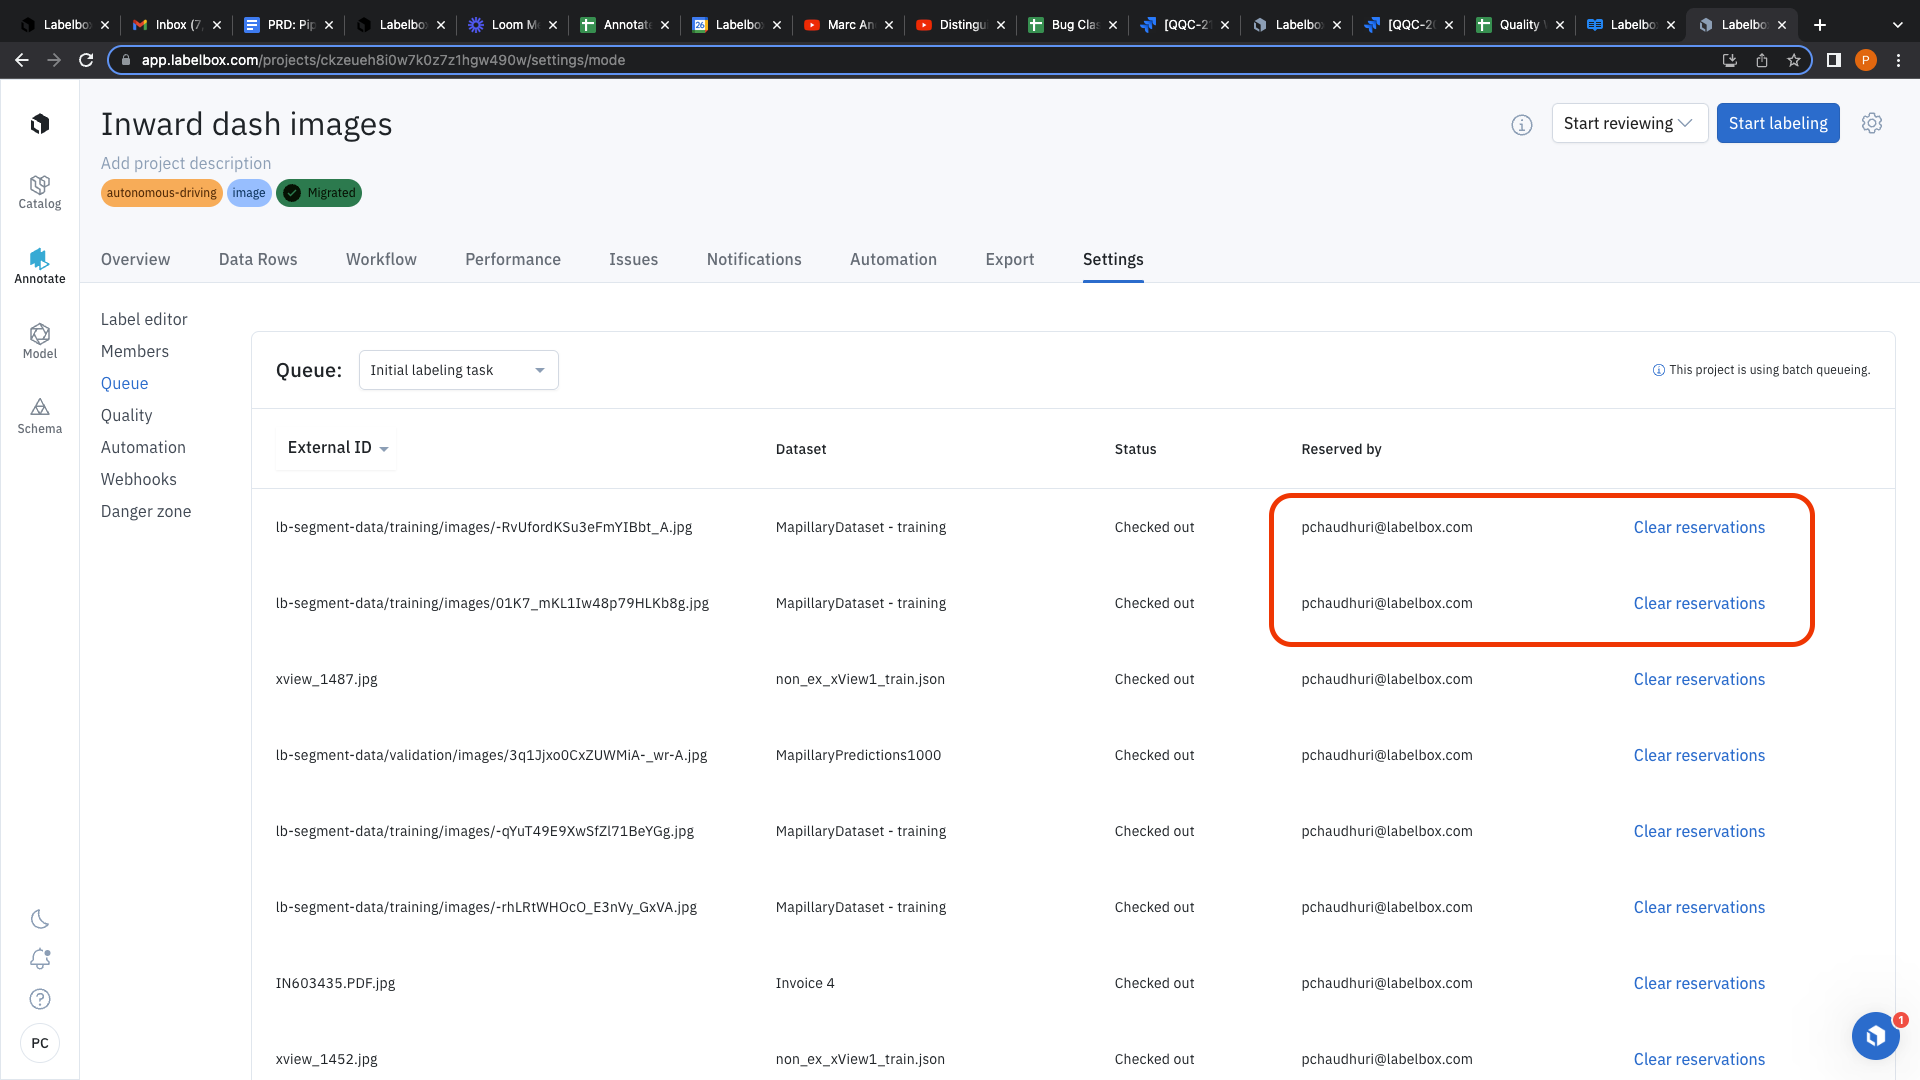
- During active labeling: Labelers may lose any unsubmitted work when clearing the reservation, unless they later take the same asset, which is uncommon and not guaranteed.
- For expired reservations: Clearing expired reservations doesn’t affect the availability of the data row, but the row must be claimed before the queue updates.
Real-time labeling
When you enable real-time labeling, it allows your team to label continuously. This can be helpful if you have labeling time constraints or if you need to improve your labeling team’s efficiency by enabling a continuous flow in the labeling queue. You can enable real-time labeling in Annotate > select a project > Settings > Import labels.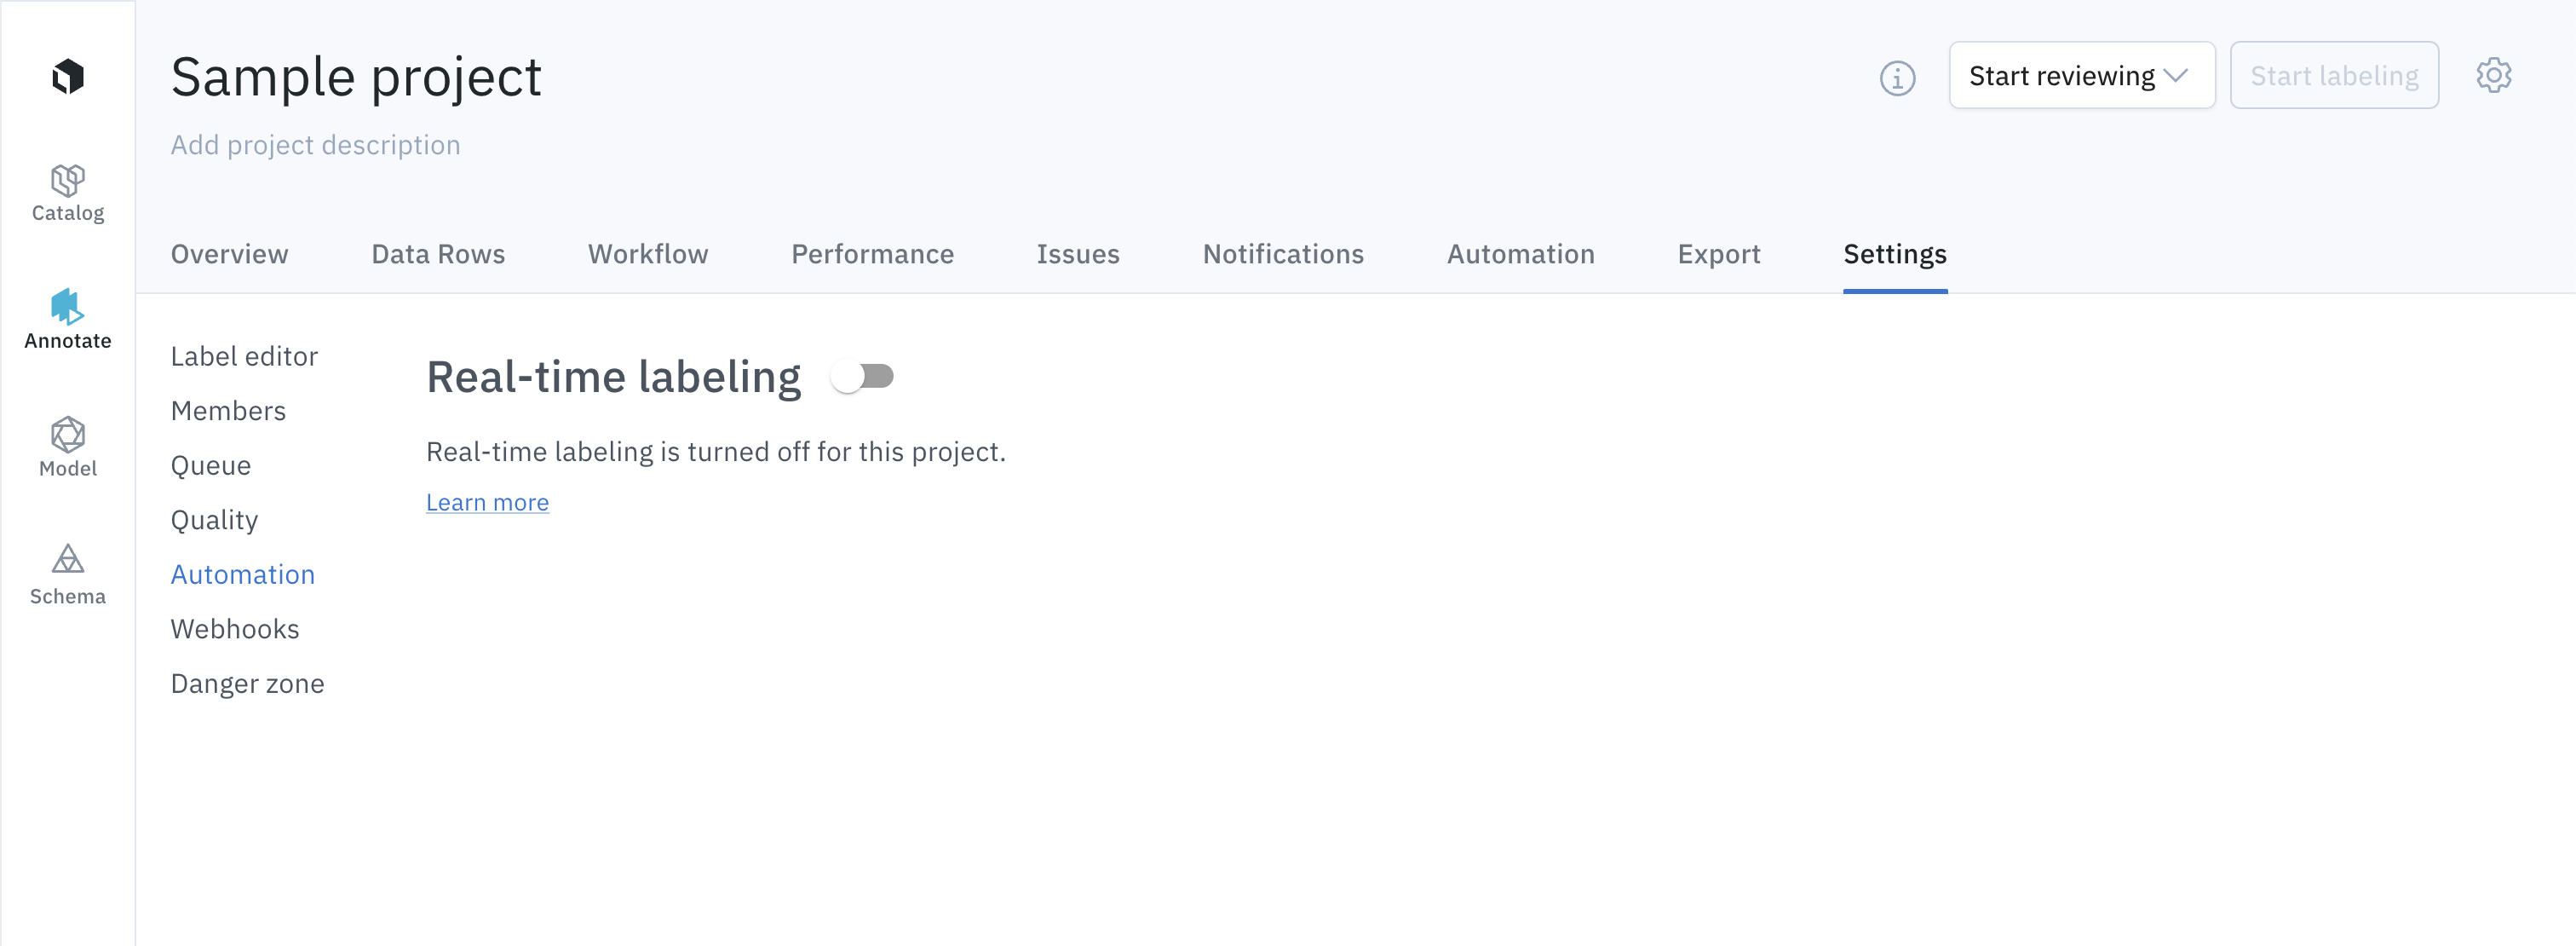
Best practices
- To avoid lost work, Labelbox recommends that labelers consult their administrator if they anticipate being away from their computer for over 24 hours. Any unsubmitted work done by the original labeler will be lost if you clear the reservations.
- The timer starts counting label time after labelers click Edit. It stops counting review and label times if our system detects 5 minutes of inactivity. When we detect user activity again, we restart the timer. This is something Labelbox does intentionally to record only active screen time on the application.
- All labeling work should be limited to one browser tab, and no mobile devices should be used. Duplicate labels may be unintentionally created when a user has multiple tabs open and is actively labeling.