- How you want your model to do a given task (i.e., create predictions).
- How your labeling team should label an asset (i.e., create ground truth).
Key definitions
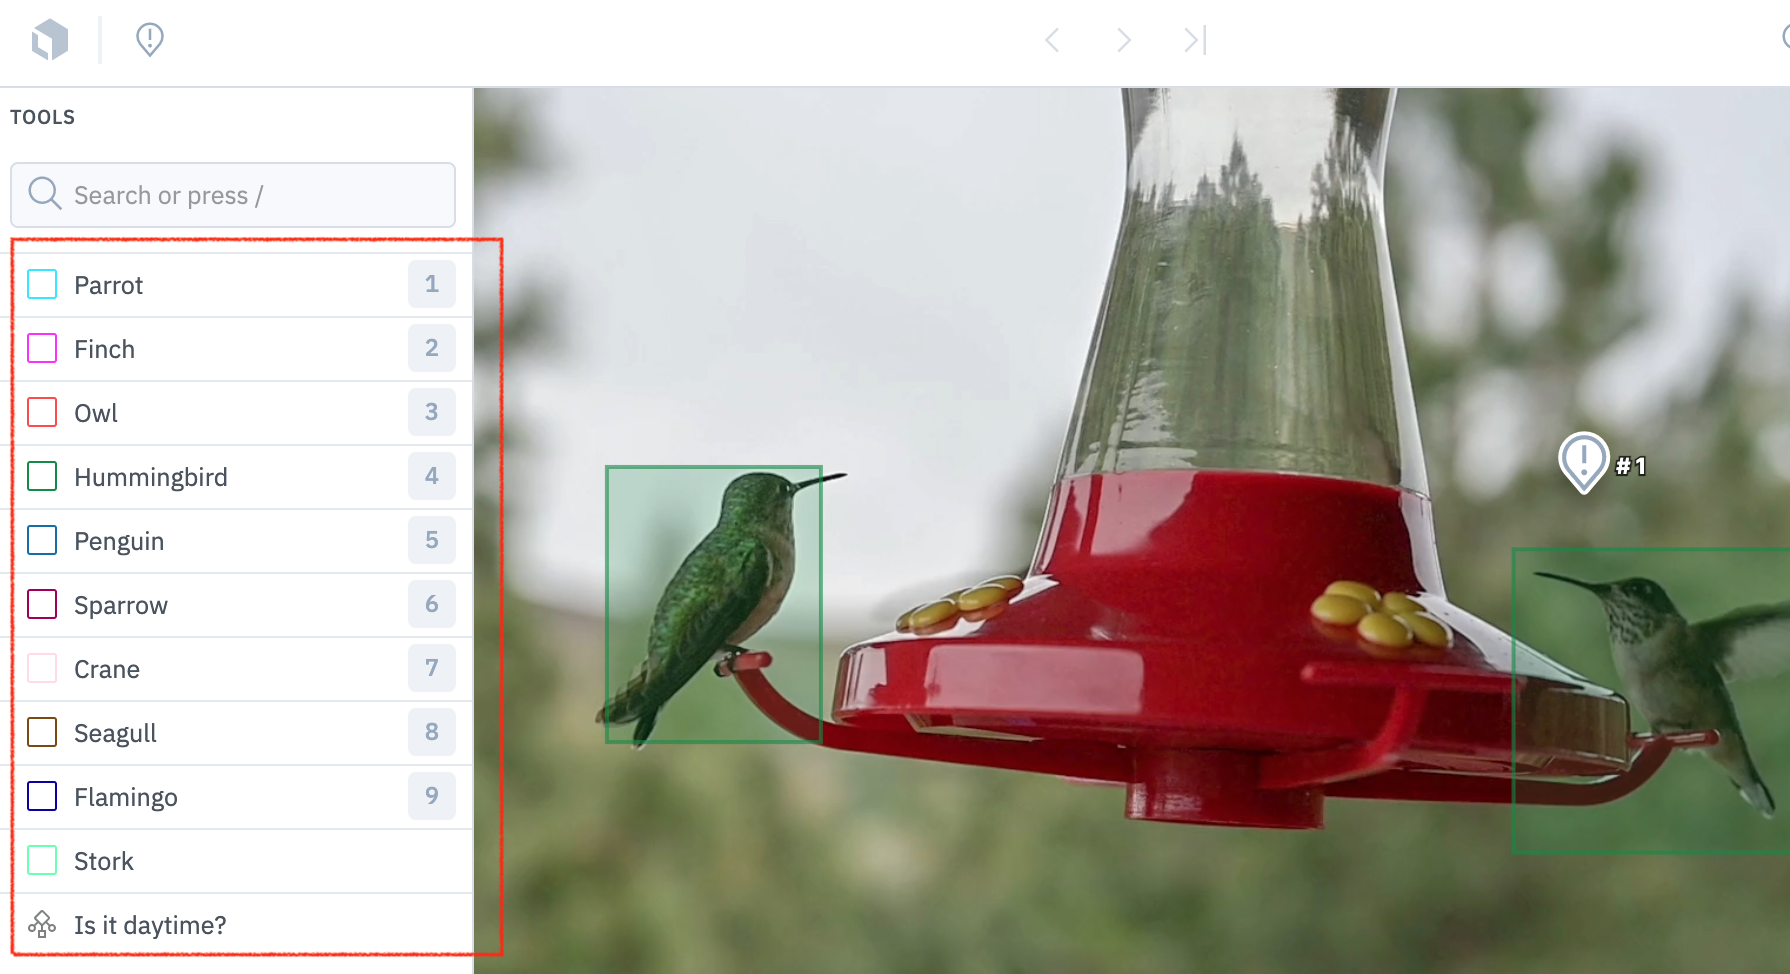
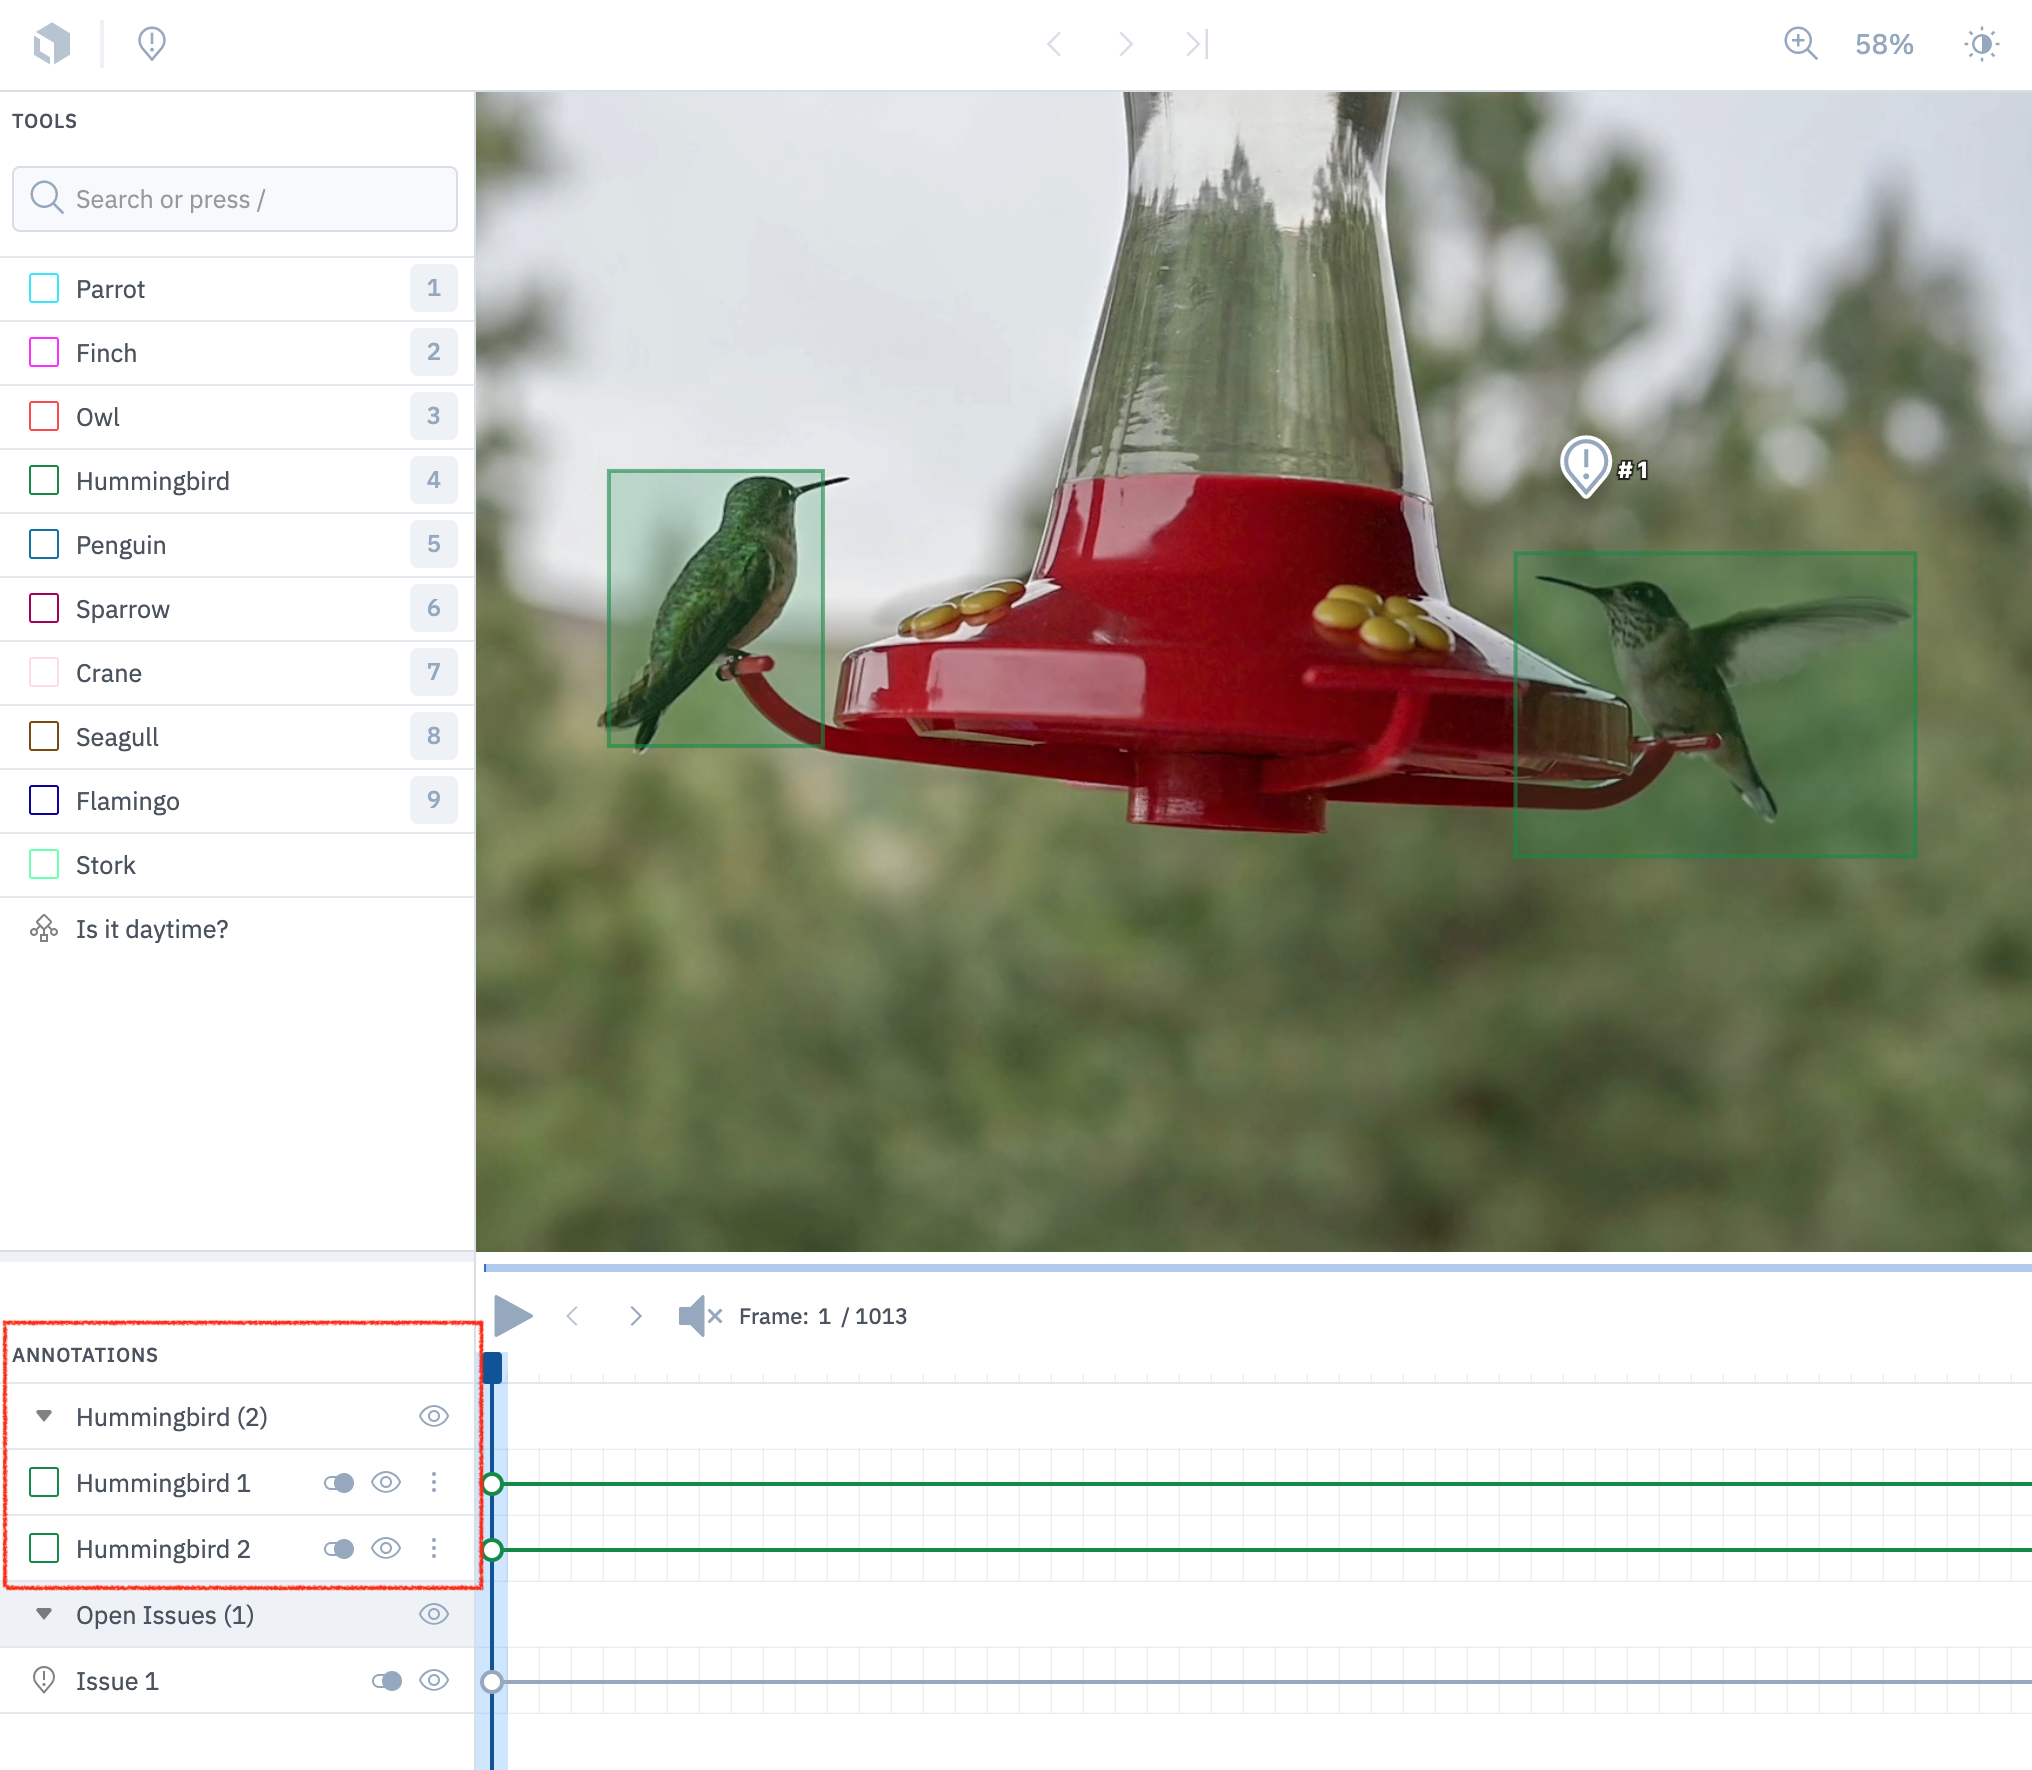
Objects versus classifications
Labelbox separates its annotations into two general categories: objects and classifications. An easy way to remember the difference between the two is that object-type annotations are visible on the editor stage and classifications are not. Structurally, objects cannot be nested within other objects. However, classifications can be nested within objects. Classifications can also be at the global level (can apply to the entire asset). In this sample ontology, there is one object feature (named “Tree”) and 3 classification features.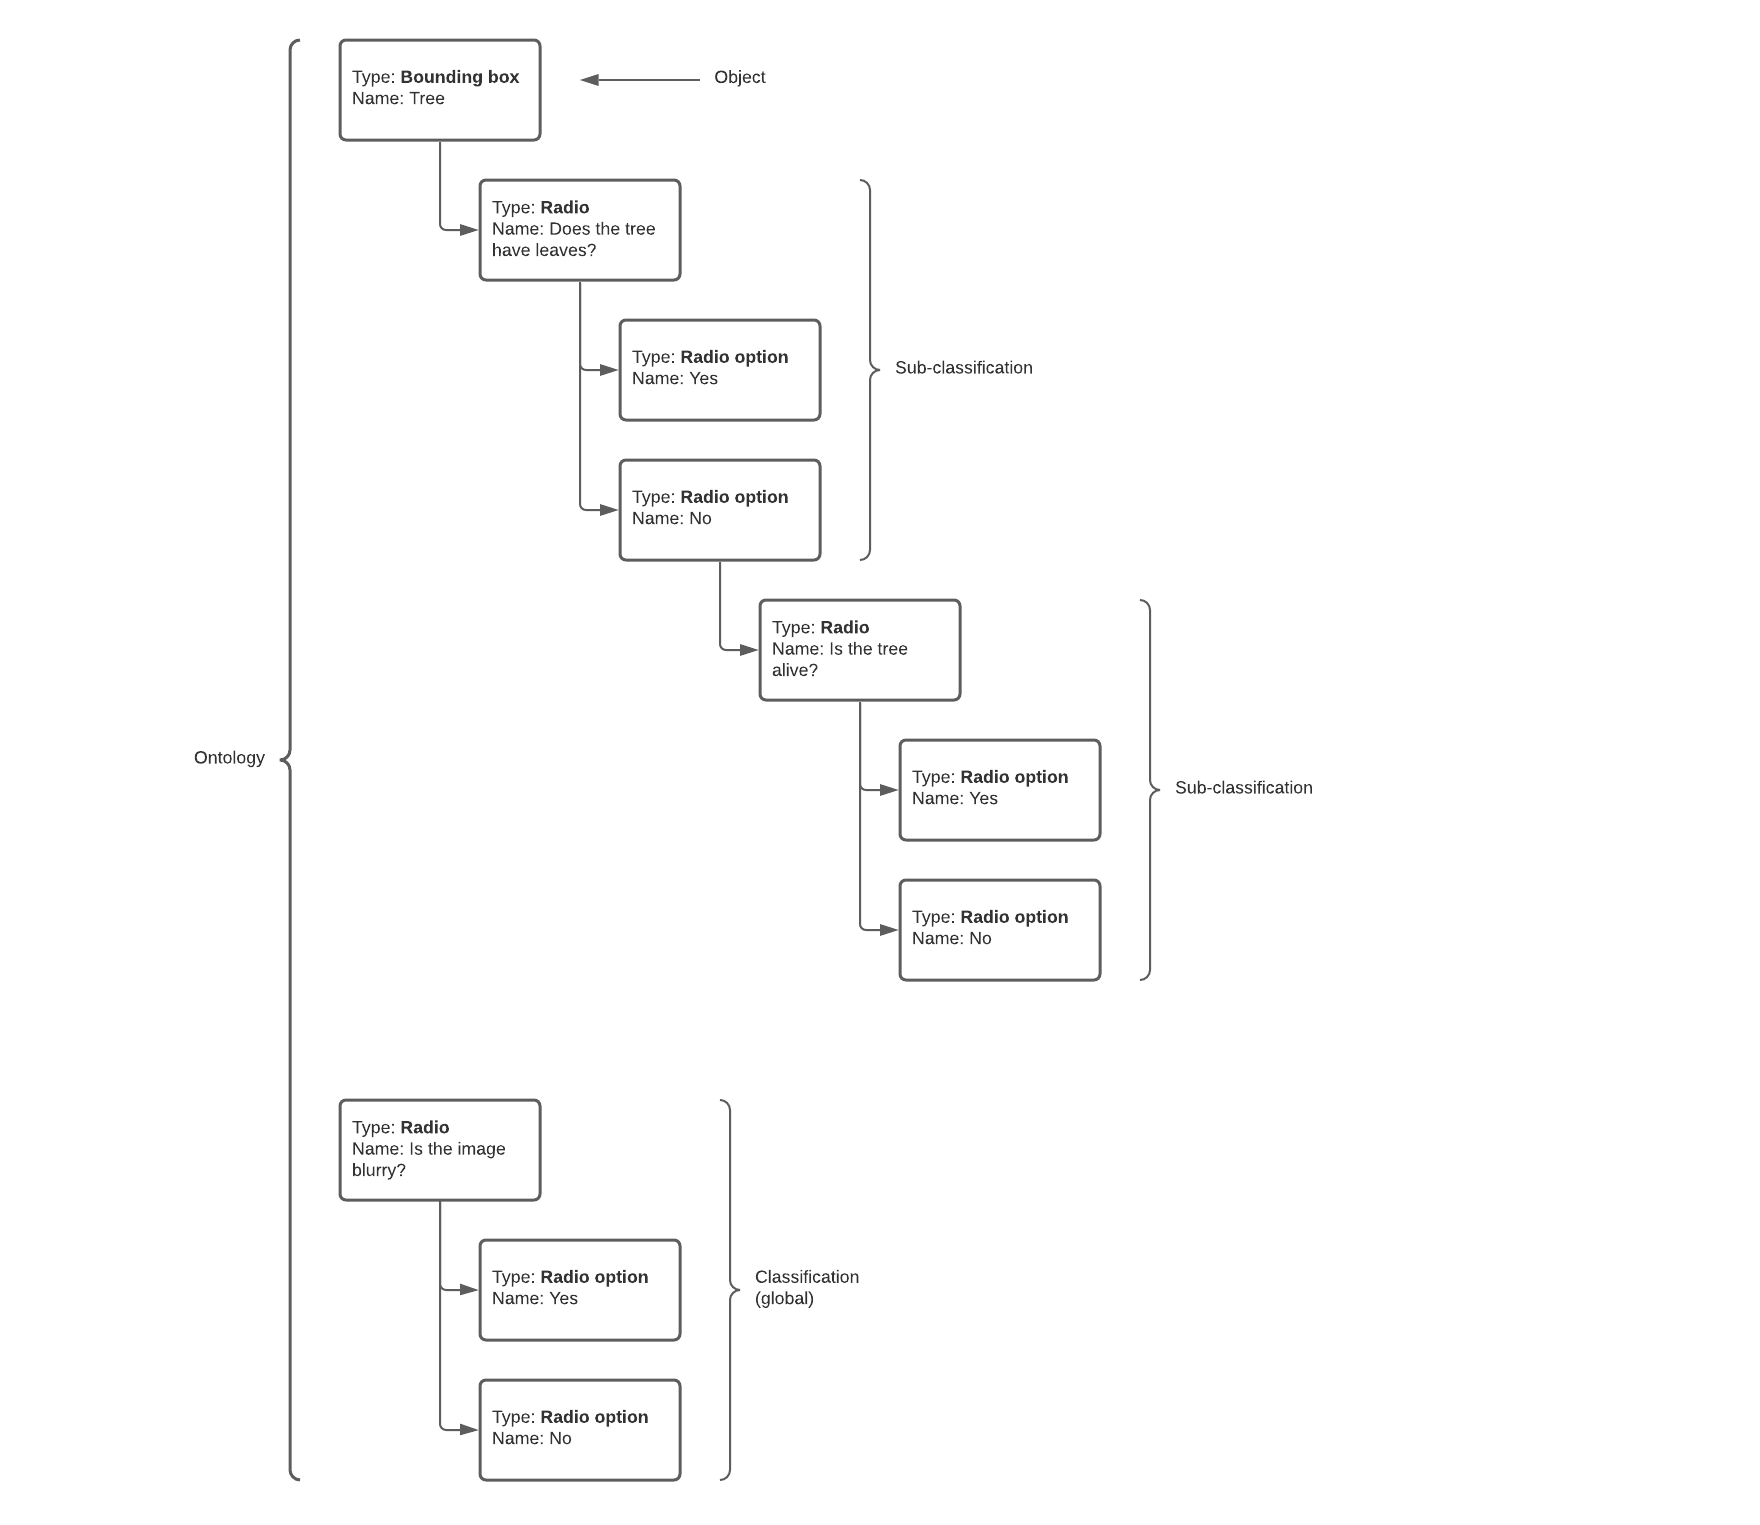
Create features from the Schema tab
To create a new feature in the UI, navigate to Schema > Features and click the Create button on the right. Features will fall into one of three categories: objects, classifications or relationships.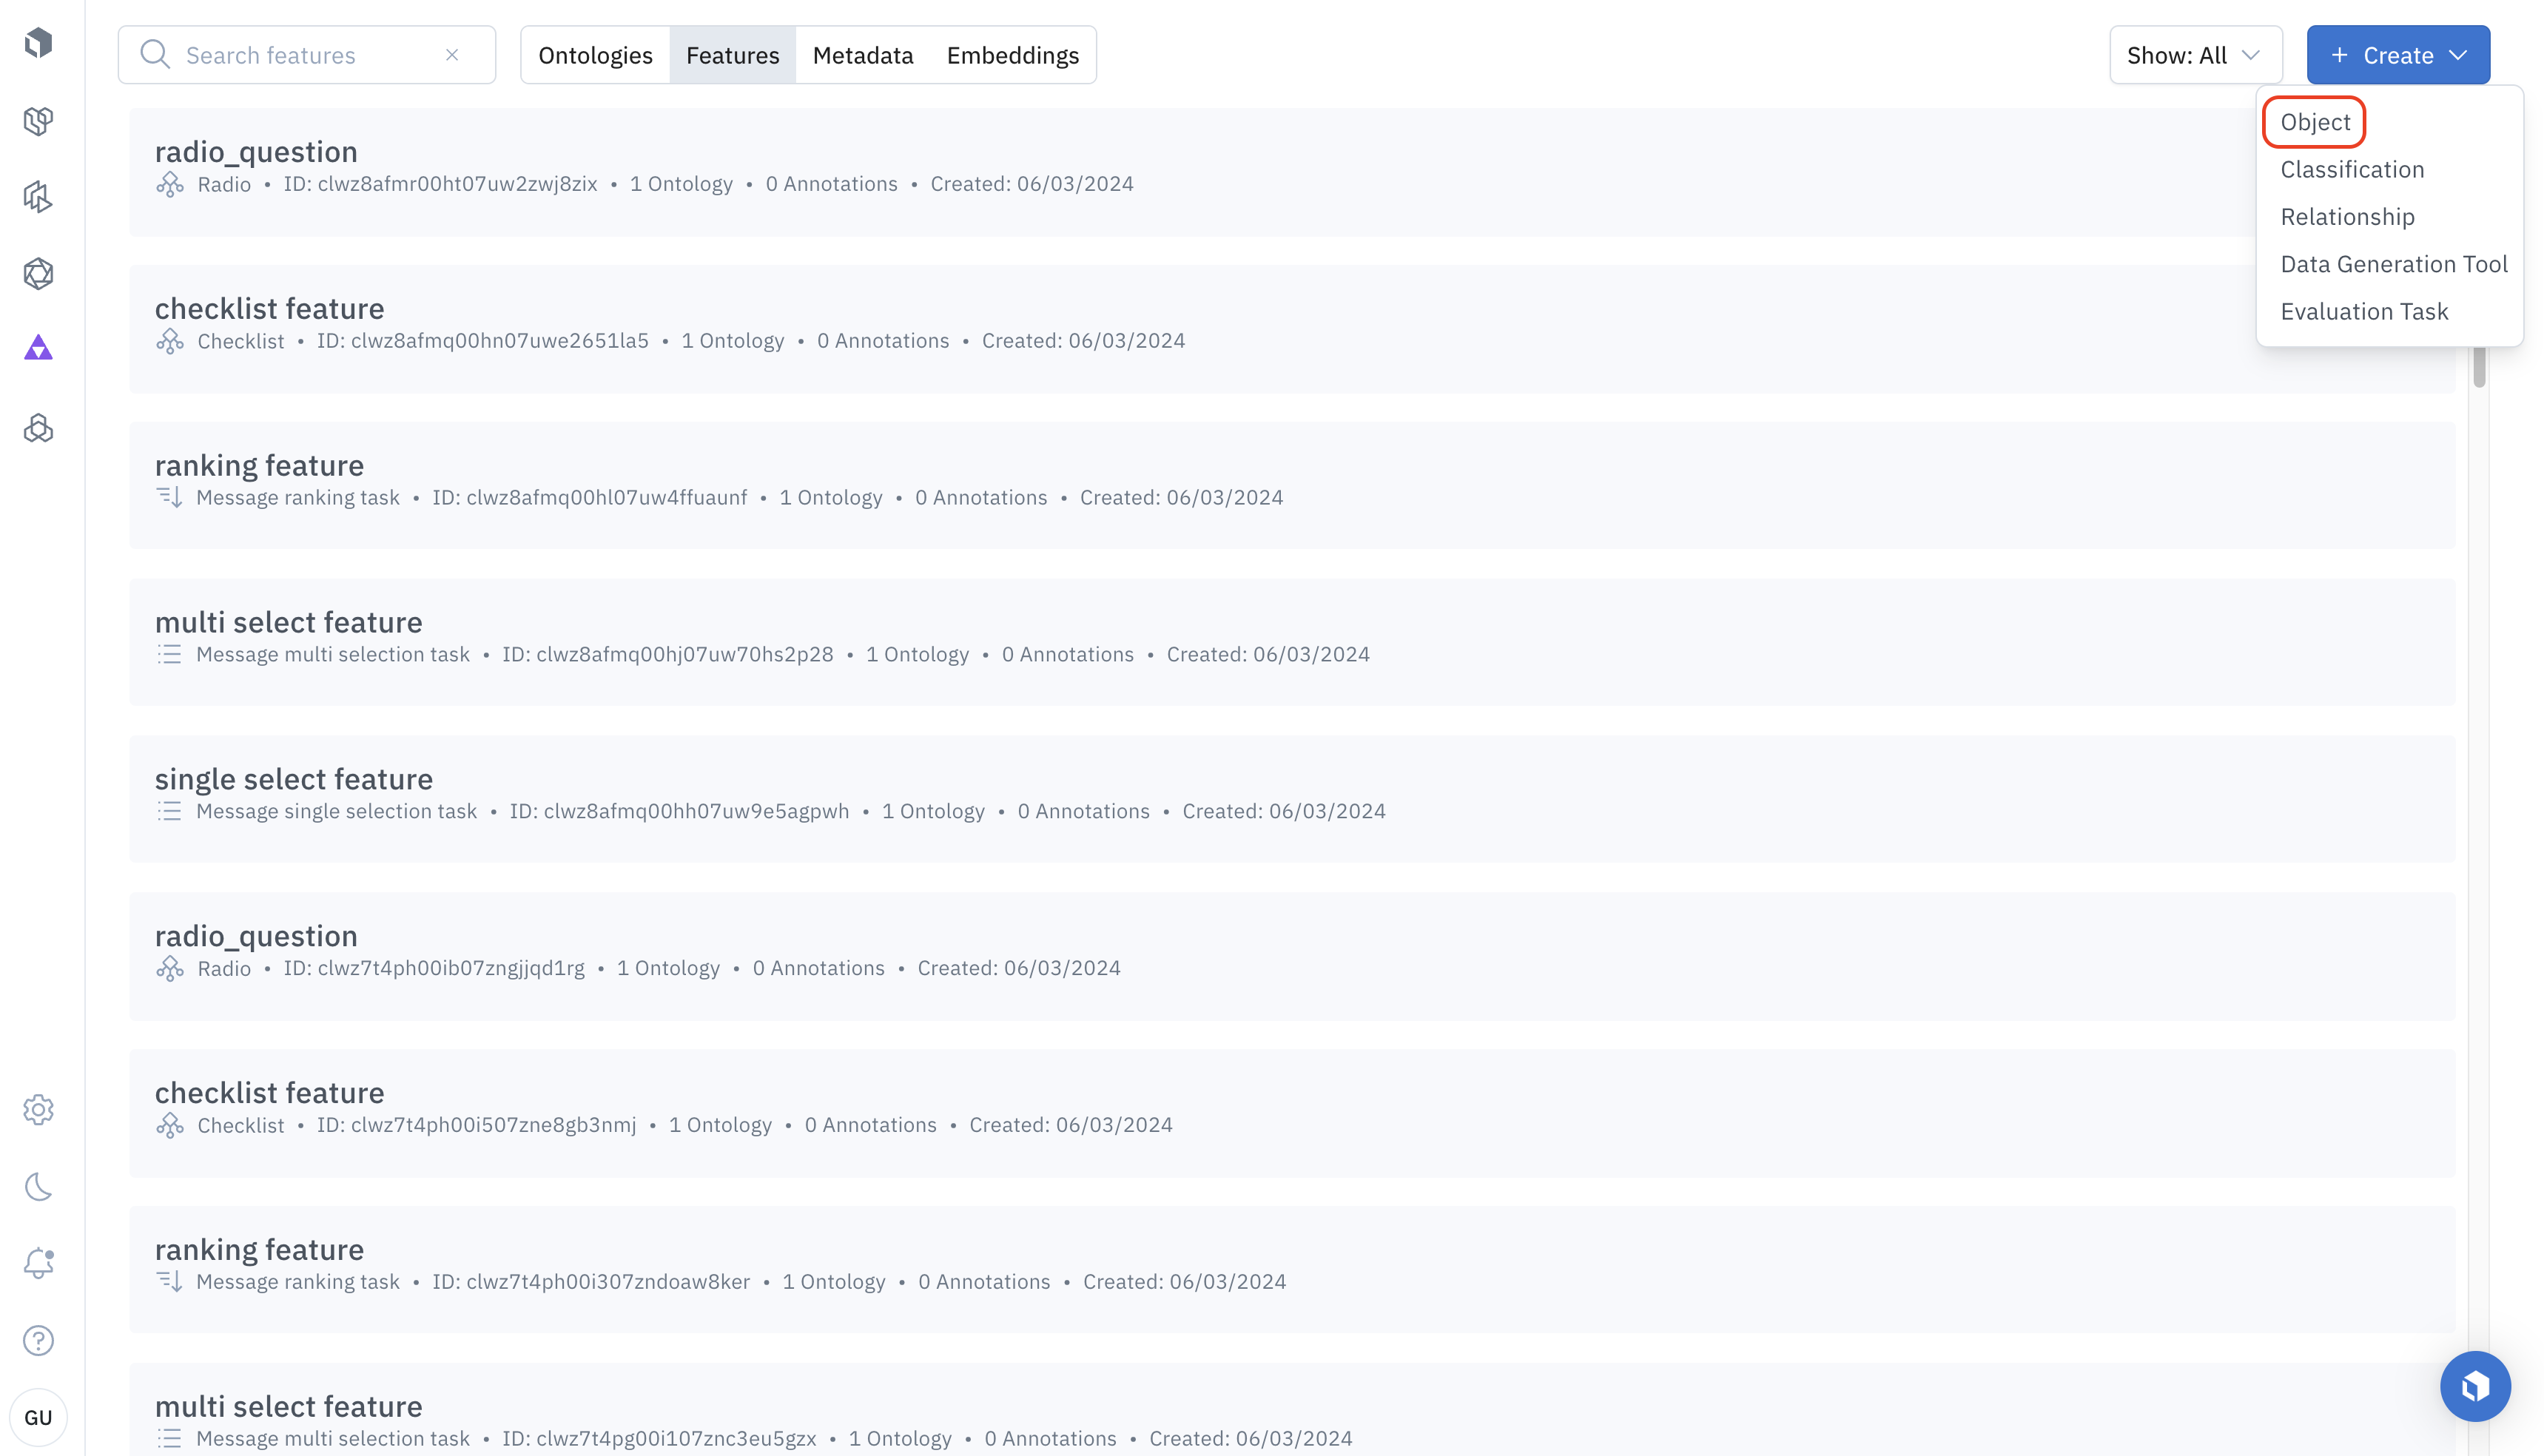
Create objects
To create an object feature, you need to provide the following information:- Tool name: Name of the feature that will appear in the Tools menu in the editor. If you want to add an existing feature to your ontology, you can look it up by name.
- Tool color: Color of the feature in the editor. Helps labelers identify the objects on the editor stage and in the Tools menu.
- Tool type: Indicates the annotation type (ex. bounding box, segmentation mask, etc)
- Sub-classifications: If you need a sub-classification (AKA nested classification) on the object, you can specify that here. This is an optional setting you can use to provide more information on the object being labeled.
Create classifications
To create a classification feature, you need to provide the following information:- Classification name: Name of the classification that will appear in the Tools menu in the Editor.
- Input type: Indicates the answer choice type (ex. radio, free text, etc)
- Required: Should this classification be answered in order to submit a label? If yes, then enable the Required option.
- Searchable: If you have a large list of answer options, the Searchable flag allows you to search the options during labeling.
Create features from a project
You can also dynamically create new features from within a project. To do this, you must:- Select a project.
- Go to Settings > Label editor and click Edit.
- In the edit mode, click the + button under the object or classification section
- Fill out the necessary information to create the feature.
- Hit the checkmark or Done at the bottom of the screen.
Parent feature ID
While working with deeply nested features, you may see feature ID and schema node ID for every child entity. They will soon be removed entirely. For all useful workflows, you now only need to care about the feature ID that you can see and copy from the UI.Edit a feature
You can make changes to a feature definition anytime.- If the feature has one or more annotations, you can only change everything except the tool type.
- If the feature has no annotations, you can make changes to every setting.