What is zero-shot learning?
Zero-shot learning (ZSL) is a machine learning technique that allows an AI model to recognize and categorize objects or concepts it has never seen before. In a typical supervised learning model, an AI is trained on a large dataset of labeled examples. For instance, a model might be trained on thousands of images of cats and dogs, with each image labeled as either “cat” or “dog.” The model then learns to distinguish between cats and dogs based on the patterns it observes in the training data. Zero-shot learning, on the other hand, does not require any labeled examples of the categories it is being asked to classify. Instead, it relies on auxiliary information, such as textual descriptions or attributes, to make predictions. For example, a zero-shot learning model could be told that a “zebra” is a “striped horse.” Even if the model has never seen a zebra before, it can use its existing knowledge of horses and stripes to recognize a zebra in an image. Labelbox’s bulk classification using zero-shot learning is a great way to speed up your classification projects, as you can quickly generate classifications without having to label each asset one-by-one. This allows you to integrate off-the-shelf neural networks as zero-shot classifiers.How to bulk classify data
Here is a step-by-step guide on how to bulk classify data in Labelbox.- Select a subset of data to classify: Use the search features in Labelbox to select a subset of data. You can select the top results of a natural language search or all assets that look similar to each other using similarity search.
- Add a classification: Click on the number of items selected in the top right corner and choose Add classification.
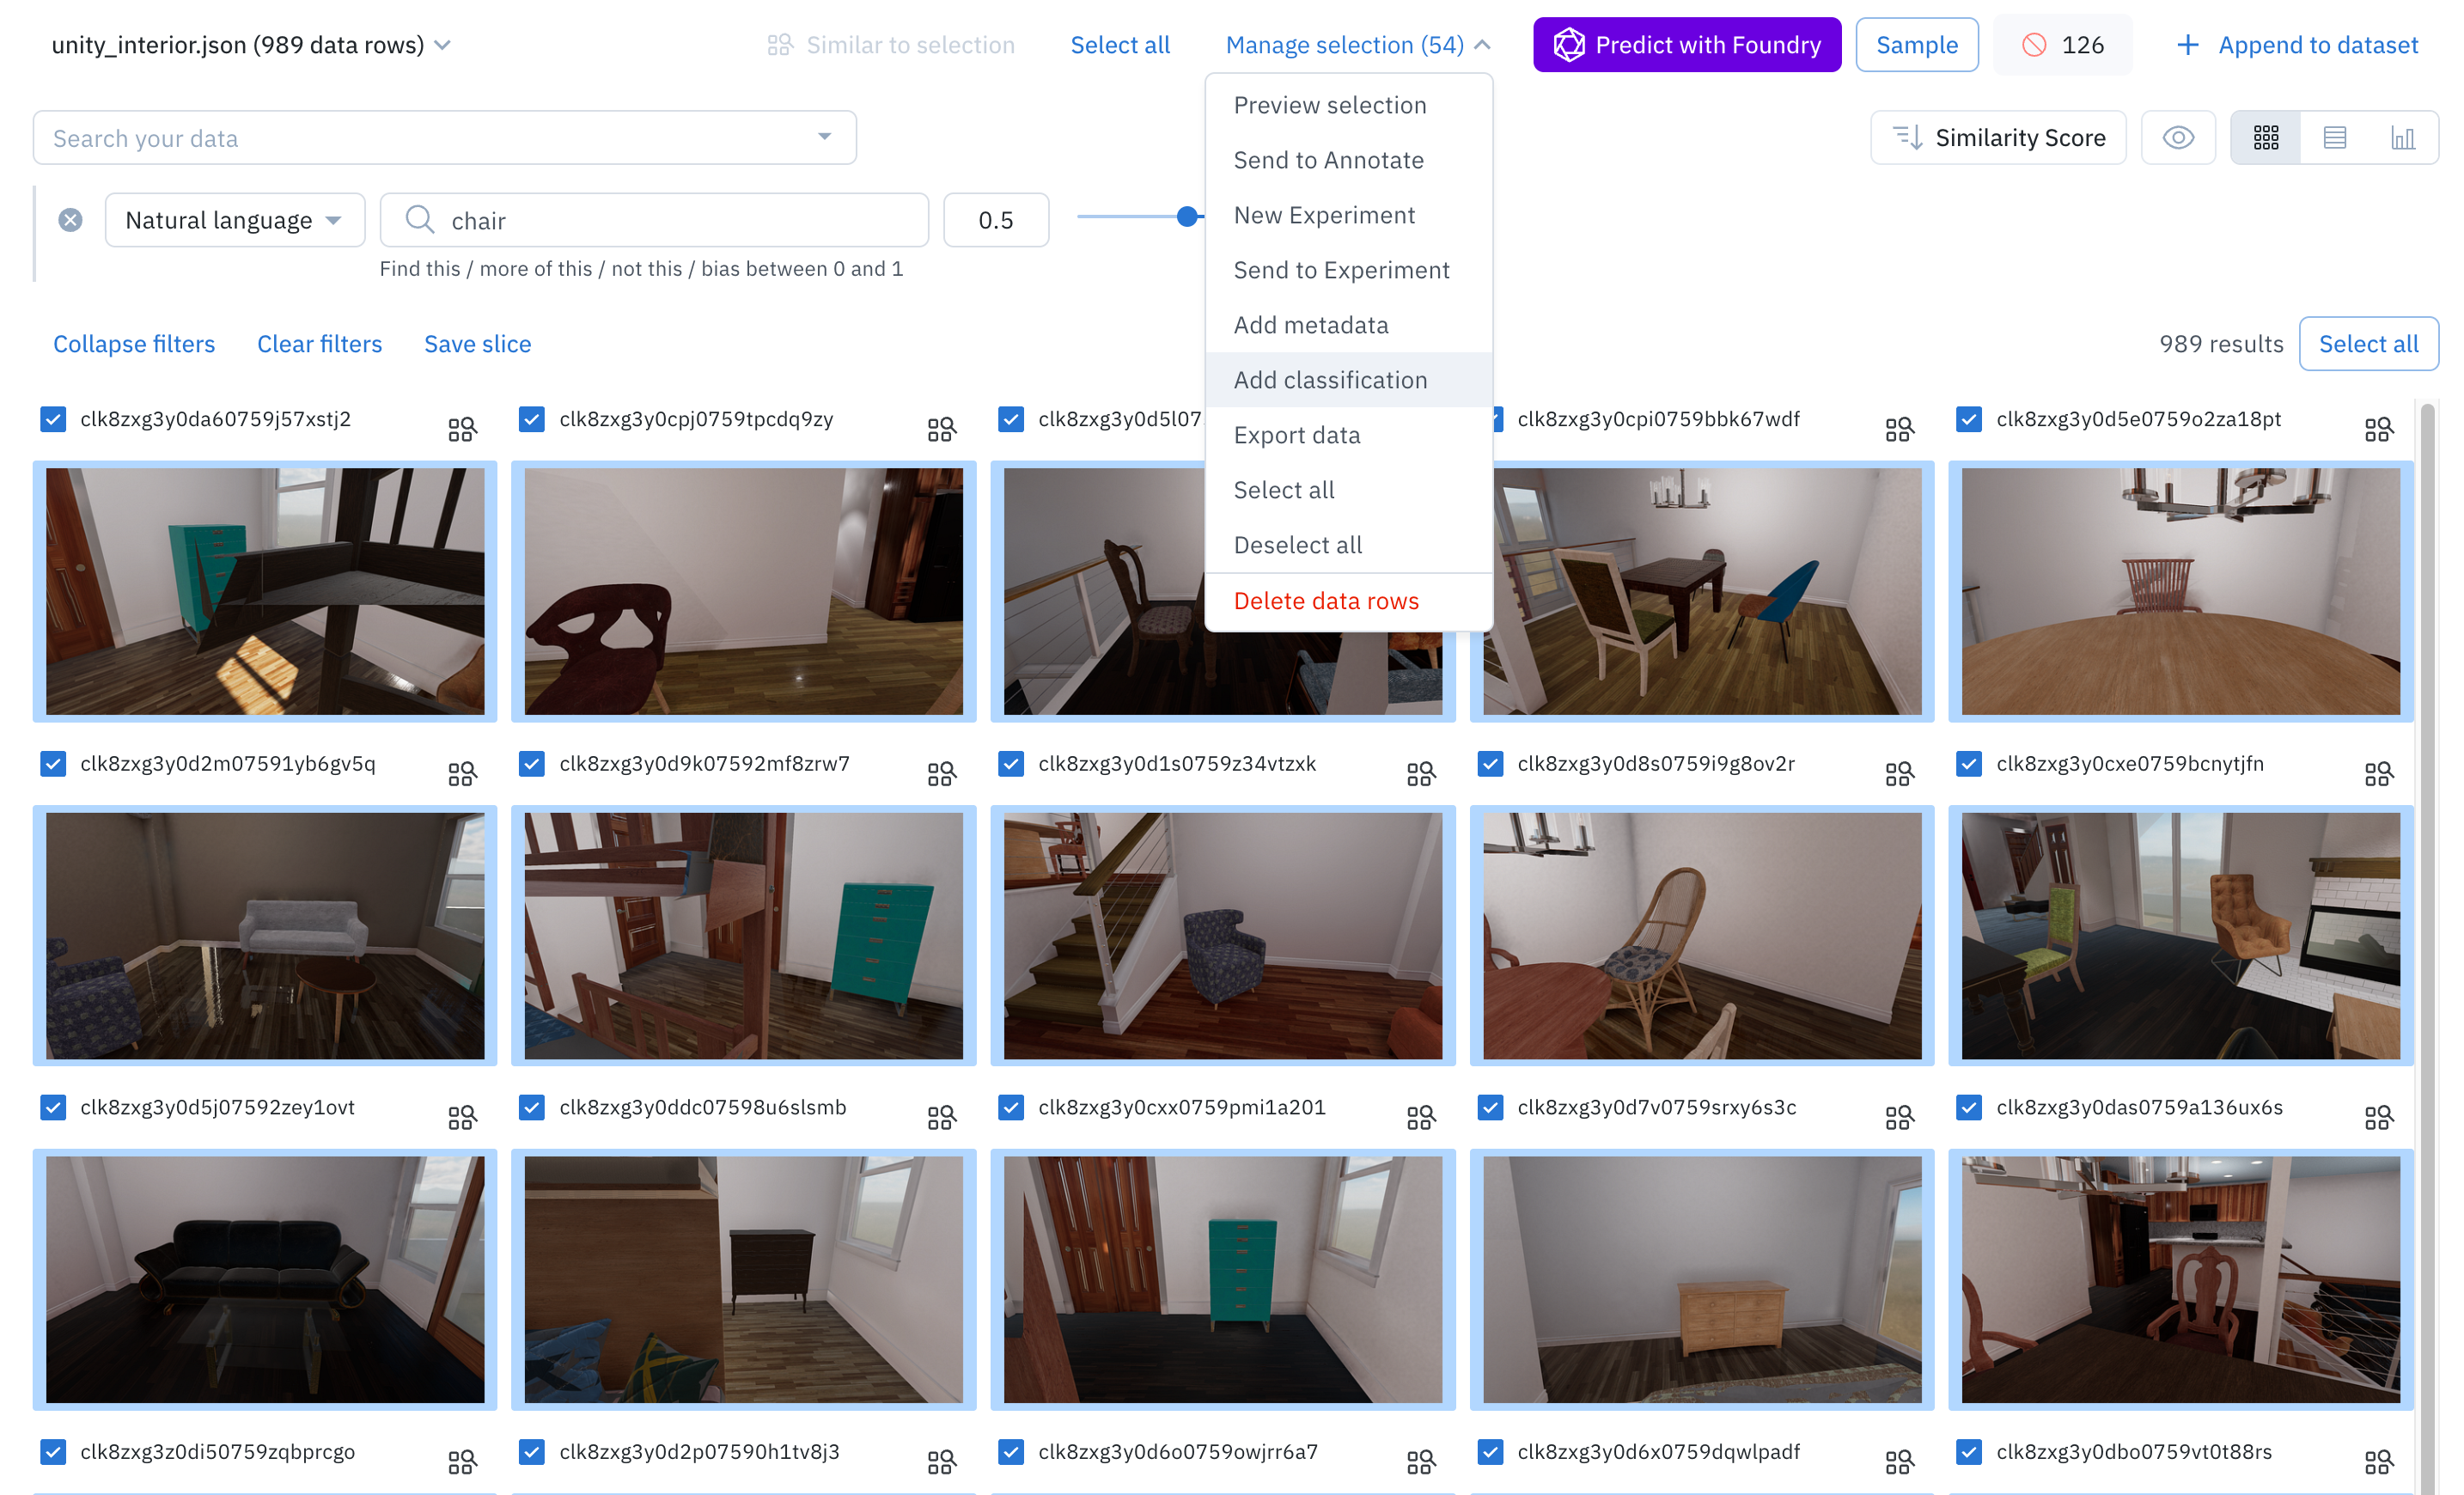
- Pick the destination labeling project: Select the destination labeling project from the dropdown menu. Only projects with a global classification question in their ontology will appear.
- Provide classification values: Answer the classification questions that appear. These values will apply to all data rows in the bulk classification job. You must answer all required classifications and subclassifications. You can search for a classification question by typing its name.
- Specify the workflow step: Choose which step of the labeling and review workflow the data rows should be sent to. For example, if you pick the Initial labeling task, then the classifications will be sent as pre-labels. If you pick any other task - such as Rework, Initial review task, or Done - then the classifications will be sent as labels.
- Include or exclude data rows that already have labels: If a data row already has a label in the destination project, you can either overwrite the existing label or exclude the data row from the job.
- Overwrite previous value with new value: Only classification questions that you answer — as part of the bulk classification job — will overwrite already-existing classifications.
- Exclude from job: Excludes these data rows from the bulk classification job to preserve the already-existing labels.
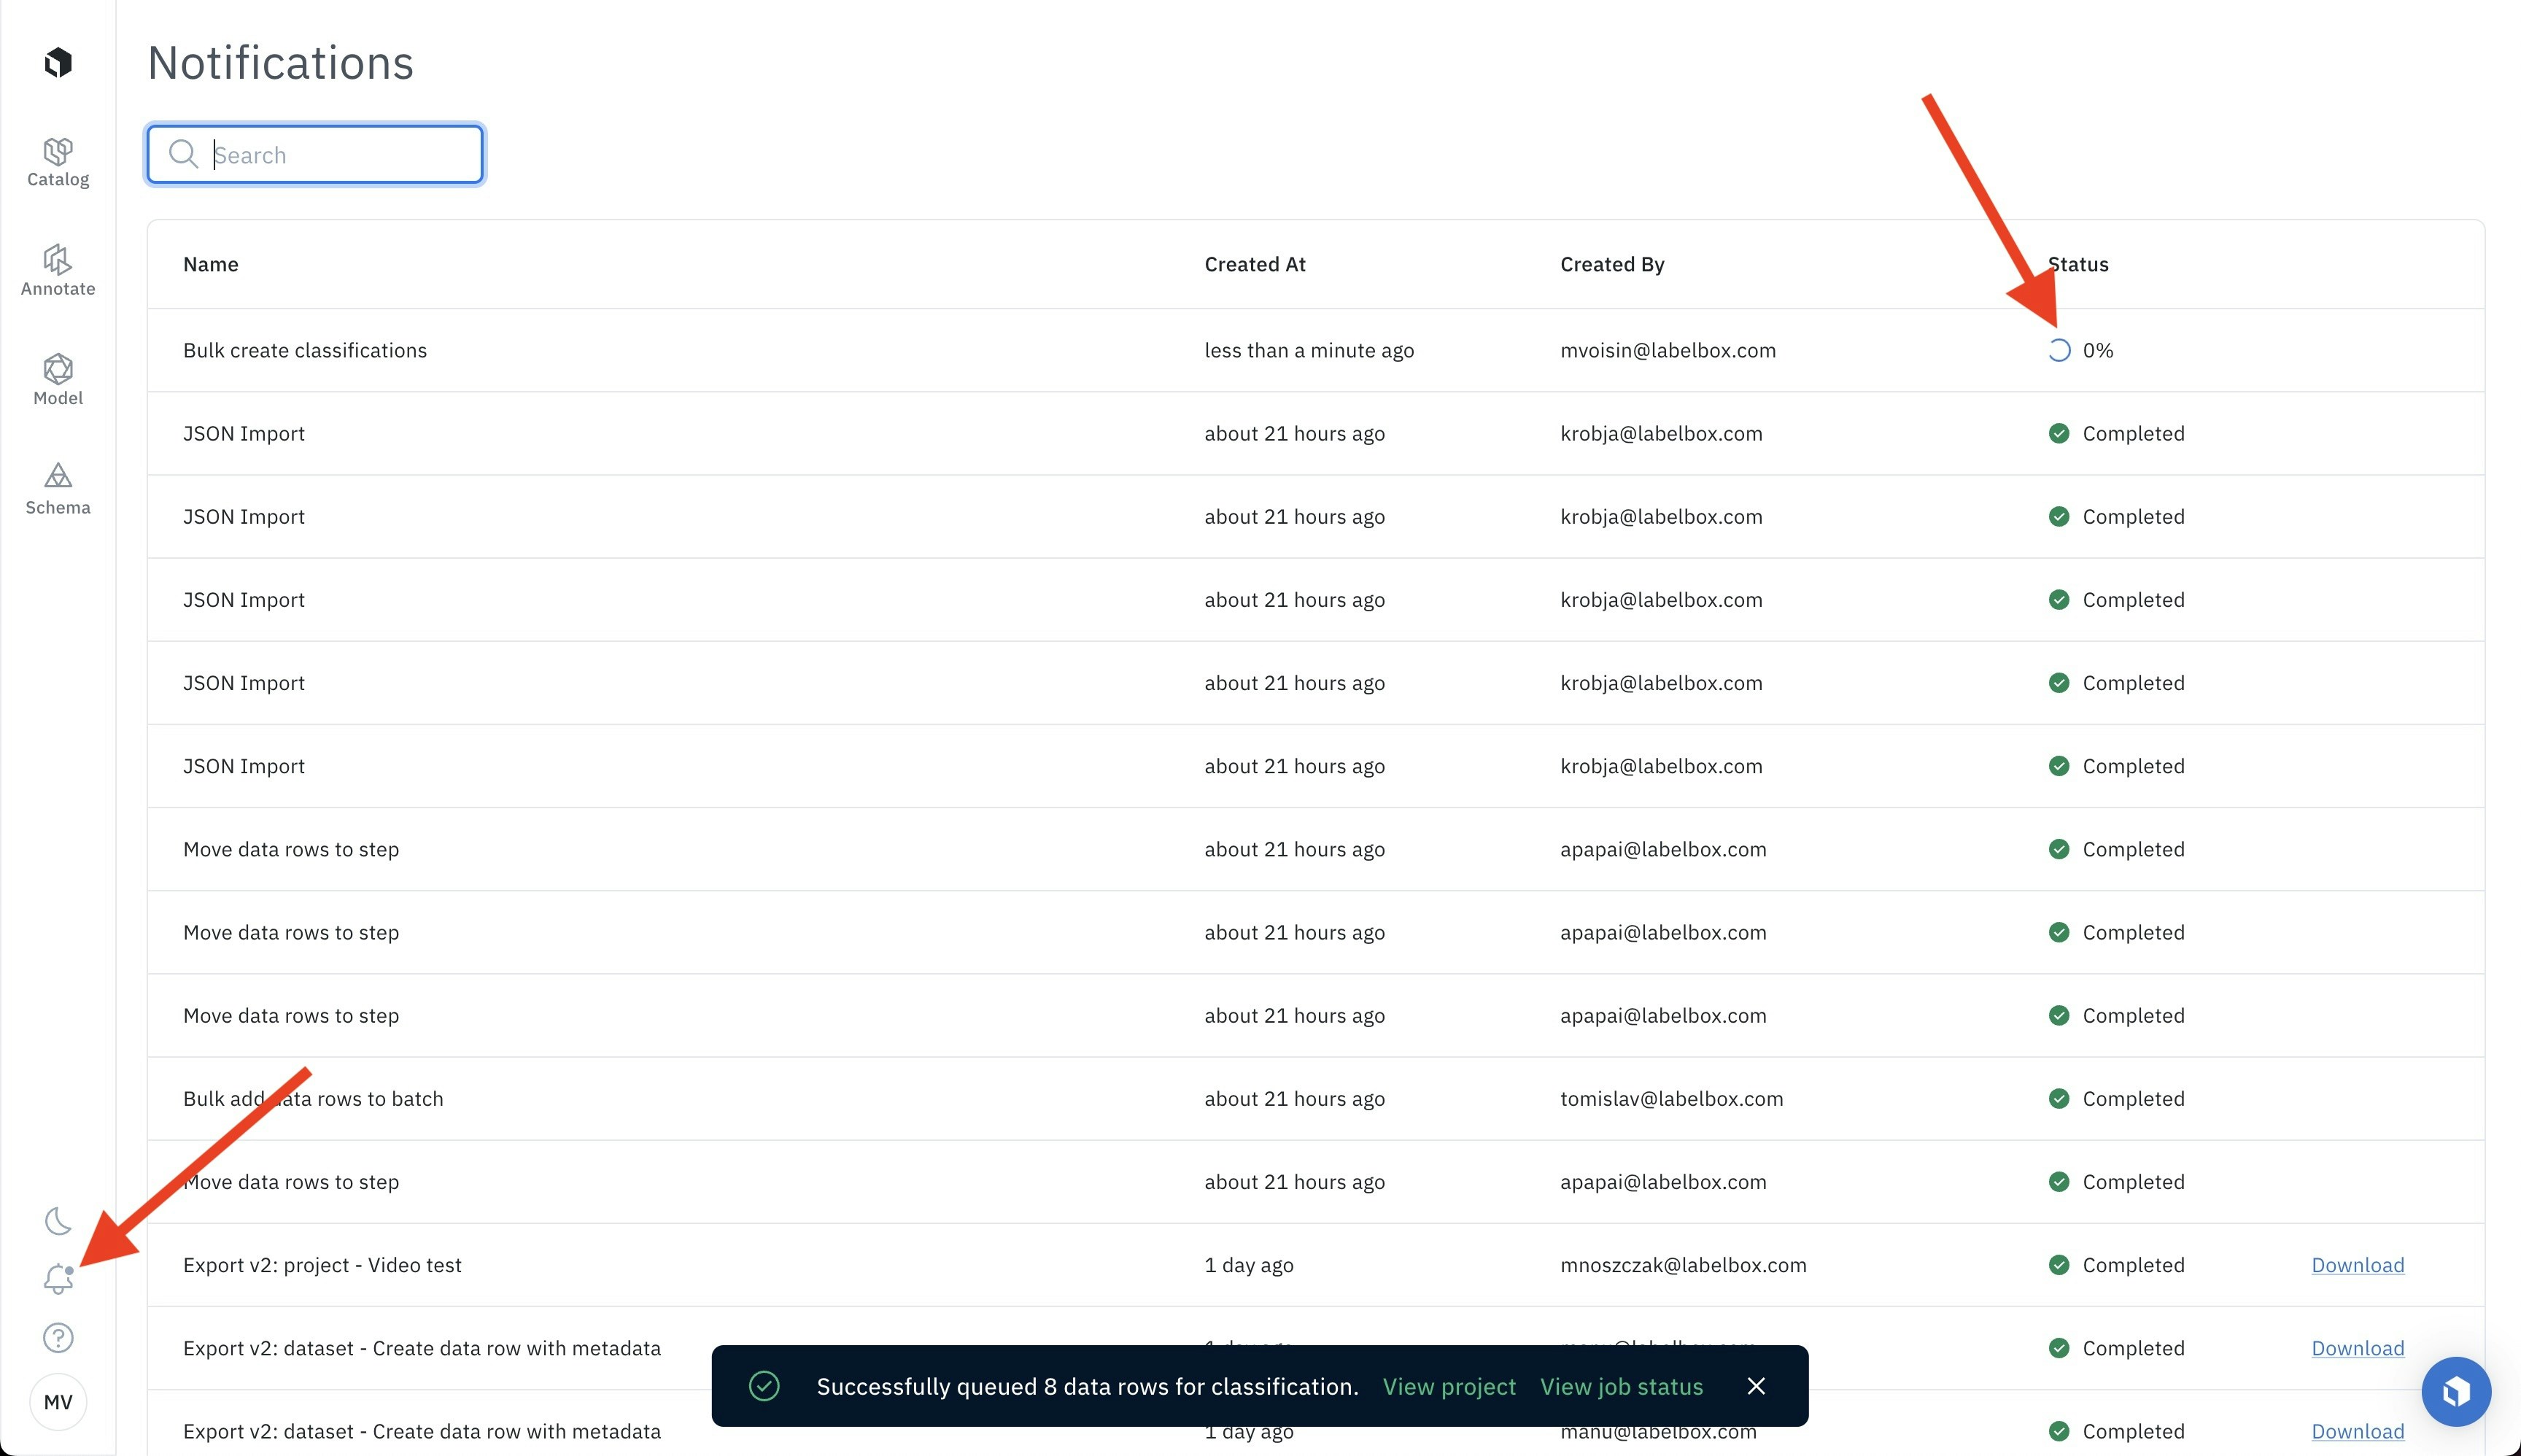
- Submit the bulk classification: Click Submit batch to launch the job. It may take a few moments for the data to be sent to the labeling project.
- Track the progress: You can track the progress of the job in the notification panel and will be notified by a pop-up message when it’s complete.
Limitations
There are a few limitations to keep in mind when using bulk classification:- There are limits to the number of data rows you can classify at once. You can work around this by classifying data in chunks. For example, you can leverage the Annotation filter with the attributes is not one of and [your classification question] to filter out already classified data rows and proceed with the next bulk classification job.
- You cannot use bulk classification with a consensus project.
- Benchmark data rows are excluded from bulk classification jobs. Since benchmark labels are a gold standard label, they should not be overwritten by bulk classifications.