Building your workflow
You can customize the default workflow by adding your own tasks and logic to create a process that fits your specific needs. By default, every project comes with a simple, four-step workflow: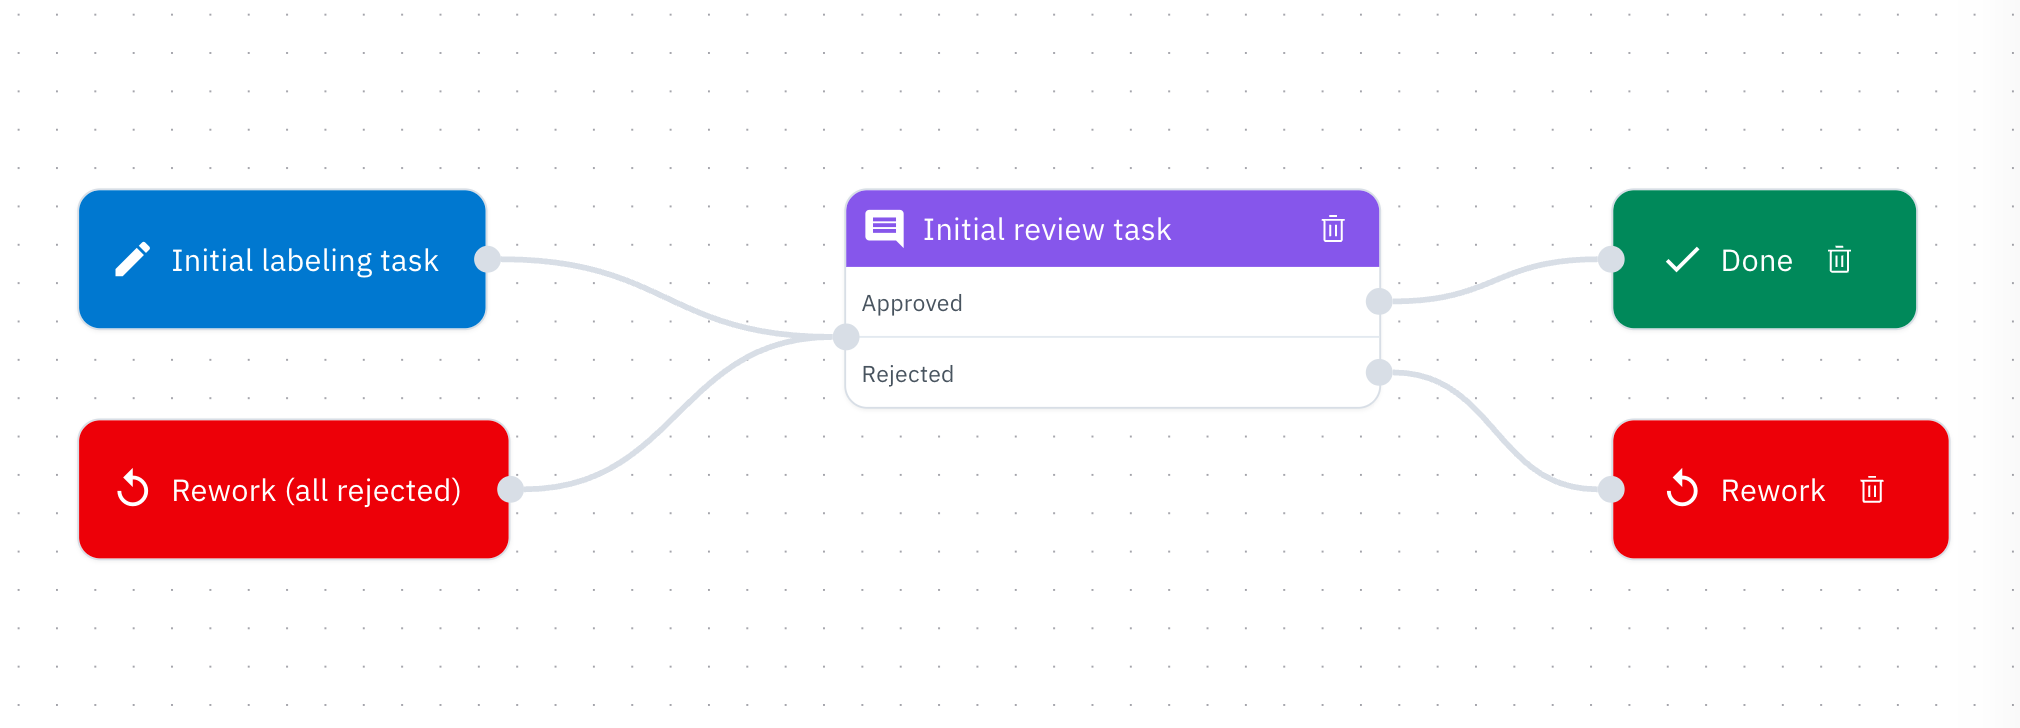
| Task | Description |
|---|---|
| Initial labeling task | This is the starting point for all data rows that need to be labeled. You can customize the “Initial review task” by renaming it and adding specific filtering criteria to it. |
| Initial review task | After a data row is labeled, it moves to this first review step. |
| Rework | If a label is rejected during any review step, the data row is sent here to be corrected. |
| Done | Once a data row has successfully passed all the required steps in the workflow, it is marked as “Done”. |
Create a new task
You can add custom review and rework tasks to your workflow. To do so:- Go to the Workflow tab and click Edit workflow.
- Click the + button in the workflow editor.
- Select Step → Review task or Custom rework task.
- In the task configuration settings (Review task and Custom rework task only), you will need to provide:
- Task name: A descriptive name for your task.
- Instructions: Clear instructions for the users who will be working on this task.
- Group assignment: The user group that will be responsible for this task.
- Maximum number of labels per task queue: This setting puts a per-contributor cap on how many labels a single user can create in that specific task queue. Once an individual contributor hits that cap, they stop receiving more tasks from that queue even if tasks remain, unless the field is left empty for no limit.
- Per-user/group task limits: This setting lets you define who the task caps apply to, at a more granular level:
- For specific users: you can set a maximum number of tasks that each listed user can complete in that queue. Once a user hits their per-user limit, they stop receiving additional tasks from that queue, even if more tasks are available.
- For specific groups: you can set a cumulative task limit per group for that queue (e.g., a reviewer group can do at most N tasks total across that queue). Once the group collectively reaches that limit, no one in that group will receive more tasks from that queue, even if other groups or users can.
- Individual assignment (custom rework tasks only): For custom rework tasks, you can configure this setting to ensure that any data rows sent to rework get re-assigned to the original label creator.
To view the maximum number of tasks per workflow, see limits.
Add filtering logic to tasks
You can use filtering logic to control which data rows are sent to which tasks. This allows you to create specialized review steps for different types of data. To add logic:- Go to the Workflow tab and click Edit workflow.
- Click the + button in the workflow editor and select Step → Logic.
- Click + Add to choose one or more filters.
- Select All or Any to specify whether all or any of the filter conditions must be met.
| Filter | Description |
|---|---|
| Labeled by | The user who labeled the data row. |
| Annotation | The label added to the data row. |
| Labeled at | The date range for when the label was added. |
| Sample probability | The likelihood of a data row being included in the task. For example, a sample probability of 40% means each data row that meets the other filters has a 40% chance of being included in the task. |
| Consensus average | A range of average label-level consensus scores. |
| Feature consensus | A range of average feature-level consensus scores. You can select more than one feature schema in the ontology. |
| Dataset | The dataset where the data row comes from. |
| Issue category | The issue category of issues on the data row. |
| Batch | The batch where the data row is sent. |
| Metadata | The non-annotation metadata information on the data row. |
| Model prediction | The Foundry model predicted label of the data row. |
| Labeling time | The labeling time spent on the data row. |
| Review time | The review time spent on the data row. |
| Natural language | A natural language expression and confidence score range matching data rows with similar vector embeddings. |
| Label feedback | The label feedback score range. |
Sample probability is processed after all other filters. It’s a probability, not a guarantee, so it’s possible that none or only a few data rows are included for the task, even if many data rows meet the other filters.
Connect logic and tasks
Once you have created your tasks and logic, you can connect them in the workflow editor by dragging and dropping the arrows between the nodes. This allows you to visually map out the flow of your review process. For complex workflows, you can add multiple Rework and Done terminal nodes to the editor to make your workflow easier to read. This is a visual aid and does not create additional tasks.Managing your workflow
Workflows are designed to be flexible, allowing you to optimize your quality assurance process as your project evolves. To modify a task or logic node, simply click on it in the editor to open its settings. You can delete a node by clicking the trash can icon. To change the connections between nodes, select the arrow connecting them and either drag it to a different node or click the trash can icon to delete it. To see a breakdown of how many data rows are in each workflow status, click the info icon next to the editor.Advanced workflow actions
Here are some more advanced actions you can perform within your workflow to manage your data quality.Add terminal nodes
Terminal nodes represent the default Rework and Done tasks. You can create multiple terminal nodes on the editor instead of connecting everything to a single Rework or Done node, making your workflow easier to read and visually cleaner. Adding multiple terminals does not create additional tasks and is purely for improving the visual layout.Reject and rework data rows
When a label is rejected, the data row is automatically sent to the “Rework” task.- To send a single data row to rework:
- Select the task in the Workflow tab.
- Click Start Reviewing.
- Click Reject on the data rows you want to send to rework.
- To send multiple data rows to rework in bulk:
- Go to the Data rows tab.
- Use the filters to find the data rows you want to send to rework.
- Select the data rows (up to 10,000 at a time).
- From the dropdown menu, select Move to task and choose Rework.
Use benchmarks in your workflow
At any stage of the project, if a label on a data row is set as a benchmark, the data row (and thus any current and future labels made on the data row) will move to the Done task until the benchmark status is removed from the label. If you are trying to review a data row with a benchmark label, remove the benchmark from the label and then proceed to move the data row to the appropriate task.View audit logs
Labelbox automatically creates an audit log for every data row that enters a workflow. This log provides a complete history of all the events that have occurred on a data row, which is useful for investigating its review history. To view the audit log:- From the Workflow tab, click on a task to view the data rows within it.
- Click on a data row to open it.
- Click on the clock icon to view the audit log.