Submit a batch to a labeling project
To send a batch of data to a project for labeling, use the following steps:- Go to the Catalog and use the filters to surface a subset of data rows.
- Click Select all or manually select data rows to include in your batch.
- Click the Manage selection dropdown and select Send to Annotate.
-
One the Configure batch modal:
- Select an Annotate project for sending the batch to.
- Select a priority for the data rows. This value indicates where this batch of data rows will be placed in the labeling queue according to priority. 1 is the highest, and 5 is the lowest. You may see a warning that some of the data rows have already been submitted to the labeling project. Data rows that have already been submitted will be excluded from the batch when you click submit.
- Use the Consensus toggle to enable / disable Consensus for the batch. Add a % Coverage value to indicate the percentage of data rows in the batch that will be queued for labeling by multiple labelers (hence can have multiple labels) and a # Labels value to indicate the number of label can be added to the data row.
- Click Submit.
Sampling methods
Manually selecting data for labeling is a time-consuming process. You can use sampling to make the data selection process faster and easier.Random sampling
Random sampling is a very useful selection technique when you are working with large amounts of data. You can randomly select data rows from your Catalog query to create a batch for labeling or re-work. Here is an example to help you understand random sampling. A user constructs a query to find plums in Catalog and clicks Sample. Then the user adjusts the amount of desired data rows in the batch to 100 and clicks Resample. The random selection is always executed on the results of the query.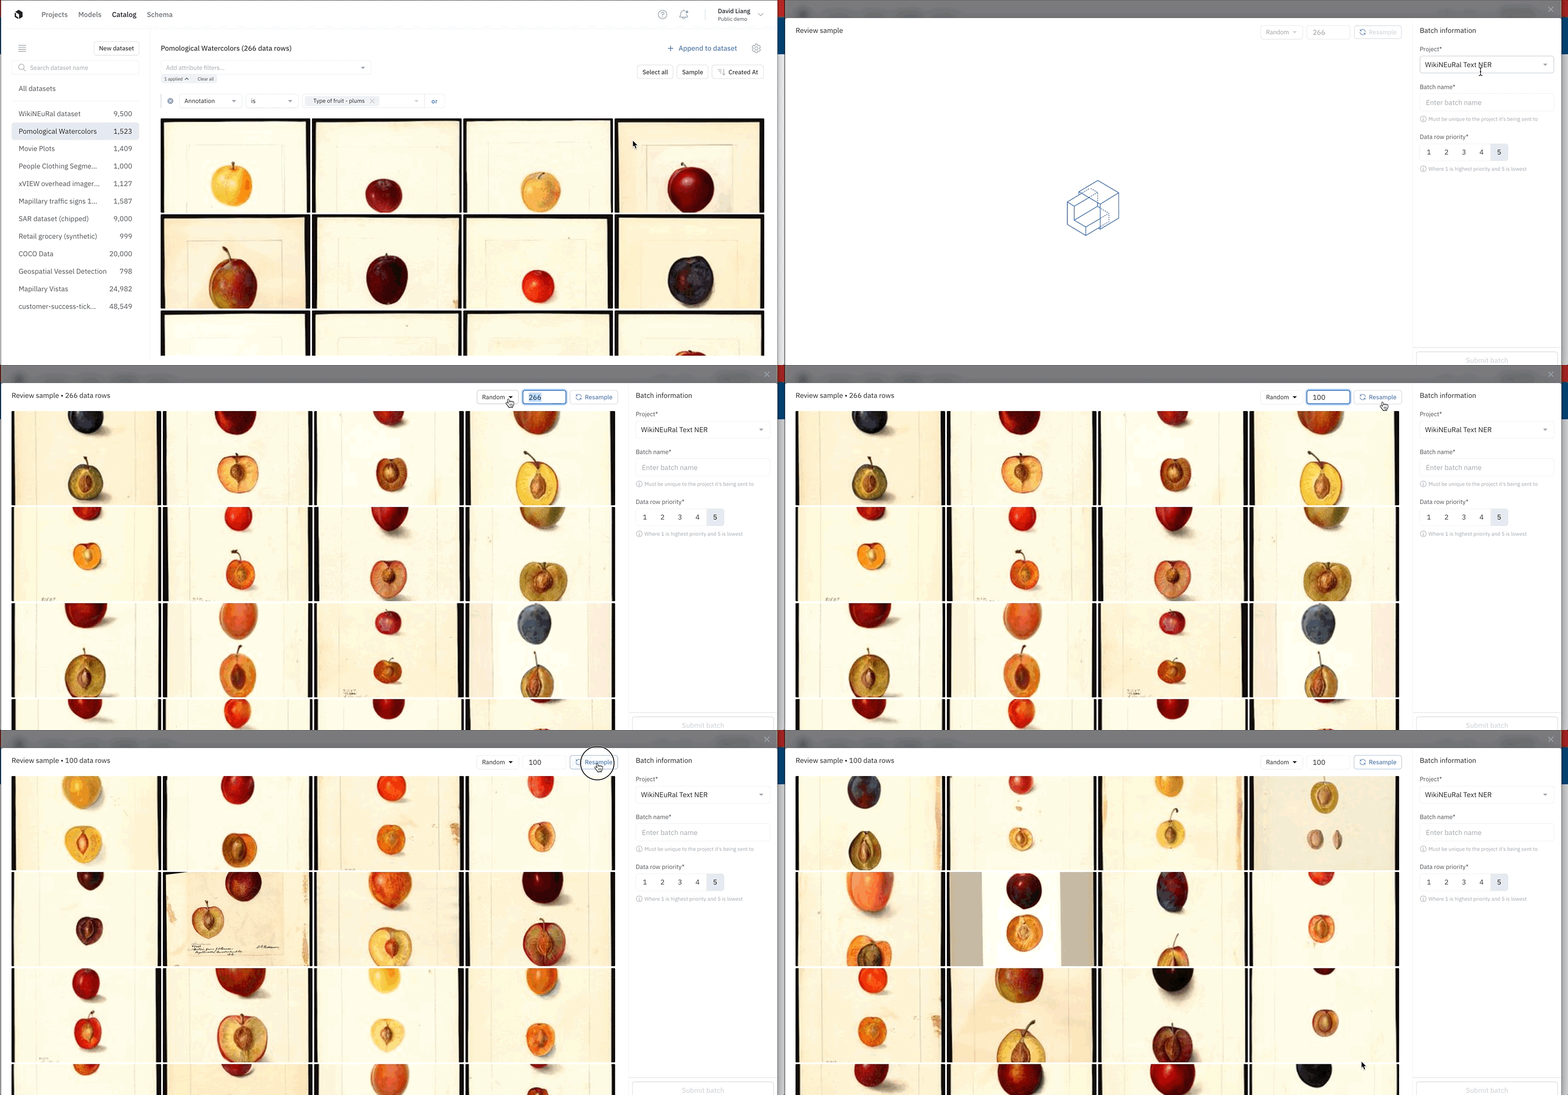
Ordered sampling
The ordered sampling selection technique will respect the sorted order of data rows that you see in the results. You can order the results by changing the Created At timestamp to ascending or descending order. When you send a batch to a project, the sequence generated by ordered sampling does not influence the sequence of the data rows in the labeling queue. Here is an example to help you understand ordered sampling. In the example below, a user constructs a query in Catalog to find plums and clicks Sample. The user then selects the Ordered parameter, adjusts the amount of desired data rows in the batch to 100, and clicks Resample.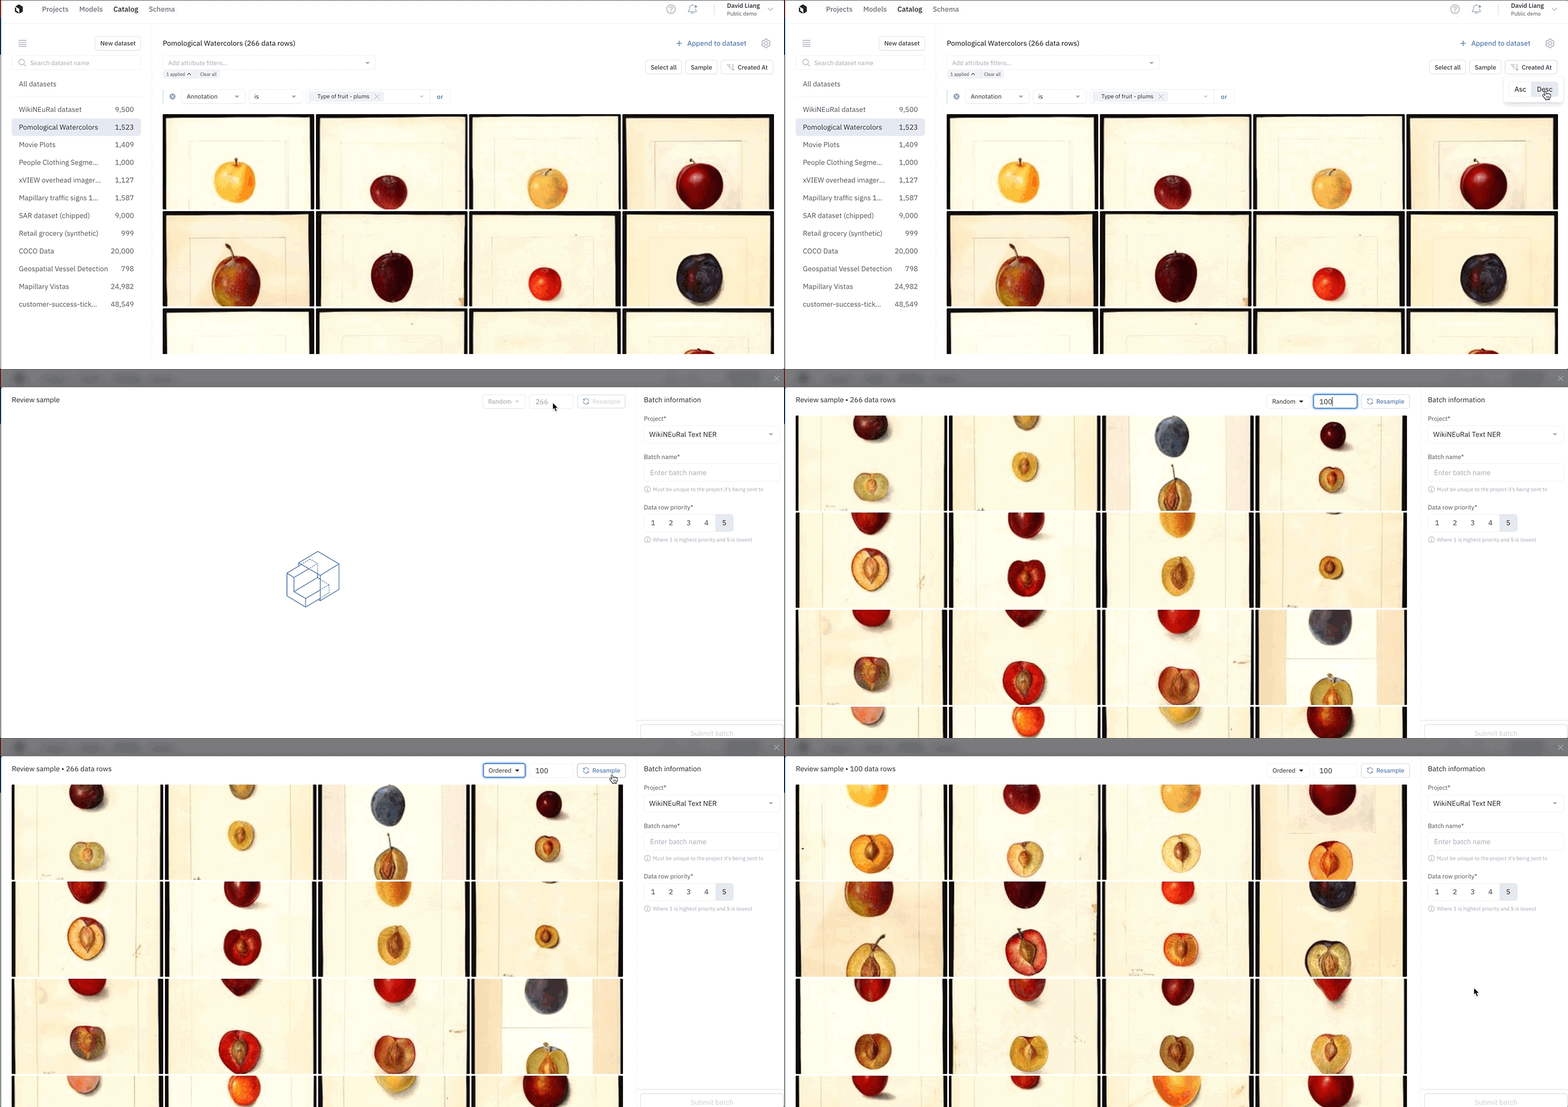
Create a batch by sampling
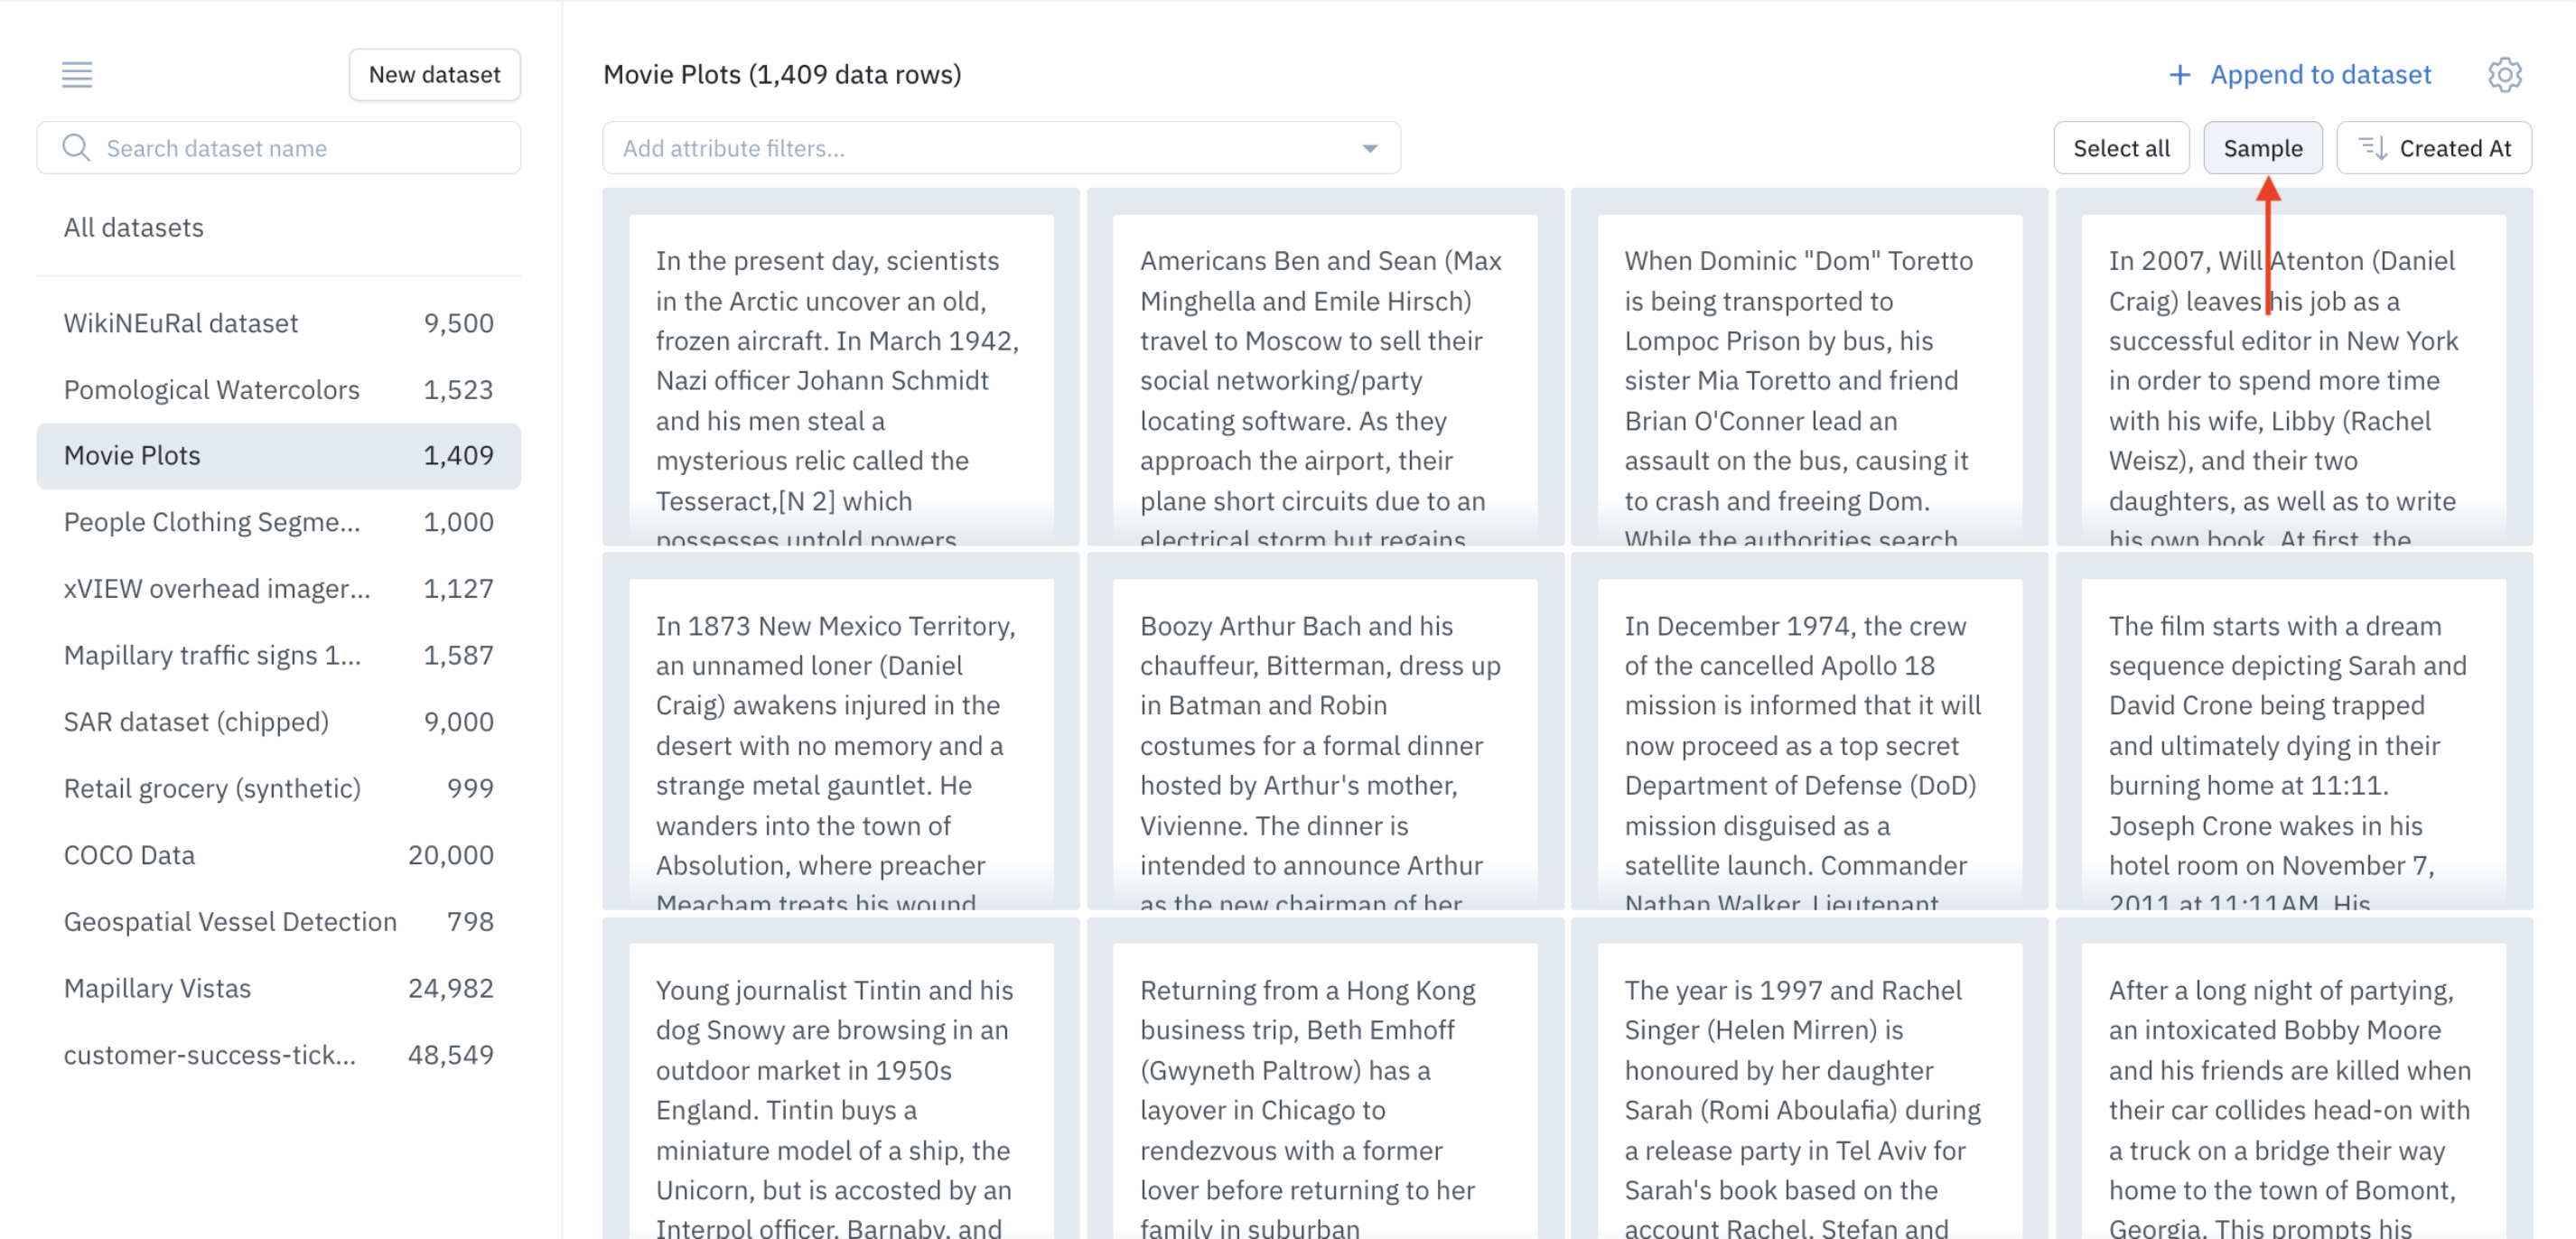
Within Catalog, you can sample from the results of a filter. Sampling can be performed in a random or non-random order. To create a batch with the sampling technique, follow these steps:- Go to the Catalog tab and filter for the relevant data rows you want to label. Once you have the relevant data rows, click the Sample button on the top right.
- From the batch creation modal, in addition to filling out the project, batch name, and priority details, you can choose how many data rows to sample and the sampling method. Currently, Labelbox supports two sampling methods: random and ordered.
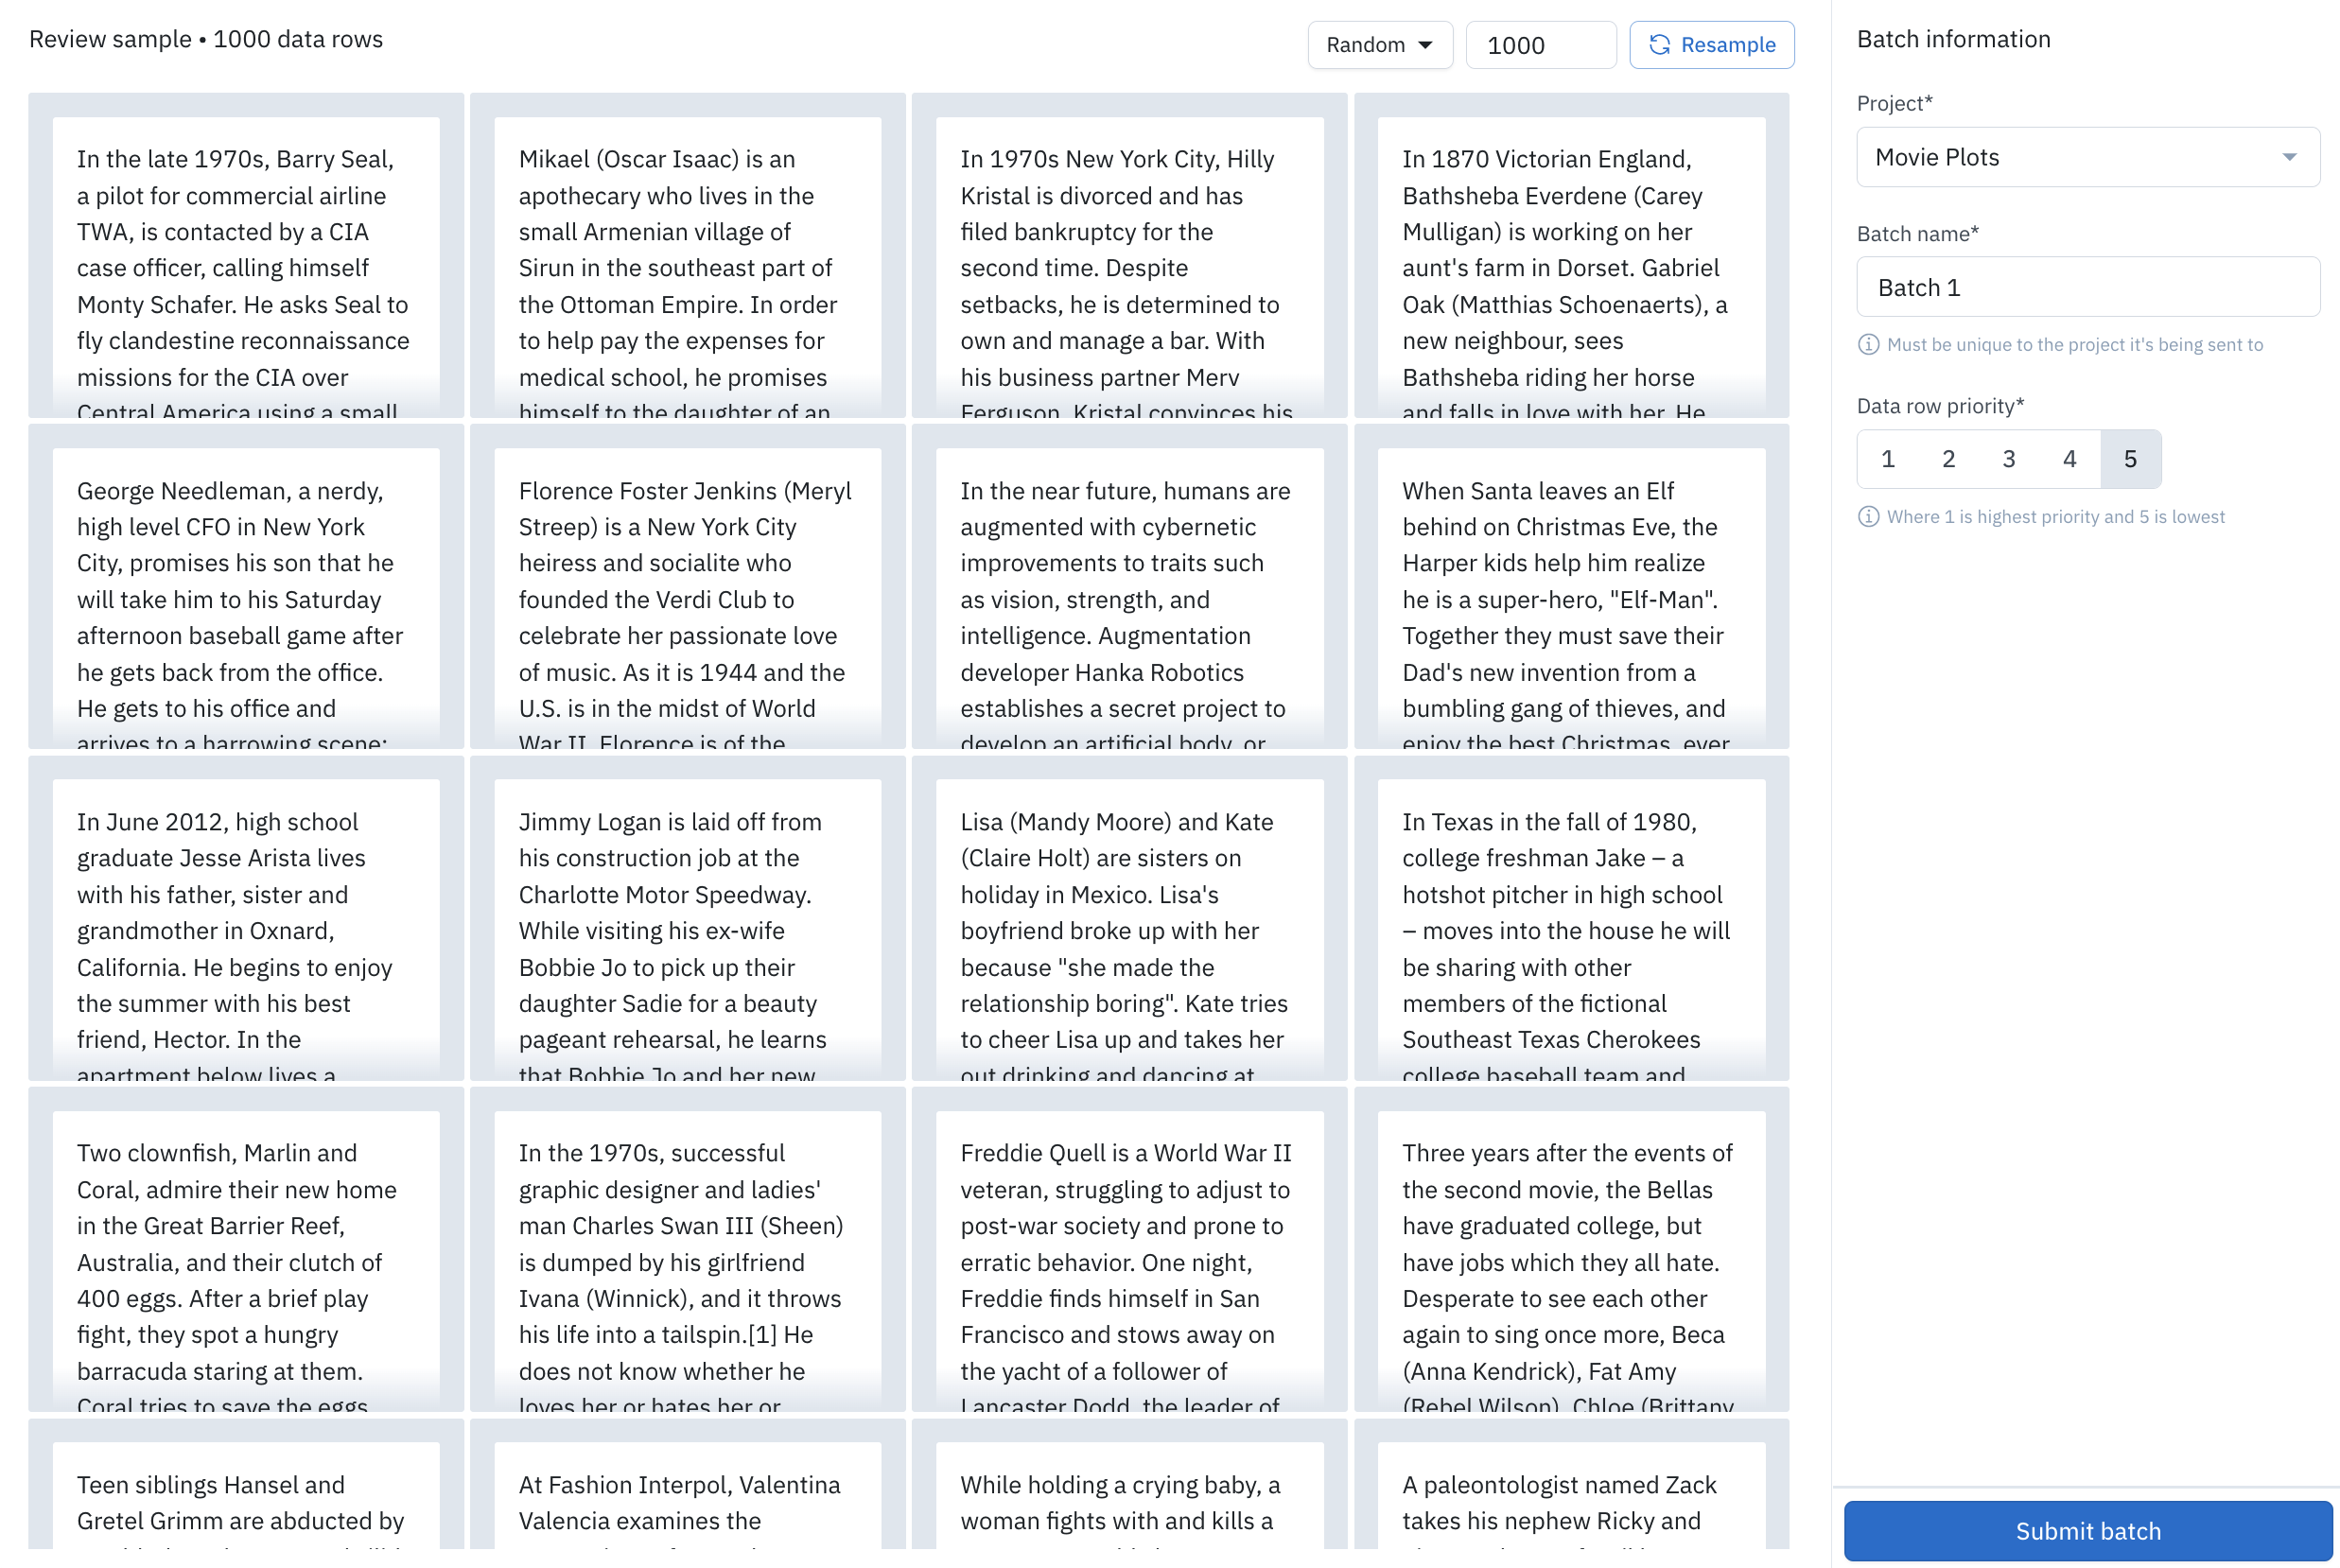
- Click Submit batch.
- Optionally, include predictions as pre-labels in the batch. If you want to speed up labeling, you can send predictions that are stored in a Model Run, as pre-labels in the labeling project. Learn more about How to include predictions as pre-labels in a batch
- Navigate to the project to begin labeling. Remember to make sure the project is in batch mode to access these new data rows for labeling.
Send predictions as pre-labels
It is not always efficient to label data from scratch. Indeed, it is sometimes recommended to start labeling based on your model predictions. Labelbox allows users to send predictions that are stored in a Model Run, as pre-labels in the labeling project.Step 1: Choose to include predictions
A toggle allows you to include or exclude predictions from the batch. Labelbox shows you how many predictions could be sent as pre-labels.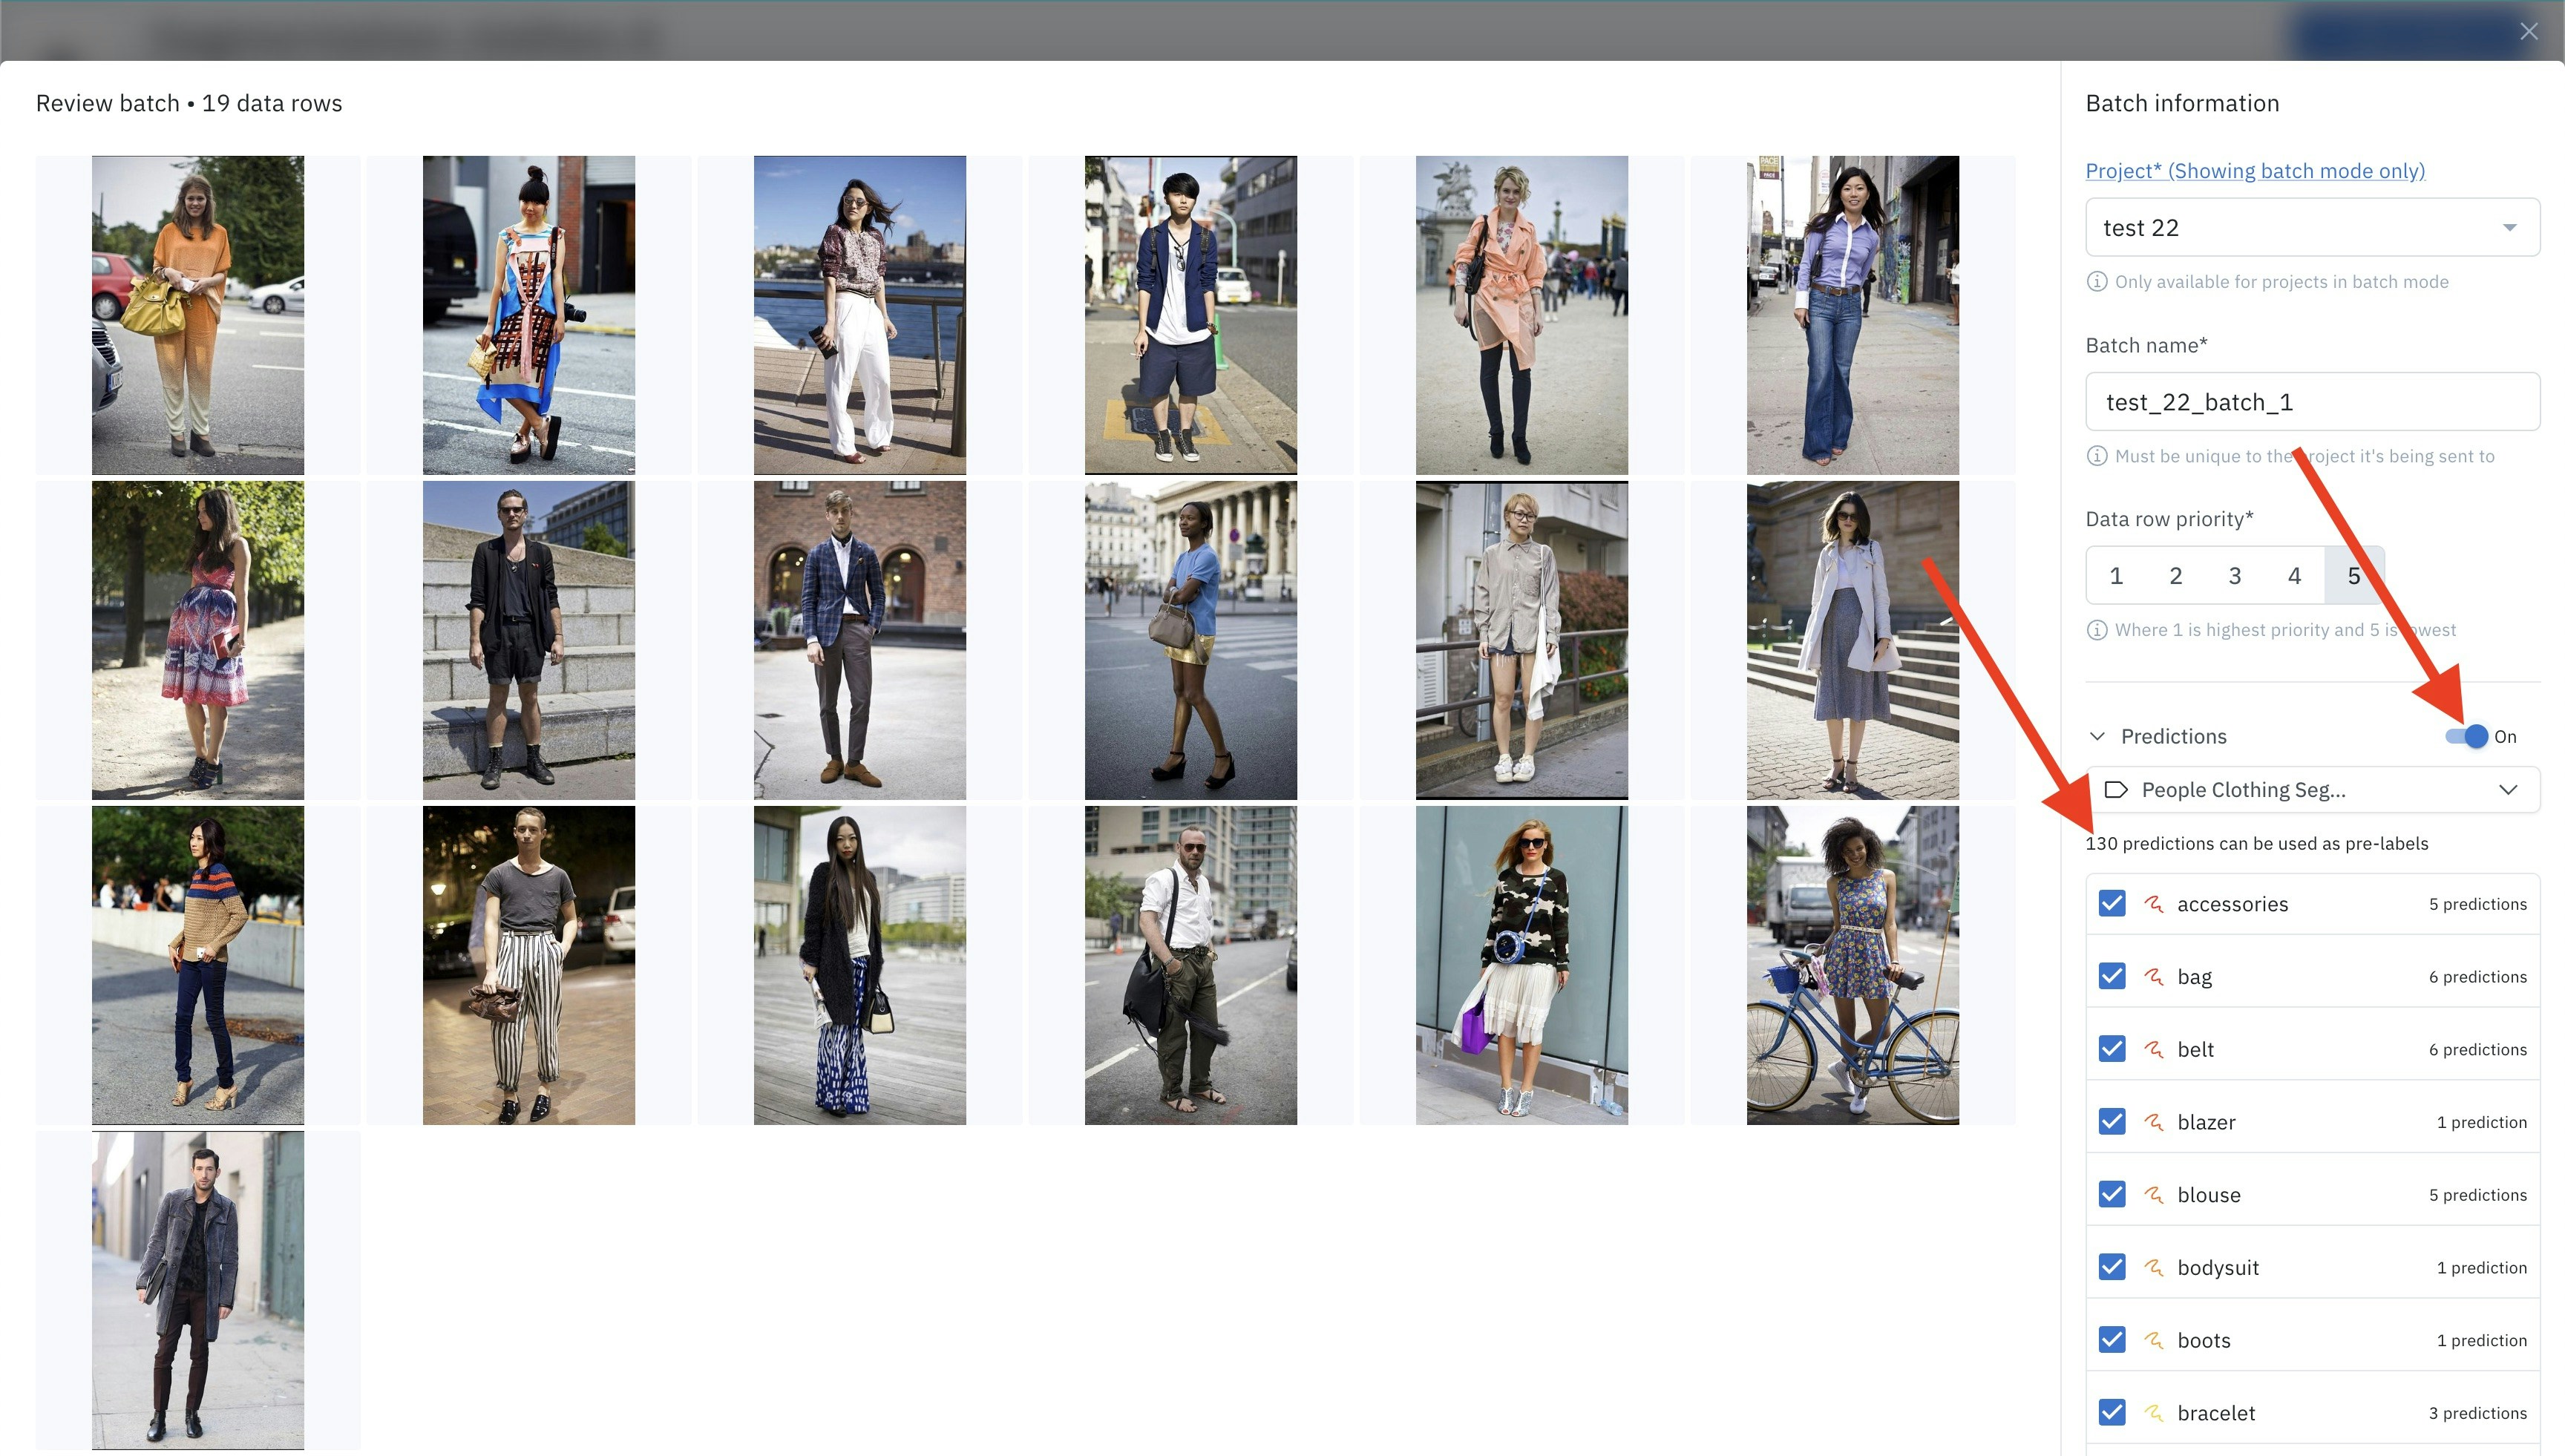
Step 2: Select predictions
From the dropdown, select the model run and the predictions to include in the batch. You can use the checkboxes to specify which predictions to send to the project as pre-labels. For example, you may want to use predictions from specific features on which your model is doing well, but exclude predictions from other features on which the model is struggling.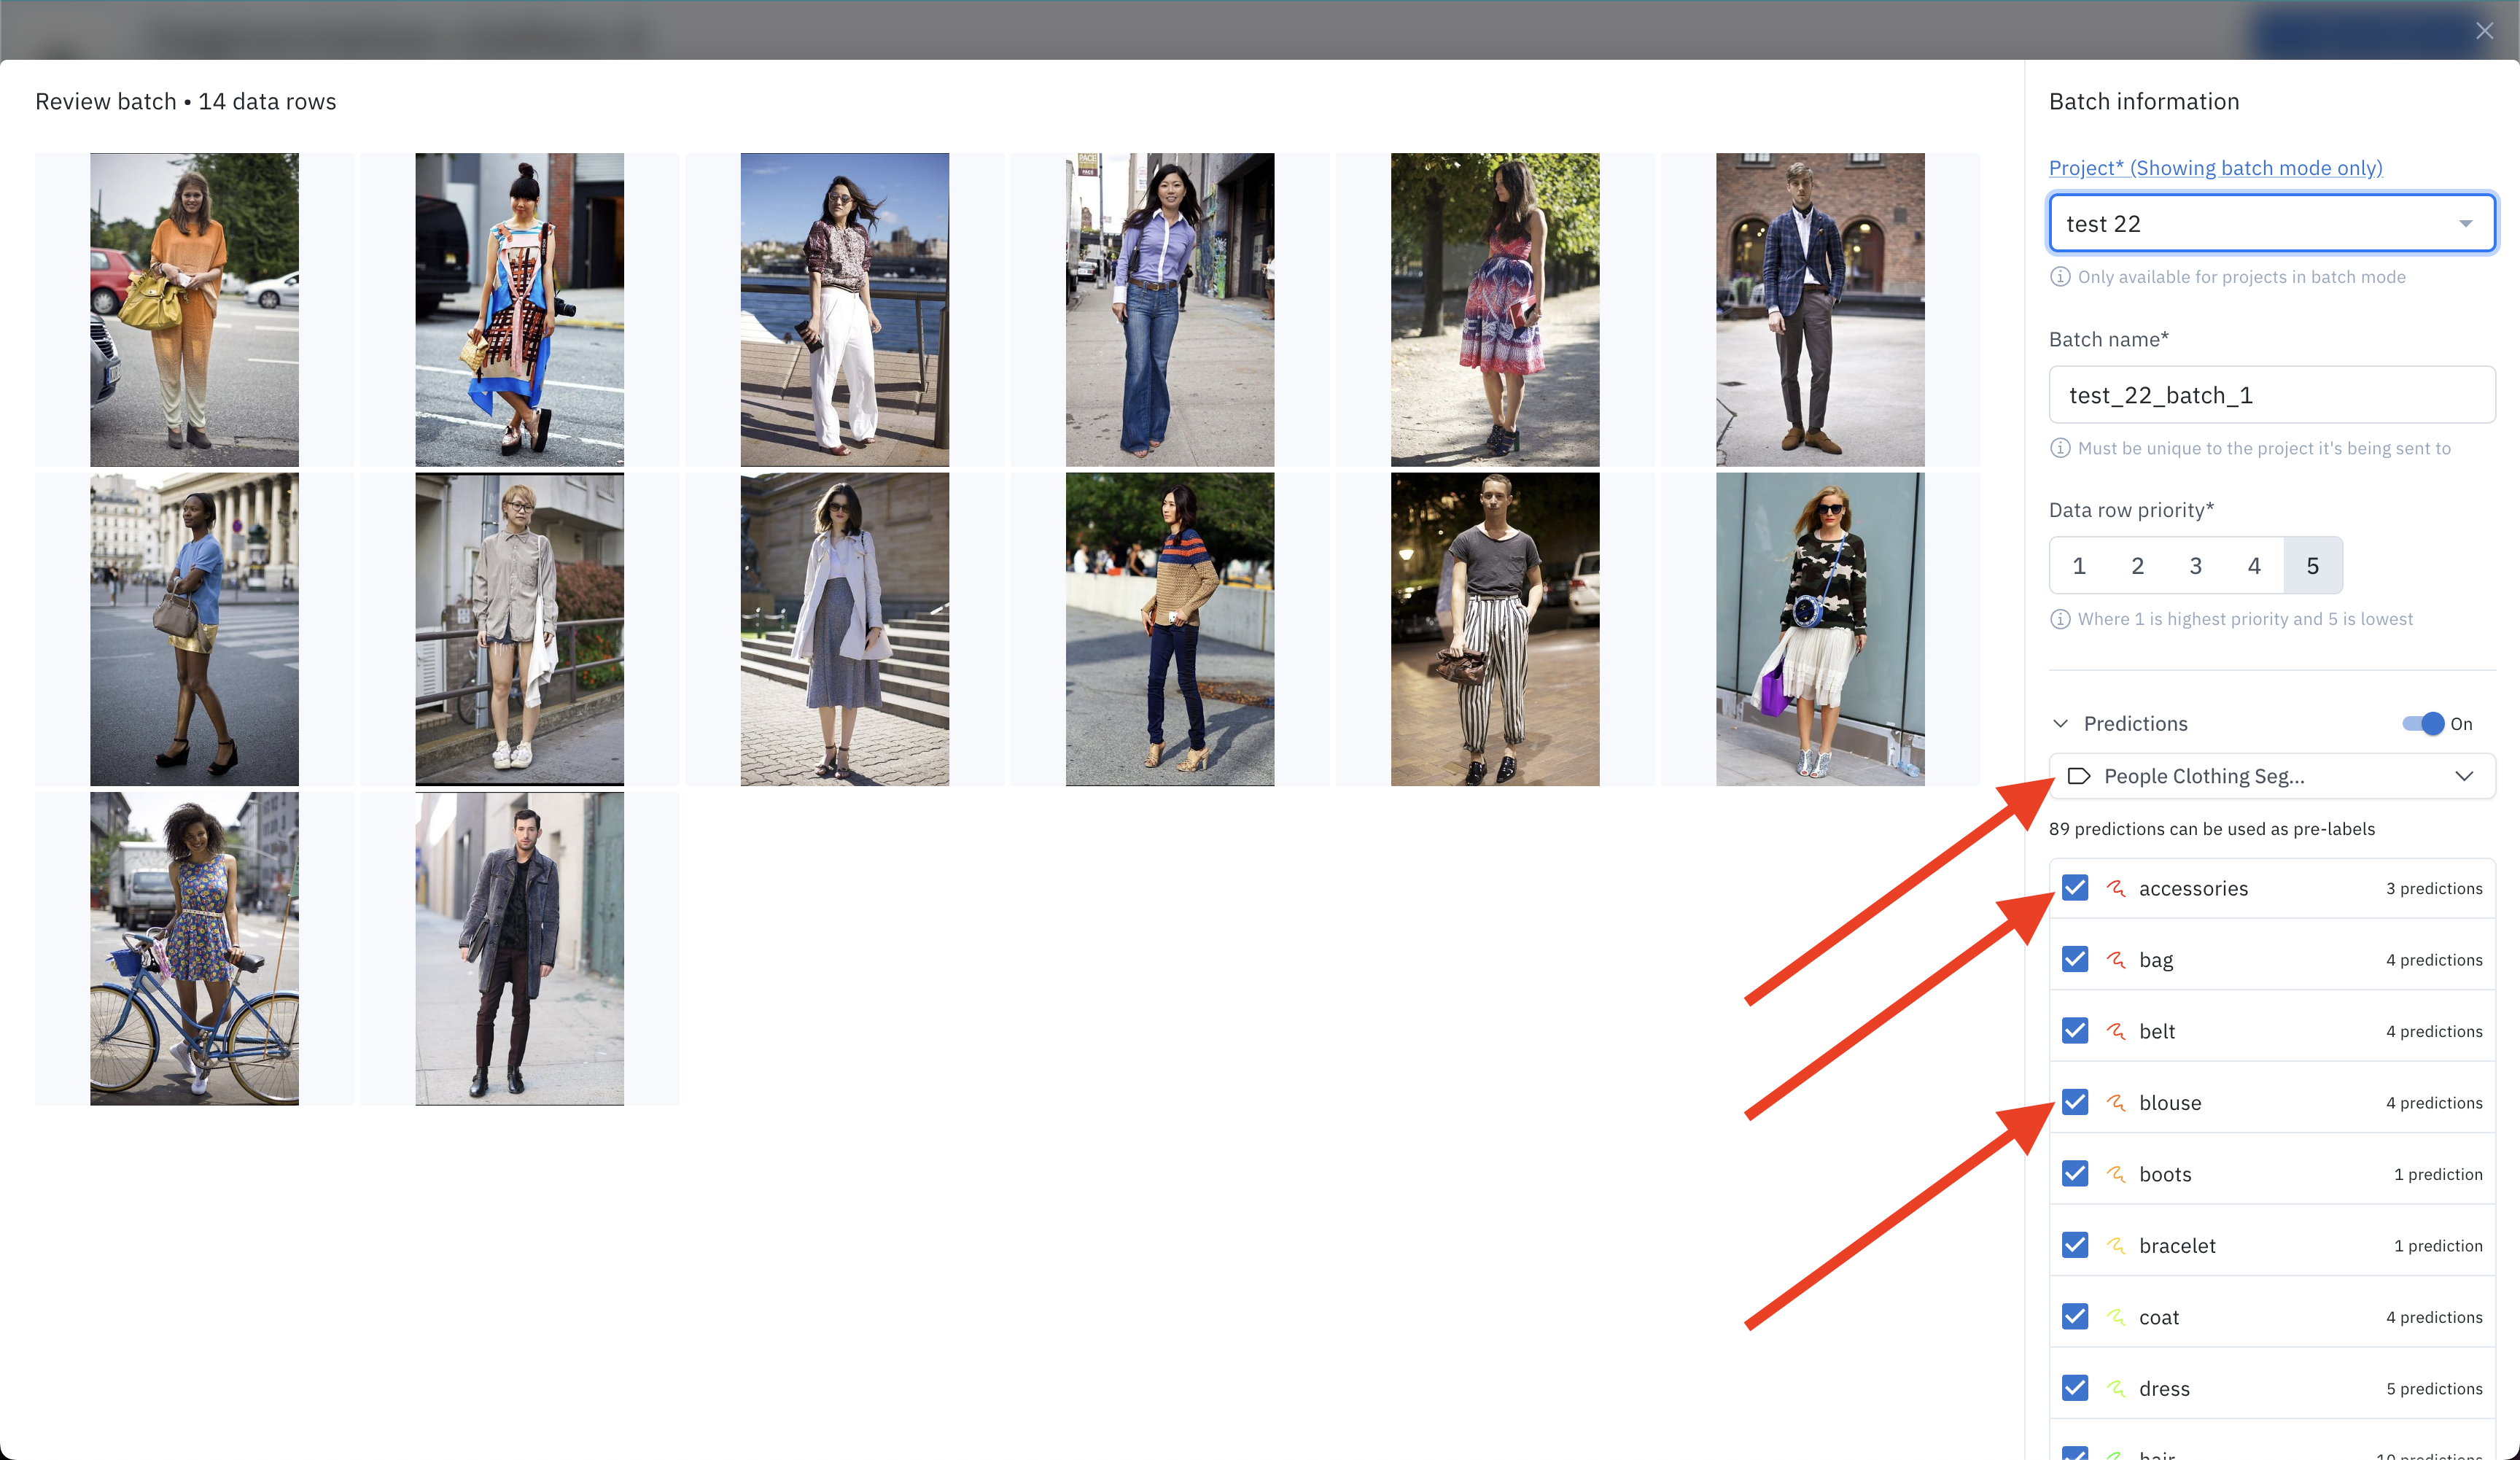
Step 3: Confirm model run is compatible with labeling project
In order to send predictions from a model run as pre-labels to a labeling project, the features must be present in both the model run ontology and the labeling project ontology. The model run and the labeling project do not need to share the exact same ontology. However, they must share at least some features in common. You can only send predictions as pre-labels, for these features that are shared between the model run and the labeling project. If no predictions from the model run are compatible with the labeling project, you will see a warning message.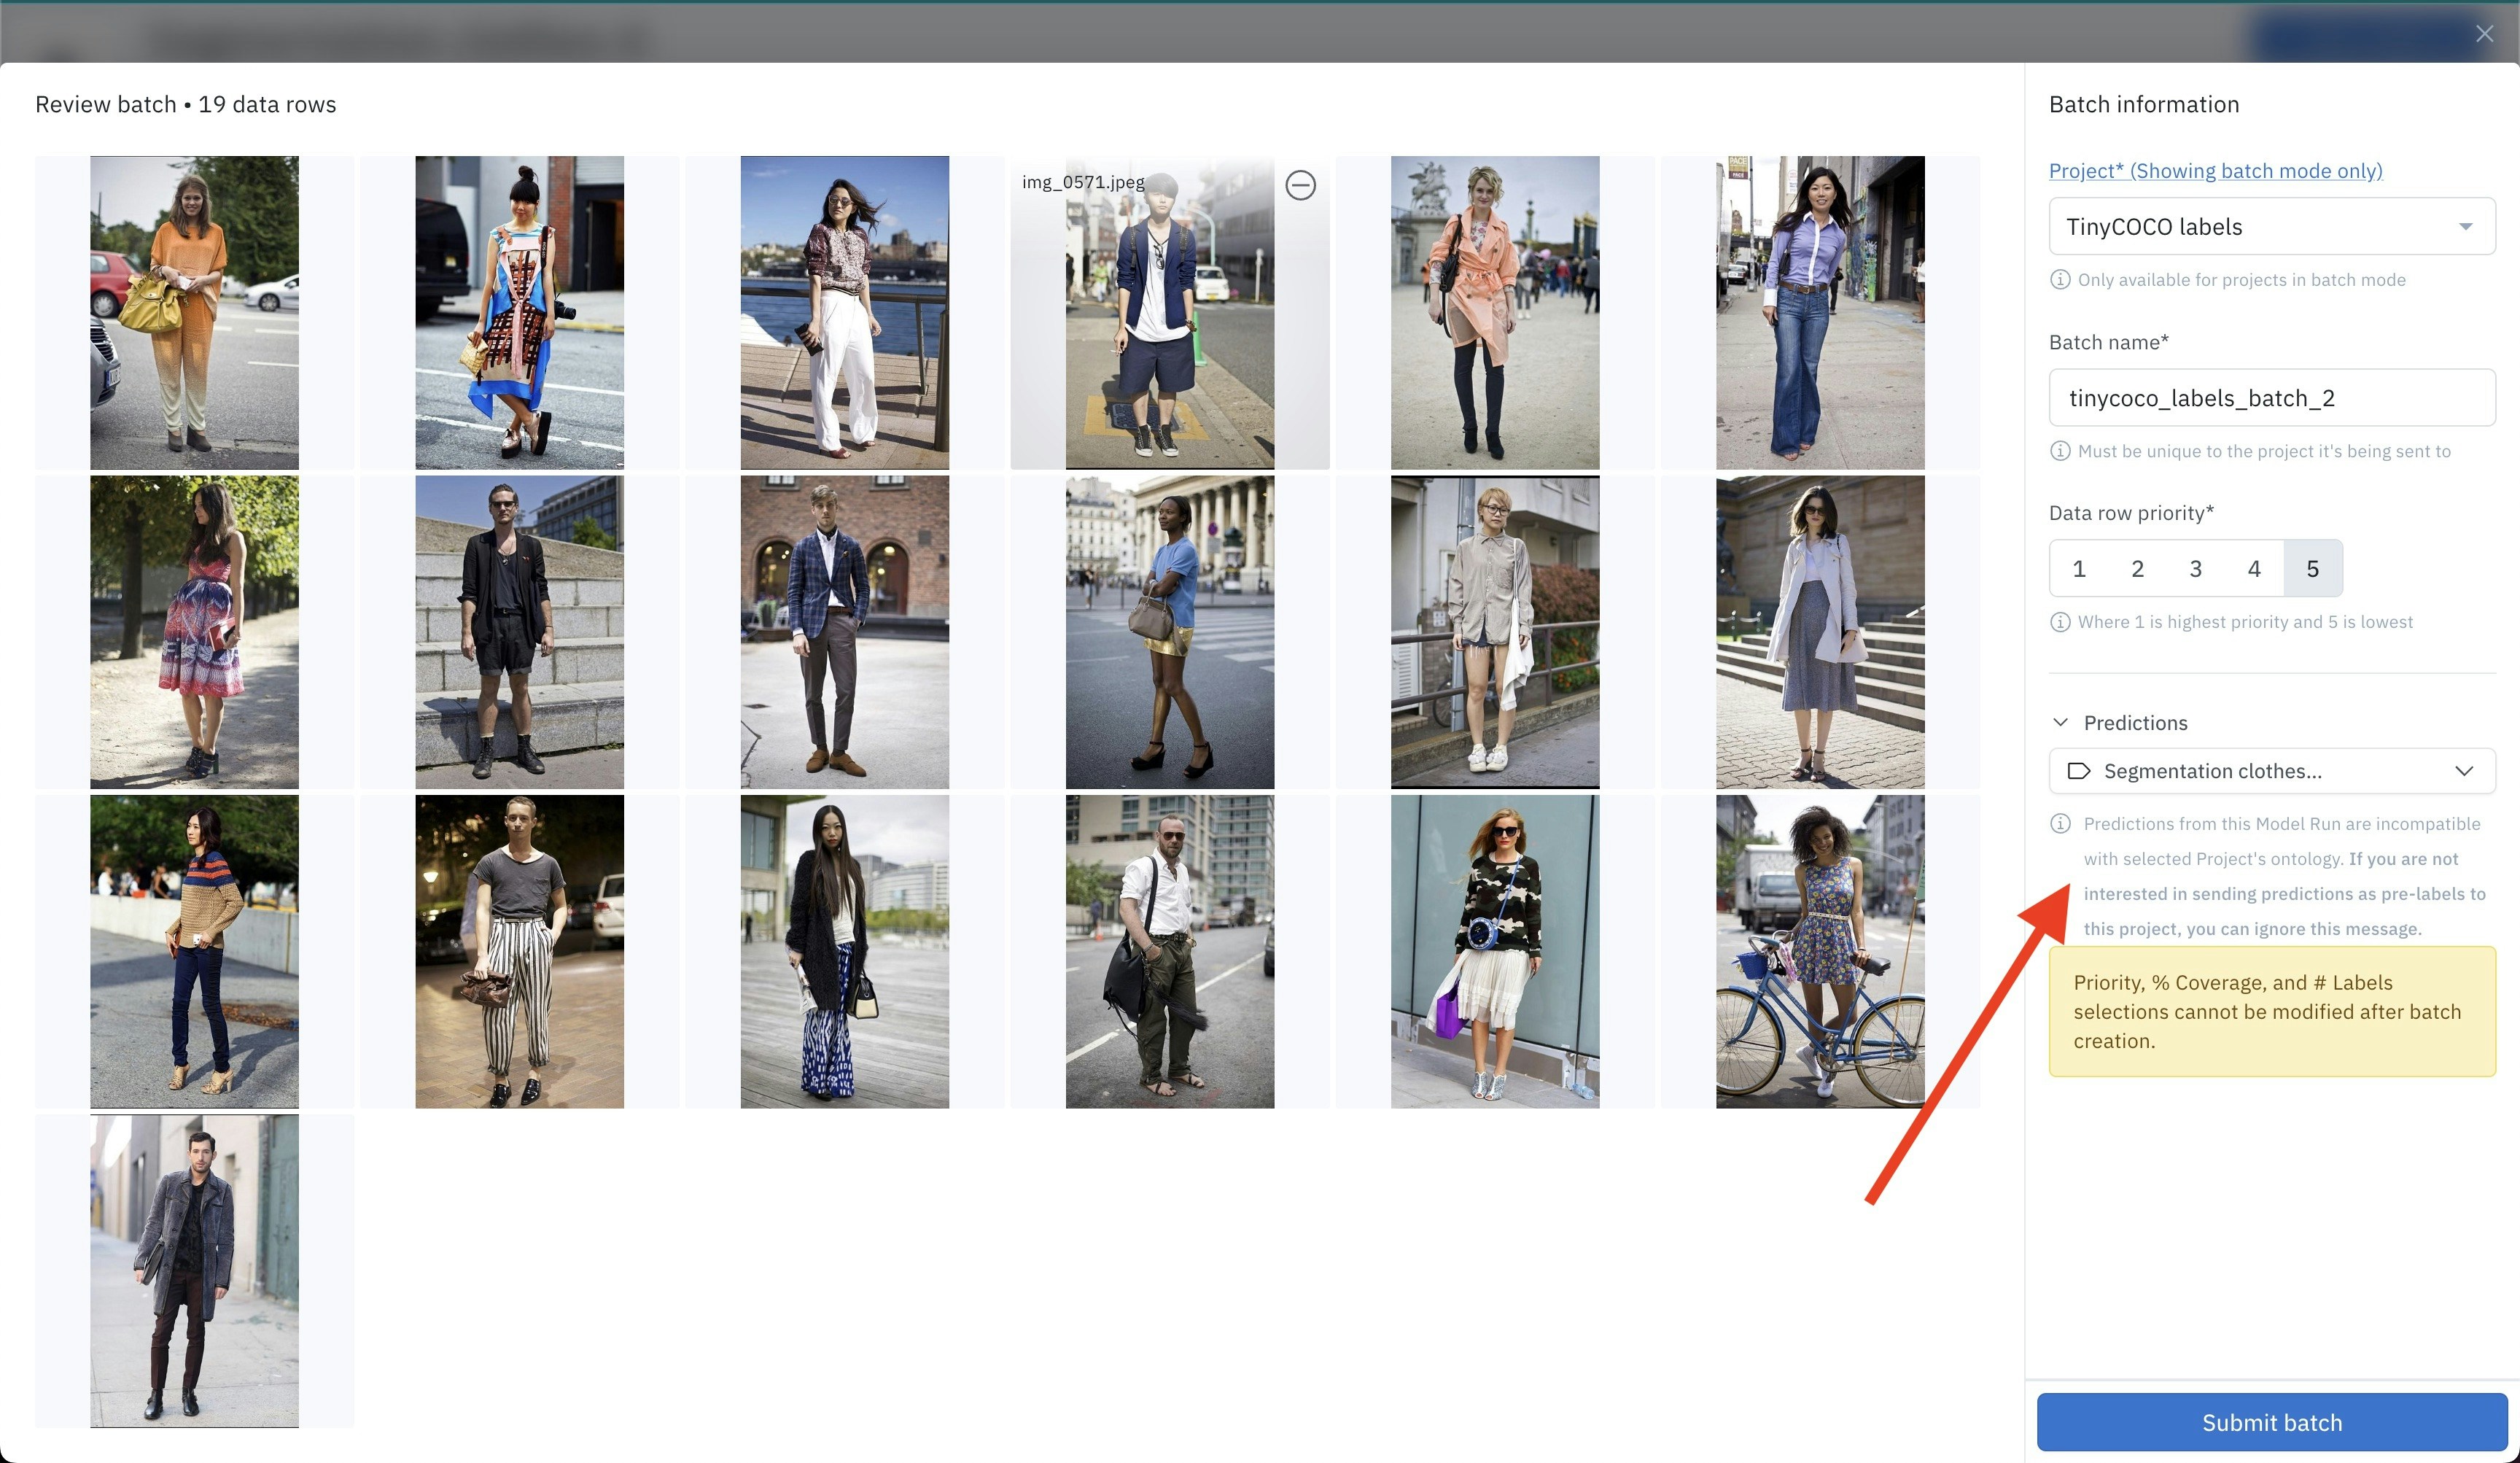
FAQs
Can I submit the same data row multiple times?
Can I submit the same data row multiple times?
A data row cannot be part of more than one batch in a project at a time.
Can a batch be shared between projects?
Can a batch be shared between projects?