Fine-tune model

Shows how to use Foundry to fine-tune a model to improve performance with unique ontologies, features, or data distributions.

Labeled data rows can improve model performance in model-assisted labeling (MAL) scenarios. This process, called fine-tuning or deep learning, helps improve Foundry predictions, which in turn reduces labeling and review time.

🚧

This feature is currently in beta

Some feature improvements may not yet be documented.

At this time, you can use Yolo v8 to detect objects on image data. Additional models and scenarios may be enabled over time.

Fine-tuned models begin as open-source, pre-trained models. You improve their accuracy on specific machine learning problems by training them with ground truth data.

Fine-tuning improves performance with unusual data or requirements, such as:

  • Ontologies involving unique or uncommon features
  • Unique data distributions that general models do not typically support

To use Foundry to fine-tune a model, you:

  1. Create an experiment to prepare training data
  2. Use experiment results to fine-tune a base model
  3. Use the tuned model to perform model runs on untrained data.

The following sections walk through each step in turn

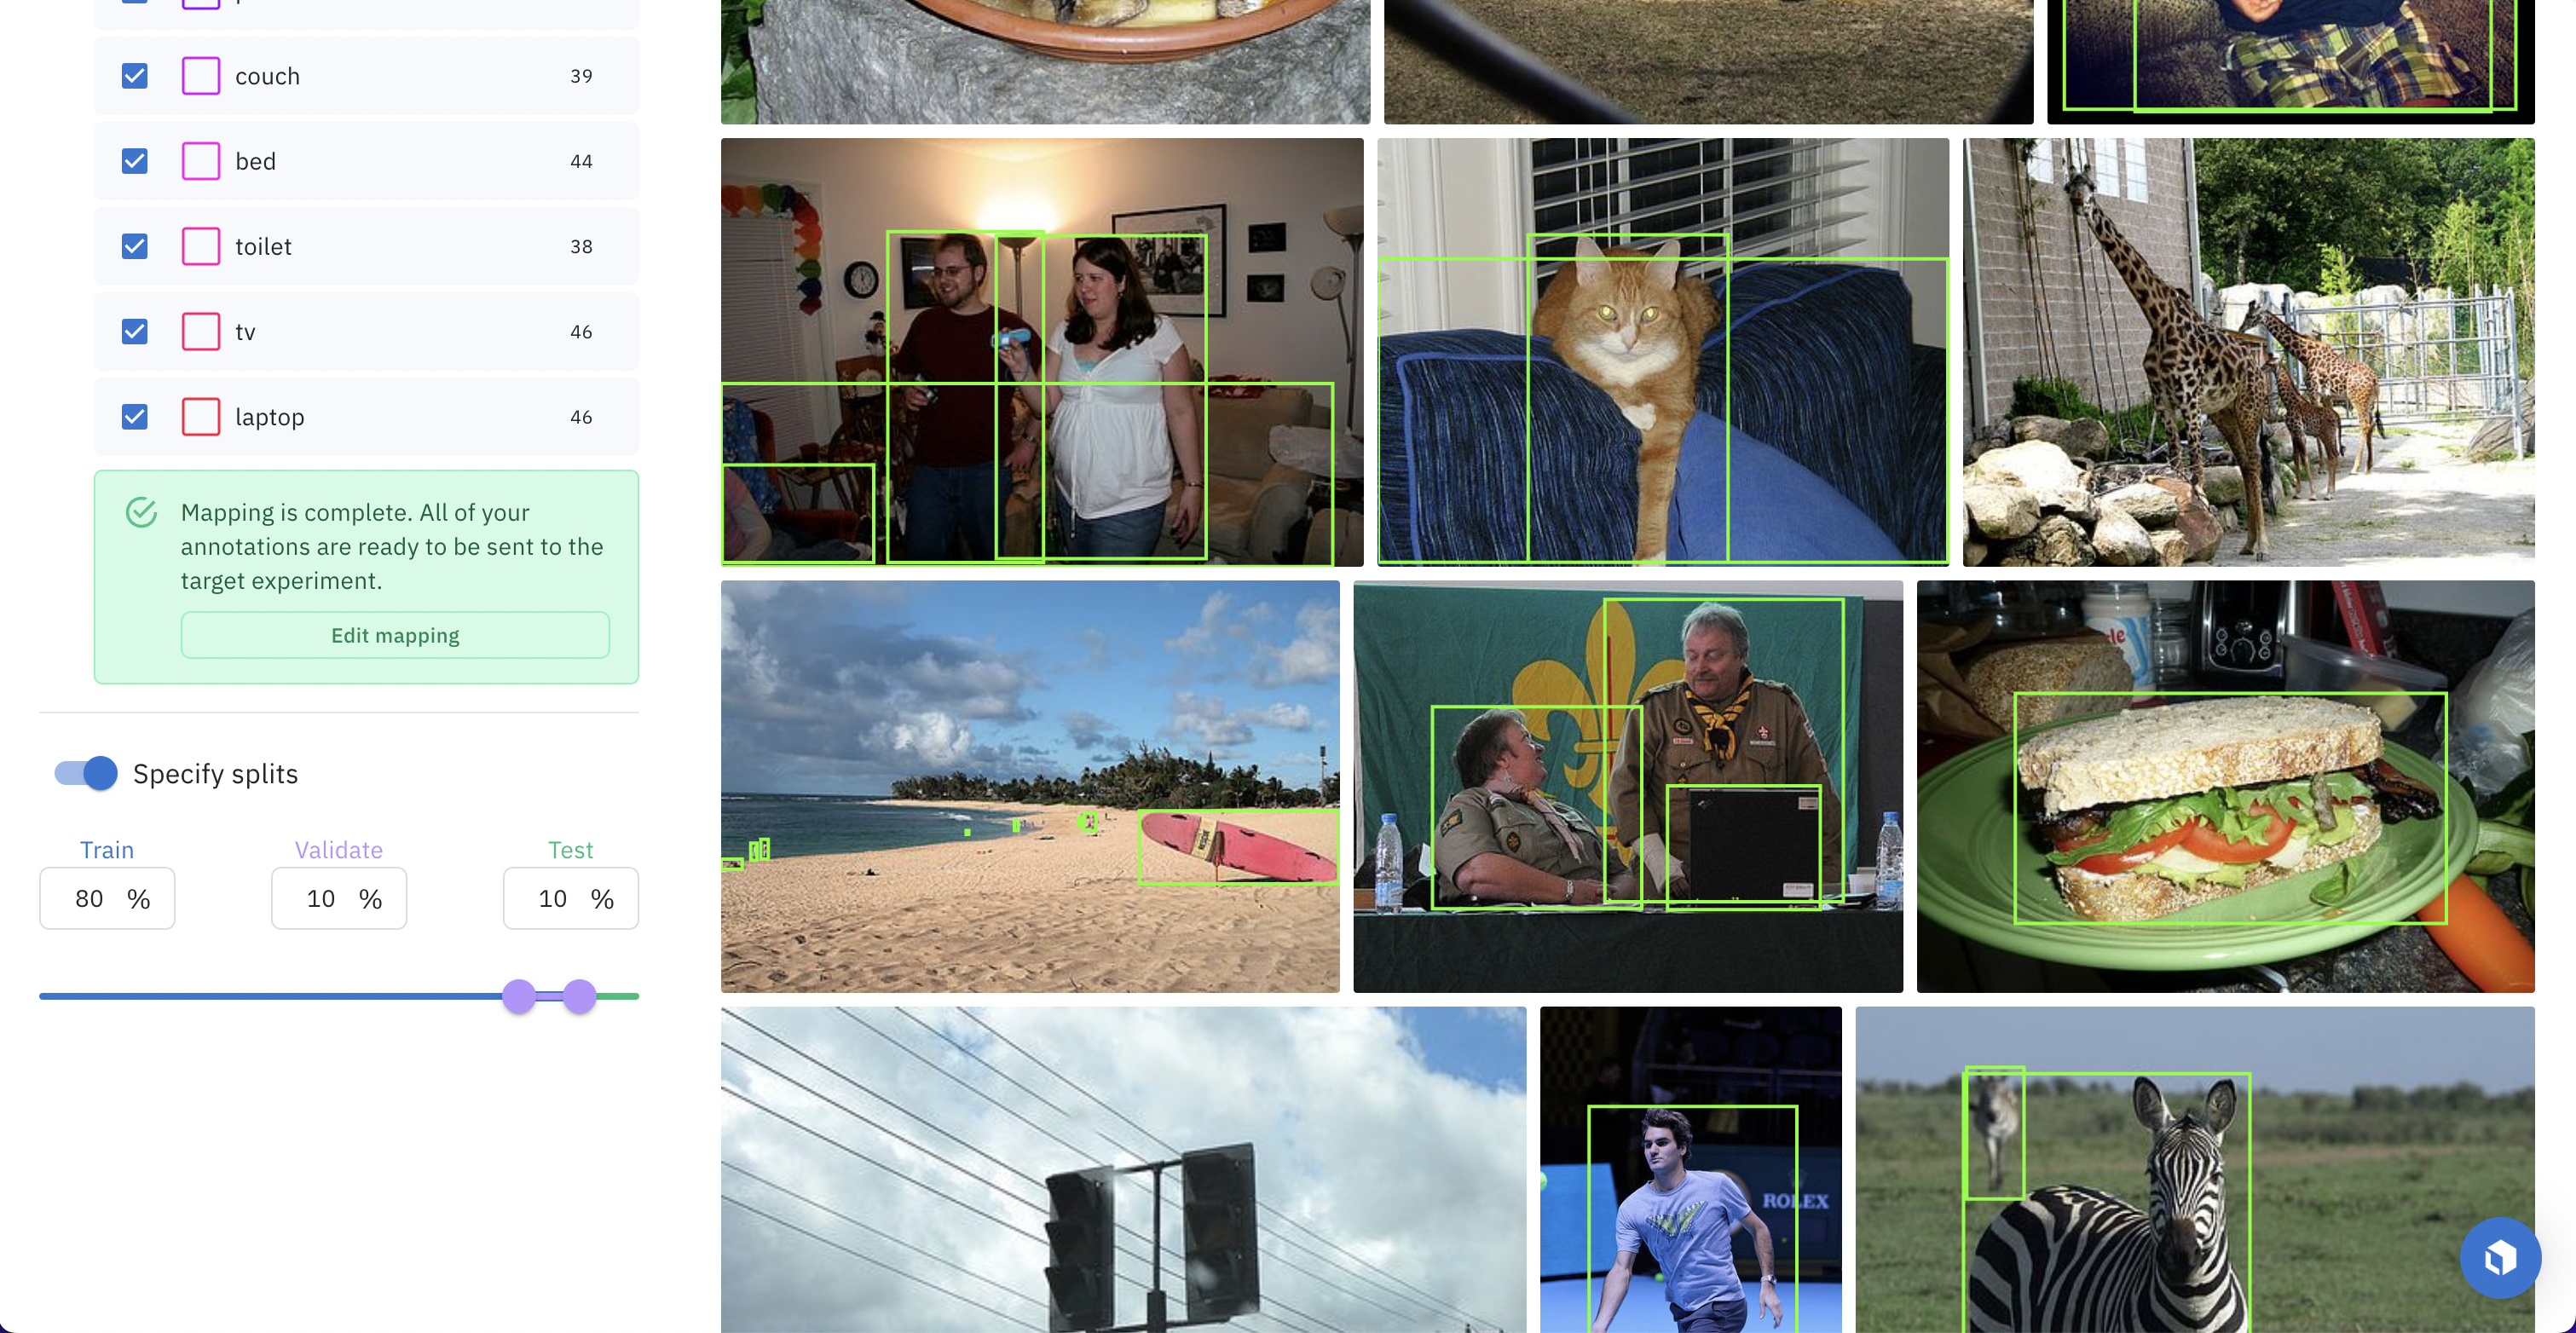
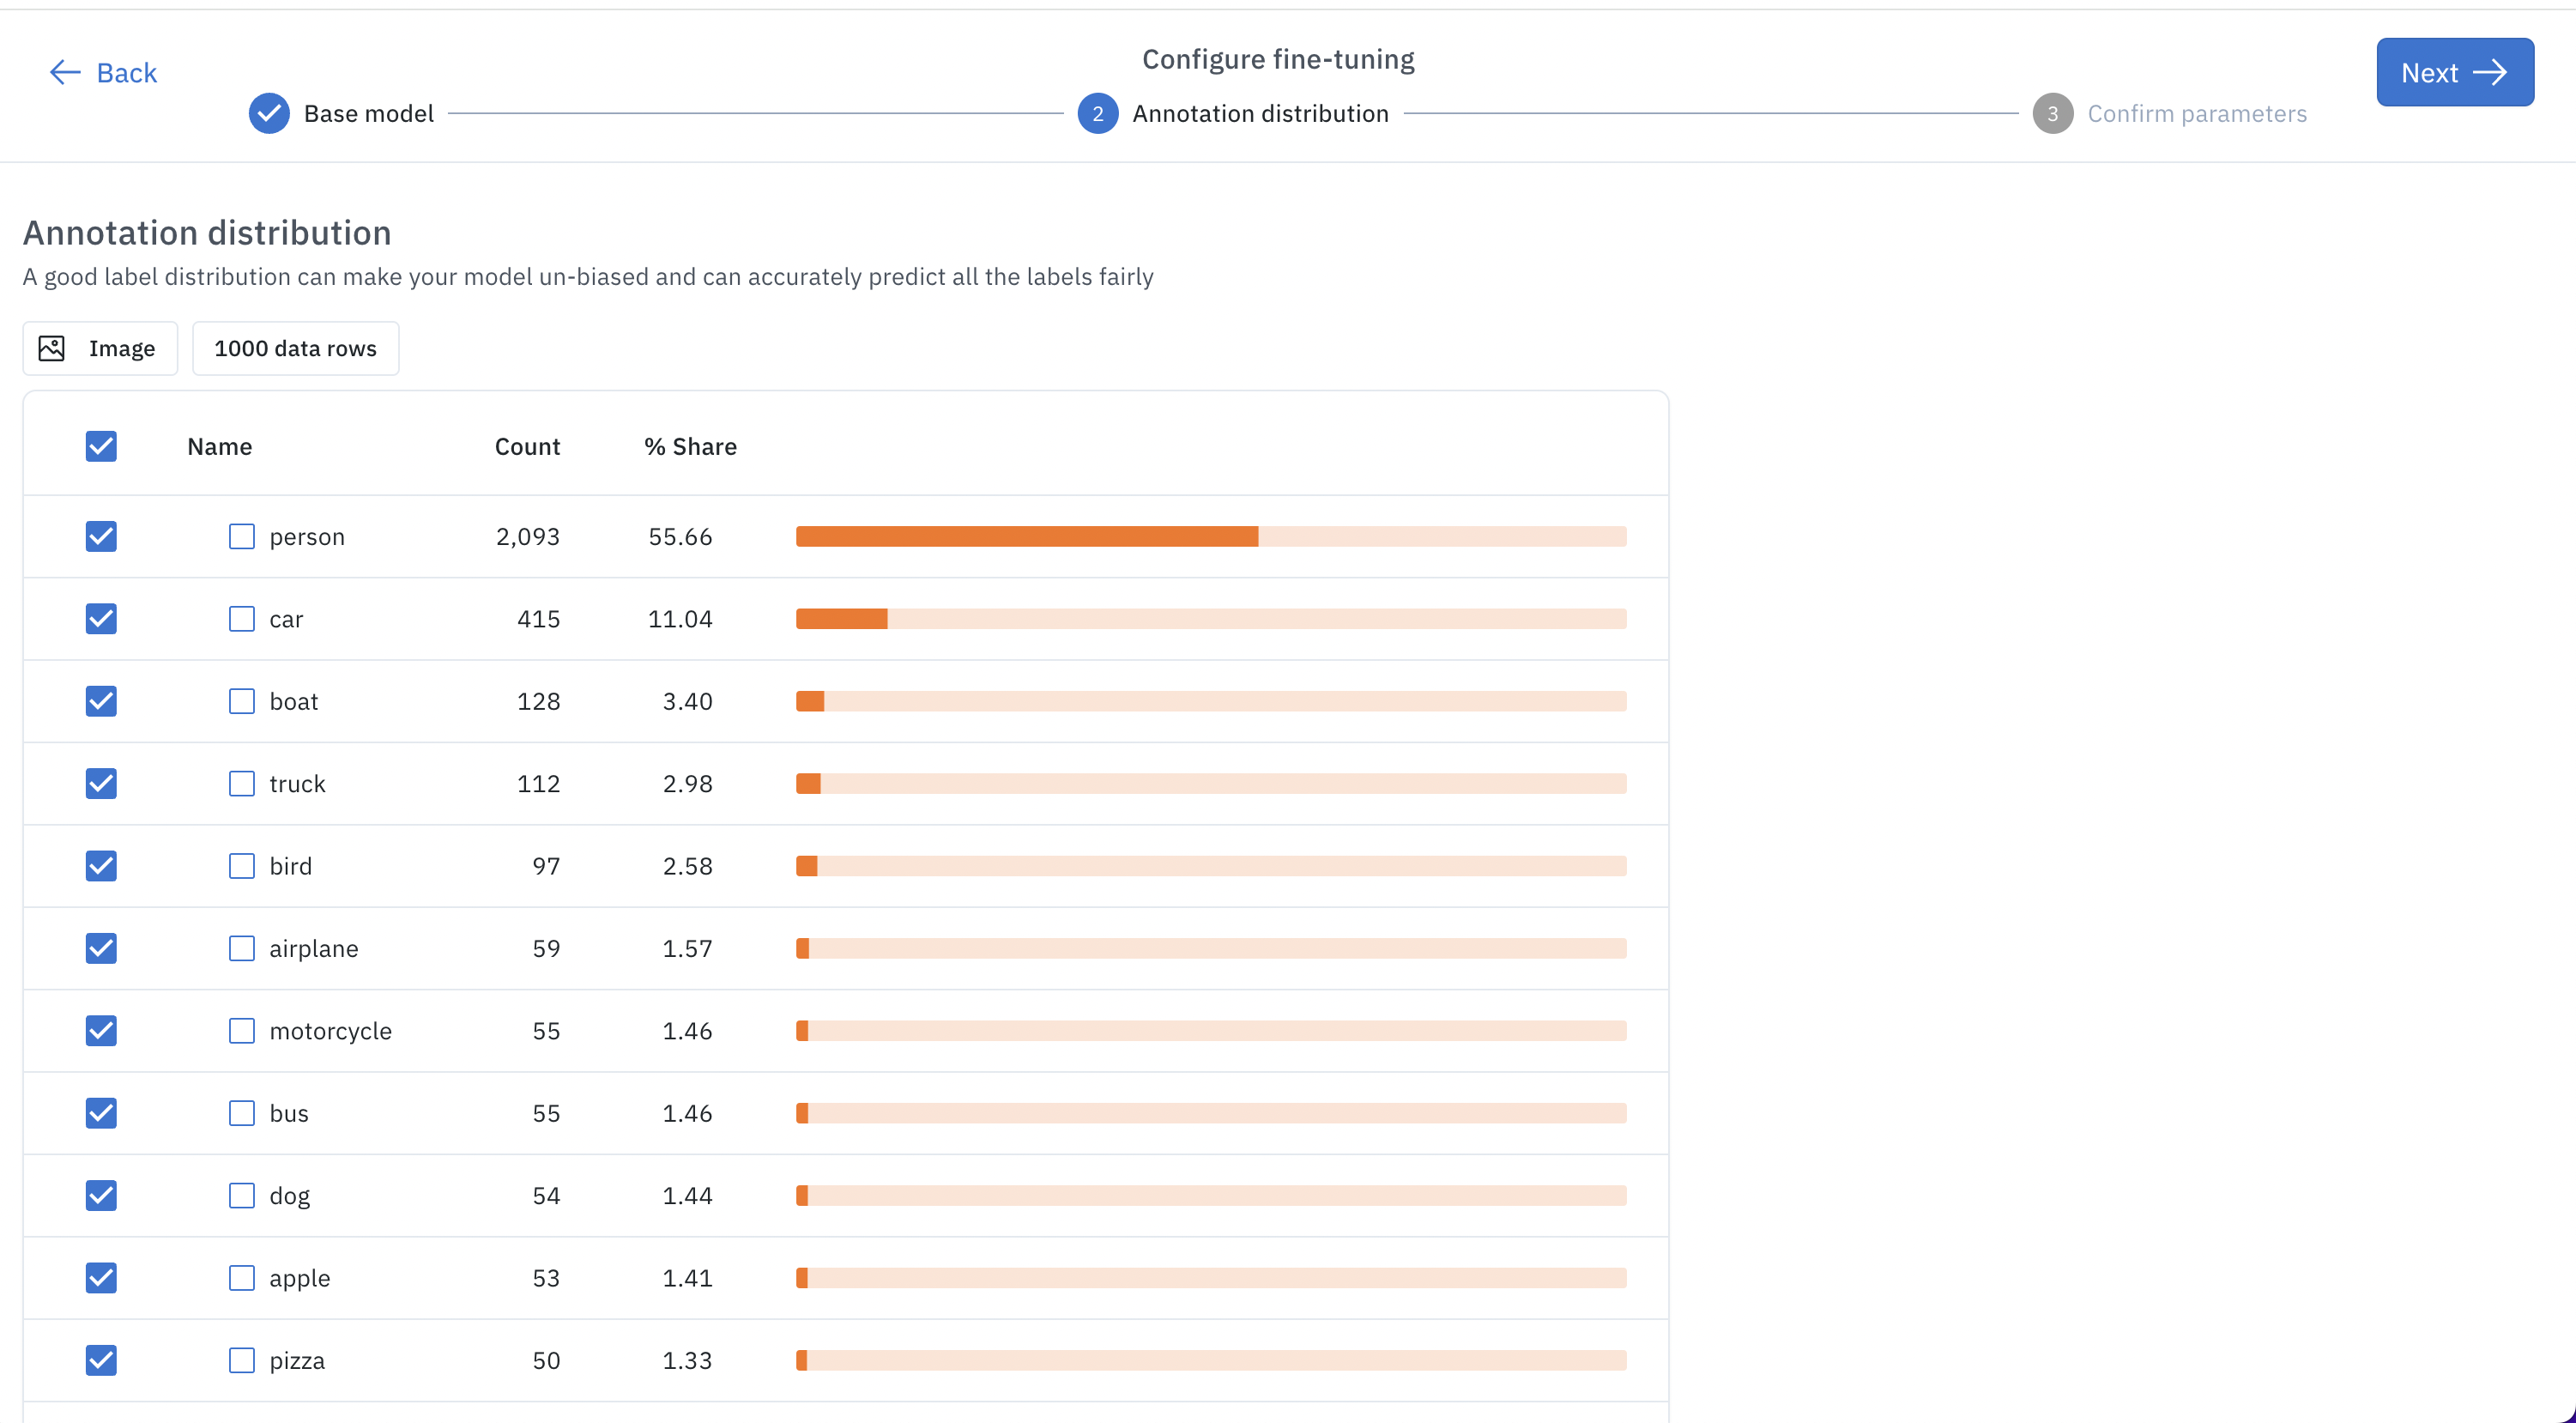
Prepare training data

To begin, add data rows and ground truth labels to a model experiment Model Run

  1. Select data rows and add them to a new experiment.
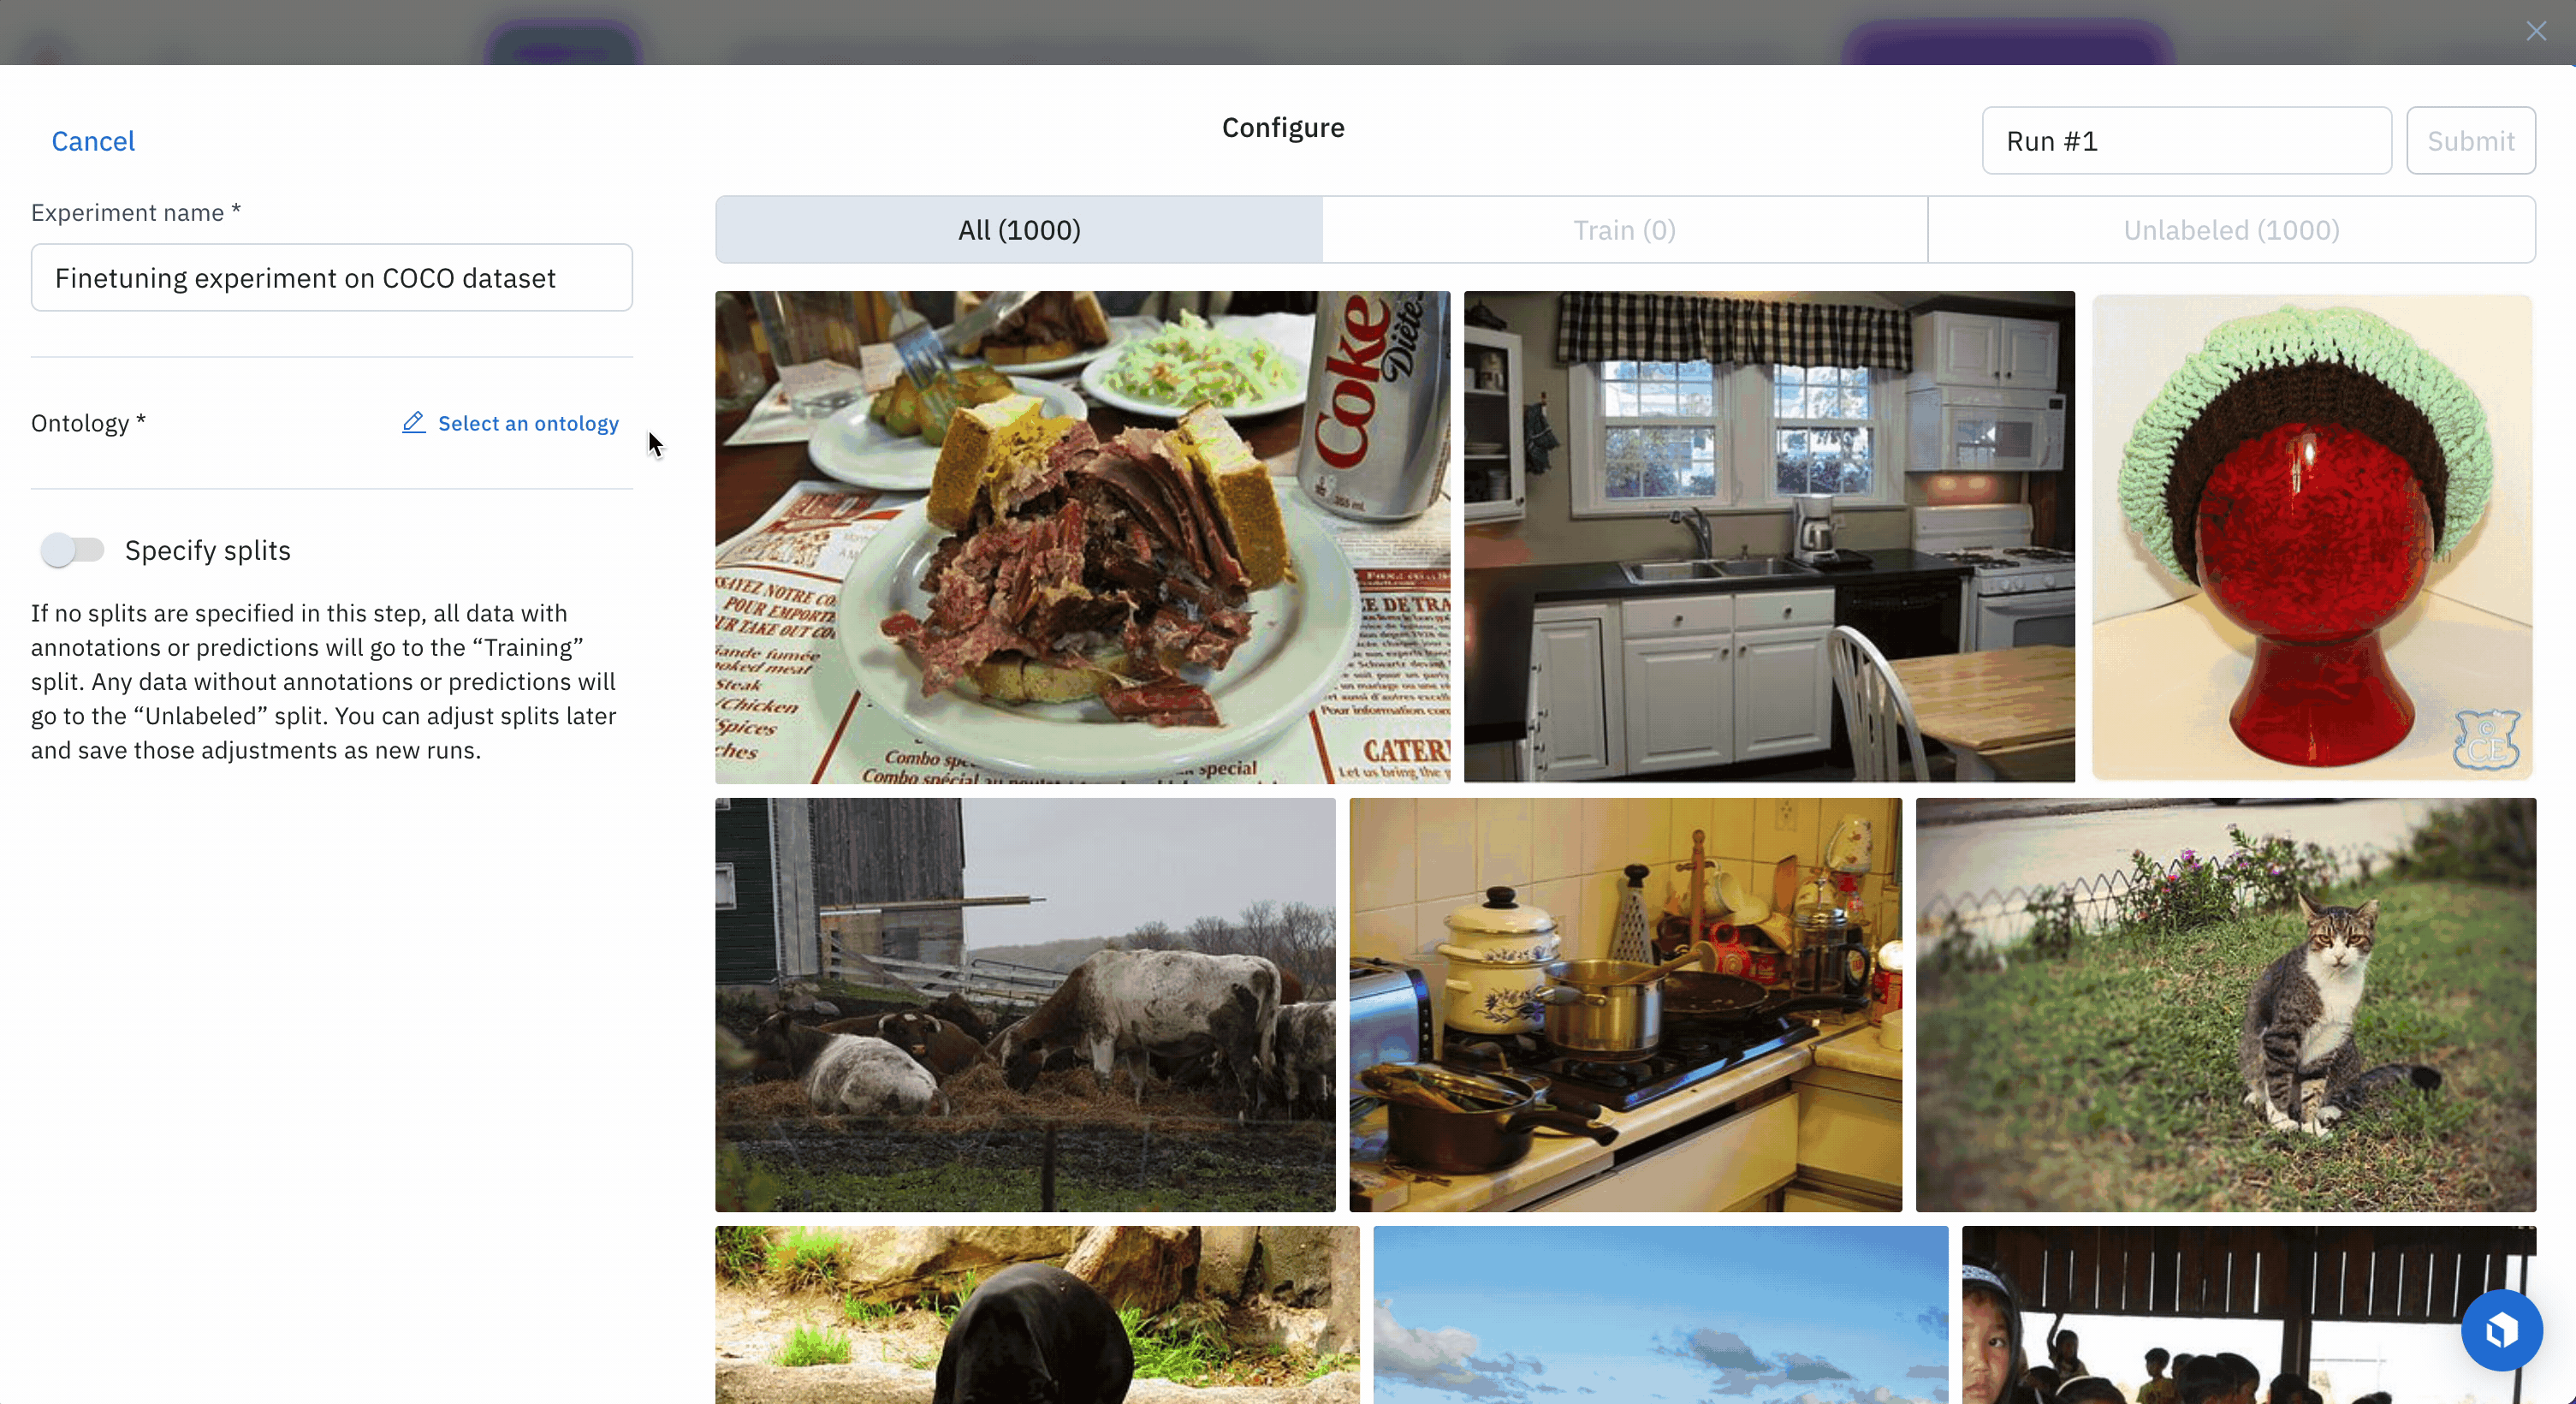
  2. Configure your experiment
  3. Provide an ontology
  4. Define split
  5. Name and submit your experiment as a training model run.
Select 1000 data rows, click **Select all**, then click **New experiment** to  
create an experiment for this fine-tuning job.

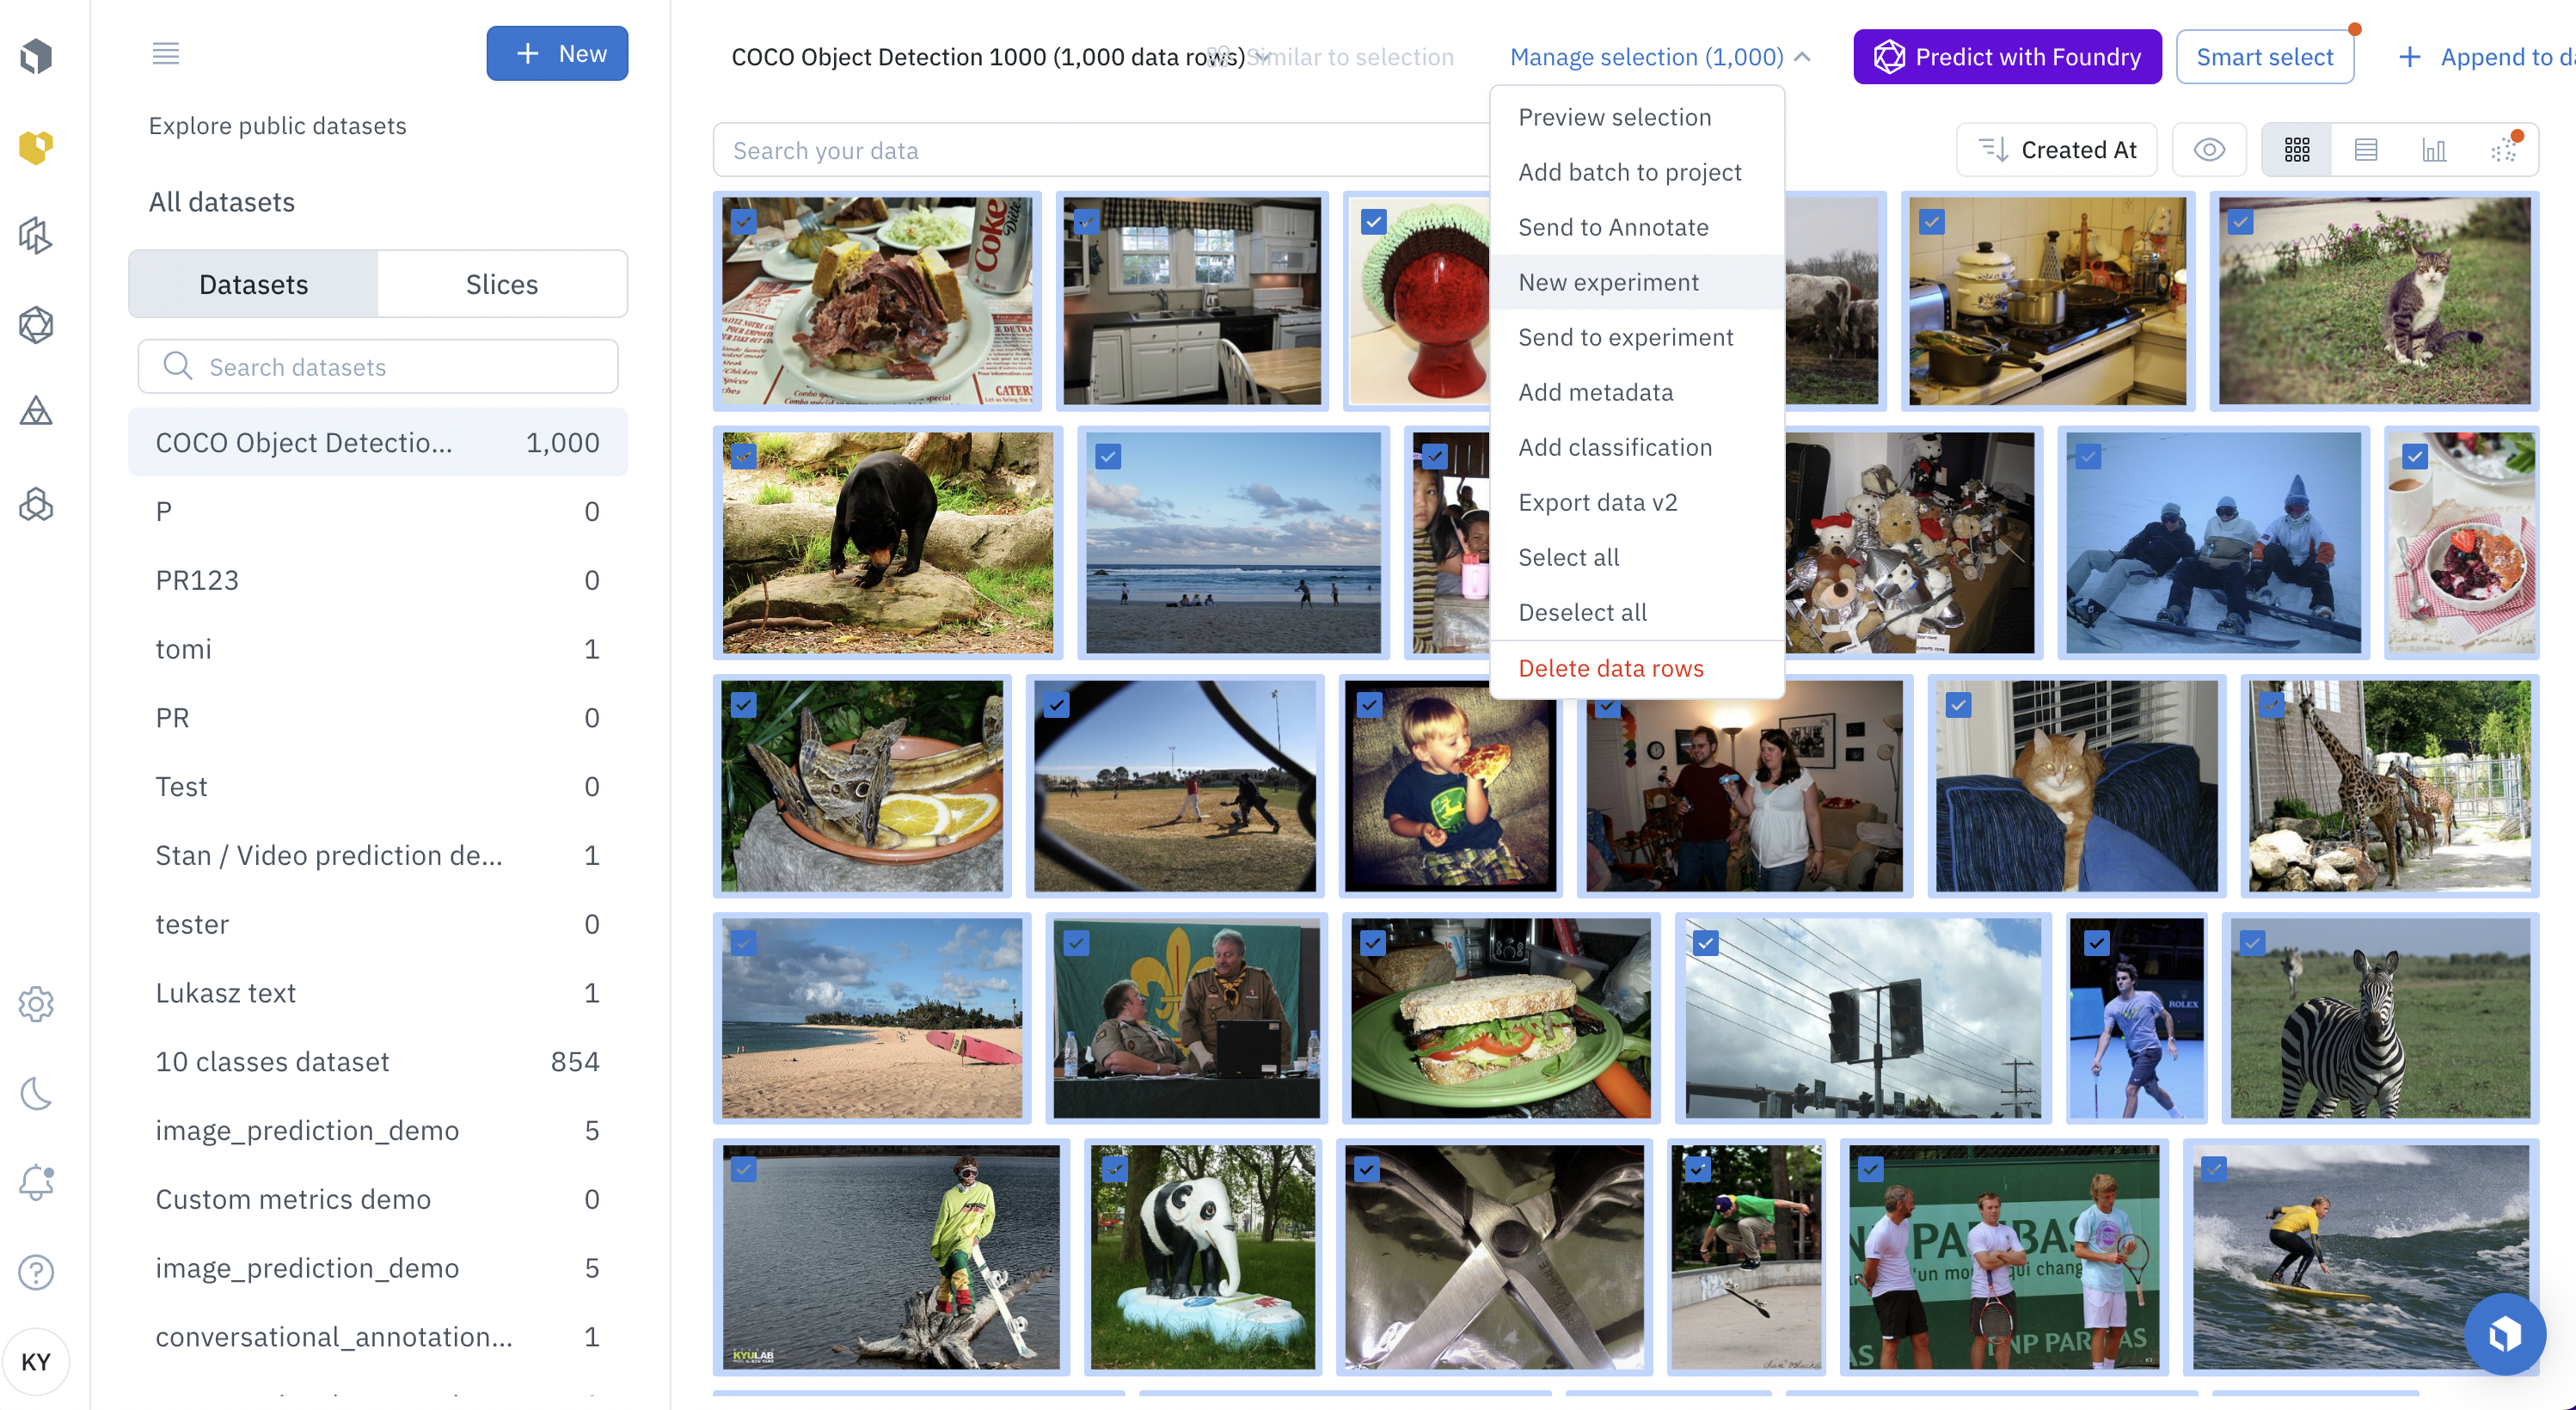
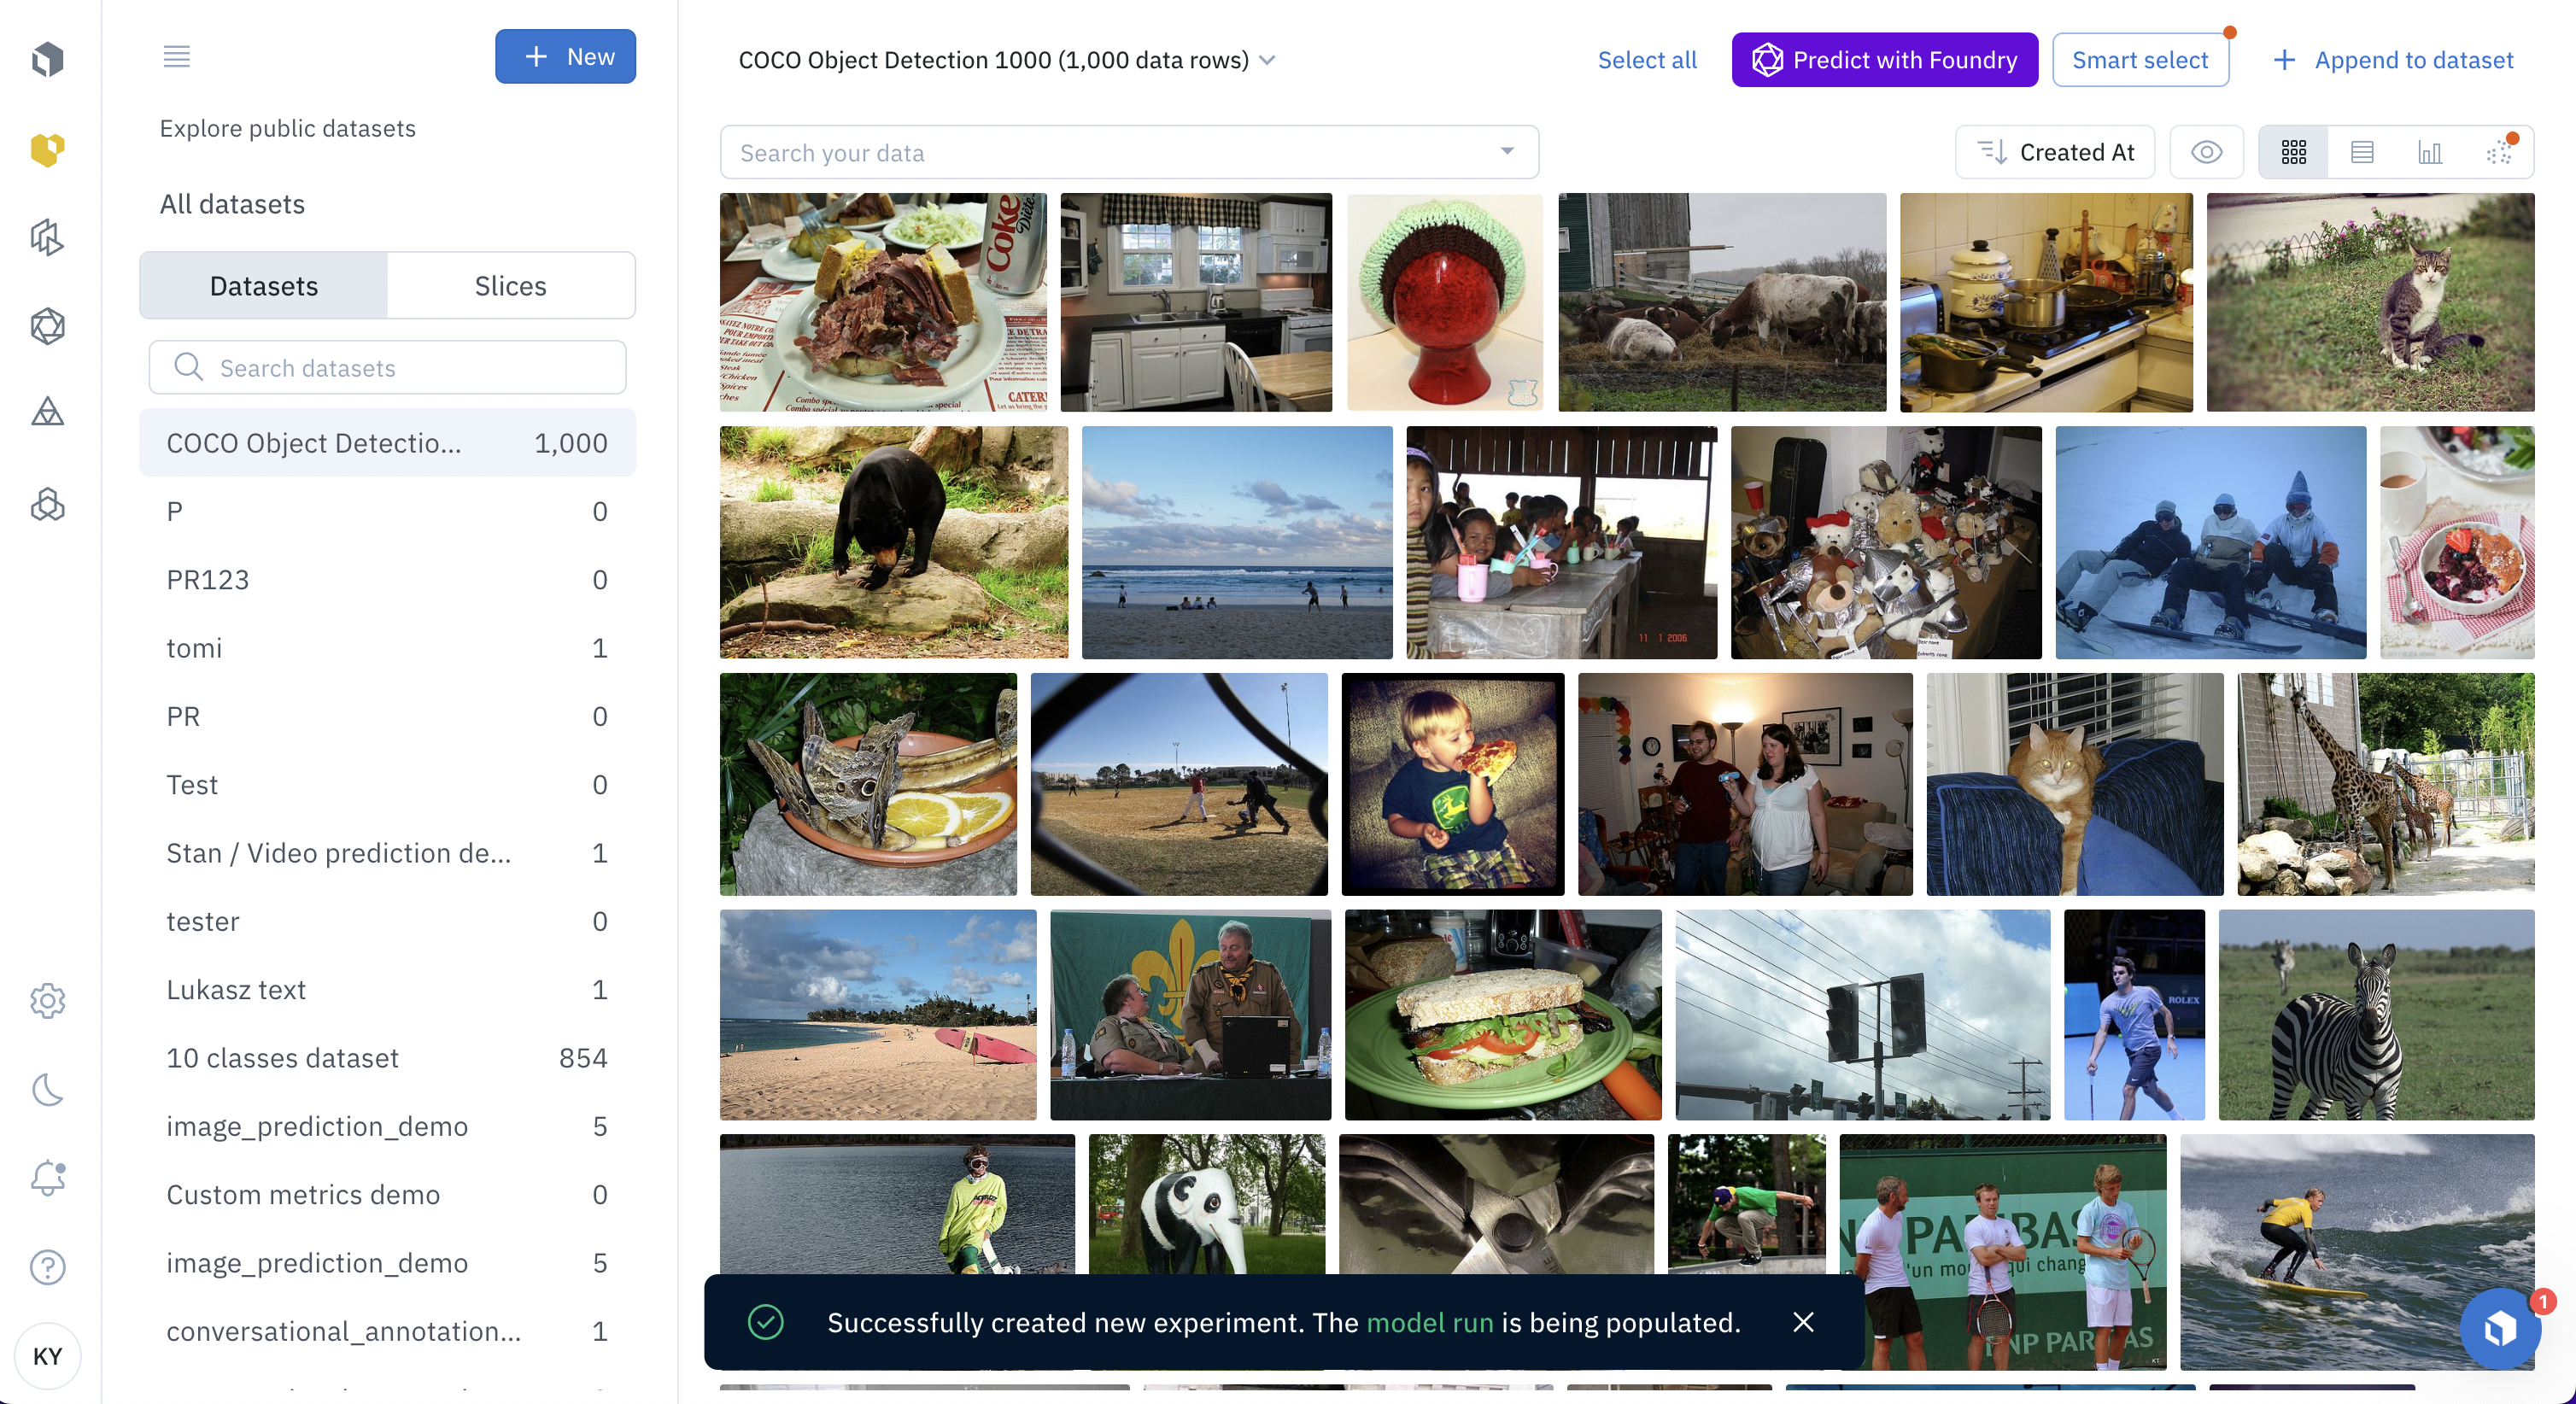
Select 1000 data rows, click Select all, then click New experiment to
create an experiment for this fine-tuning job.
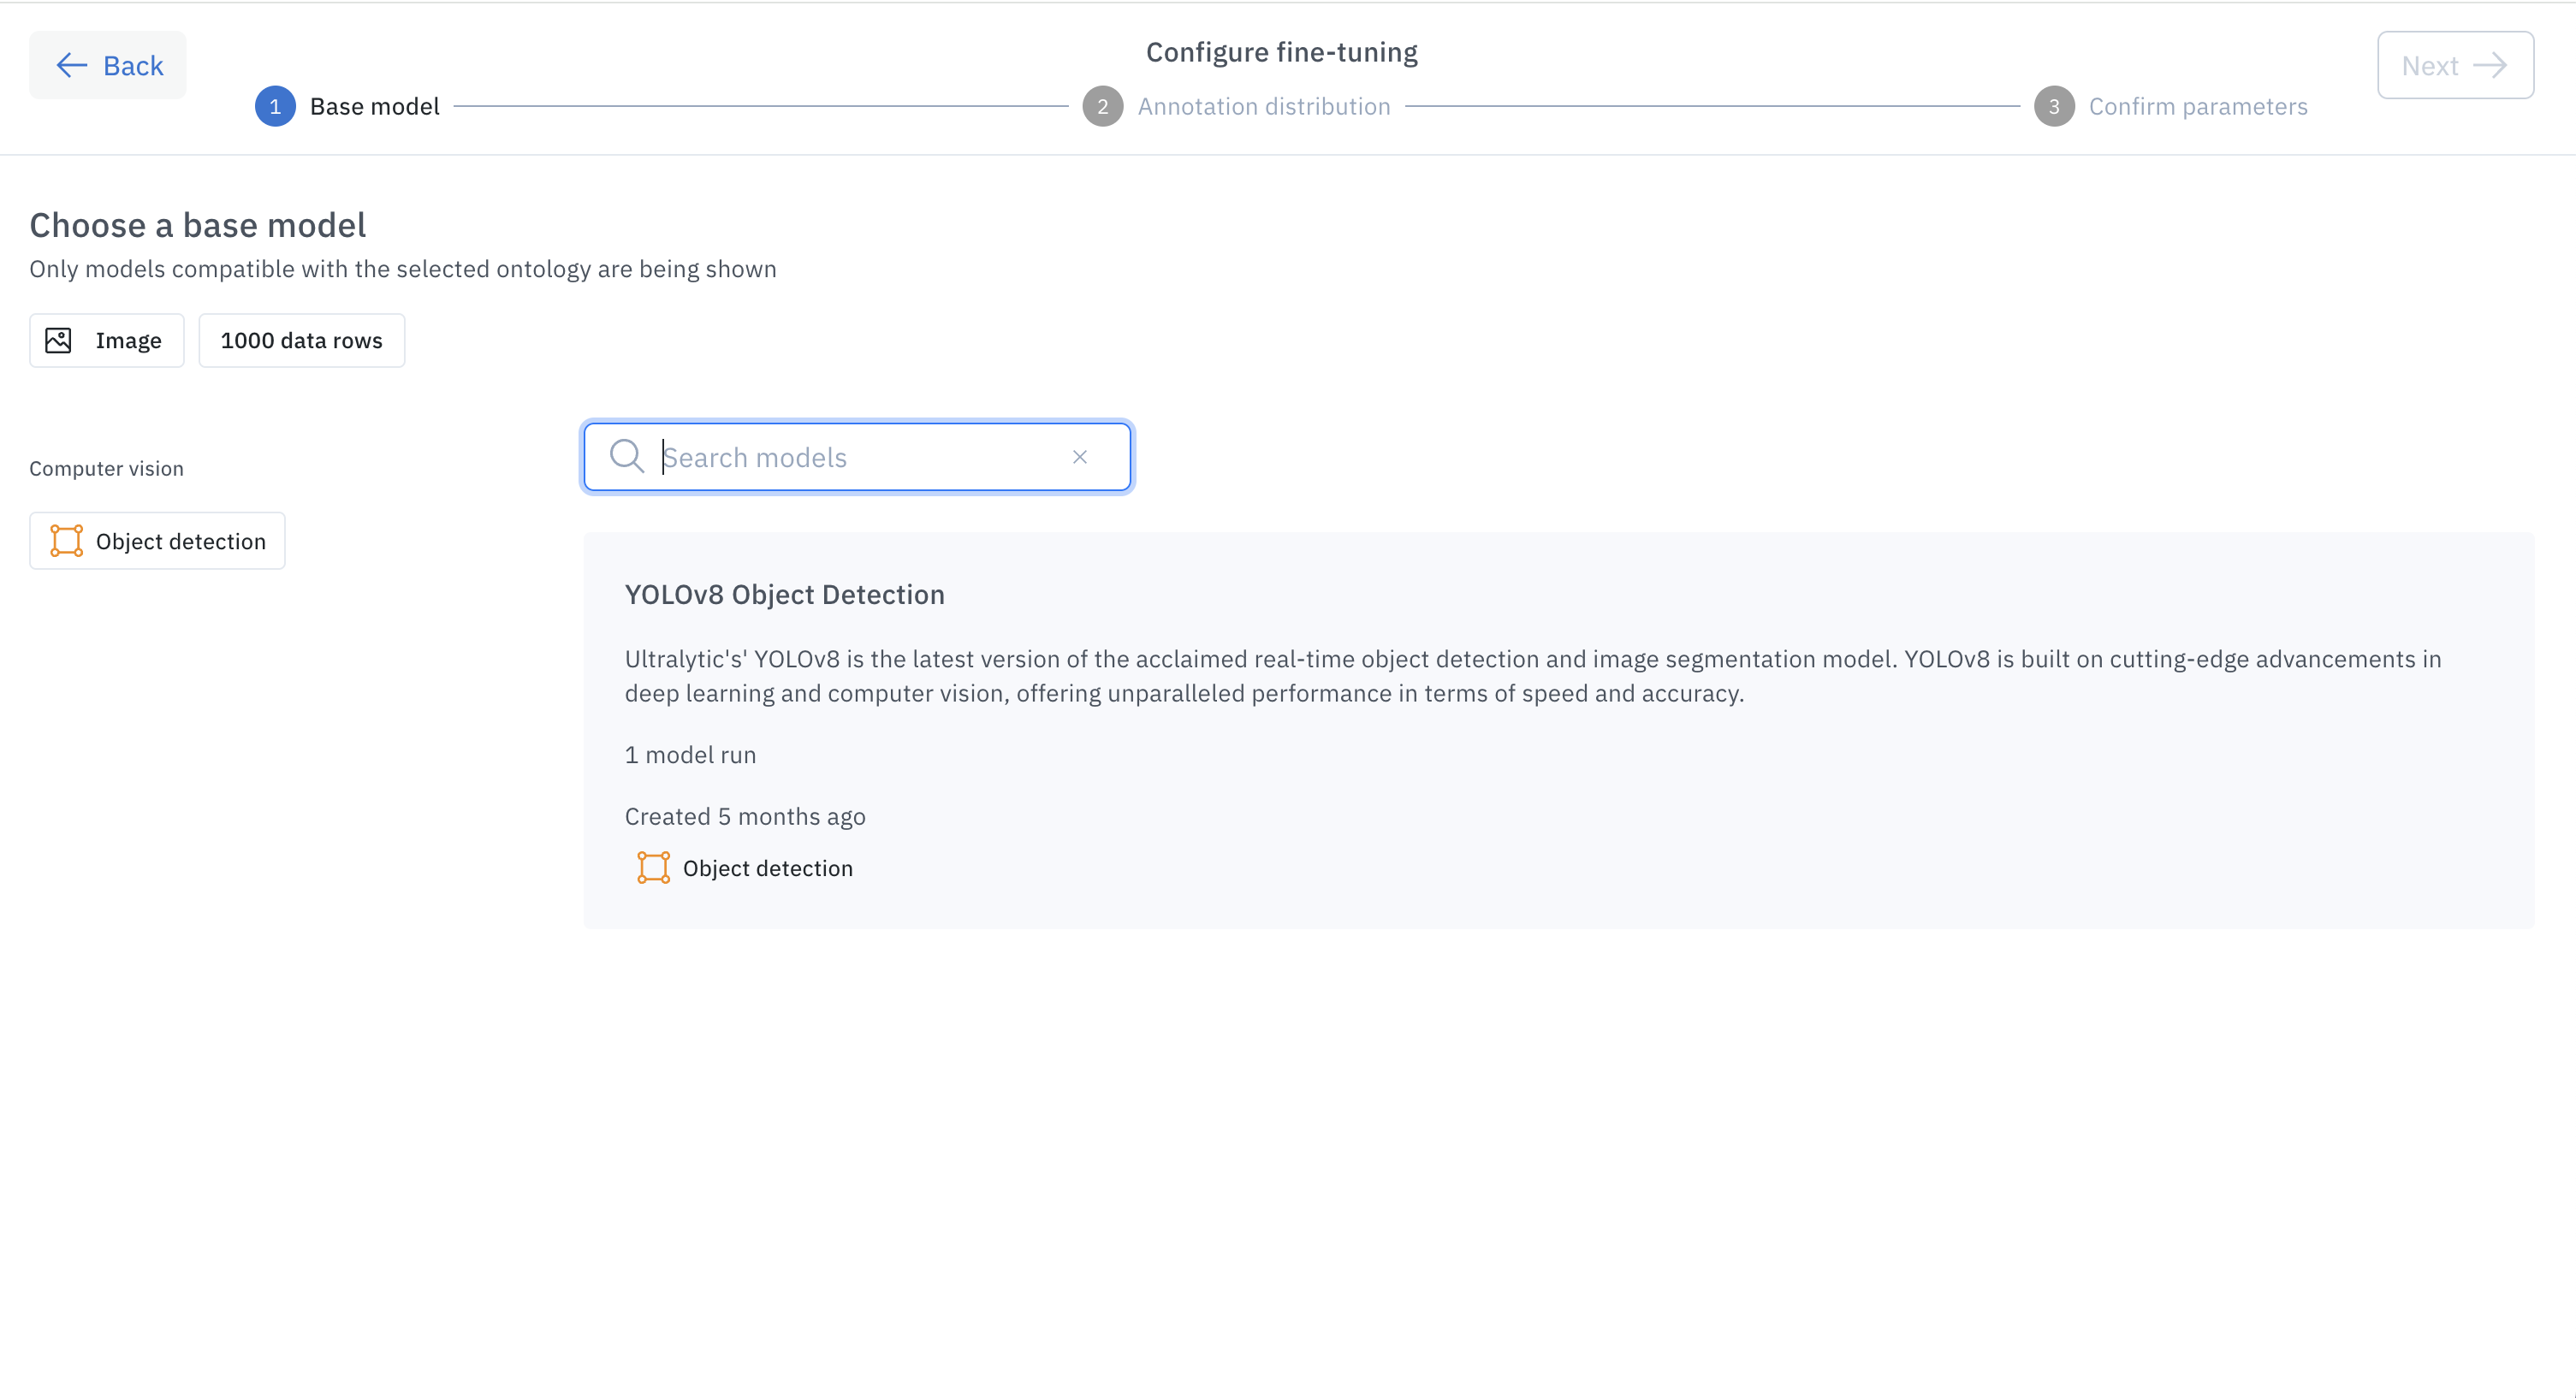
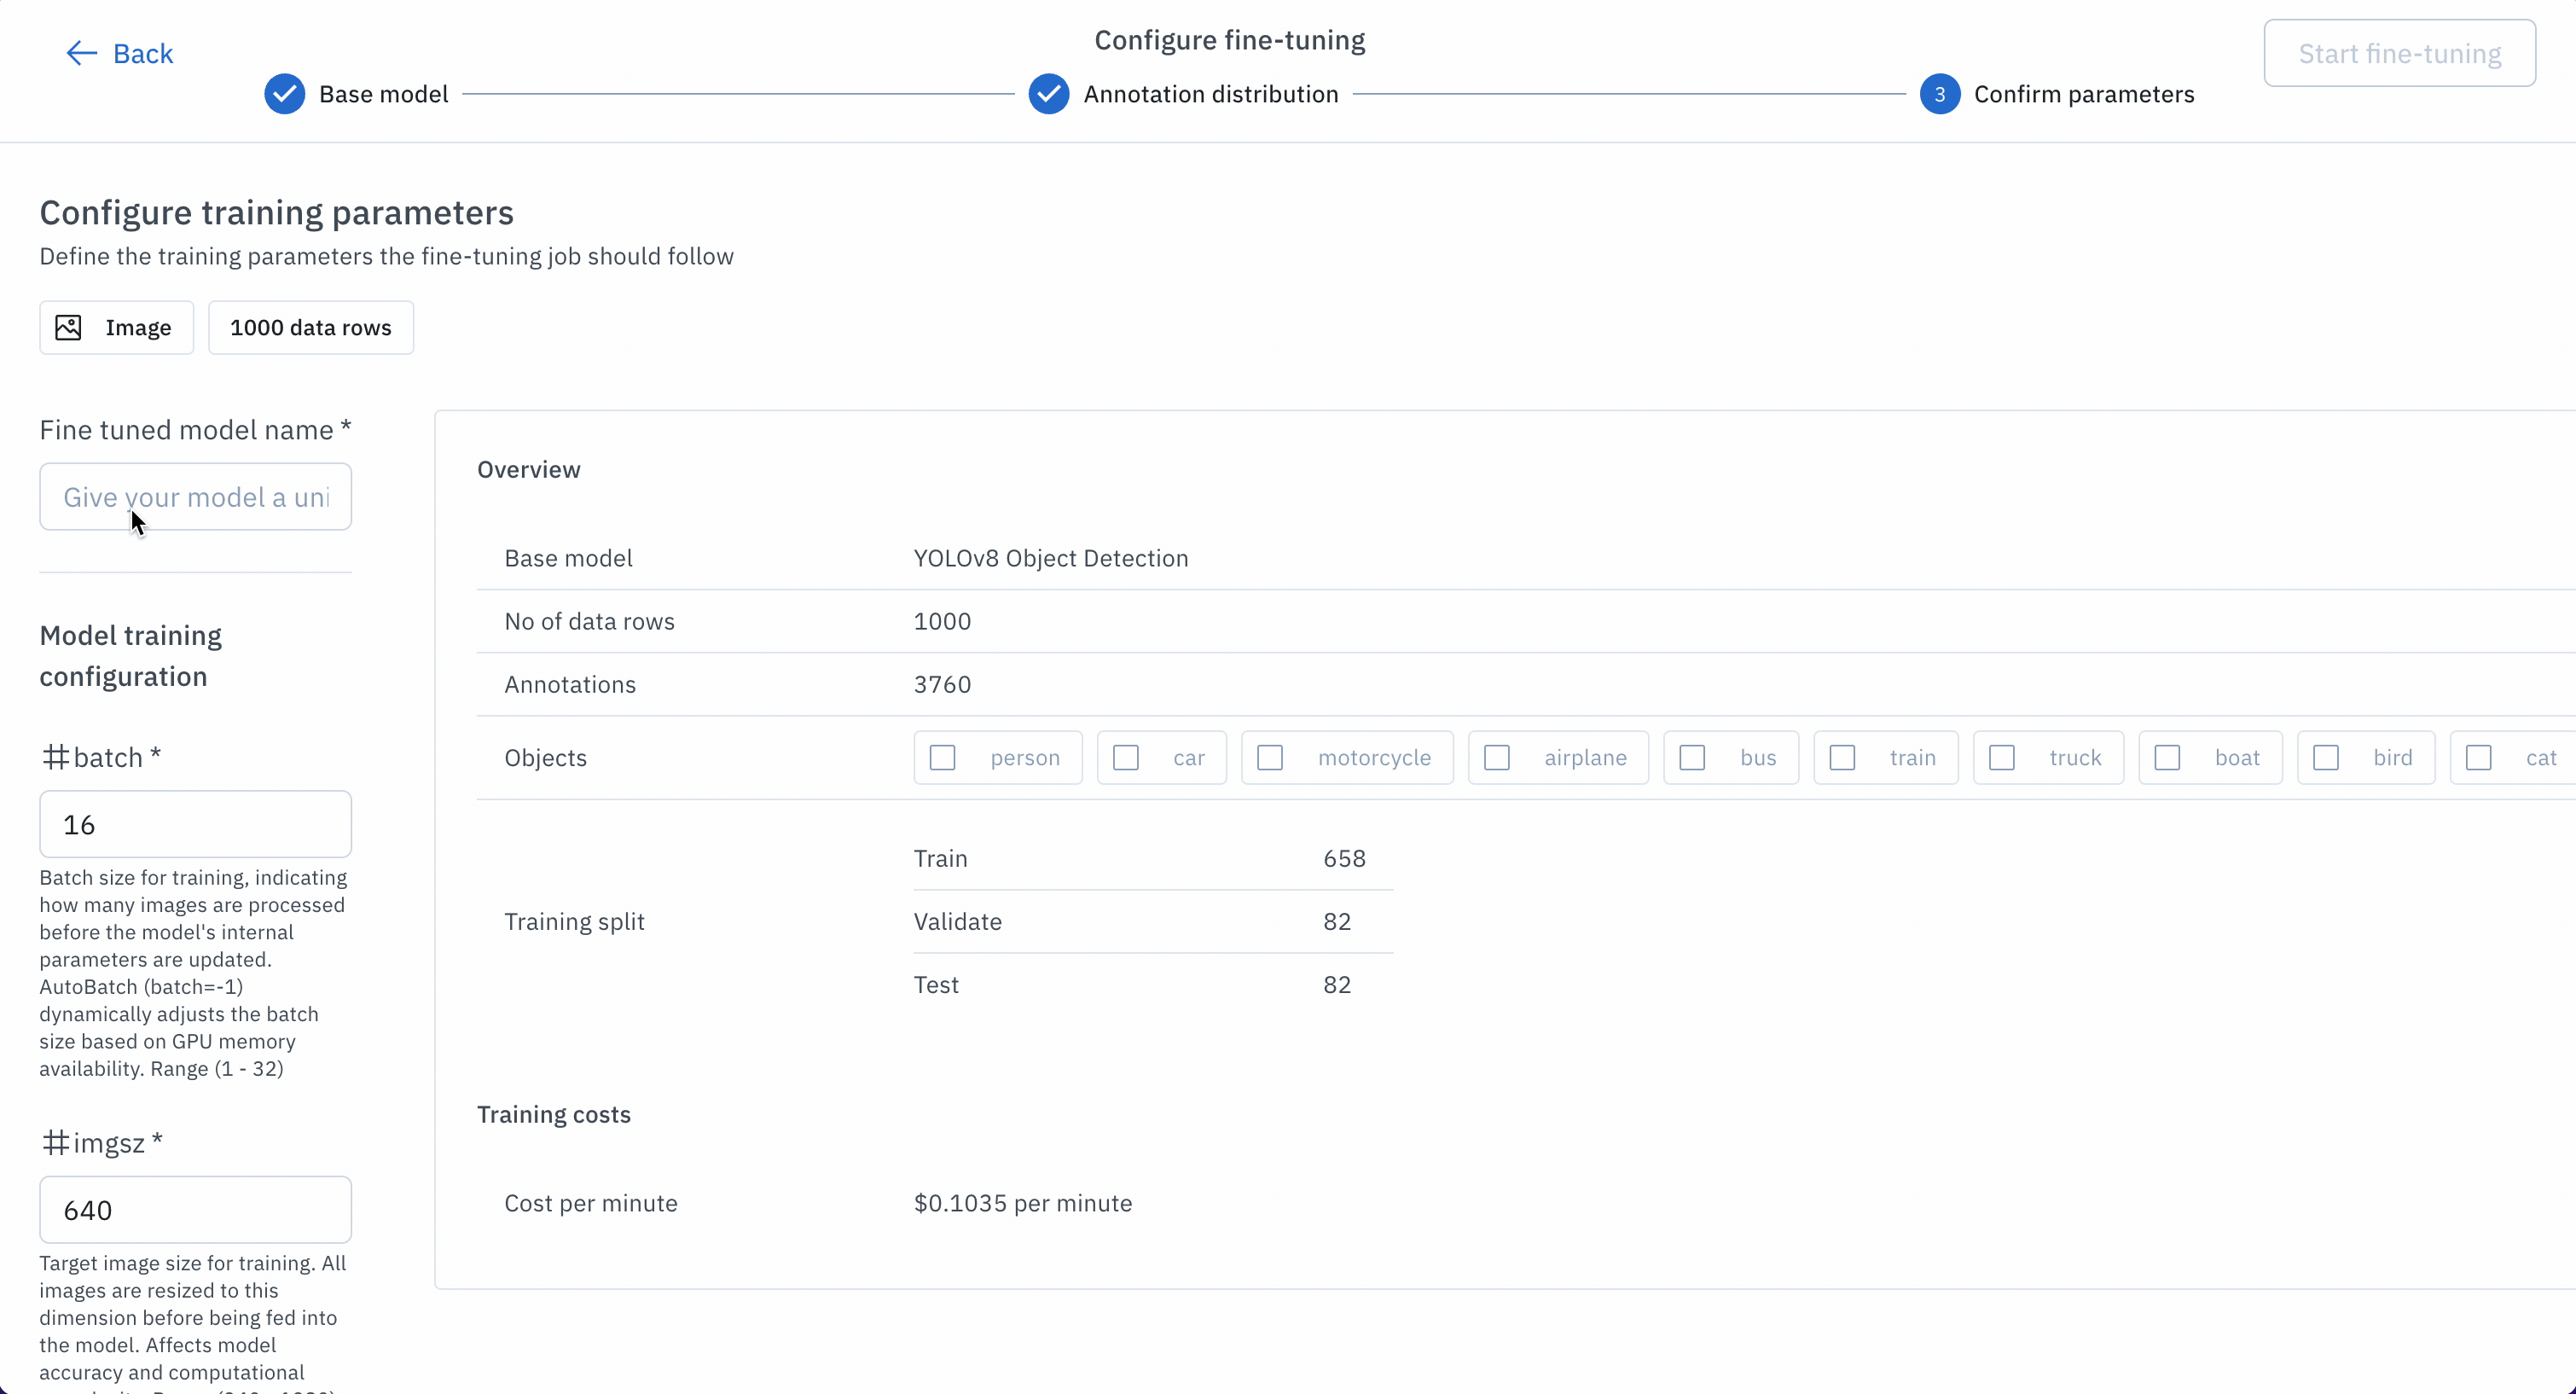
You will configure the experiment for training. You need to provide an experiment name and select an ontology. The ontology specifies the classes that the model will be trained on. The fine-tuned model will update its weights and learn to detect features from the ontology and, therefore, adapt to your unique machine-learning problems.

Once you have provided an ontology, you must check Include ground truth annotations to bring in ground truth annotation from existing projects. For model fine-tuning, ground truth annotations are necessary for the model to train.

You can specify the Train/Validate/Test splits ratio to partition your labeled data into three different sets. It is default to have 80%, 10%, and 10% ratio respectively. It is recommended to have three sets because doing so greatly reduces your chances of overfitting your model. The validation set is used to evaluate results from the training set, and the test can be used as a final evaluation after you have picked the best model from the validation set.

Finally, you can provide a name for this new experiment run. Select Submit to create a new experiment and a model run that contains your labeled data ready for training.

You can now navigate to the newly created experiment run by clicking on the notification model run.

Fine-tune a model

In the Model runs tab, you should see the labeled data you have sent. To start the fine-tuning, select Fine-tune model.
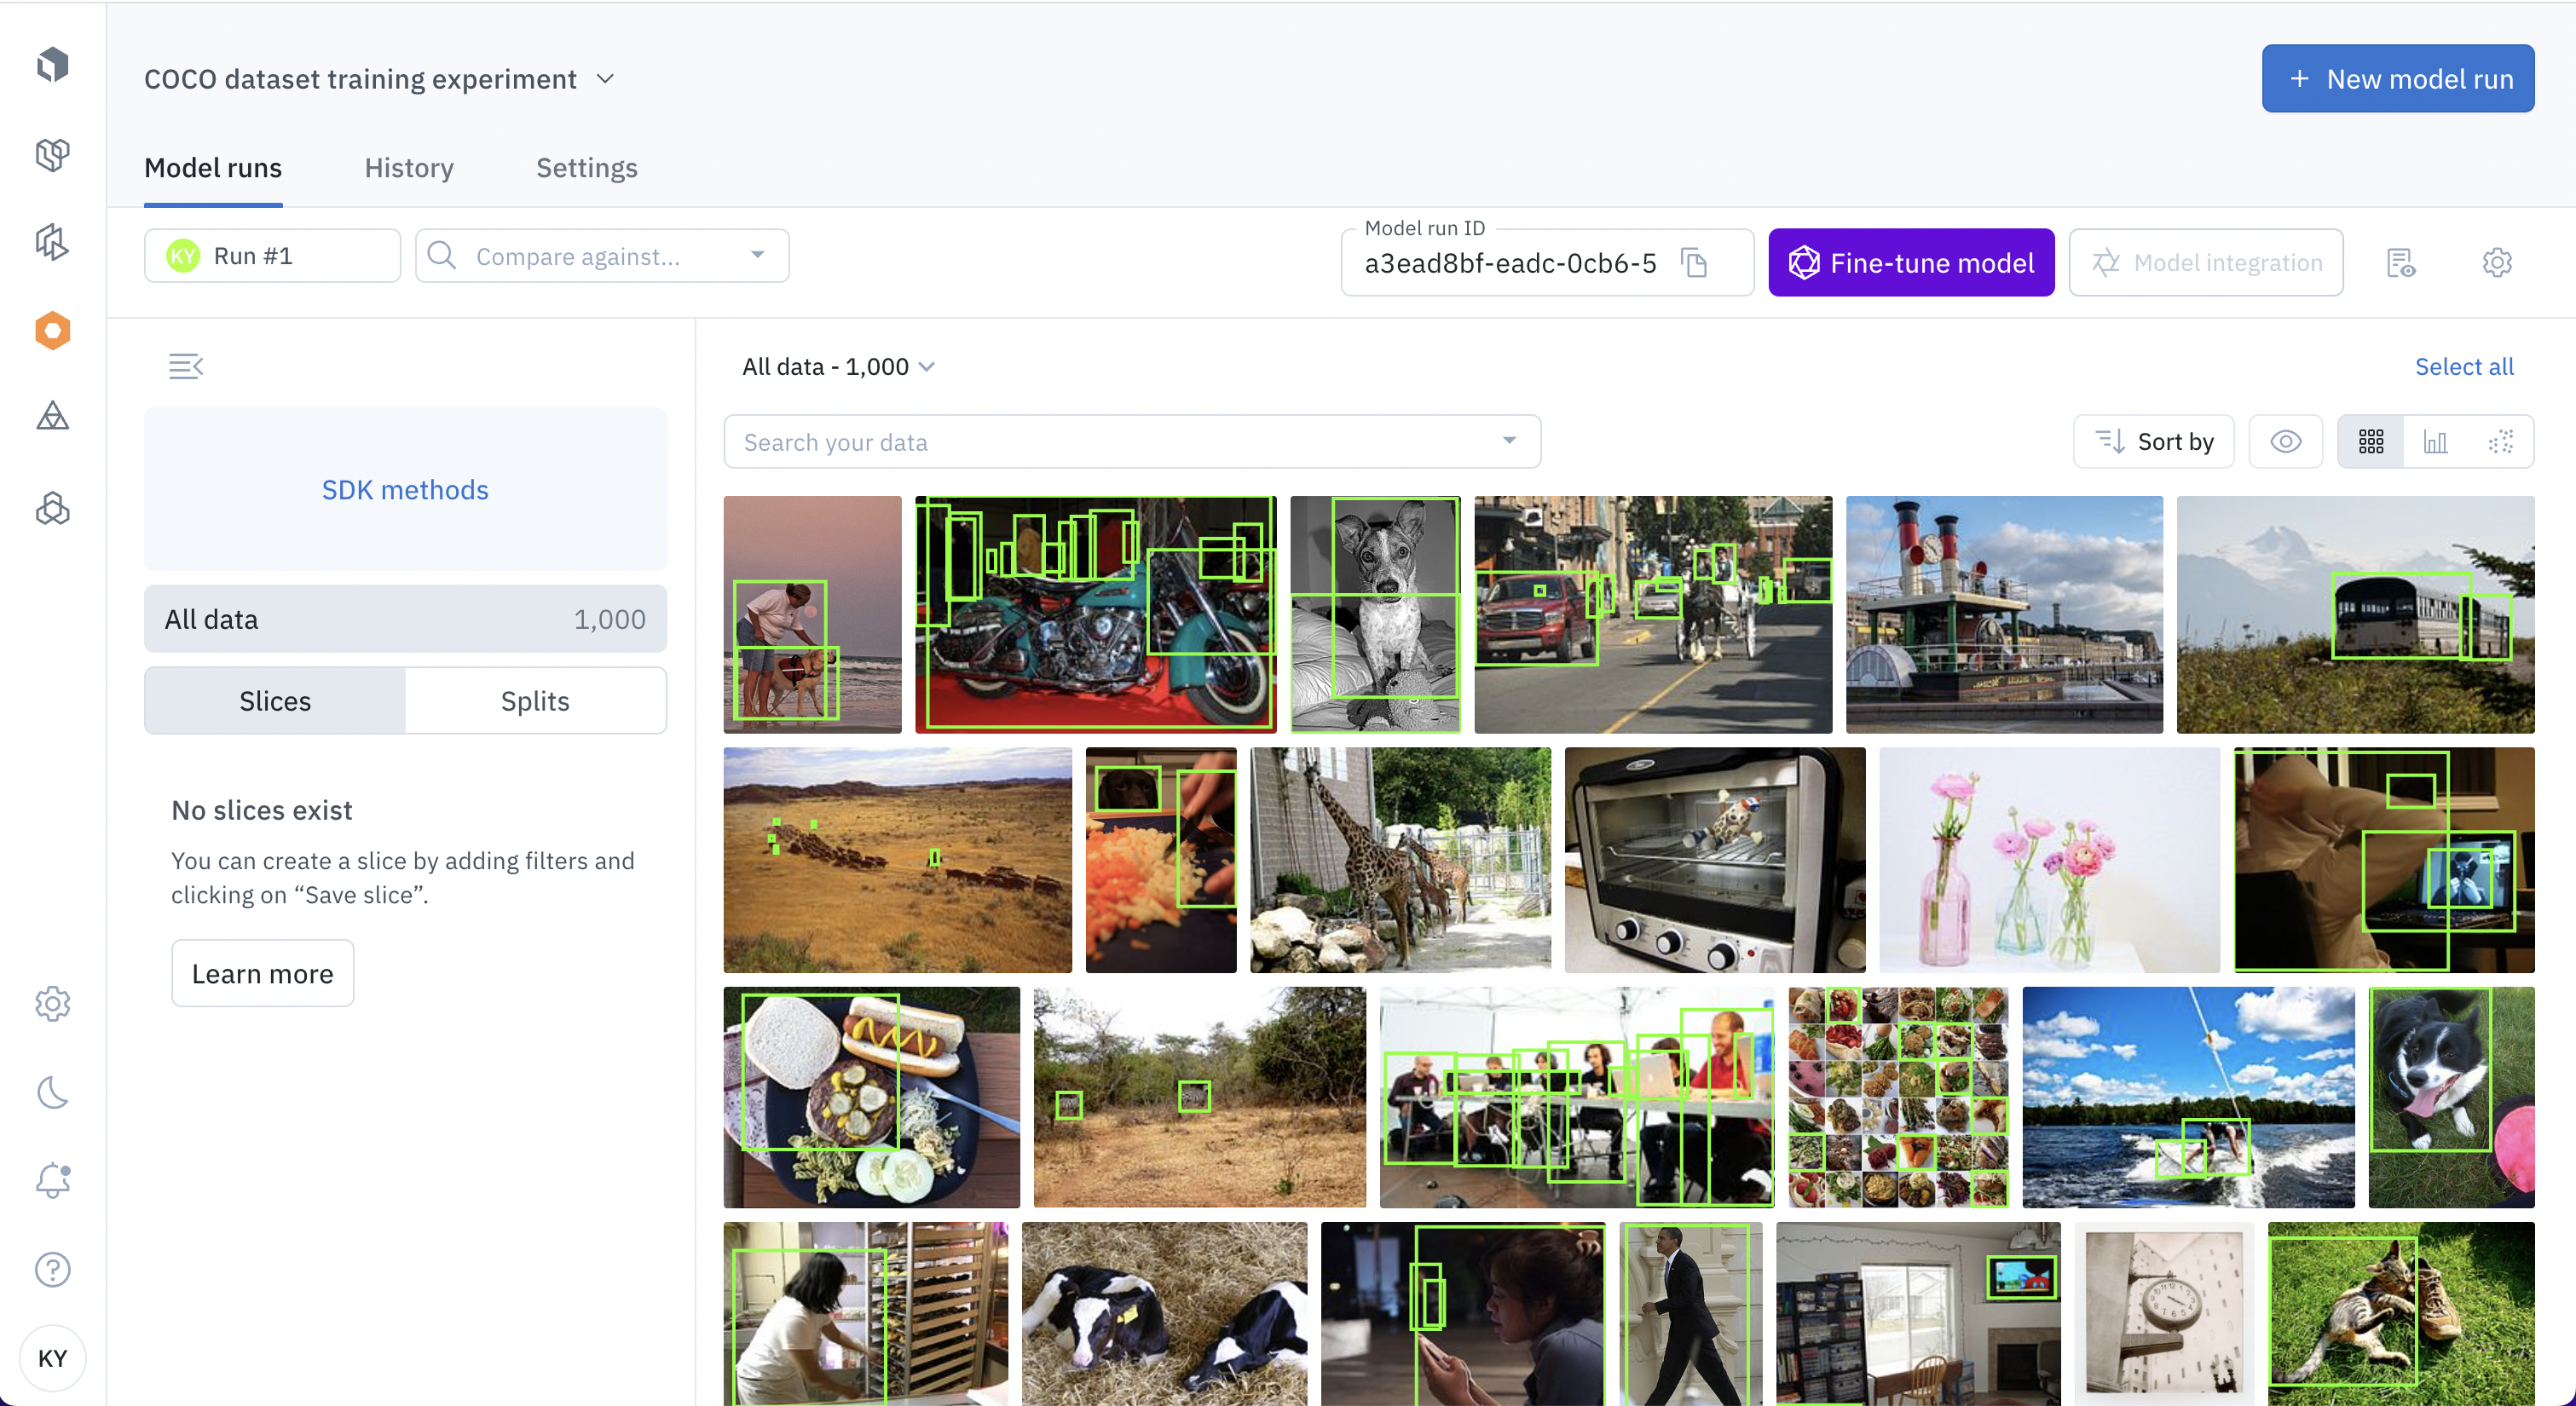
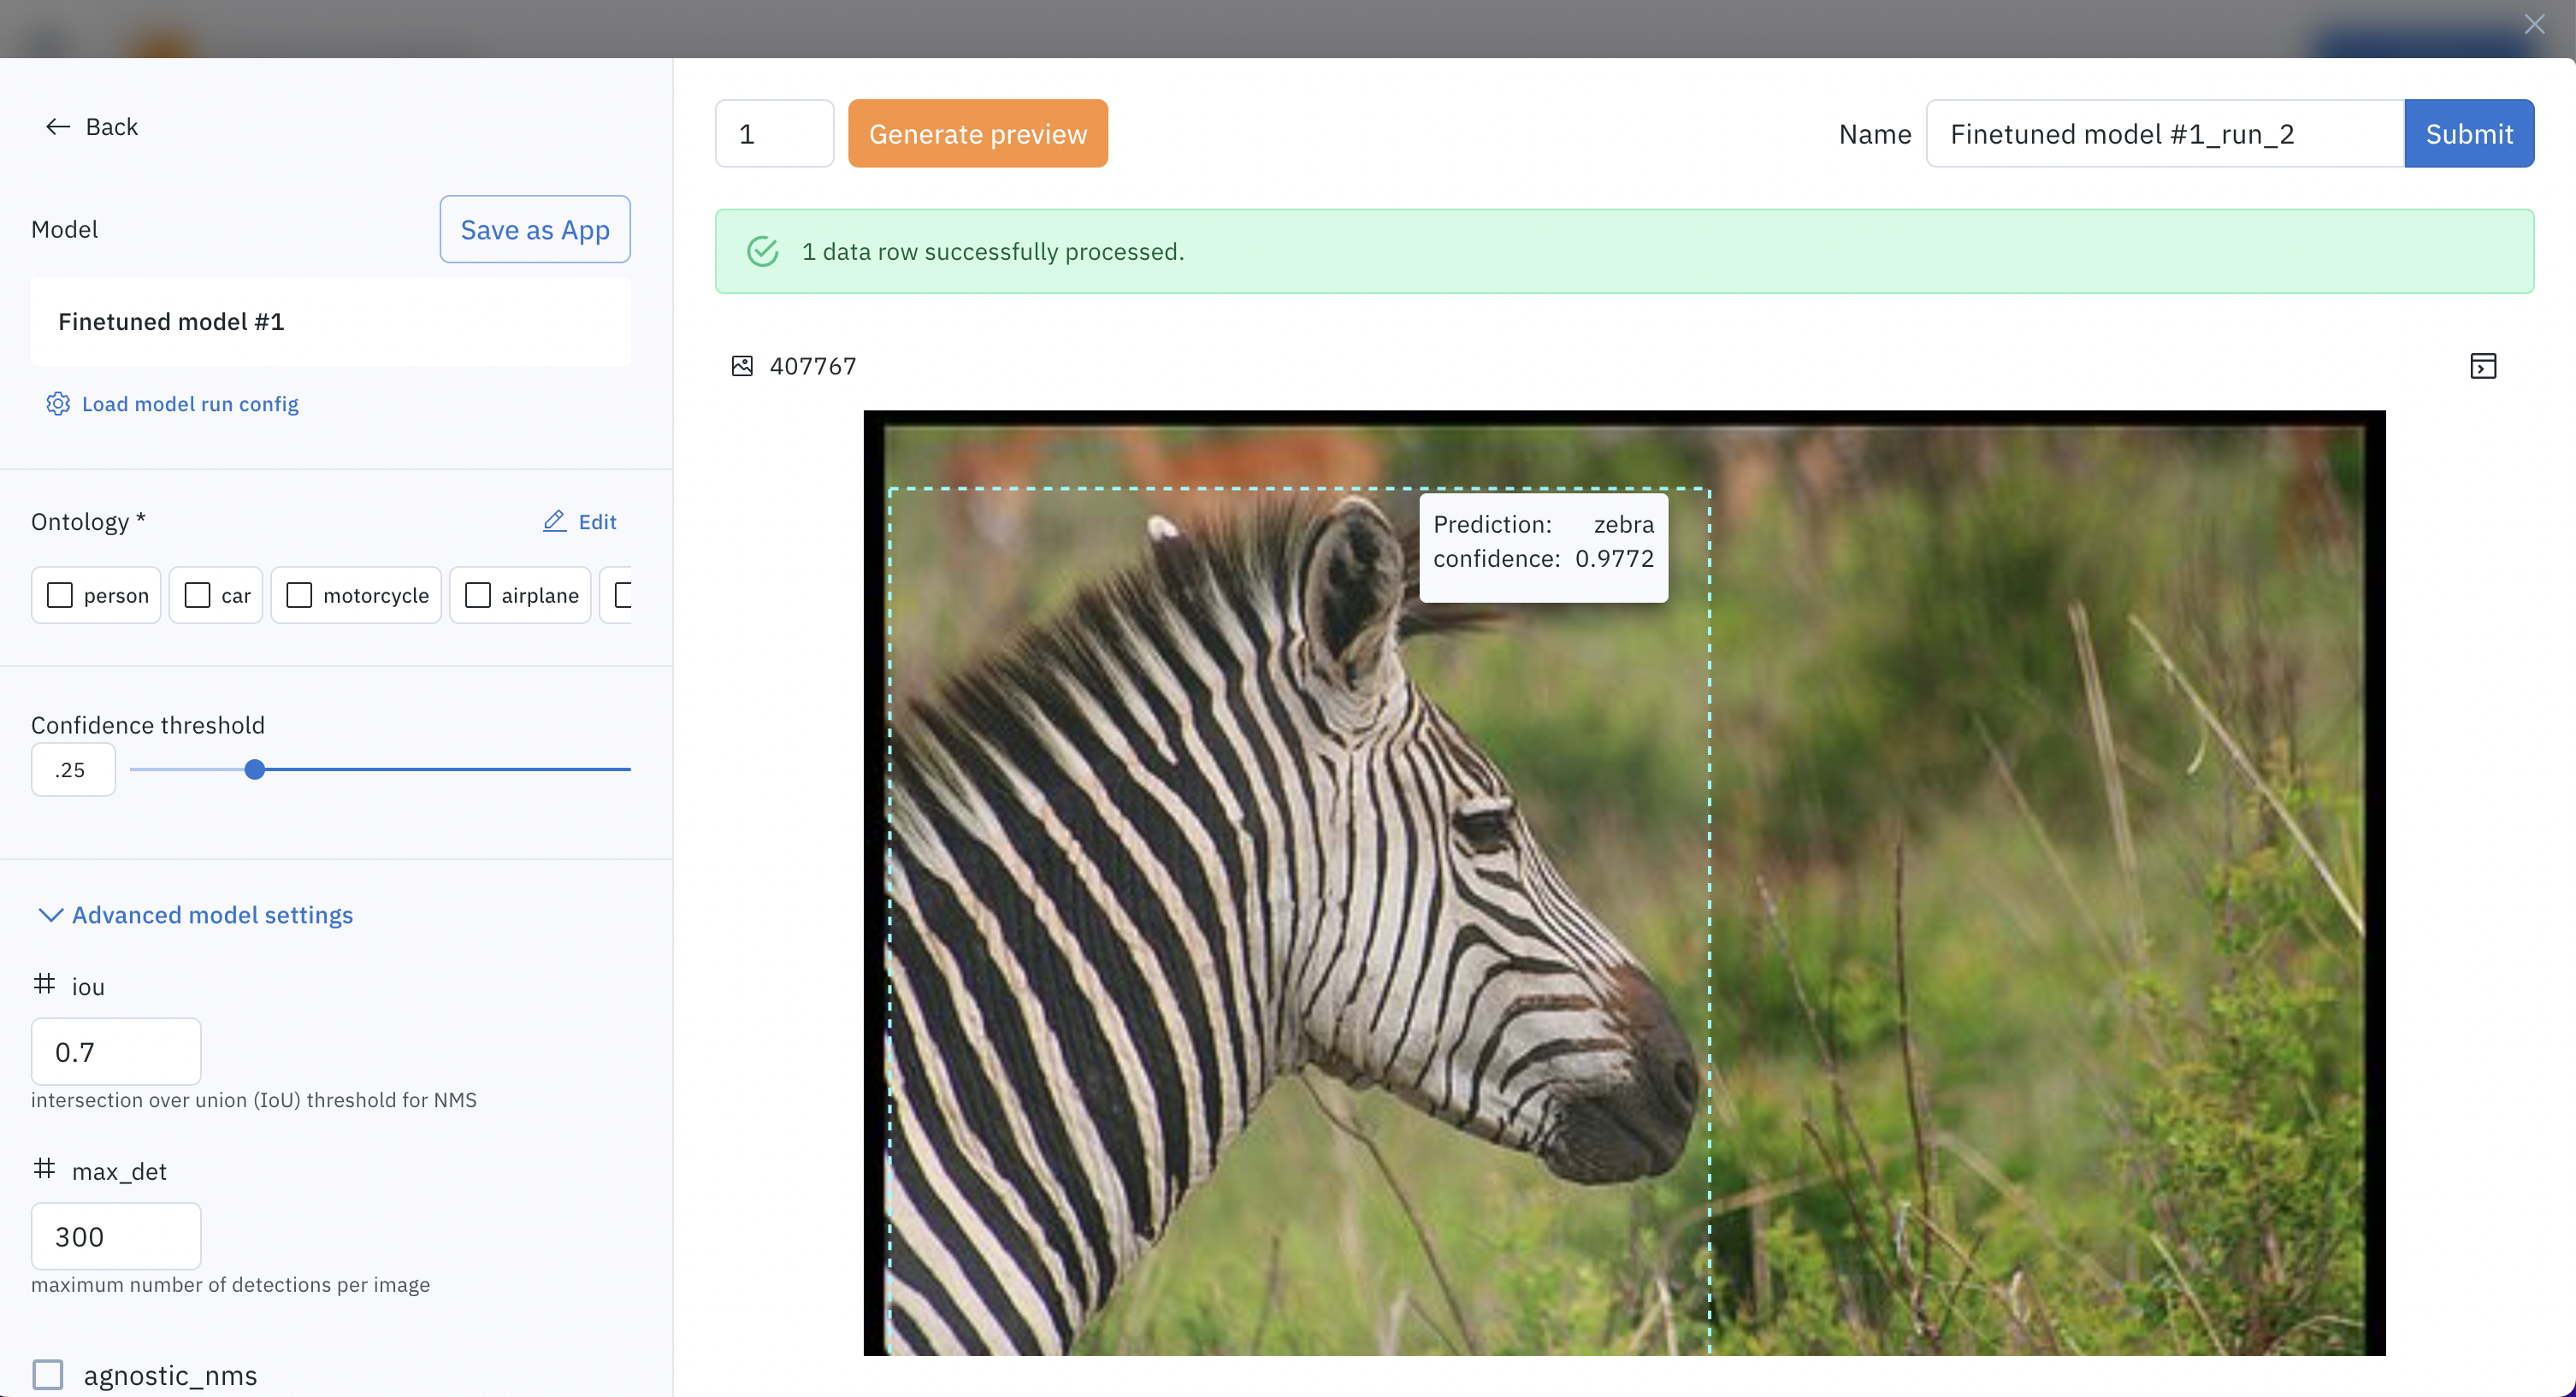
First, you will choose the base model, currently, we provide Yolov8 Object Detection as the available model.

Then, you can check out the annotation distribution among your dataset. It is recommended that each class should have a sufficient number of samples in the dataset. Optionally, you can also uncheck the boxes to ignore certain classes' labels from the training if you don't need the model to learn about them.

Finally, you can configure the training parameters. You wil need to provide a name for the tuned model, it will become available later in Foundry model cards once it finished training. For the training configuration, each model has its own set of parameters for tuning.

In the example below, we change the epoch number to 5 to have a quick experiment, which will make the training job complete very quickly. On the right side is an overview of the training job stats and an estimate of training time and cost.

Once everything is confirmed, you can click on Start fine-tuning to trigger the training job. You can track the training progress in the notification center.

Use the tuned model

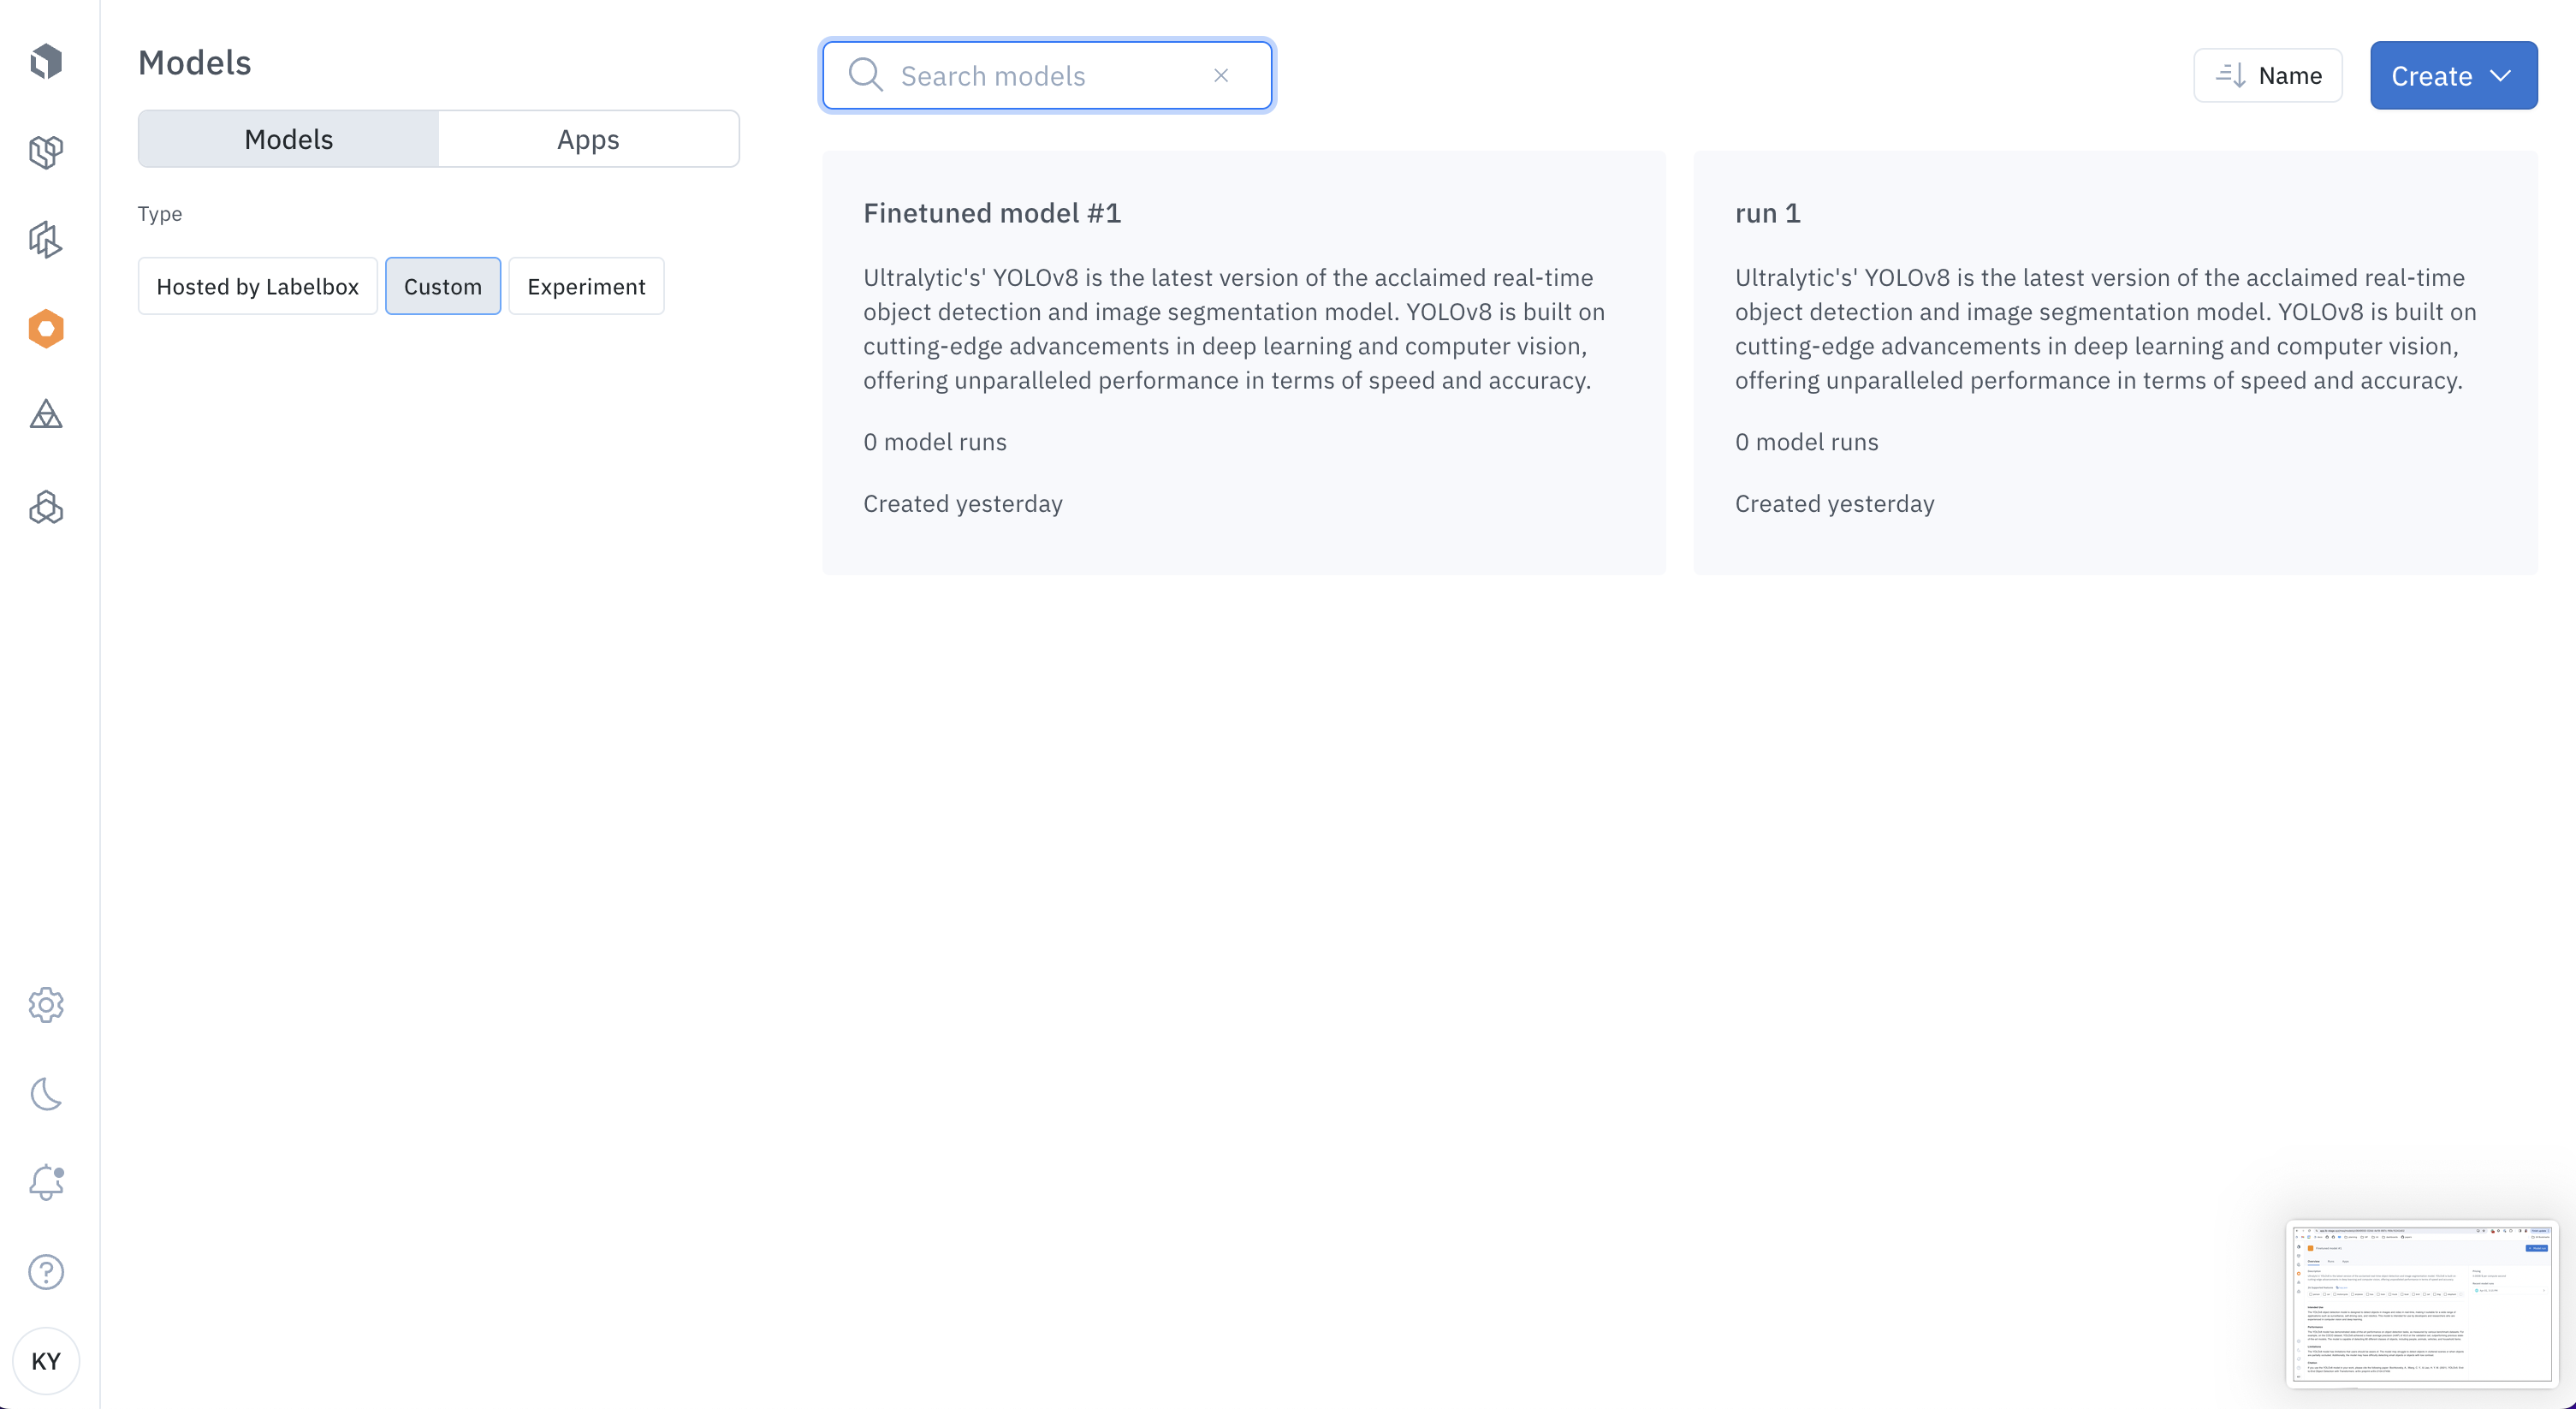
Once the model is fully trained, it will appear as a card in Model. You can also find a link to the trained model from the notification center.

In Models, you can navigate to the Custom tab to see all available custom models you have fine-tuned.


If you click on the model cards for your newly fine-tuned model, you will see the descriptions and a recent model run that contains all the training data, as well as the predictions that the final model produces.

Select + Model run to create a test run on your newly fine-tuned model. We can see that this model now supports the custom ontology that was specified before training rather than the base ontology from the original Yolo V8 model.