Why are ontologies important?
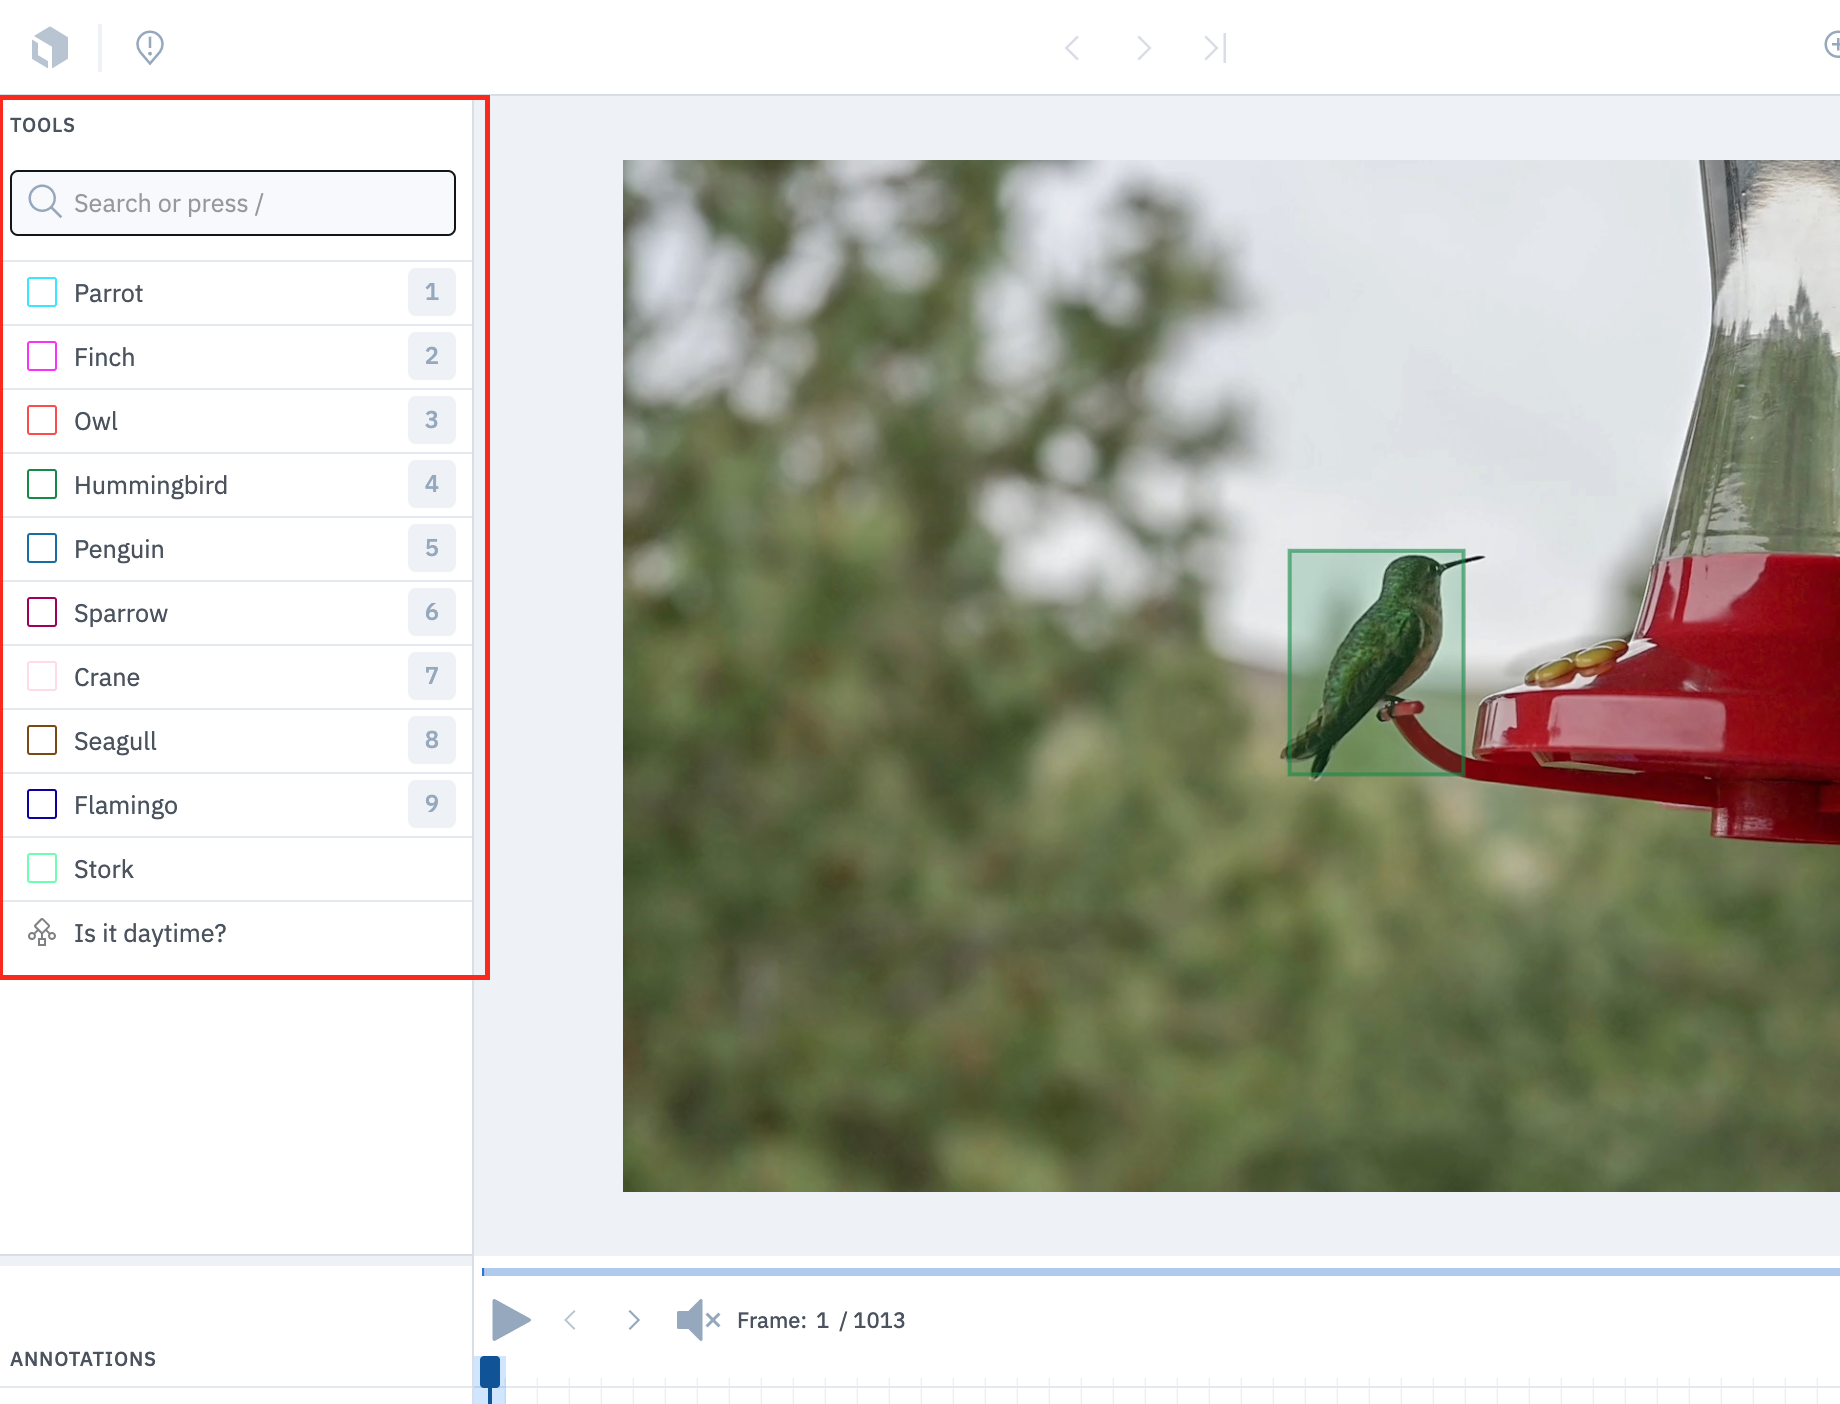
Clean, thoughtful ontologies help create high-quality labeled data with minimal errors and inconsistencies. Ontologies are an essential part of the Labelbox labeling platform. Every time you create a project or a model in Labelbox, you will need to select an ontology. A good ontology defines the following for your labeling team:- What should the labeling team be labeling? What are the objects of interest or classification tasks that your labeling team should use to label the unstructured data? Think of the ontology as a blueprint of the structure you want to apply to the data in order to train your model.
- How should objects or classifications be labeled? Your ontology should specify how you expect things to be labeled for your model. As an example, should an object be labeled with a bounding box, polygon, or segmentation mask? For classification tasks, what are the options for how something should be classified?
- What additional information is helpful for your model or review team to know? Sometimes there is secondary or tertiary information that is helpful to know about the data during labeling (e.g., the quality of the image).
Global ontologies
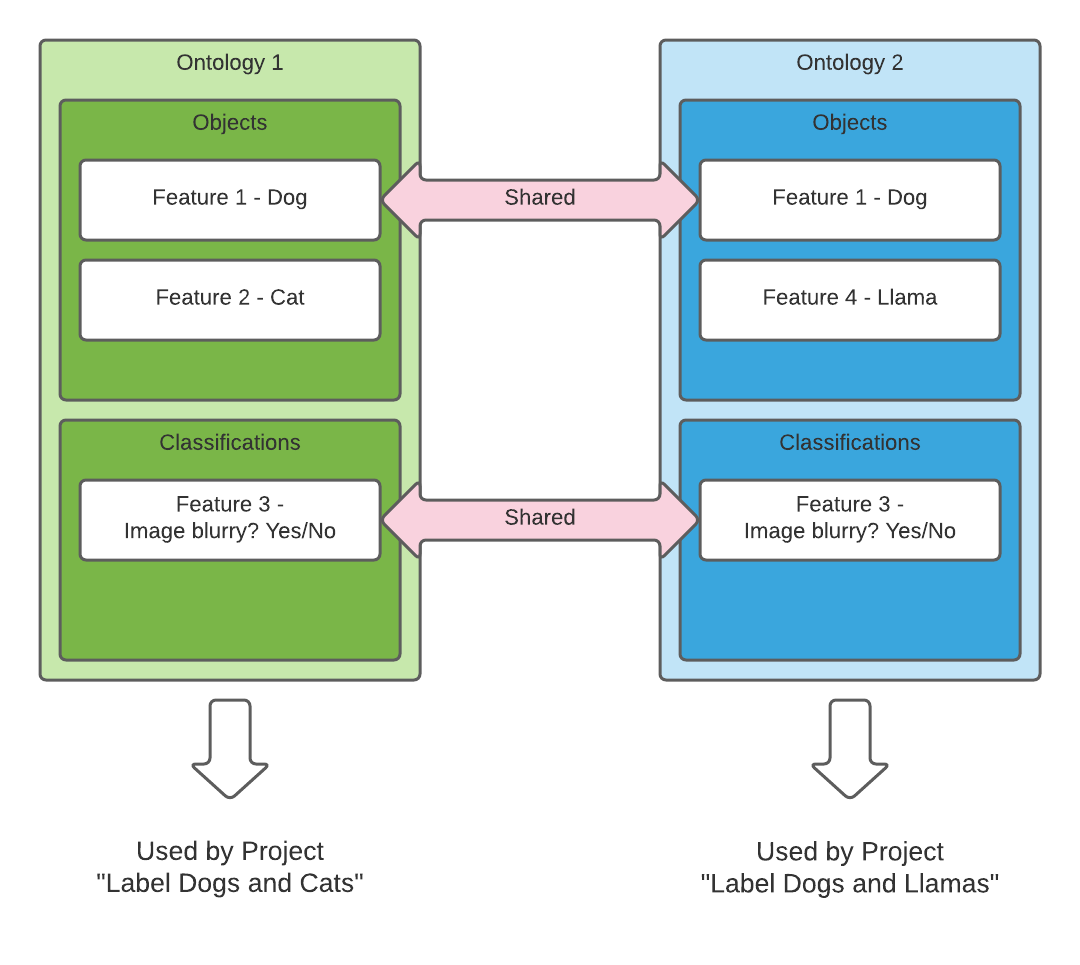
Ontologies can be accessed at the organization level and re-used across multiple projects. You can view and modify your ontologies by navigating to Schema > Ontologies.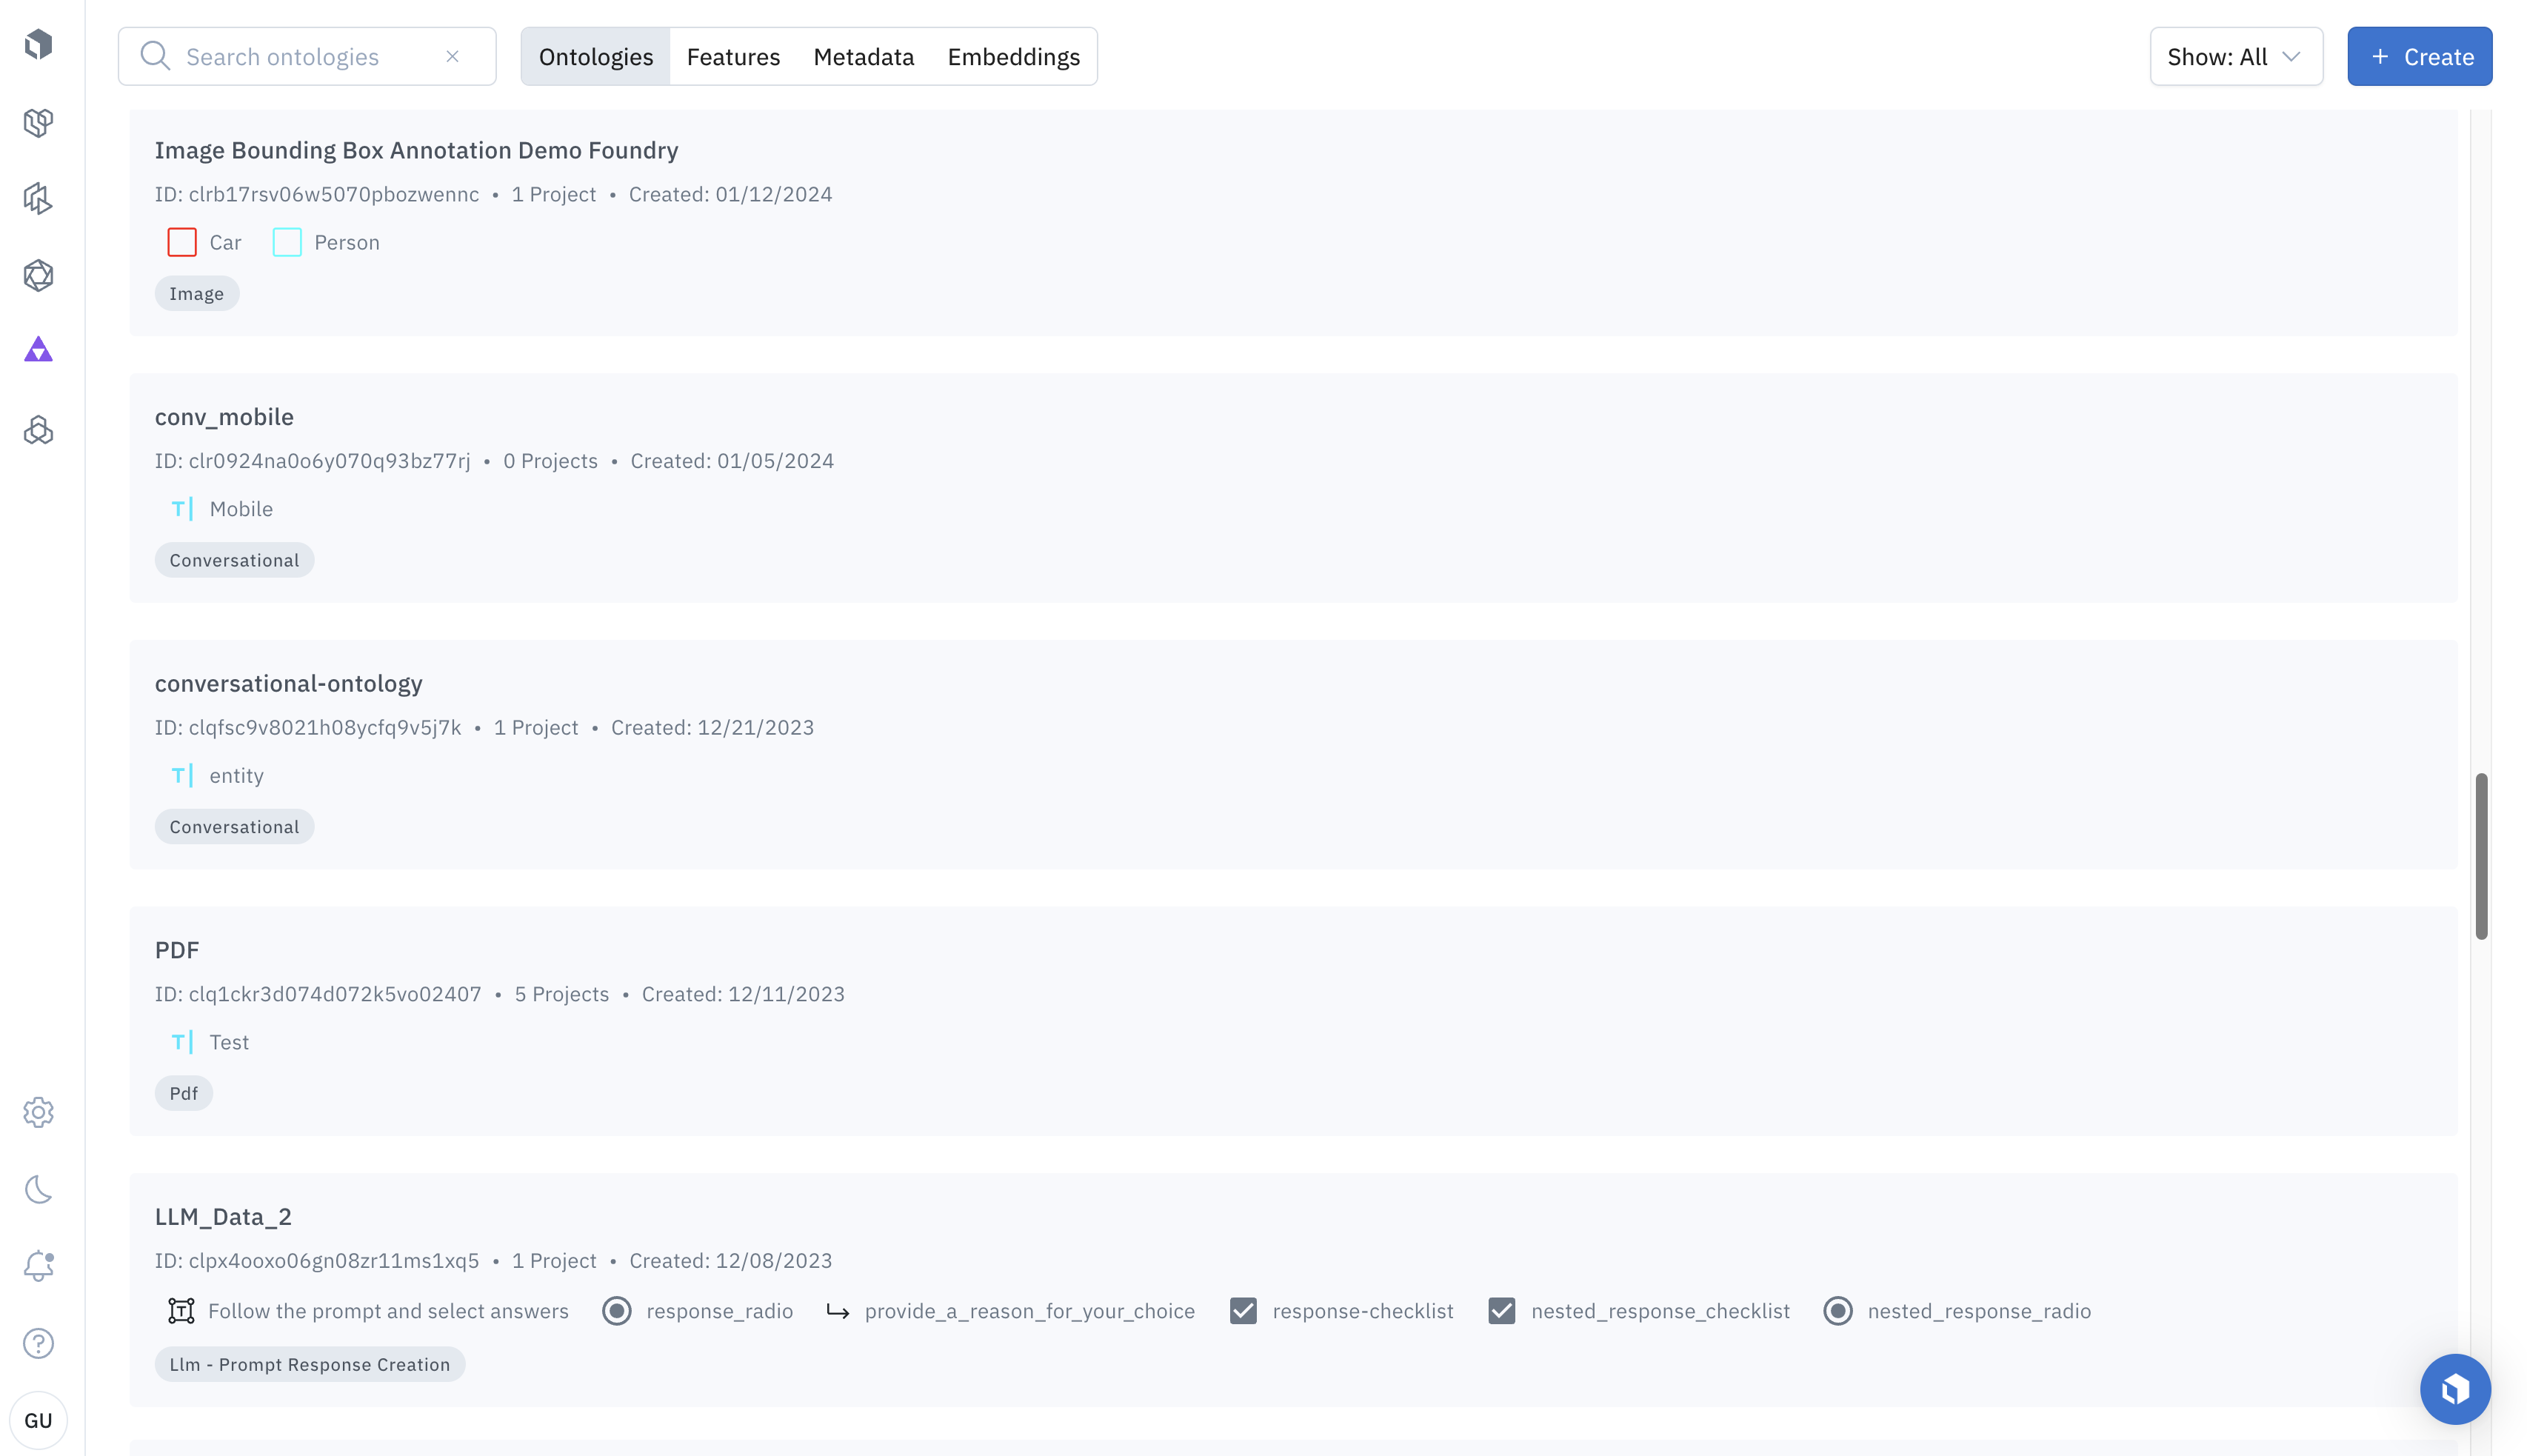
Create a new ontology
Step 1: Create
To create a new ontology, go to Schema > Ontology and click the Create button.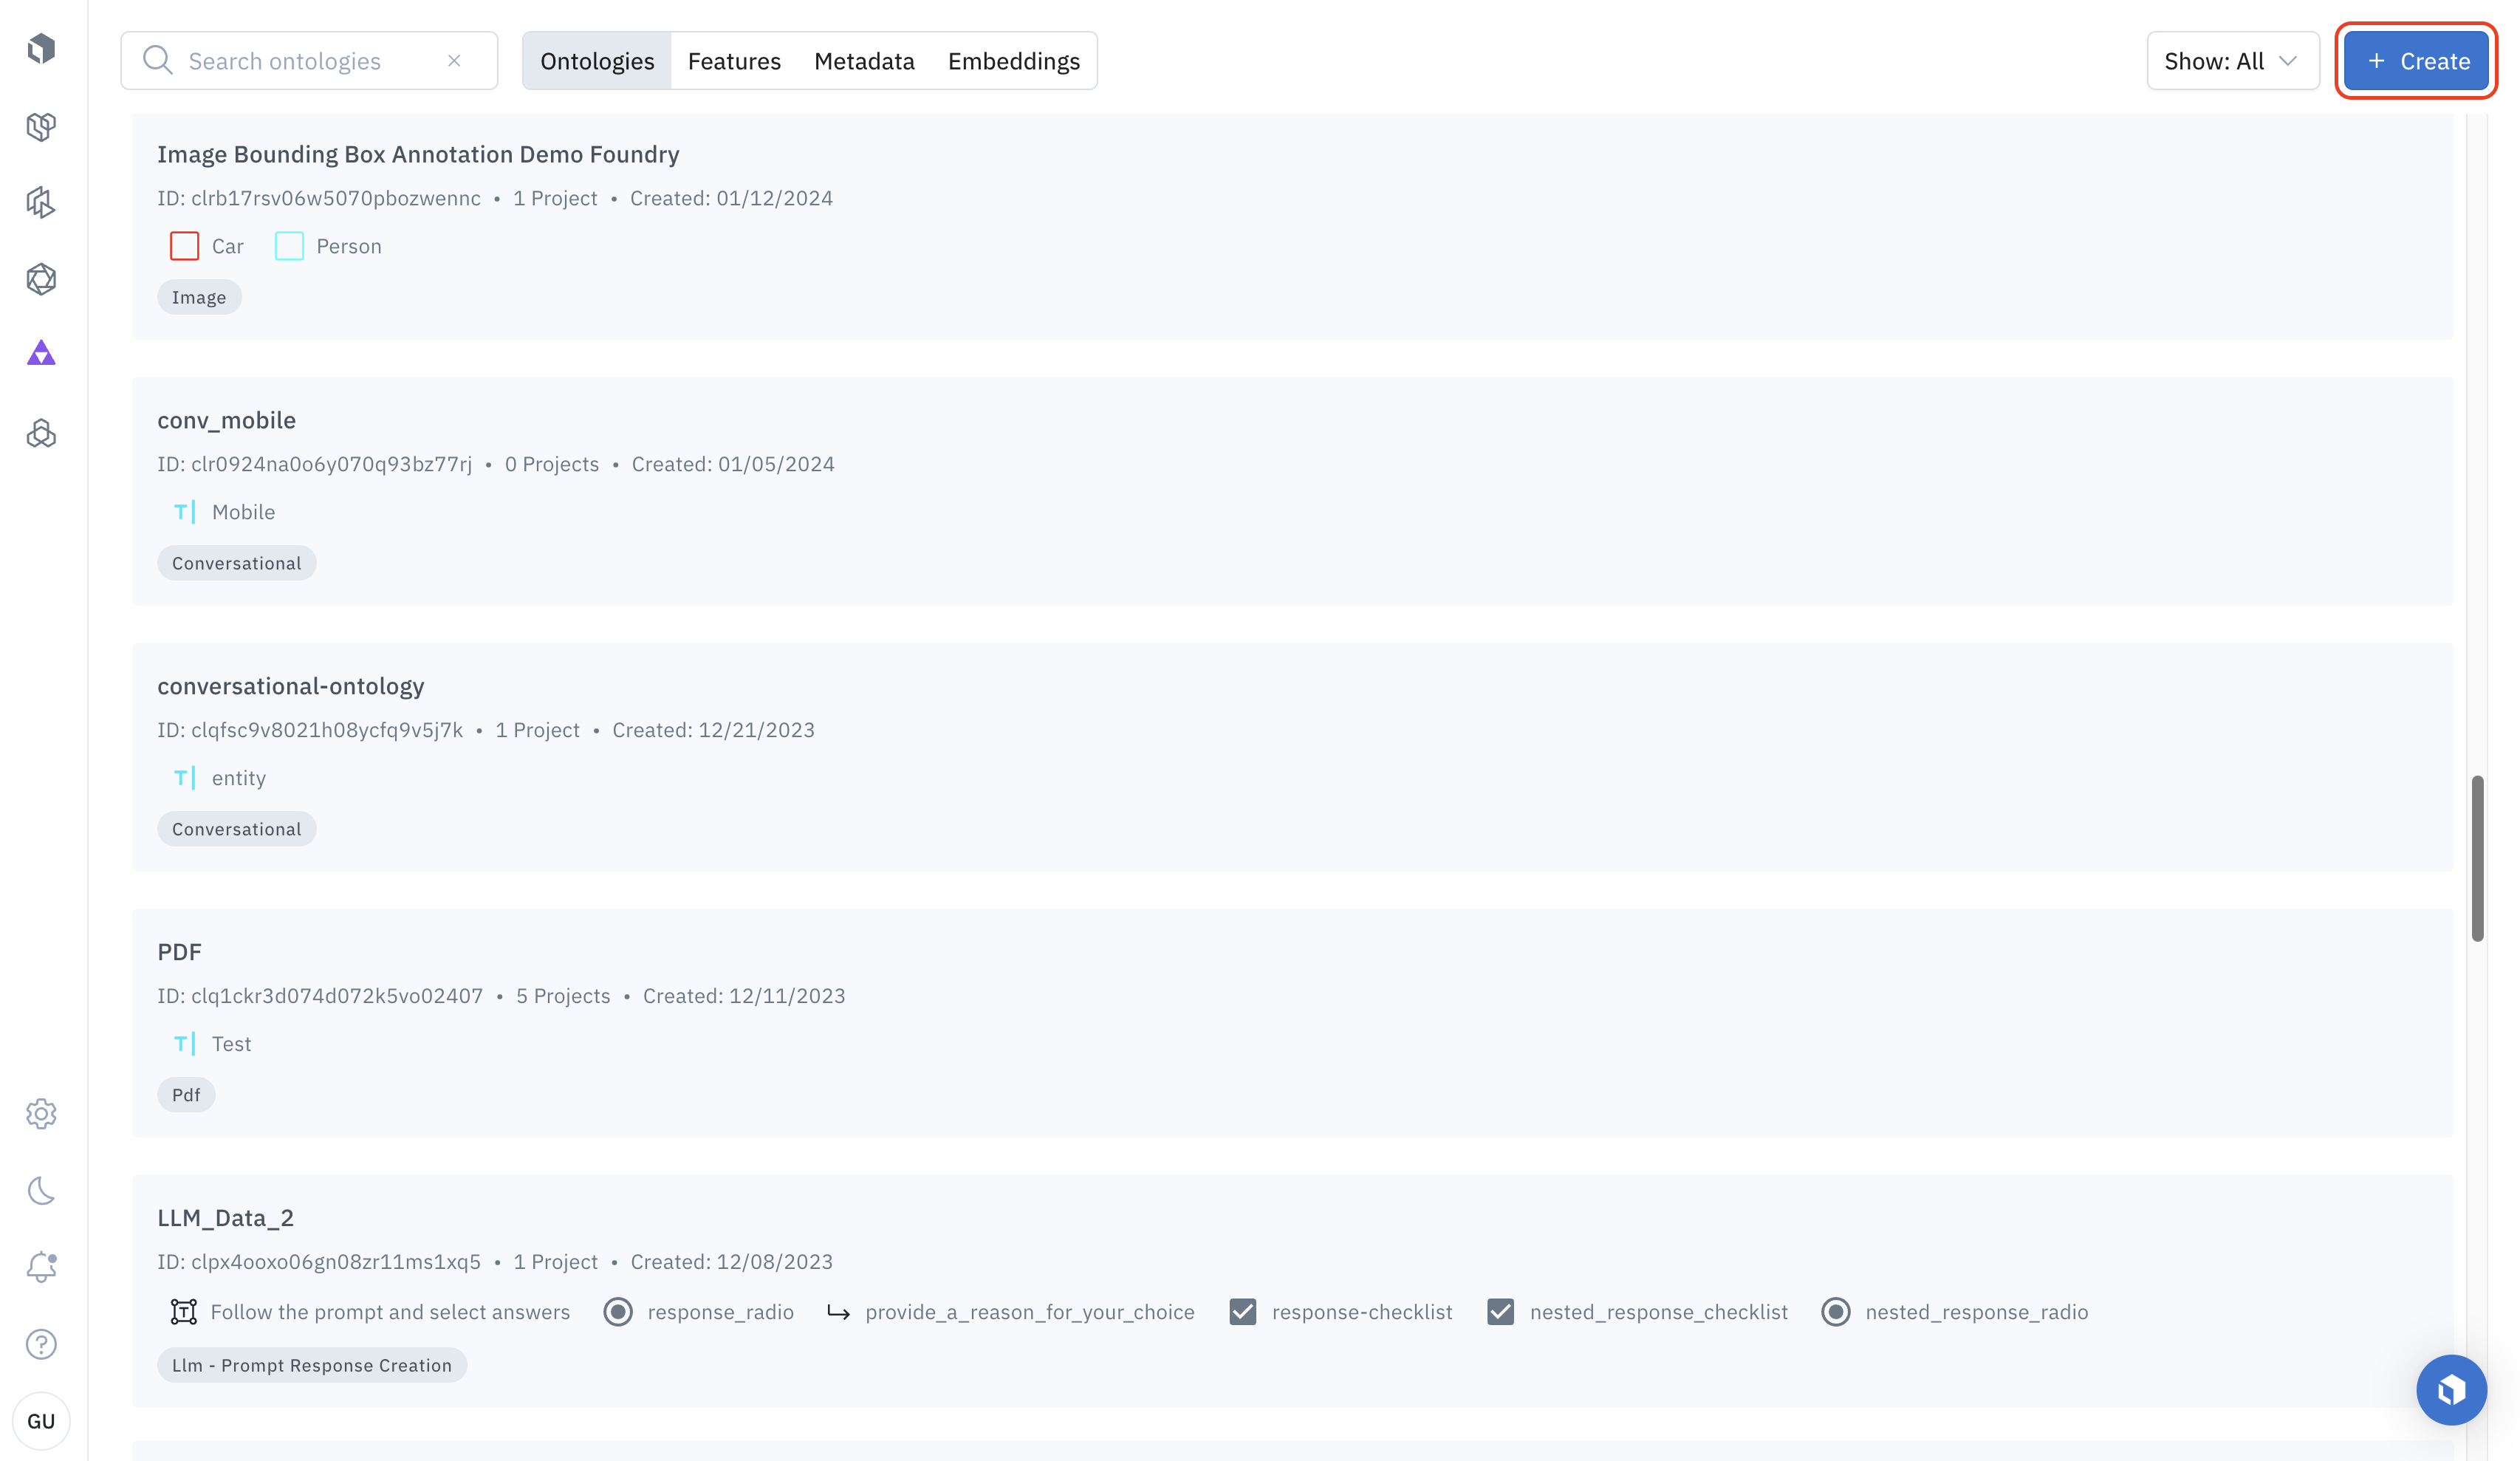
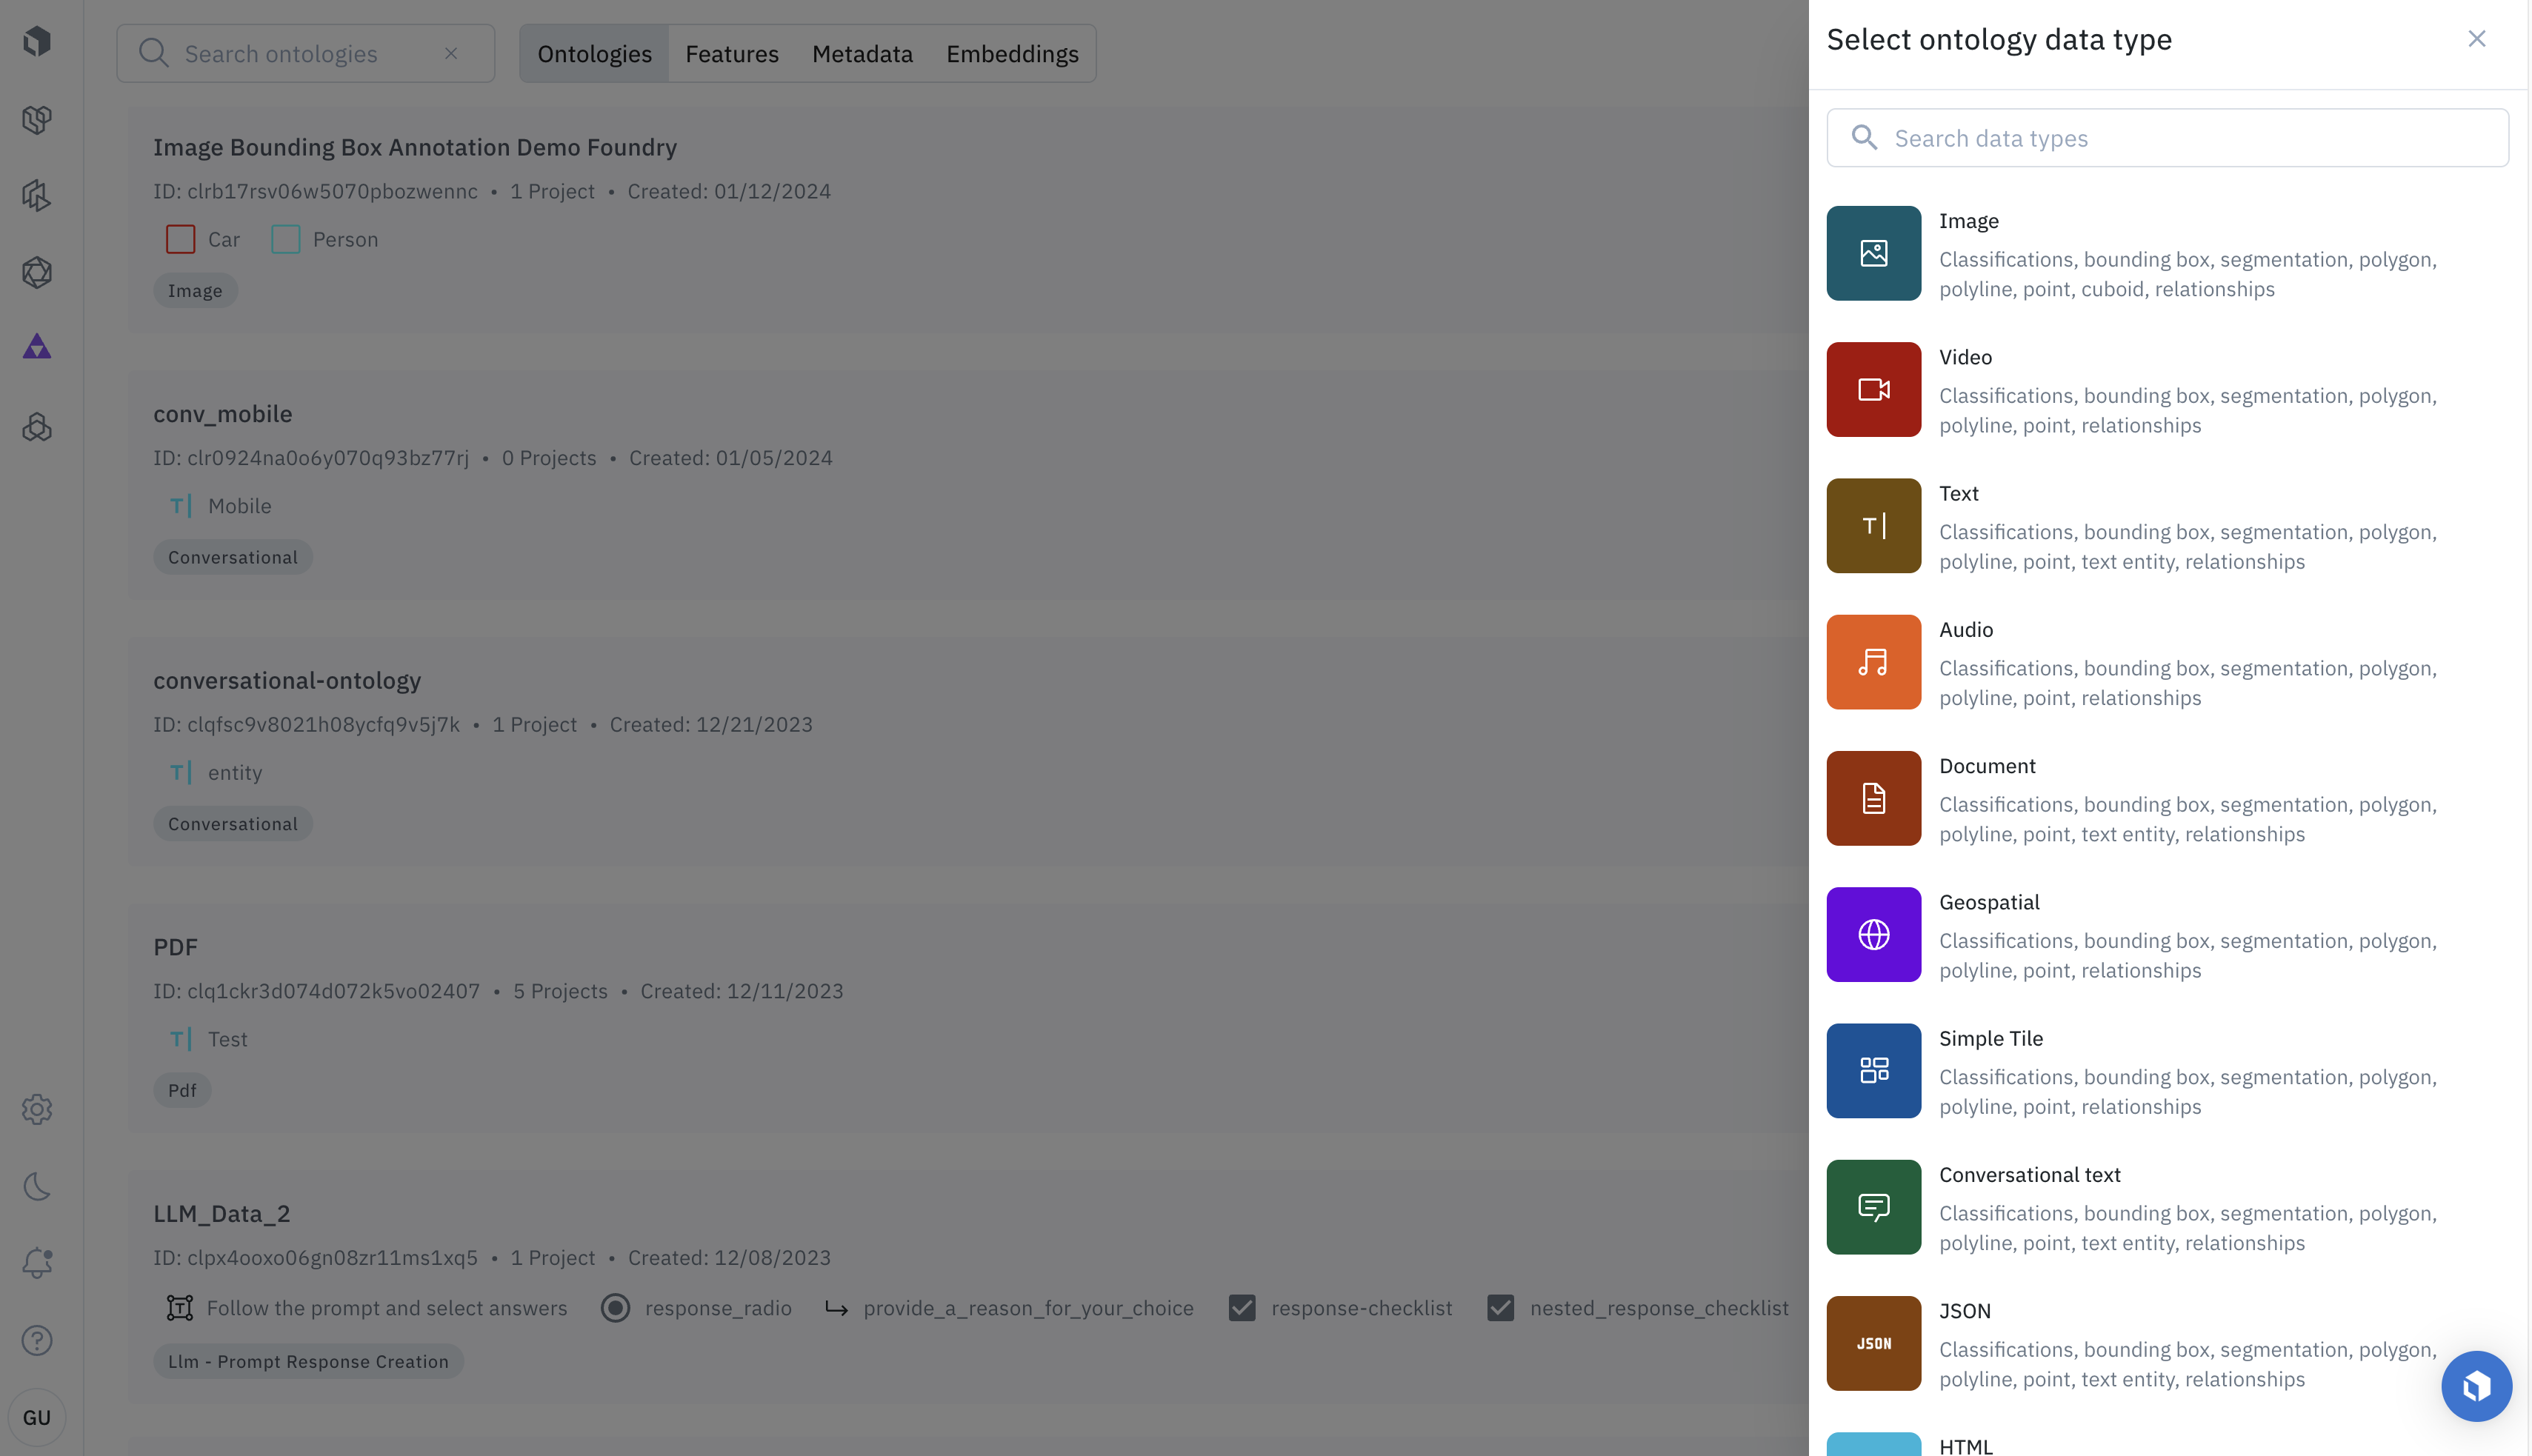
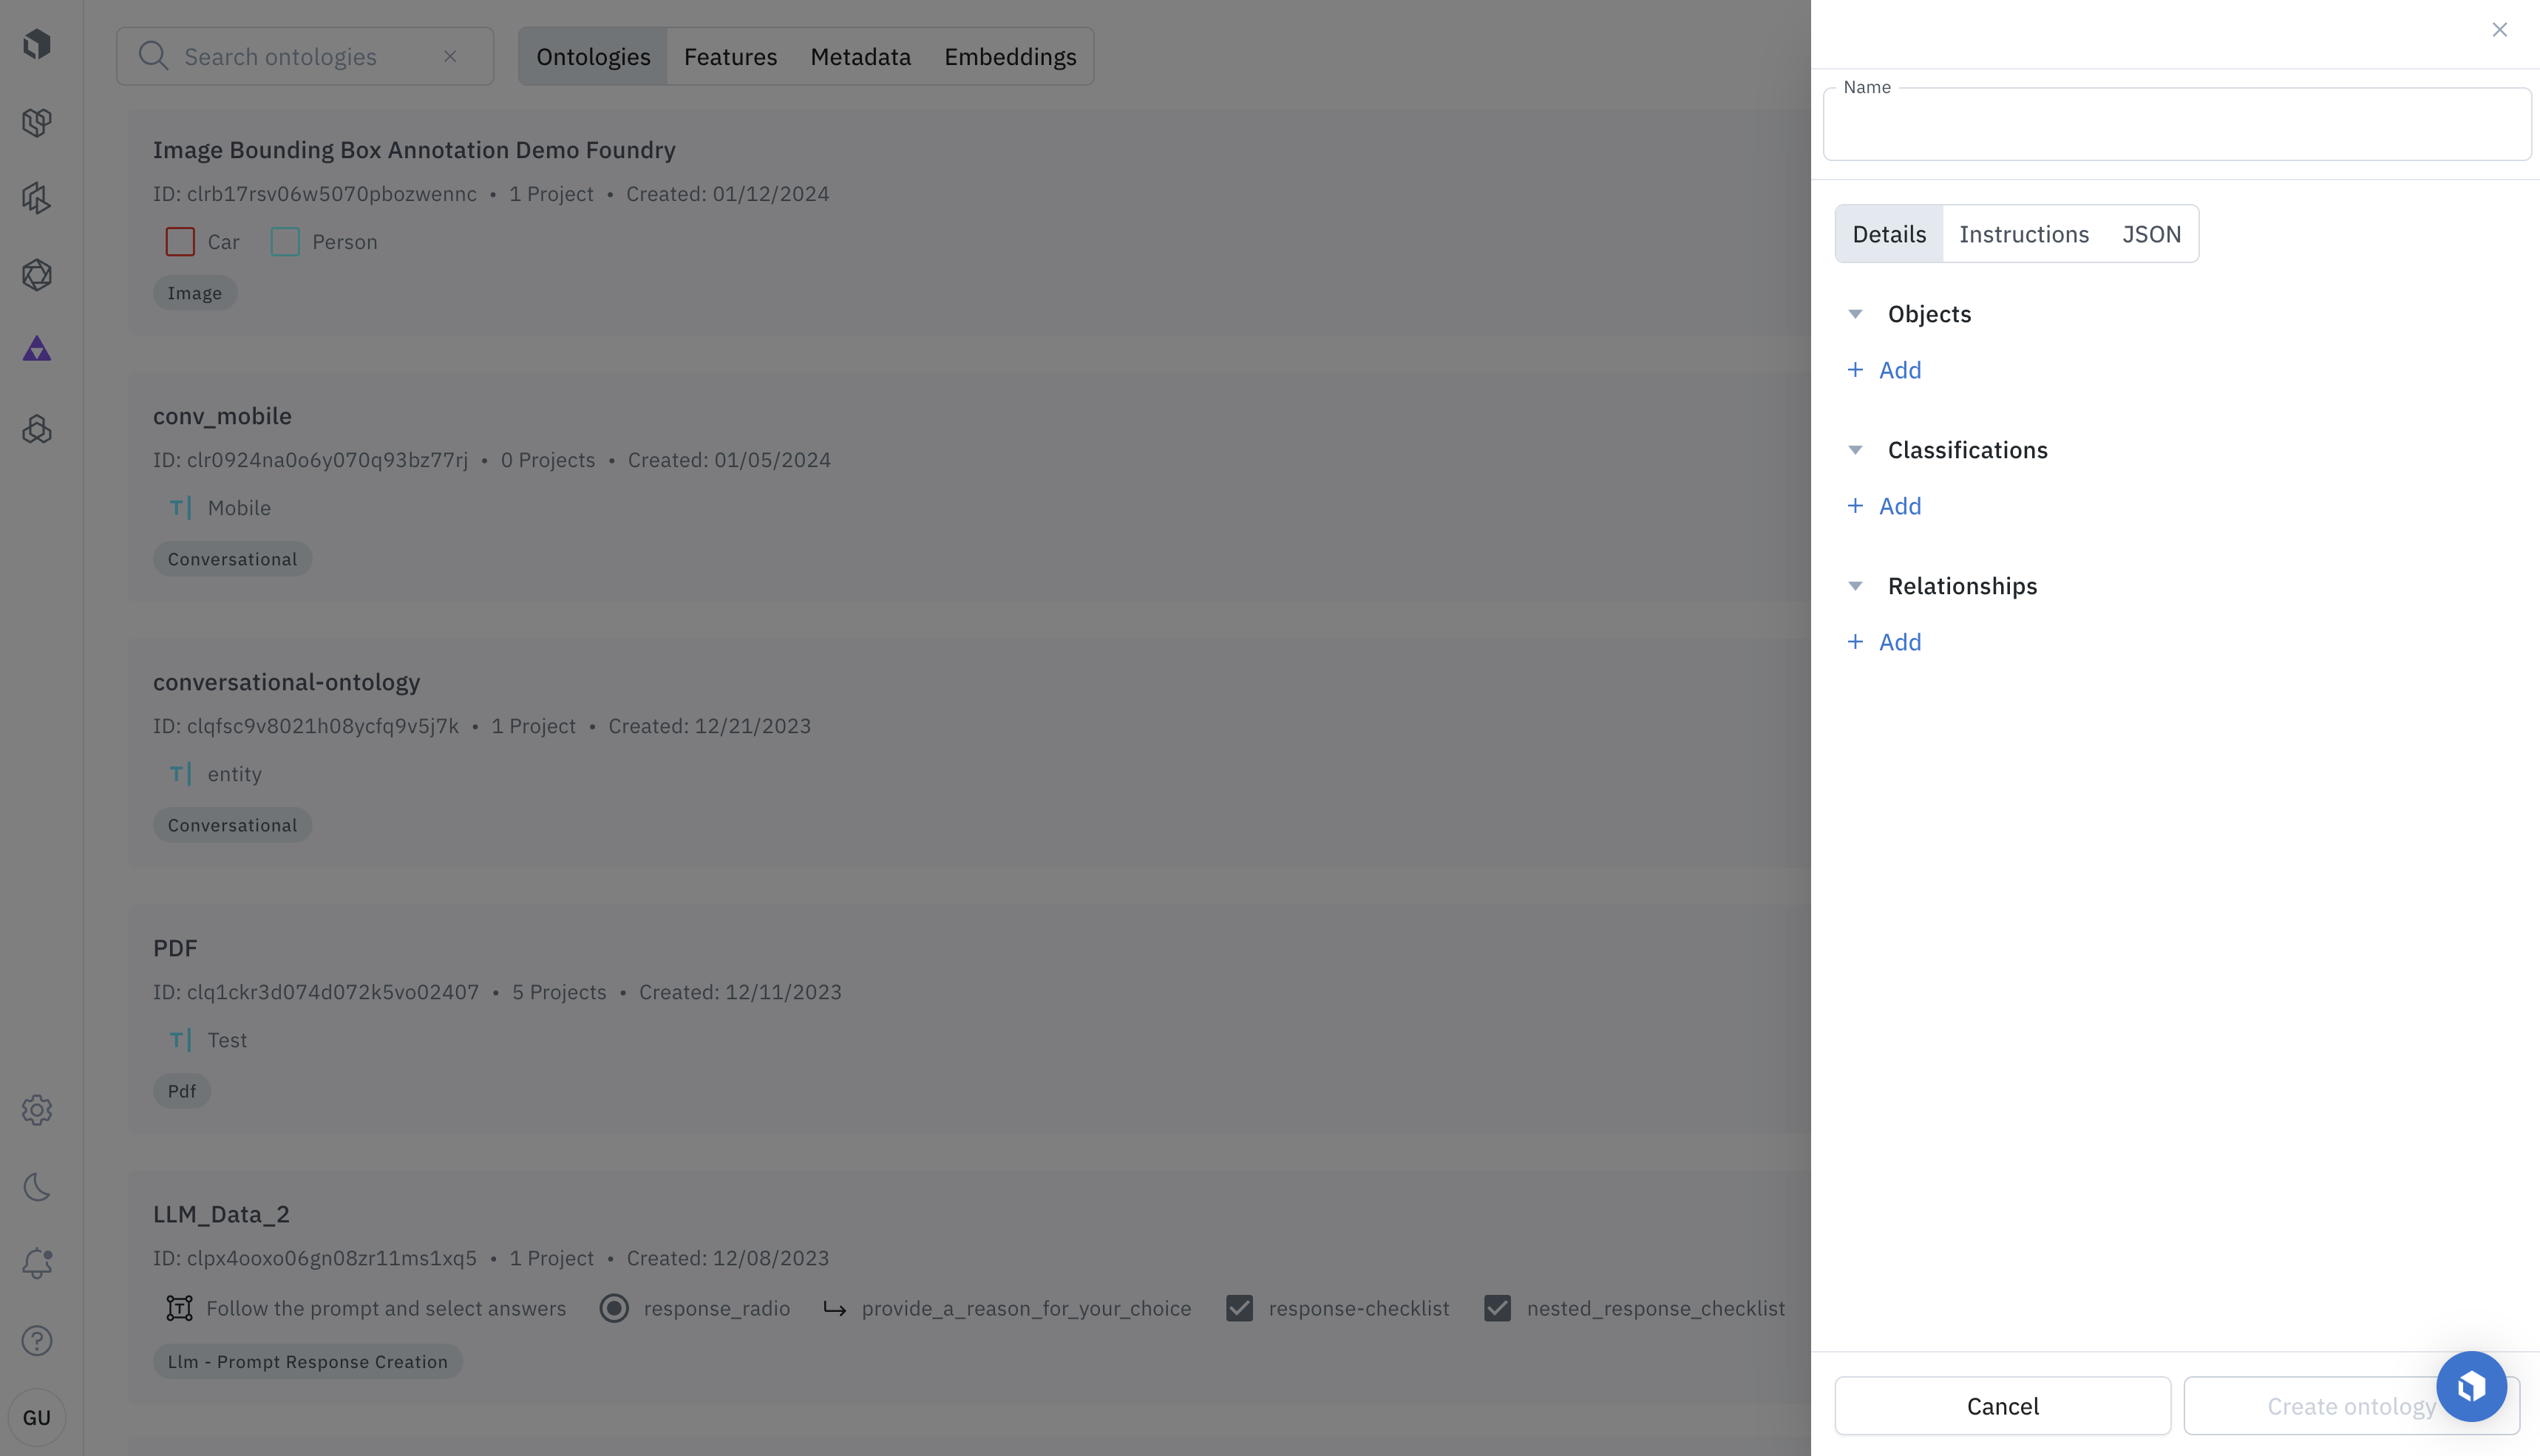
- Name: The name of your ontology. You can search by ontology name when setting up a new labeling project.
- Objects: Click + Add under Objects to add object features. By default, Labelbox will search for existing object features by name. If you type in a feature name that does not exist, Labelbox will prompt you to create a new object feature.
- Classifications: Click + Add under Classifications to add classification tasks. By default, Labelbox will search for existing classification features by name. If you type in a feature name that does not exist, Labelbox will prompt you to create a new classification feature.
- Relationships: Click + Add under Relationships to add relationships to the ontology.
Step 2: Attach
To attach or update the ontology for an existing project, go to the project Settings > Label editor and click Edit. This will take you to the ontology currently attached to the project. To update the ontology to click the dropdown: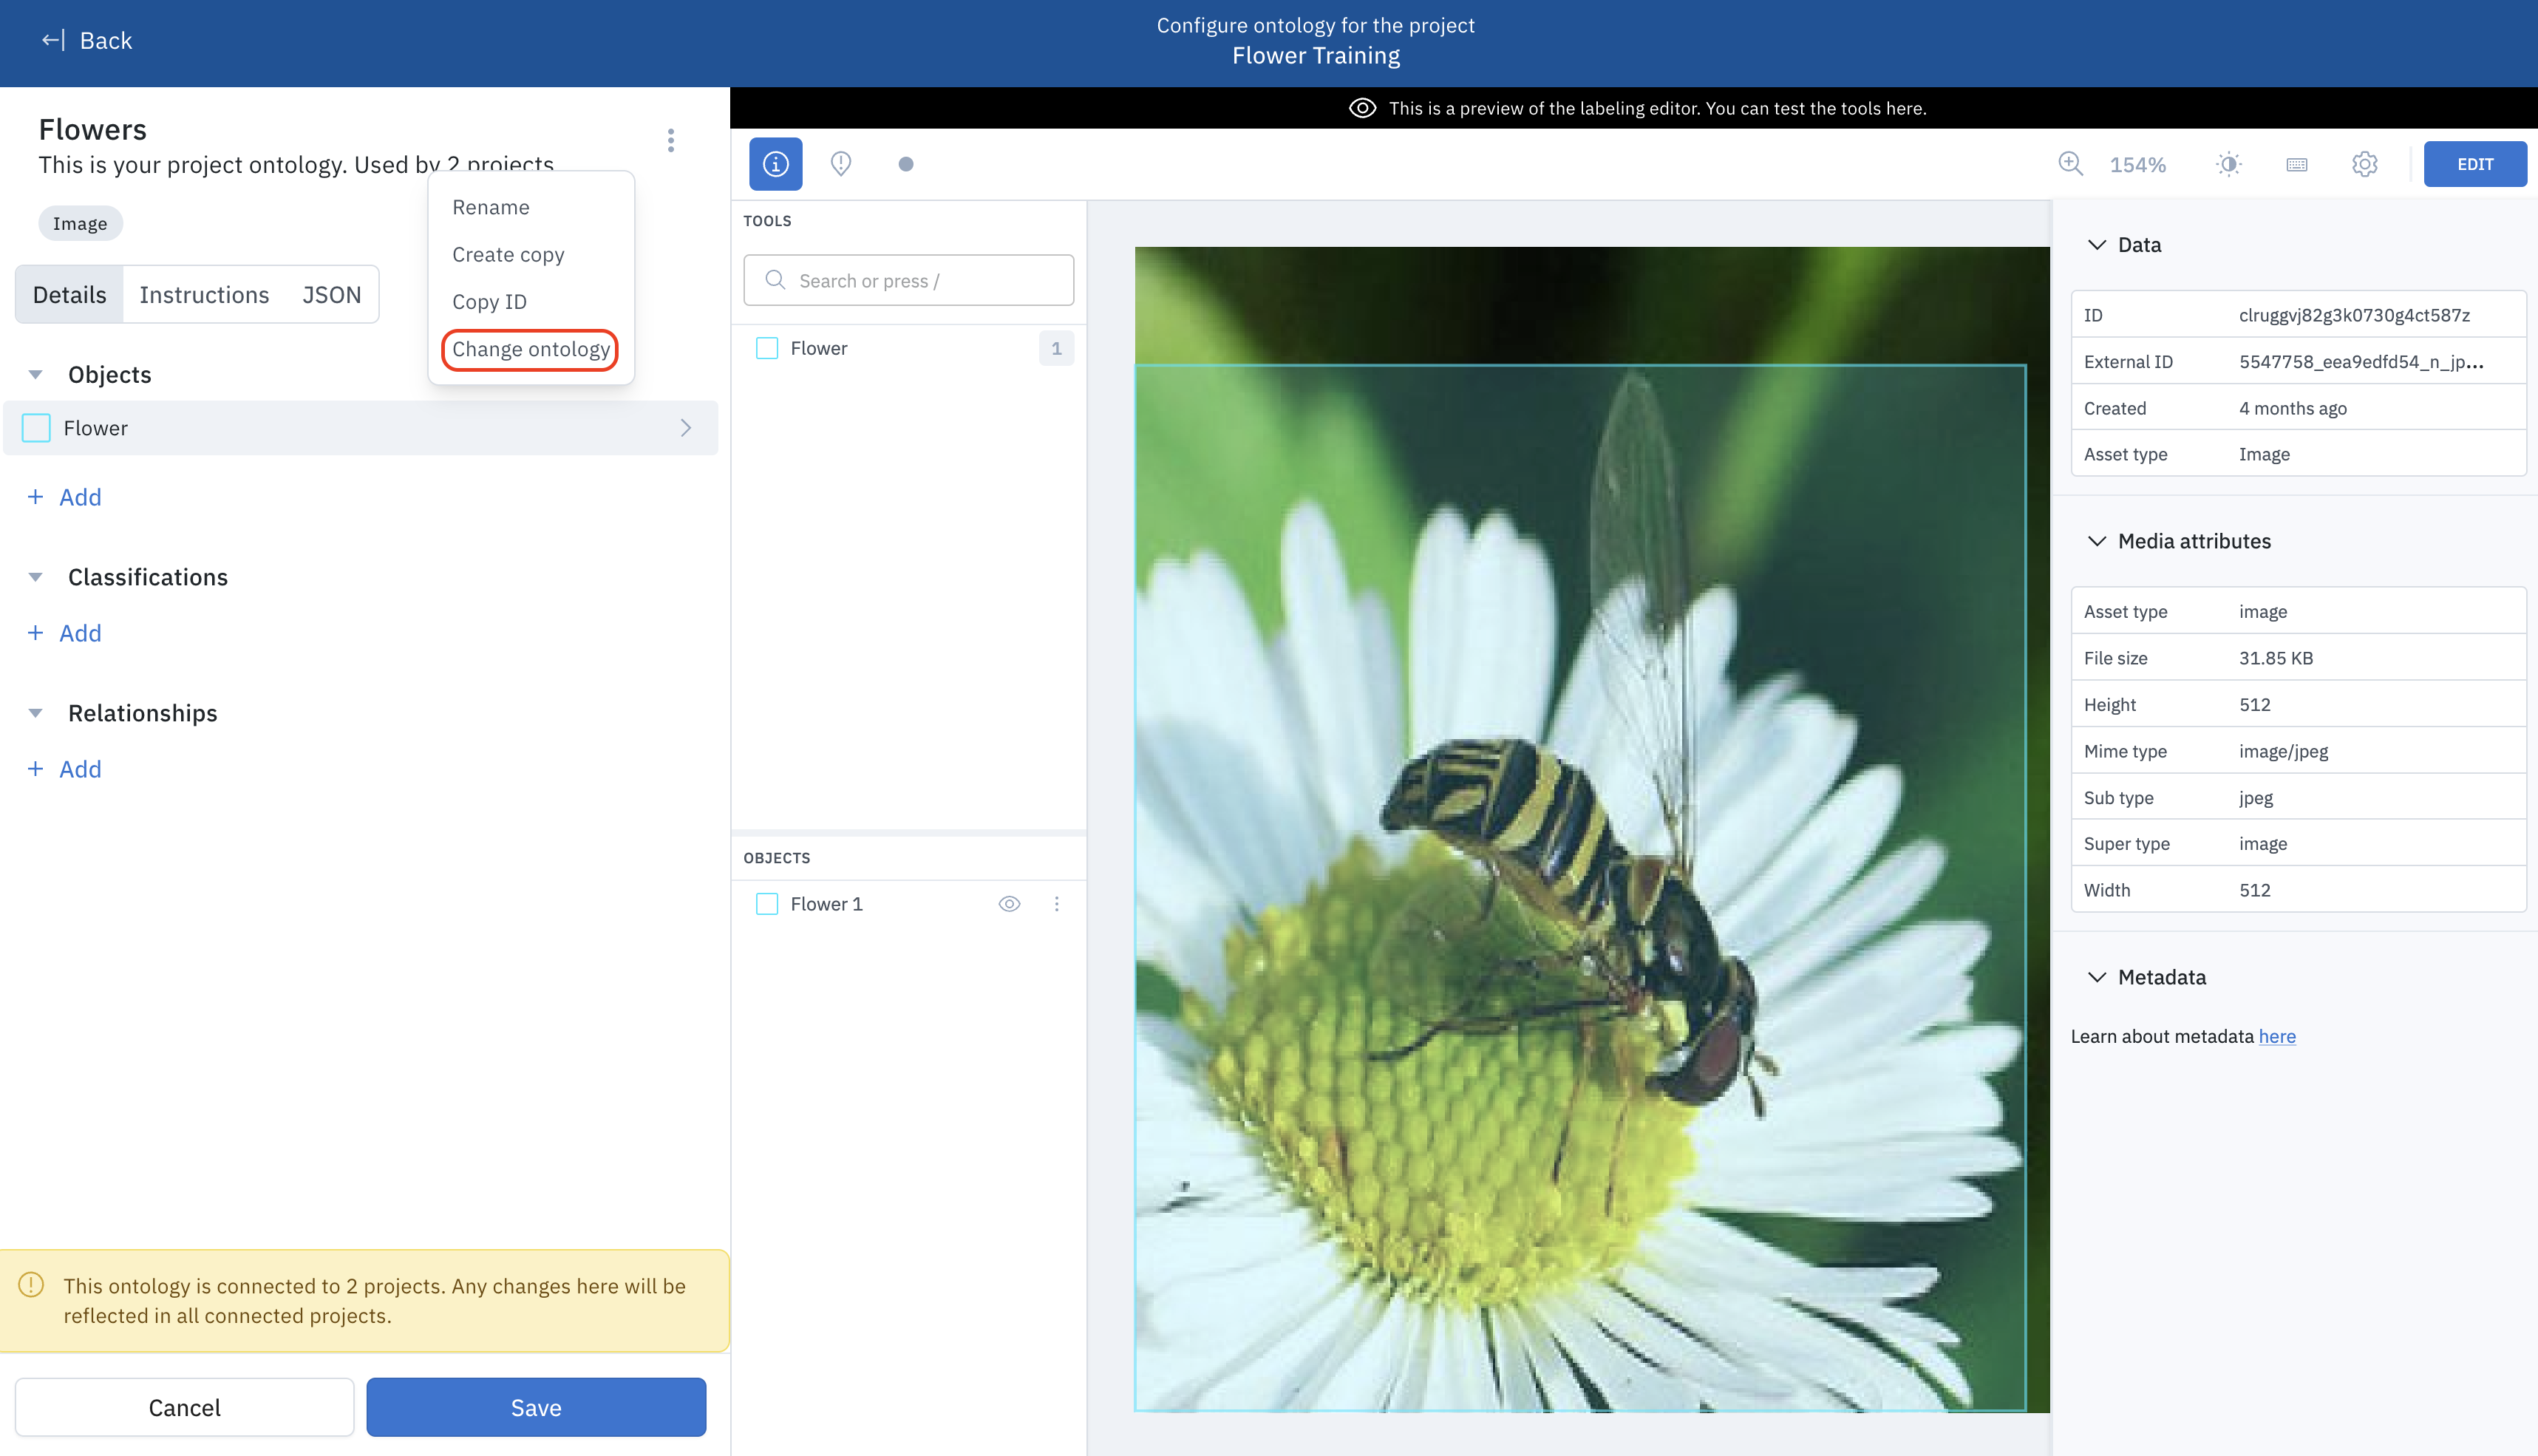
Update an ontology
Updating an ontology may be necessary for new project requirements but may require reworking all existing annotations to fit the updated structure.Reorder features
- Go to Schema > Ontology.
- Click on the ontology you want to edit. A new modal will appear on the right-hand side of the screen.
- Hit the Edit button at the top.
- In the new modal, drag and drop the features into the new order you want to display to your labelers.
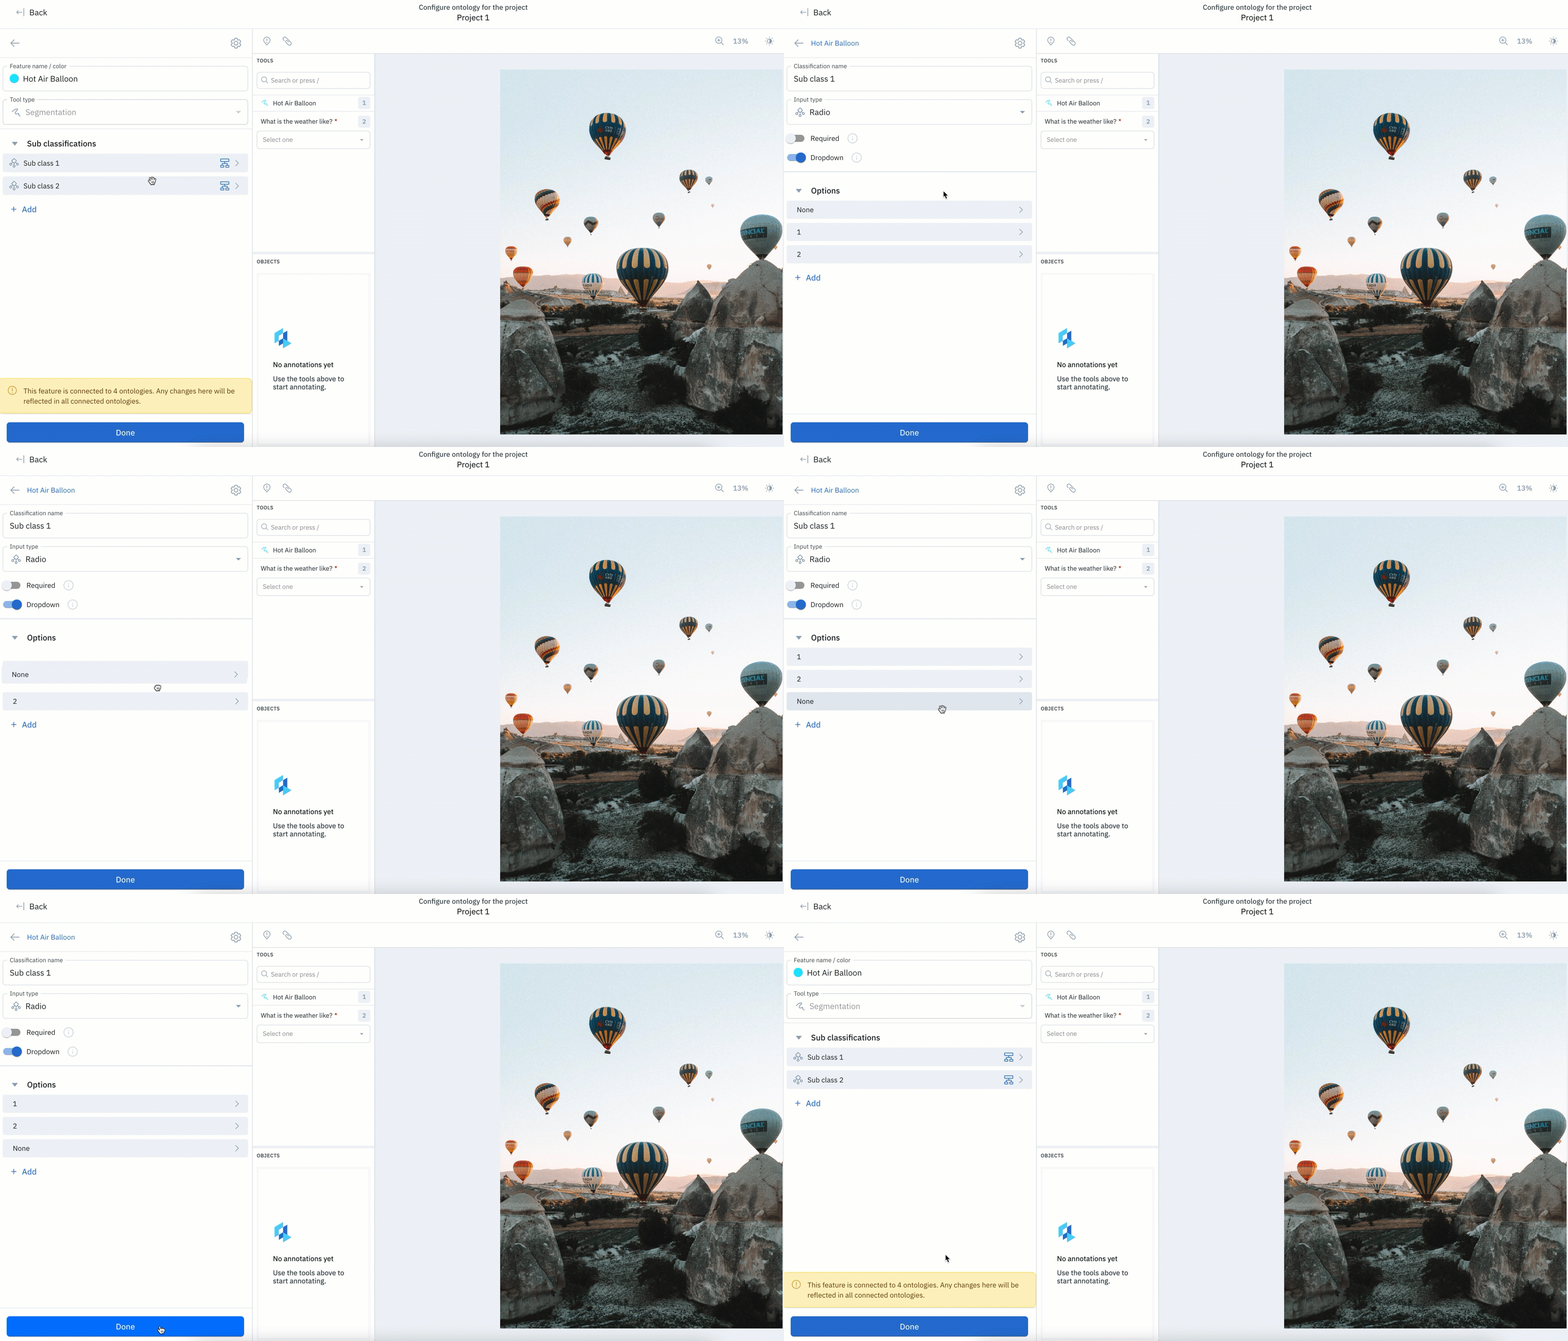
Add a new feature
- Go to Schema > Ontology.
- Click on the ontology you want to edit. A new modal will pop up on the right-hand side of the screen.
- Click the Edit button at the top to edit the ontology.
- Click the + button under objects or classifications and search for the feature you want to add.
Remove/archive features
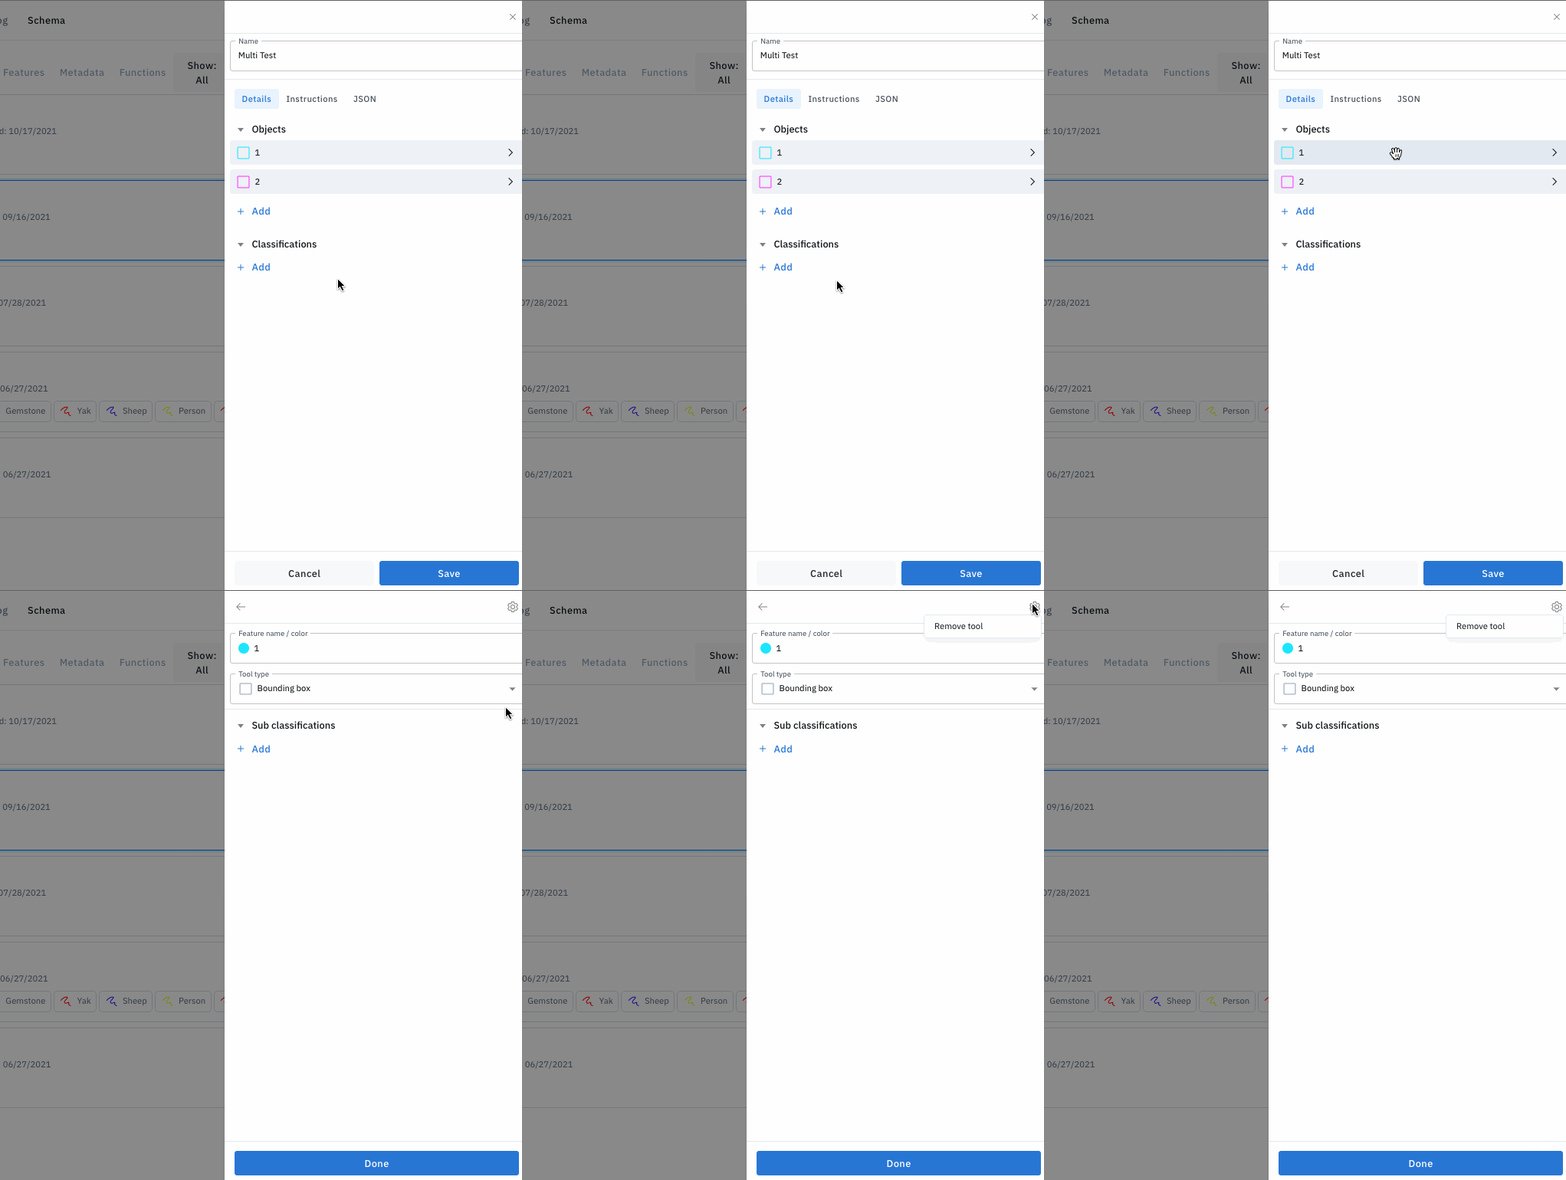
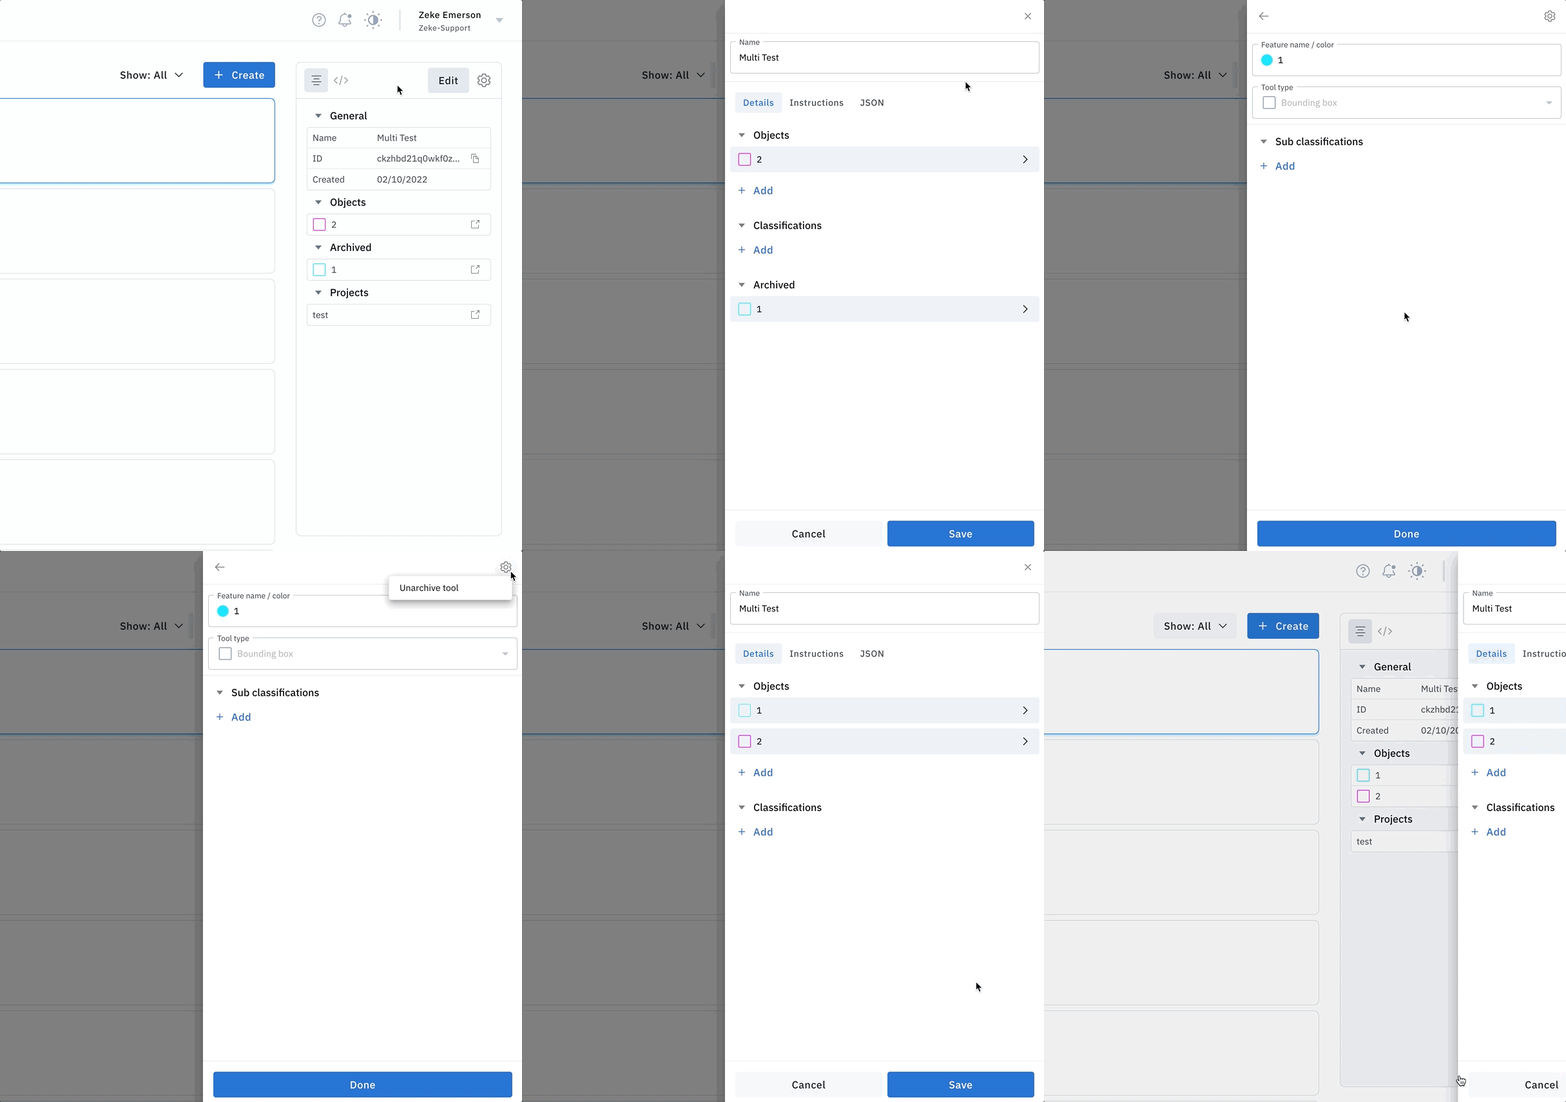
Labelbox automatically detects if the feature has annotations created from it. If a feature does not have annotations created from it, you can remove it from its ontology. If a feature does have annotations created from it, you can archive it from its ontology. There are two benefits of archiving:- Keep a record of the feature and its associated annotations within a project.
- Unarchive the feature anytime. All pre-existing annotations created using that feature will render in the project.
Exports will include archived features
To ensure that all annotation data can be exported from our application, archiving a feature will not remove it from the export file. If you do not plan on using that data in your downstream systems, you will need to ignore those annotations based on feature schema ID.Click on the ontology you want to edit and a new modal will pop up on the right-hand side of the screen.
Re-use existing features (highly recommended)
You can re-use an existing feature when creating or updating a new ontology. The existing feature will auto-populate when you add a new feature in an ontology.Add or update instructions
To update or change instructions, click on the ontology you want to update and select instructions. Once it is selected, you can configure the instructions. This can be done anytime and will affect all projects associated with the ontology.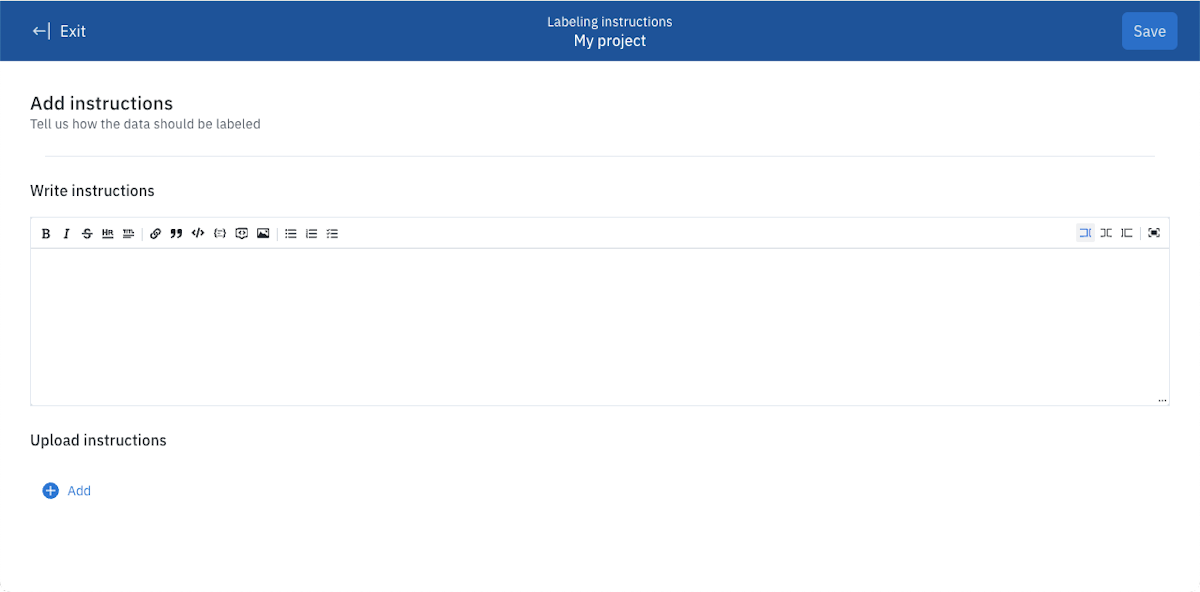
Add quizzes to ontology instructions
Quizzes help ensure that labelers fully understand your instructions before they begin labeling. When enabled, labelers must pass a quiz before they can access the labeling interface.What are quizzes?
Quizzes are AI-generated assessments based on your ontology instructions. They test labelers’ understanding of key concepts, procedures, and quality standards defined in your instructions. Quizzes provide several benefits:- Improved label quality: Labelers who pass the quiz demonstrate understanding of your guidelines before starting work
- Reduced errors: Ensures labelers comprehend edge cases and common mistakes outlined in your instructions
- Objective assessment: AI-powered scoring provides consistent evaluation of labeler understanding
- Built-in feedback: Labelers receive specific feedback on their answers to help them improve
Requirements for quiz generation
- Instructions must be at least 50 characters long for effective quiz generation
- Quizzes are generated from text instructions and PDF files
- Videos and external links in instructions are not included in quiz generation
Create a quiz
To create a quiz for your ontology:- Navigate to Schema > Ontology and select your ontology
- Click the Quiz tab in the ontology editor
- Choose one of the following options:
Auto-generate from instructions
Click Create Quiz to automatically generate quiz questions based on your instructions. The system will:- Analyze your text instructions and PDF attachments
- Generate 3 quiz questions by default using AI
- Create both questions and expected answers
- Focus on practical application rather than memorization
Add questions manually
Click Add Questions Manually or Add Question to create custom quiz questions:- Enter your question text (supports multi-line formatting)
- Provide the expected answer for AI scoring reference
- Add as many questions as needed
- Edit or delete questions at any time
How quizzes work for labelers
When labelers enter a project with a quiz-enabled ontology, they must complete the following workflow:- Read instructions: Labelers first review the complete ontology instructions
- Take the quiz: After reading, they must answer all quiz questions
- Receive results: AI evaluates each answer and provides a score and feedback
- Pass or retake: Labelers must achieve a passing score (3 out of 5 or higher) to continue
Scoring system
- Each answer is scored on a 1-5 scale using AI evaluation
- Score 3 or higher is required to pass each question
- Overall quiz score is calculated as an average of all question scores
- Labelers must pass the quiz to access the labeling interface
Answer requirements
- Minimum 20 characters per answer
- Answers should demonstrate understanding, not just copy text
- AI provides constructive feedback for improvement
Quiz analytics
When labelers enter a project with quiz-enabled ontology instructions, they must complete and pass the quiz before they can begin labeling. Since quiz attempts are tracked at the project level, you can view comprehensive analytics for each project to track performance and identify areas for improvement. Analytics include:- Overall pass rates and average scores
- Individual user performance and improvement trends
- Question-level analytics showing which questions are most challenging
- Score and attempt distribution charts
- Time-based statistics to identify trends