Create a slice
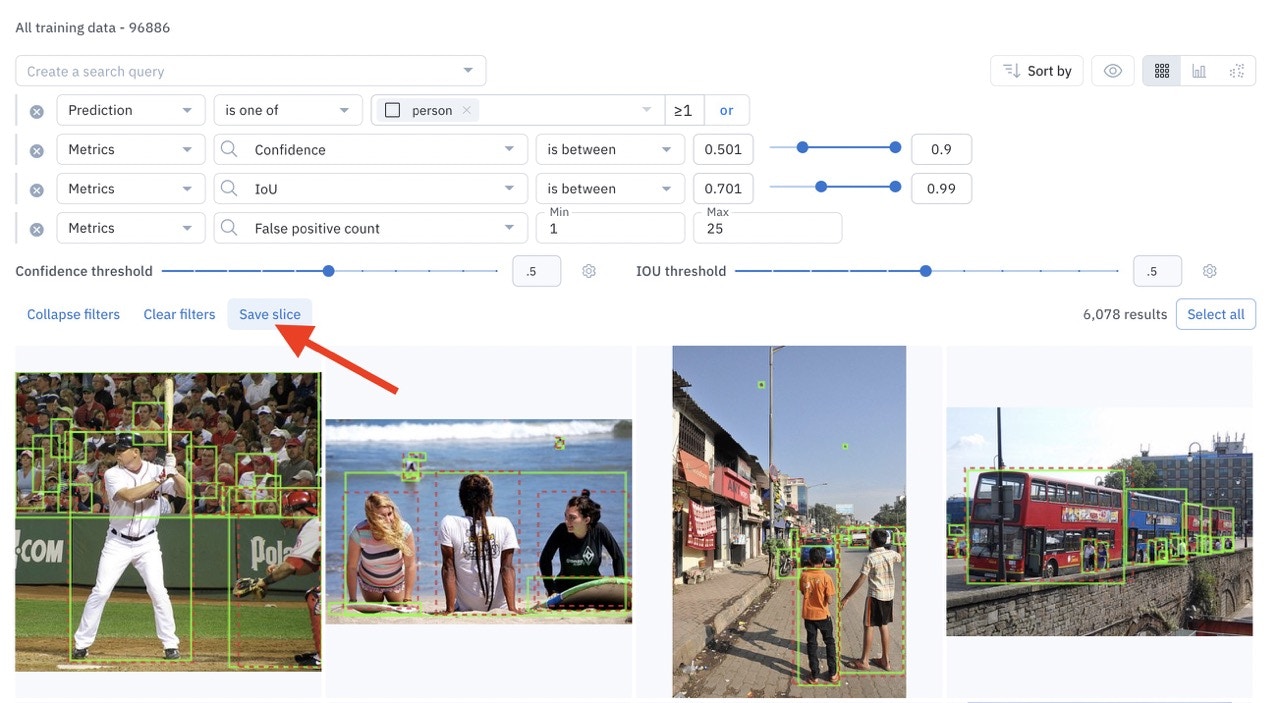
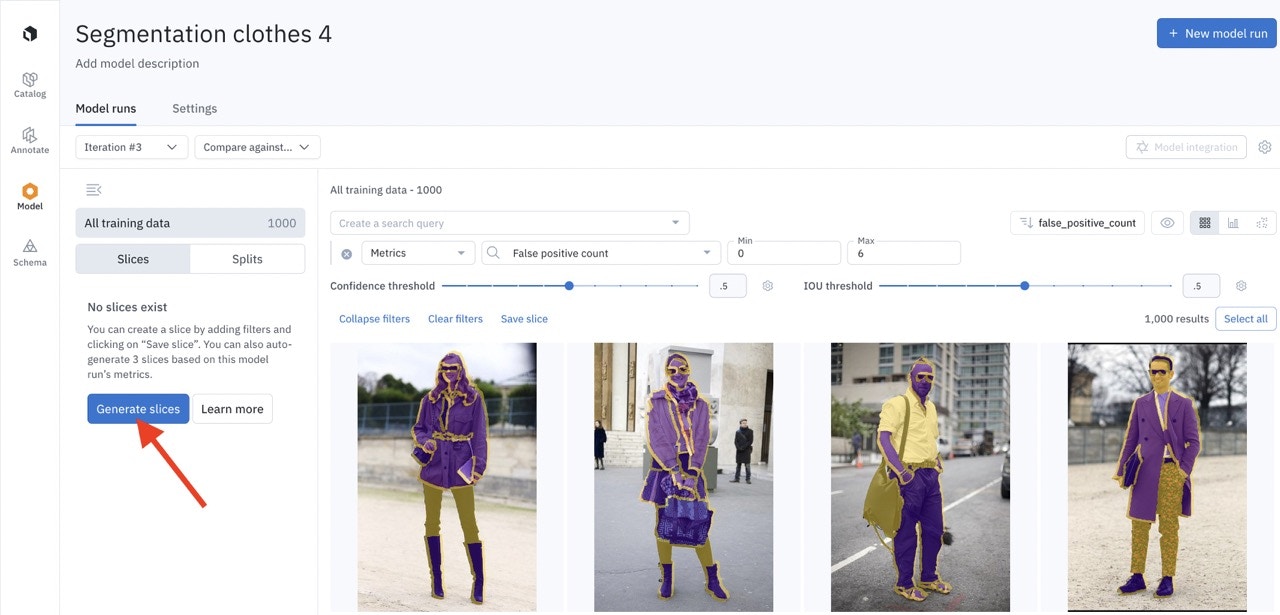
Slices in model runs can be created either manually through filtering and hand-selecting data rows or, if model predictions are uploaded, can be auto-generated.Manually create slices
Once you have narrowed down a subset of data rows using one or more filters or hand-selecting data rows, click Save slice to save the subset of data rows as a slice. You will be prompted to give a name (3 to 30 characters) and an optional description for your slice.

Auto-generated slices
After you upload model predictions to a model run, Labelbox will suggest some auto-generated slices. These auto-generated slices usually contain high-impact data.
| Auto-generated slice | Description |
|---|---|
| True positives | Sort data rows by the highest number of true positives |
| True negatives | Sort data rows by the highest number of true negatives |
| False positive | Sort data rows by the highest number of false positives |
| False negative | Sort data rows by the highest number of false negatives |
| Low precision | Sort data rows by descending precision |
| Low recall | Sort data rows by descending recall |
| Low f1-score | Sort data rows by descending f1-score |
| Low confidence | Sort data rows by descending confidence |
| Candidate mislabels | Surface candidate labeling mistakes by keeping images with false positives and sorting on descending confidence |
Explore a slice
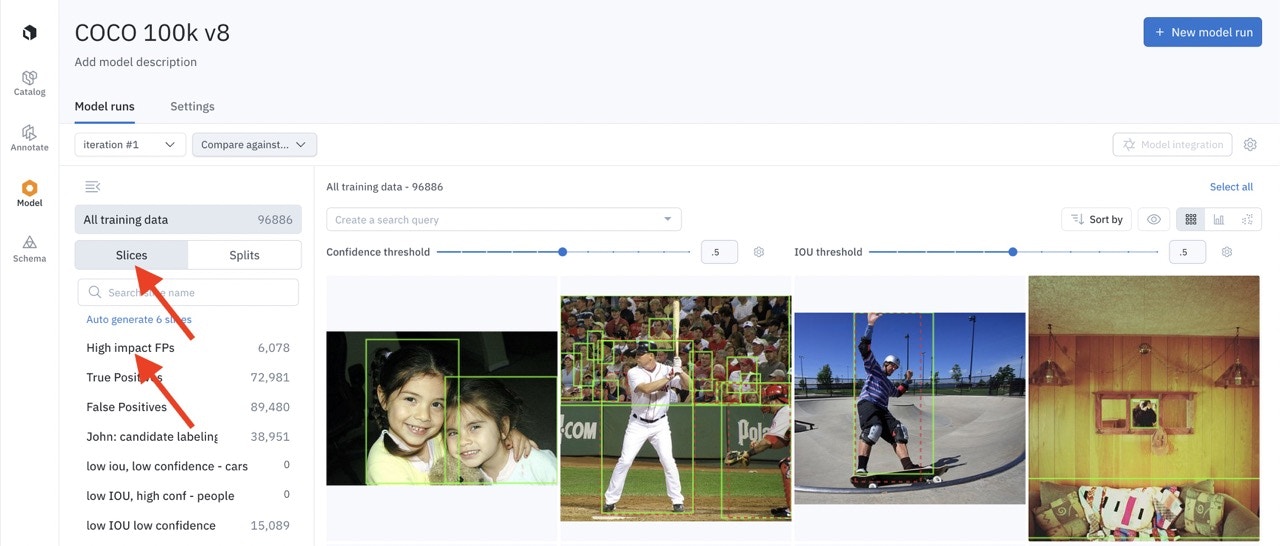
To explore a slice, go to the left side panel of the Model, click on Slices, and click on the slice name you want to explore. The filter associated with the slice will show up instantly. All data rows matching the filter will show up as well.
- Click on a different slice name, to explore a different slice.
- Click on Datasets and a dataset name to explore a dataset.
- Click on All data to explore your complete Catalog.
Update a slice
Over time, you might need to adjust the filters associated with a slice. Upon navigating to a slice, you can modify, add, or delete attributes of the filters. After you update the filters, save your changes by clicking on Update slice. Labelbox will prompt you to choose between the following:- Update the slice with the newly configured filters.
- Save as new a distinct slice with the newly configured filters.

Automate data curation using slices
Slices are dynamic, meaning that any data uploaded to Labelbox will automatically populate in any relevant slices. Therefore, the data rows in a slice may change over time in two possible ways:- New data rows appear in a slice: If you add new data rows to Catalog, they will appear in the slices whose filters they match. A data row can appear in many slices.
- Existing data rows disappear from a slice: If a data row is deleted from Catalog, or if it no longer matches a slice filter, then it will not appear in the slice.
- Set up filters in Catalog and assure that the filters are surfacing the intended data rows.
- Save the filter by creating a slice.
- Create a pipeline with cloud functions to automatically create new data rows in Labelbox when data lands in your storage buckets.
- Take action at any desired interval on high-impact data rows that automatically land in certain slices.