Set up document annotation projects
To set up a document annotation project:- Create a document (PDF) dataset.
- On the Annotate projects page, click the + New project button.
- Select Documents. Provide a name and an optional description for your project.
- Click Save. The system then creates the project and redirects you to the project overview page.
- Click Add data. Then select your audio dataset. Click Sample to sample your dataset, or you can manually select data rows and click Queue batch. To learn how to import documents using the SDK, see importing document data.
Supported annotation types
Below are the annotation types you may include in your ontology for labeling document data. Classification-type annotations can be applied globally or nested within a bounding box or entity annotation.| Feature | Import annotation | Export annotation |
|---|---|---|
| Bounding box | See payload | See payload |
| Entity | See payload | See payload |
| Relationship | See payload | See payload |
| Radio classification | See payload | See payload |
| Checklist classification | See payload | See payload |
| Free-form text classification | See payload | See payload |
Bounding box
To create a bounding box, use your cursor to create the shape around a character, word(s), or section in the document. To reposition the bounding box on the document, click + hold, then use your mouse or trackpad to reposition the annotation on the document. You can also click + drag the corners to resize the bounding box.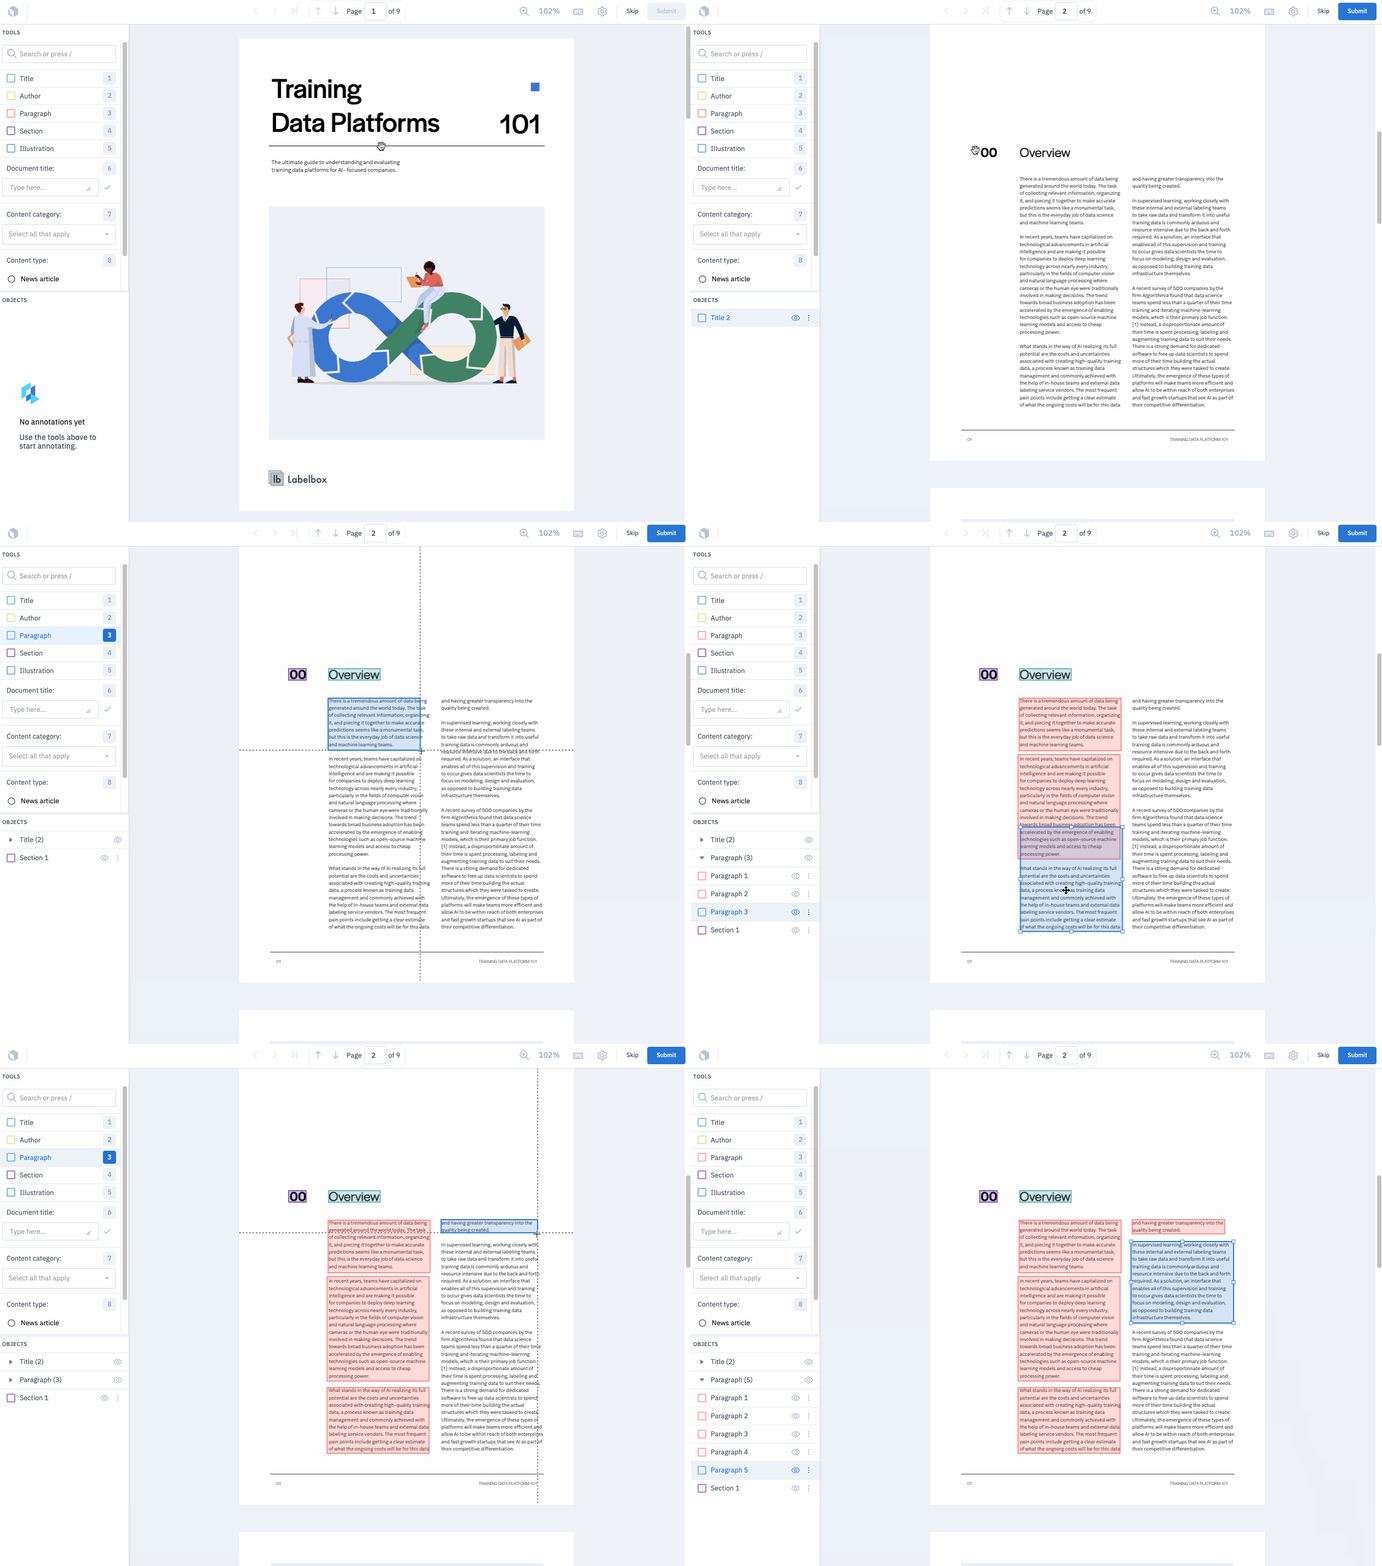
Entity
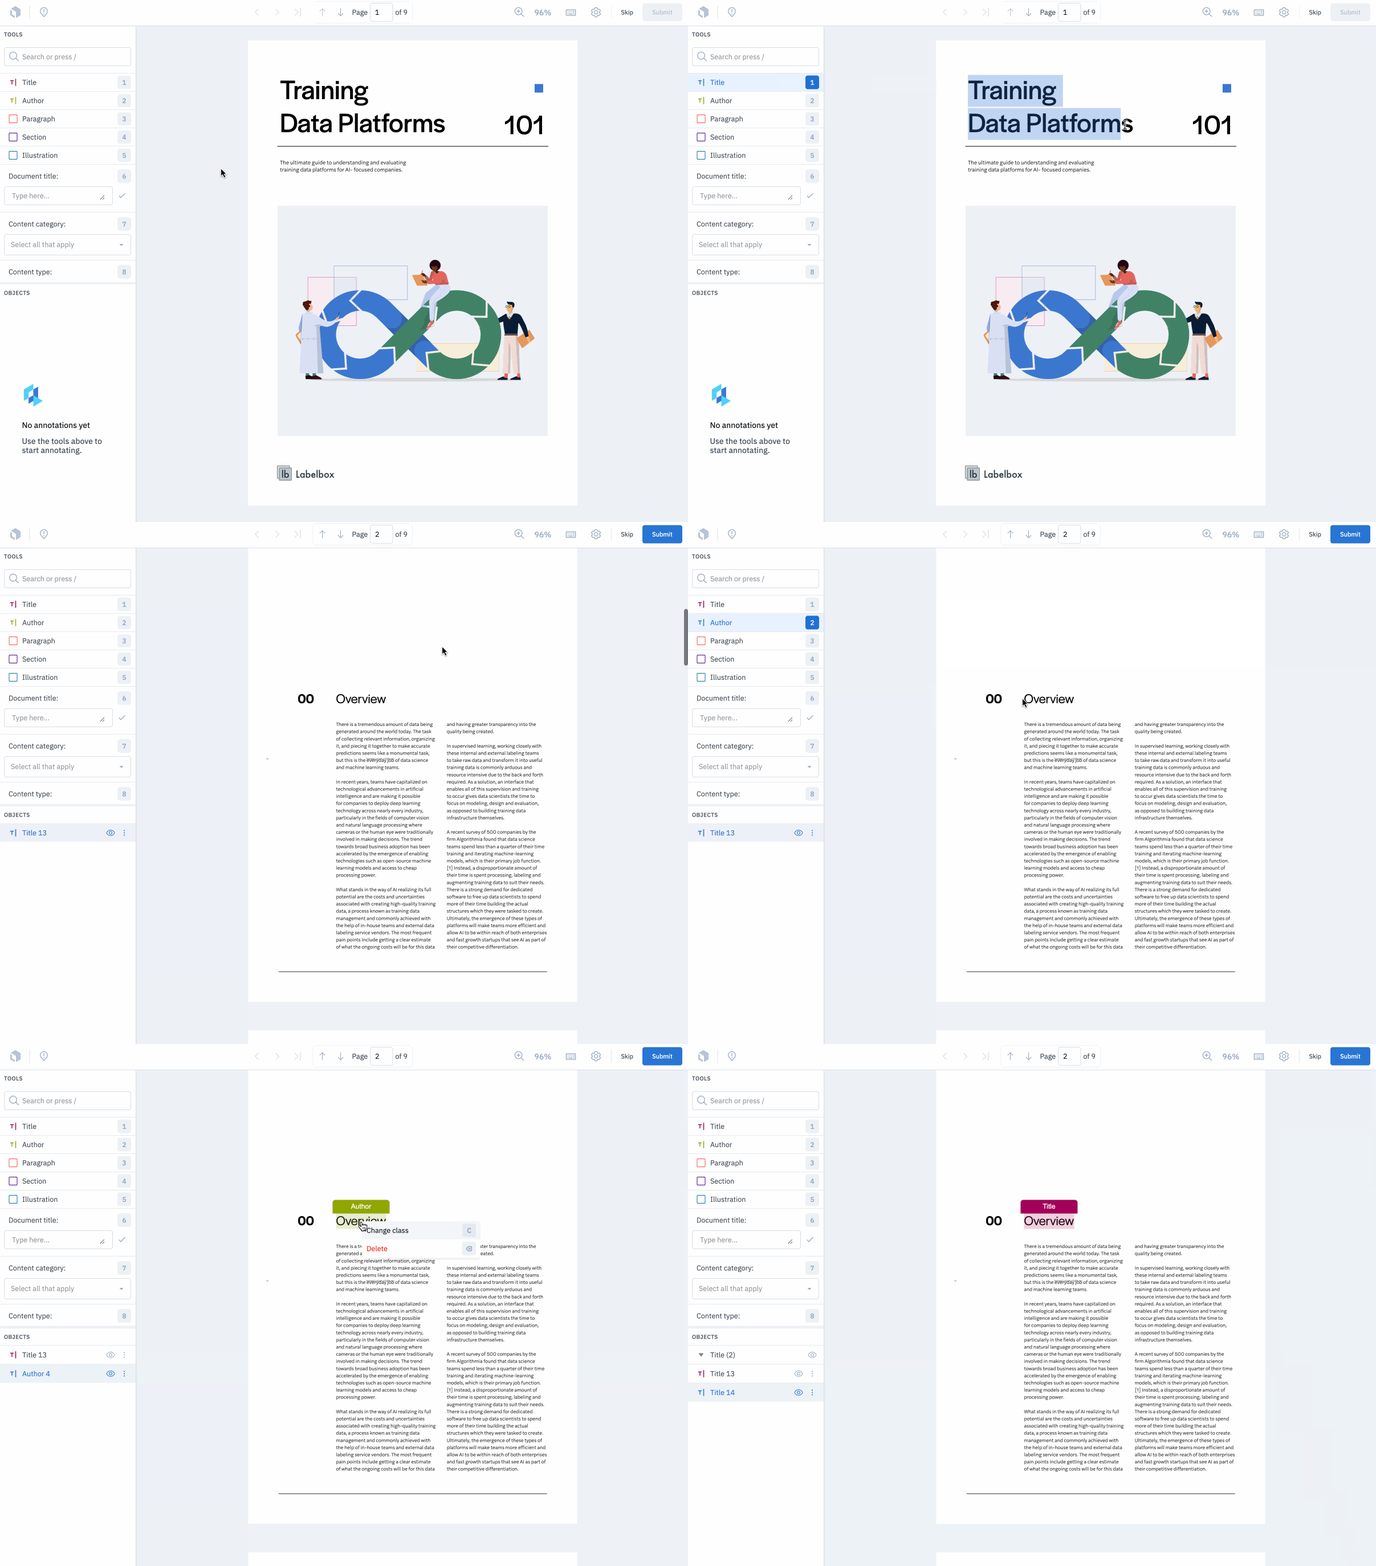
To create an entity annotation, click the desired starting character and drag to select a sequence of characters in the text. Characters are not restricted to a single class; entity annotations may overlap completely or partially. Entities may also span multiple pages. To edit an entity’s class, right-click the entity and select Change class. Shortcut: In the Tools panel, you will see a numerical hotkey next to the name of the annotation. Use the specified number hotkey (e.g.,1, 2, 3) to activate the entity tool.
To create another entity, press the number hotkey again to activate the tool, then create another entity. Once all entities have been created, press E to submit your label.
Token selection
We also support tokenization, so you can create and highlight entities at both word and character levels, which is determined by the data in your JSON upload. Clicking on a specific word will highlight the entire word. This is helpful when labeling text, as it can be easy to accidentally miss certain characters or words when highlighting.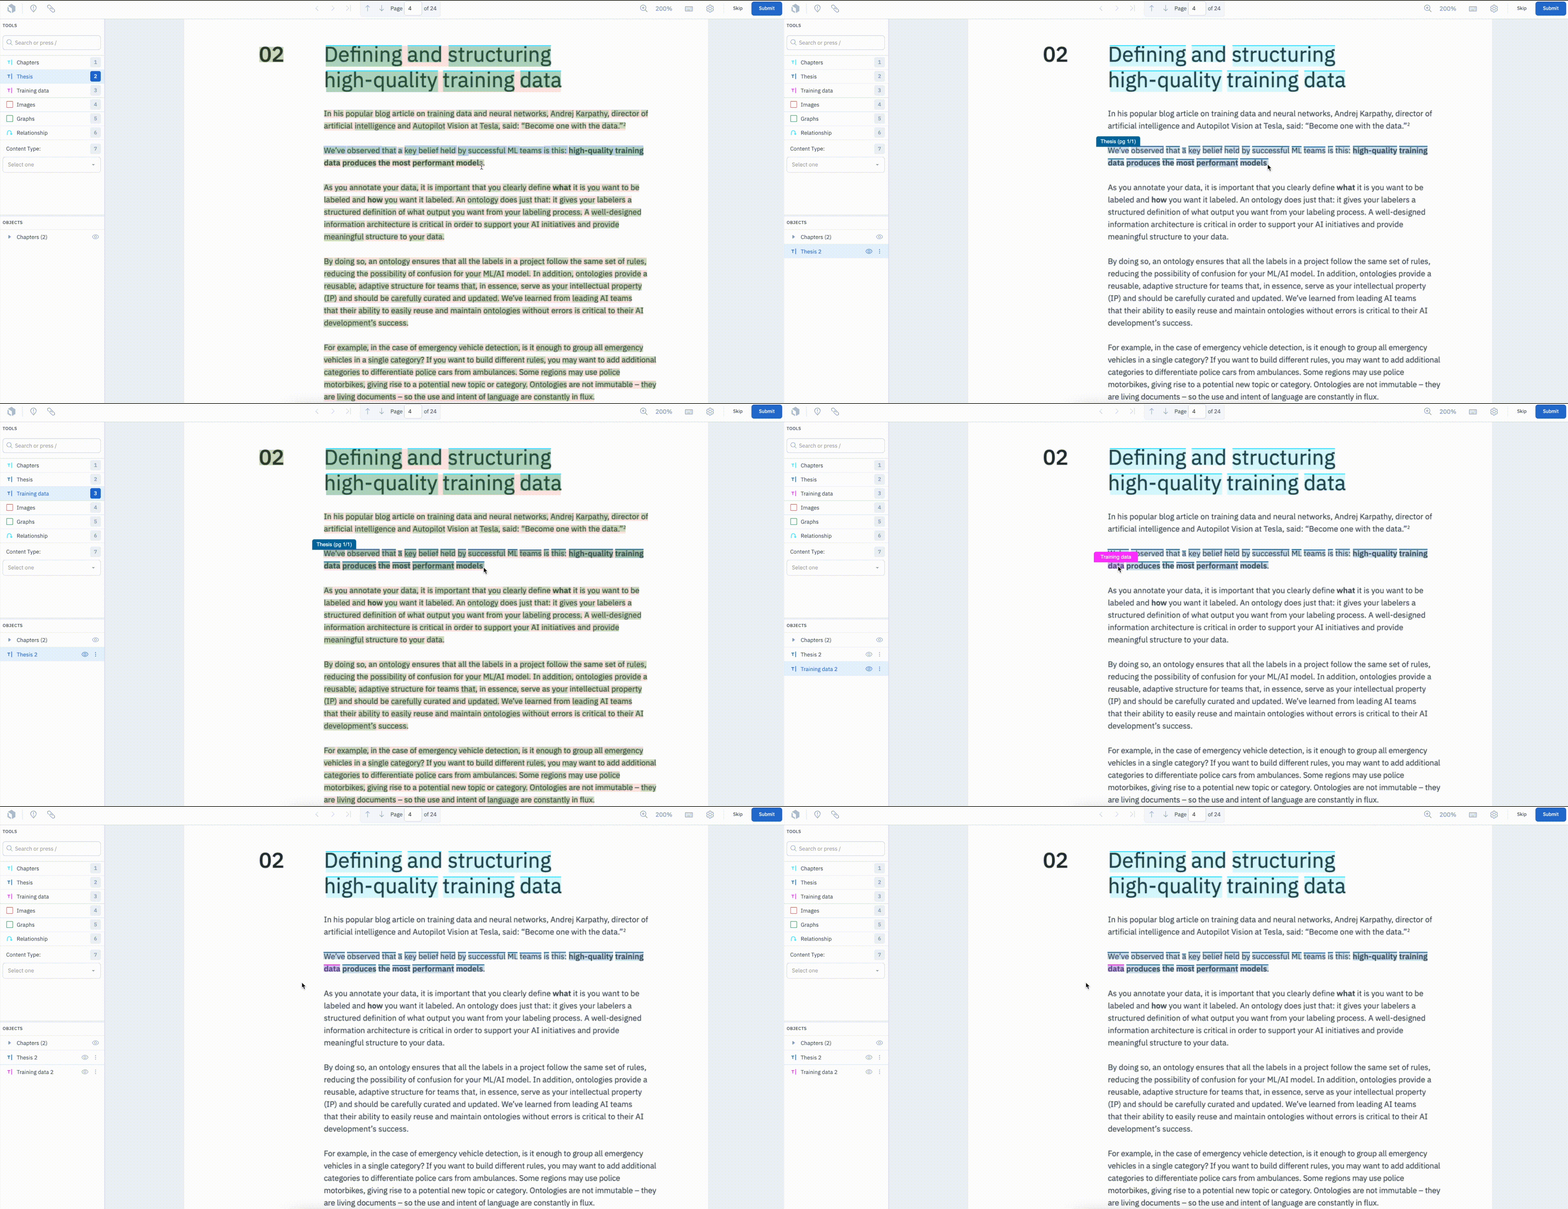
Relationships
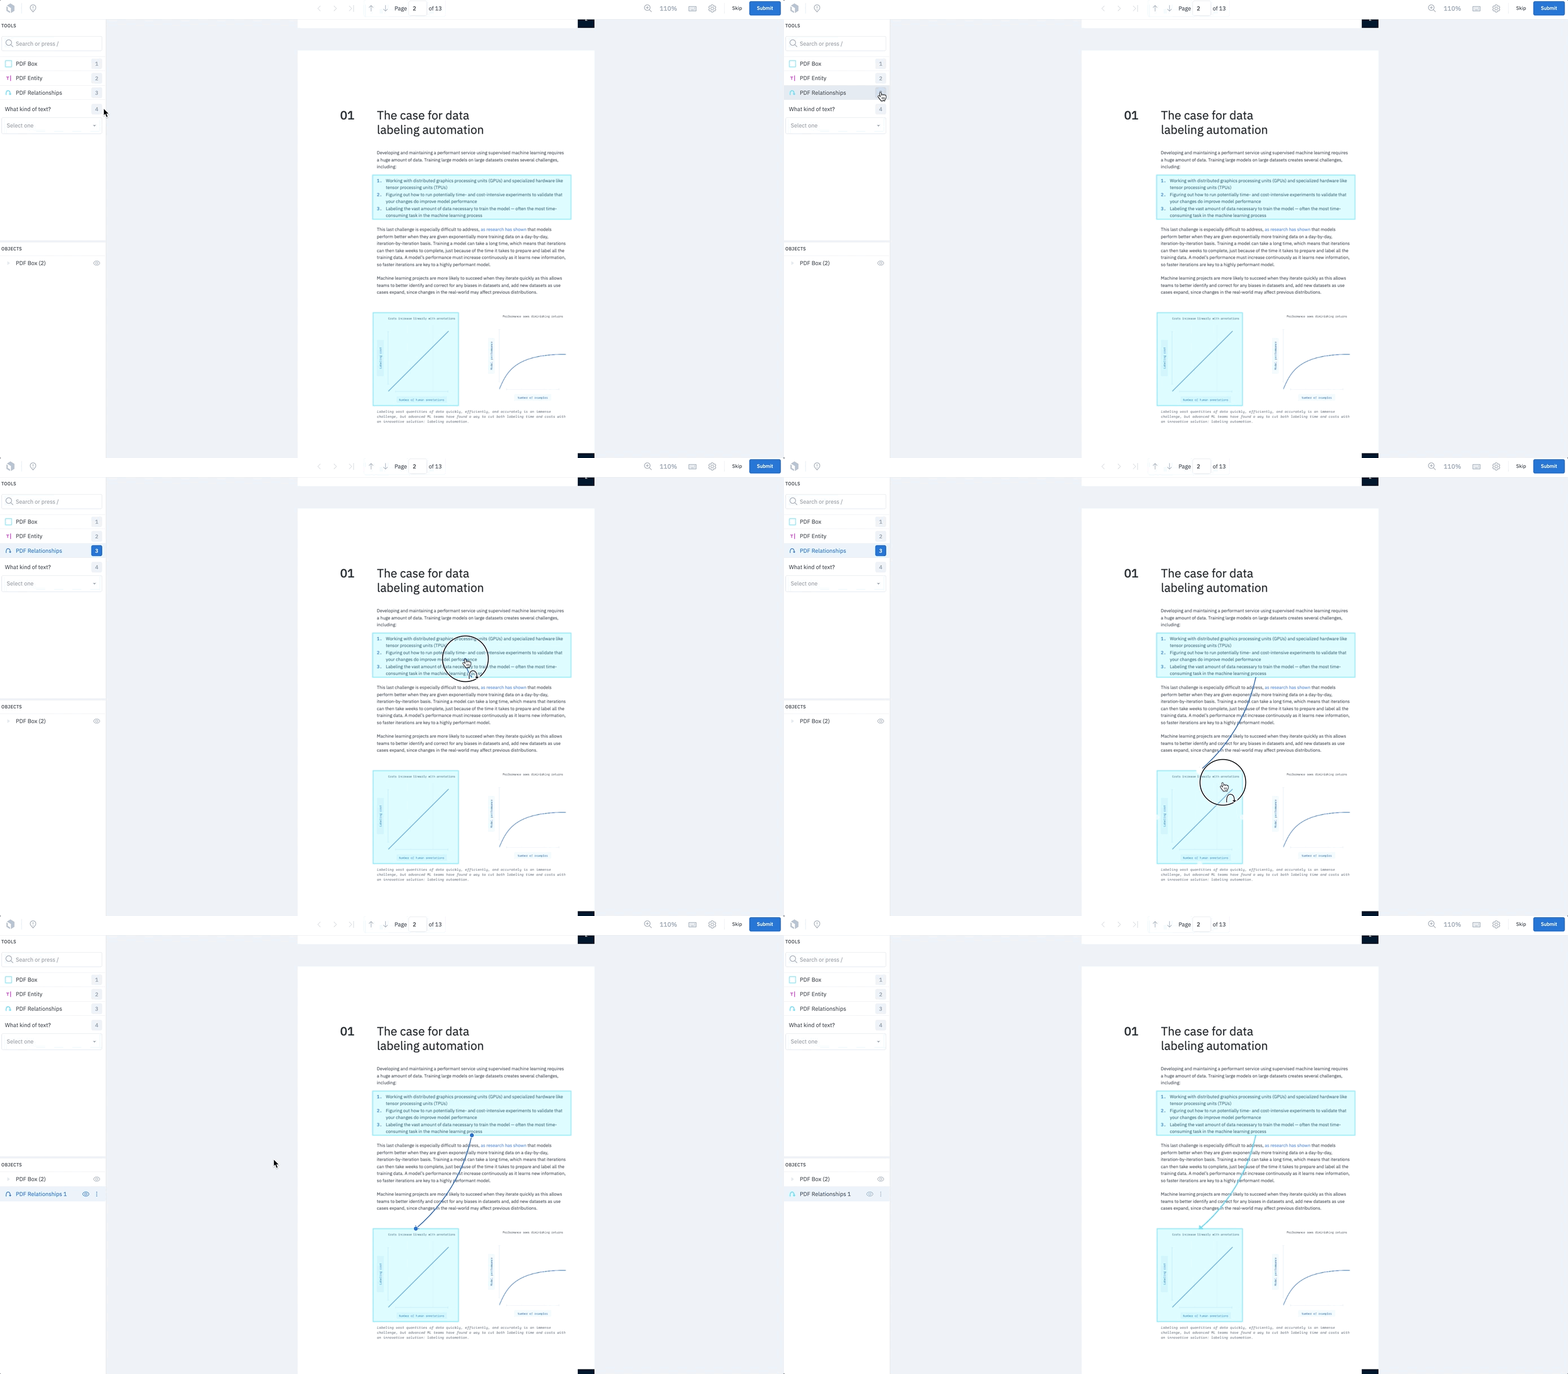
To create a relationship between annotations:- Select a relationship tool and hover over the source annotation of the relationship to reveal the annotation’s anchor points.
- Click an anchor point to create the starting point of the relationship, then bring your mouse over to the annotation you want to relate it to, hovering over it to reveal its anchor points.
- Click one of the anchor points to complete the relationship.
Relationships for annotations across pages
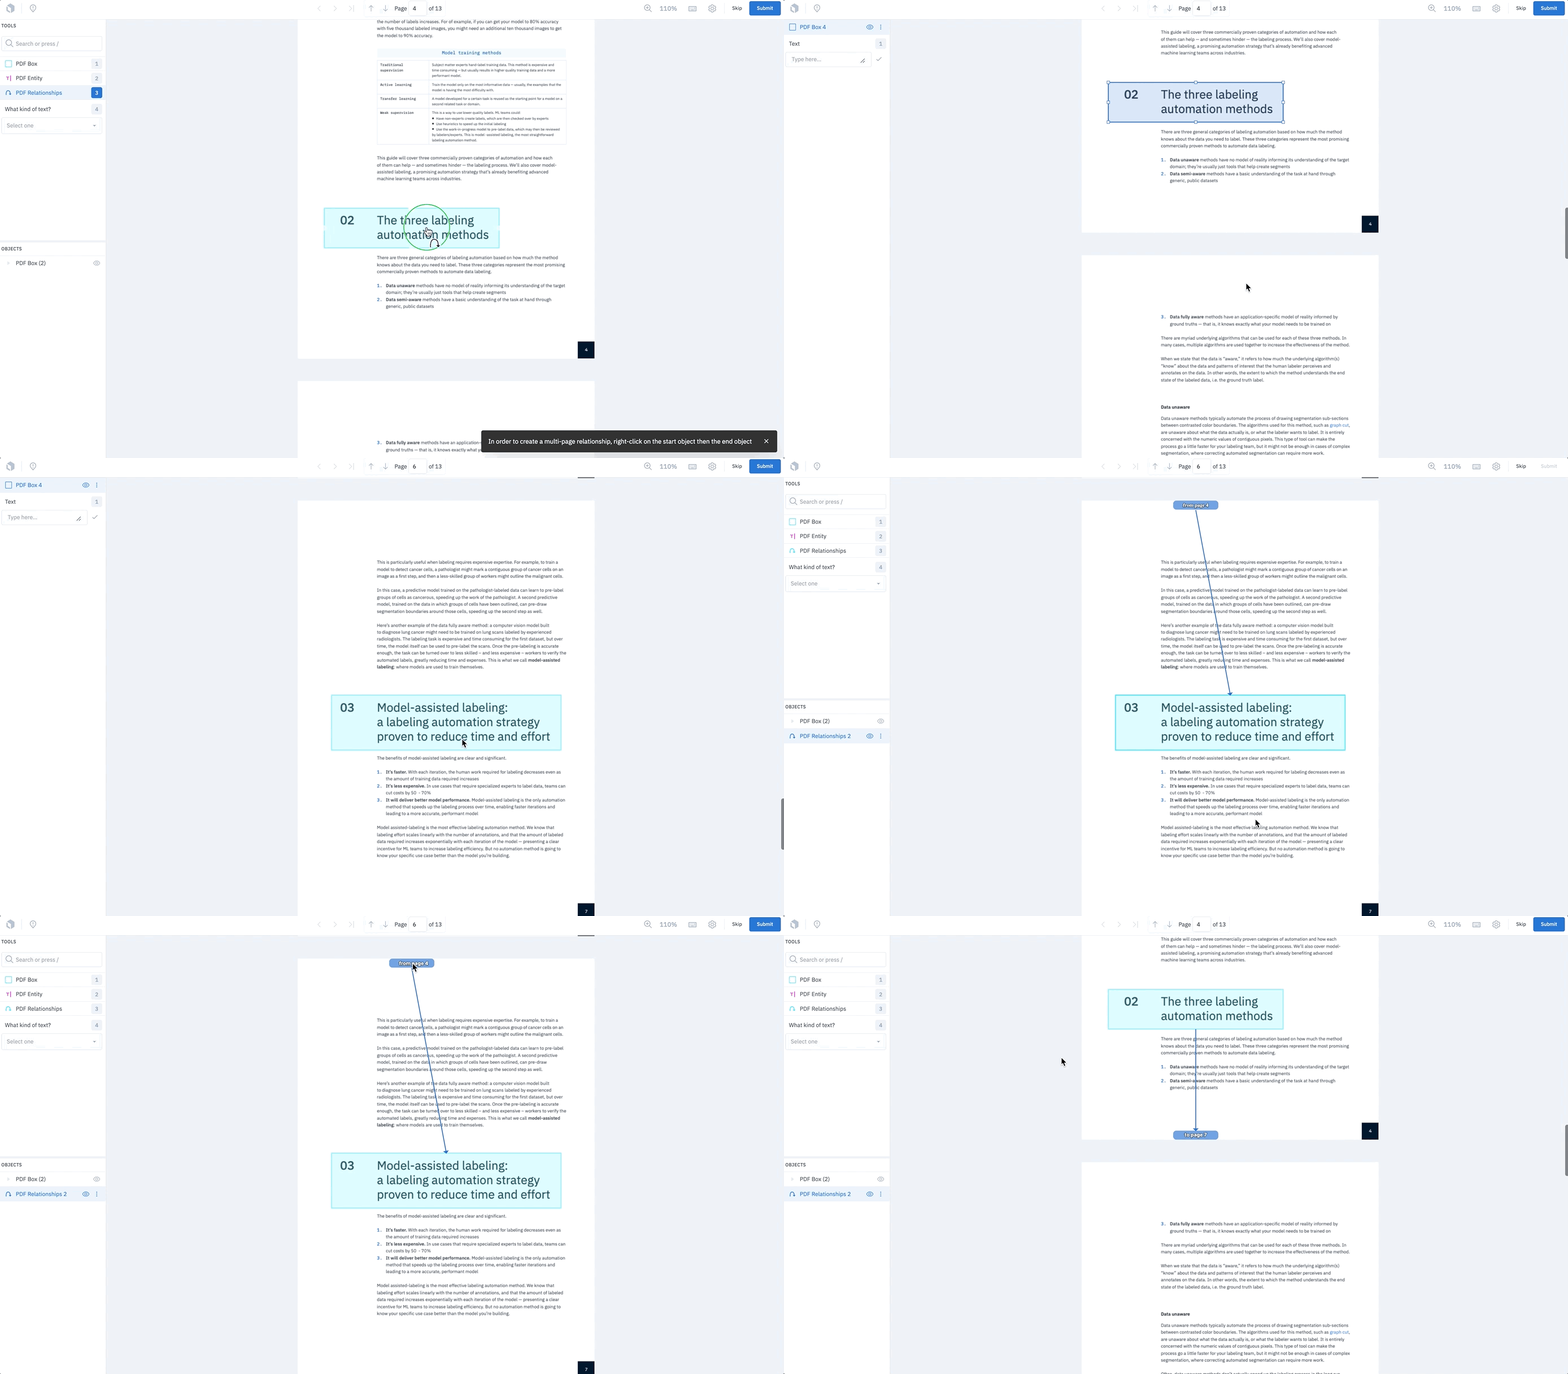
If you want to create an annotation relationship for annotations that exist on different pages, you will need to follow a slightly different workflow:- Select the relationship tool.
- Go to the annotation where you want to start the relationship, right-click, and click Select relationship start.
- Scroll to your destination annotation, right-click, and click Select relationship end.
Radio classification
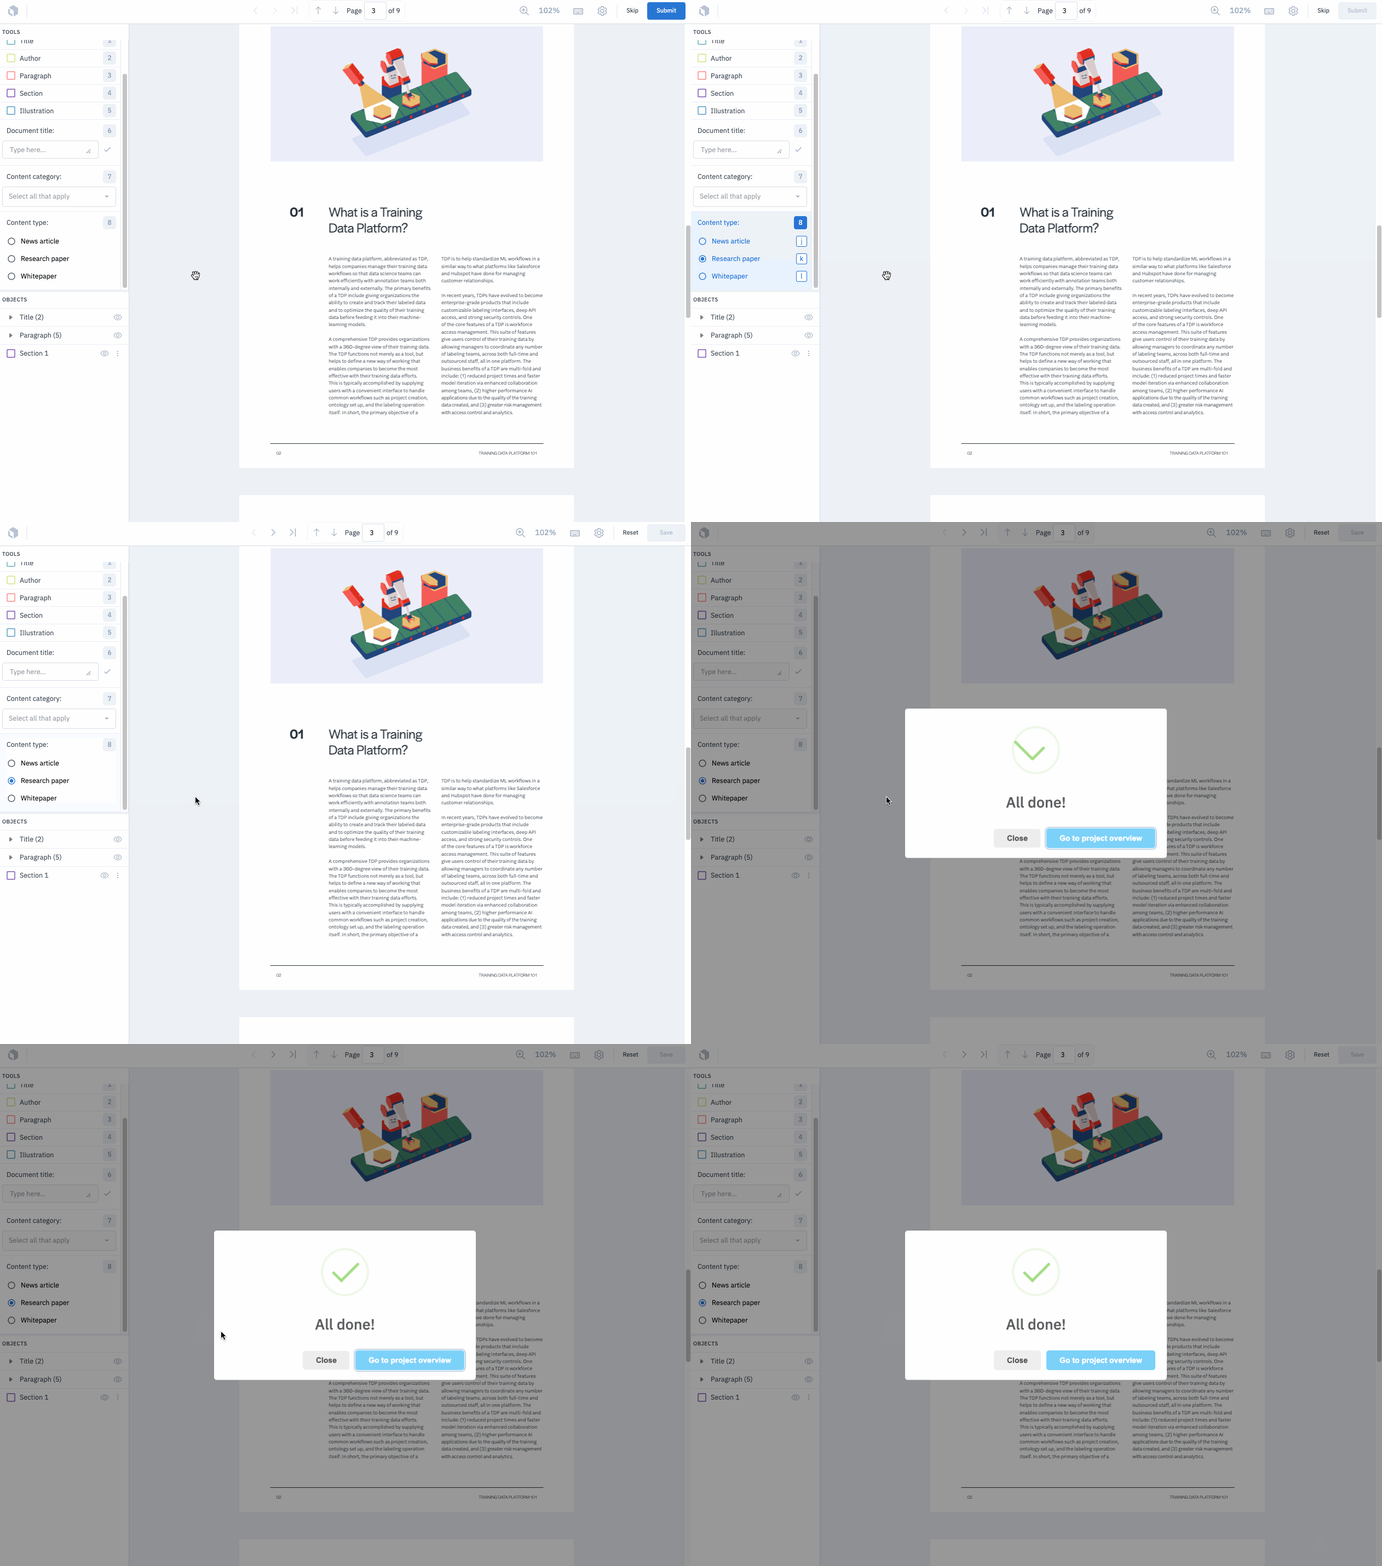
Create a radio classification by activating the classification question and inputting the answer value. In the below example, press8, k, and esc to complete the radio classification.
Once all classifications have been completed, press e to submit your label.
Checklist classification
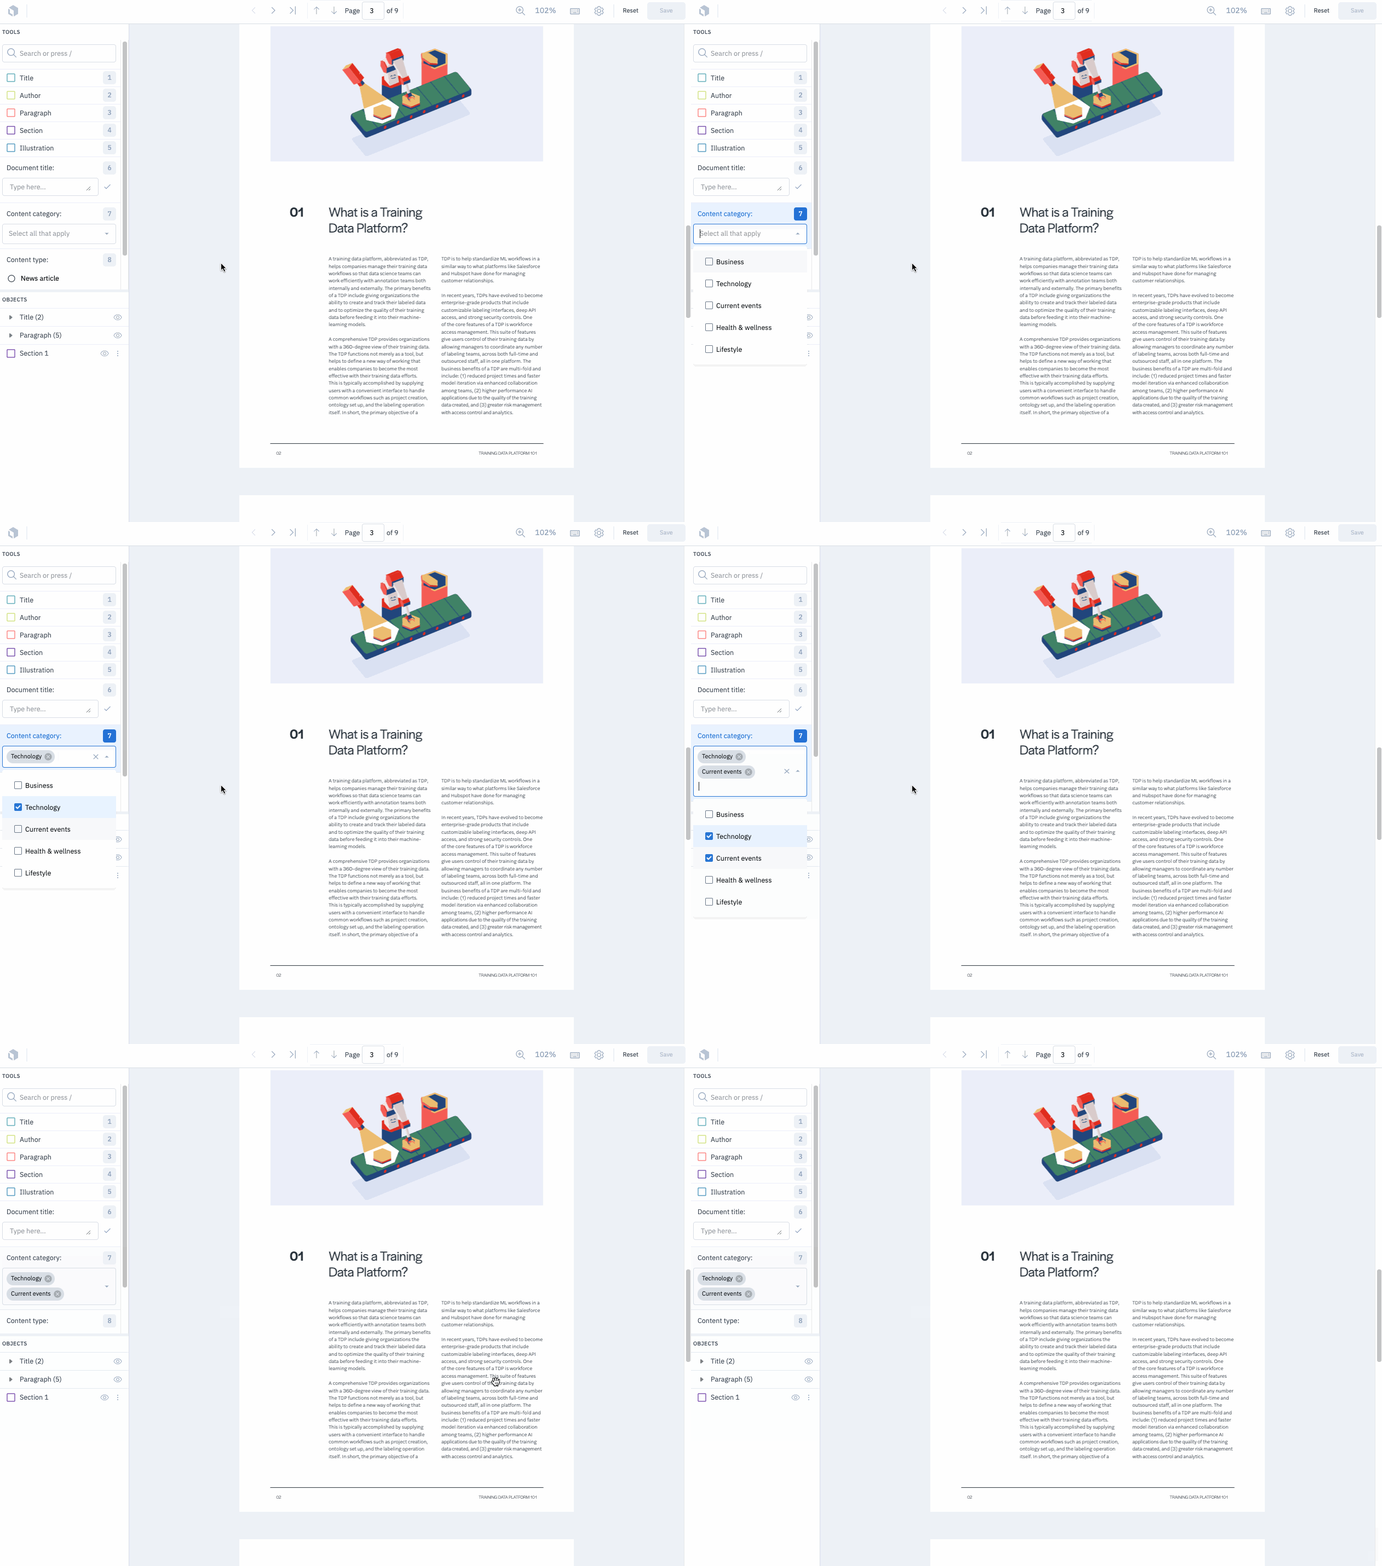
Create a checklist classification by activating the classification question and inputting the answer value(s). In the below example, pressing7 and pressing Down + Enter on the answer values completes the checklist classification.
Once all classifications have been completed, press e to submit your label.
Free text classification
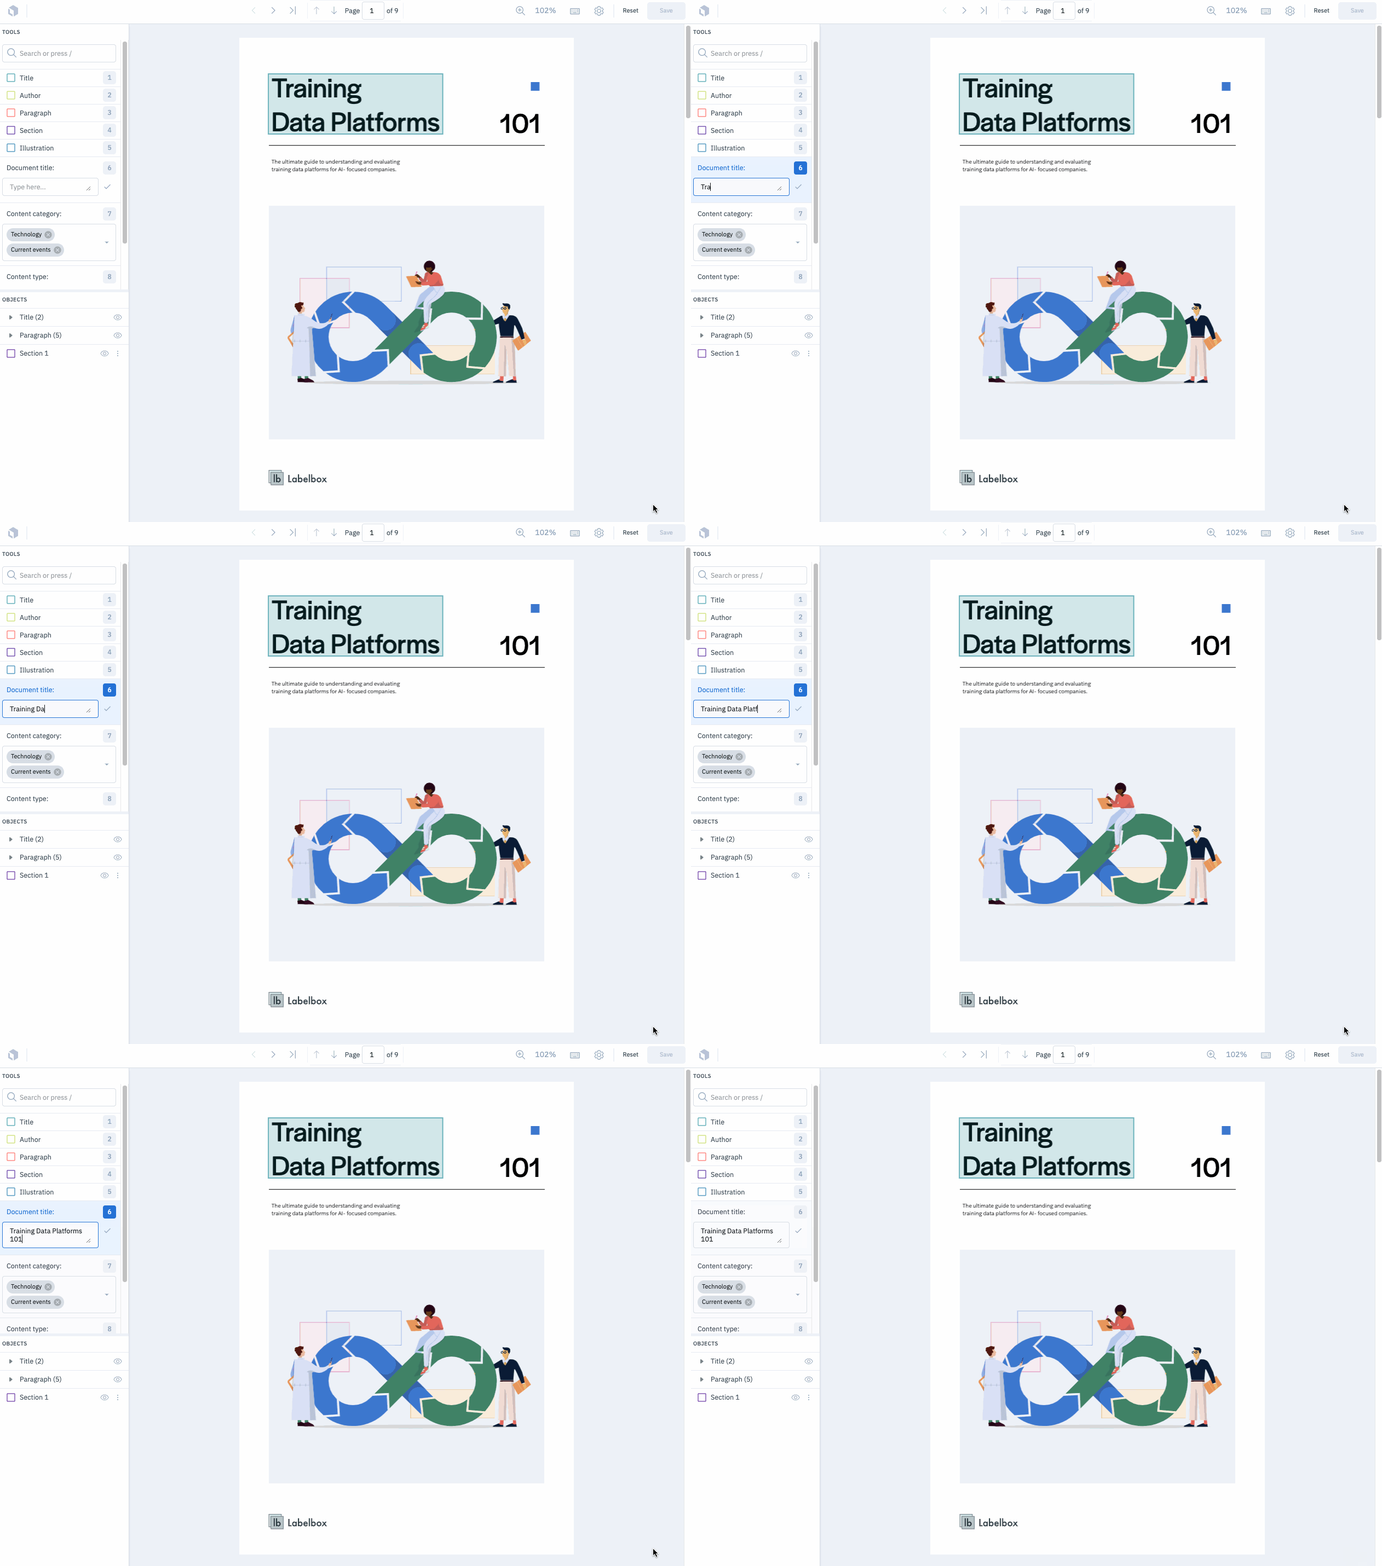
Create a free text classification by activating the classification question and inputting the answer value. In the below example, pressing6, typing the answer value, and pressing Enter completes the free text classification.
Once all classifications have been completed, press e to submit your label.
Enable auto-OCR
The in-editor automatic OCR support allows you to recognize and extract text from PDFs using bounding boxes. To enable it, add a bounding box feature and toggle on the Automatic OCR option. When you draw a bounding box on the document, OCR automatically detects and extracts text within the selected area. The extracted text is stored as a text subclassification.Custom text layers
A unique aspect of our document editor is the ability to view text layers. You can toggle the text layer on and it will appear whenever you want to highlight an entity.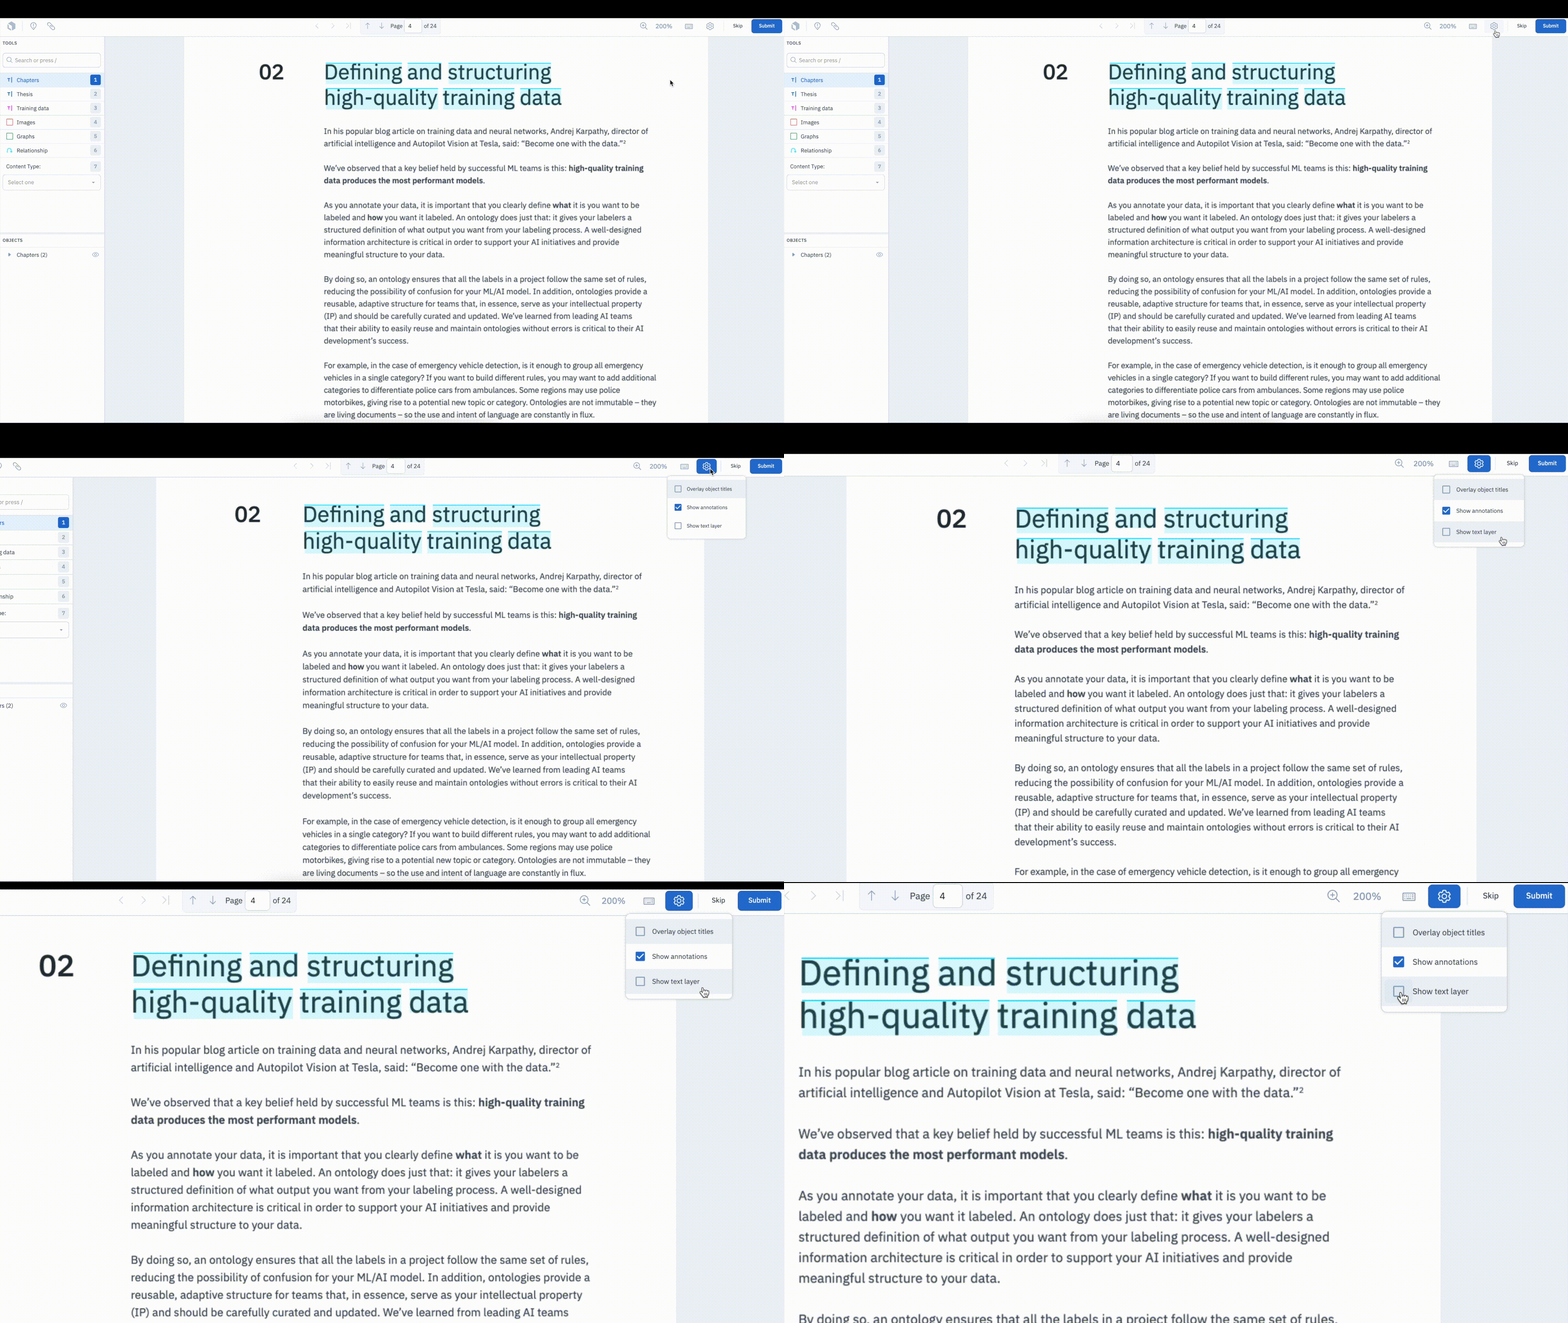
Navigate the document
Use your mouse scroll wheel or trackpad to move forward and backward through the pages of the document. To jump to a specific page, highlight the current page number in the top navigation bar, type your desired page number, and pressEnter.
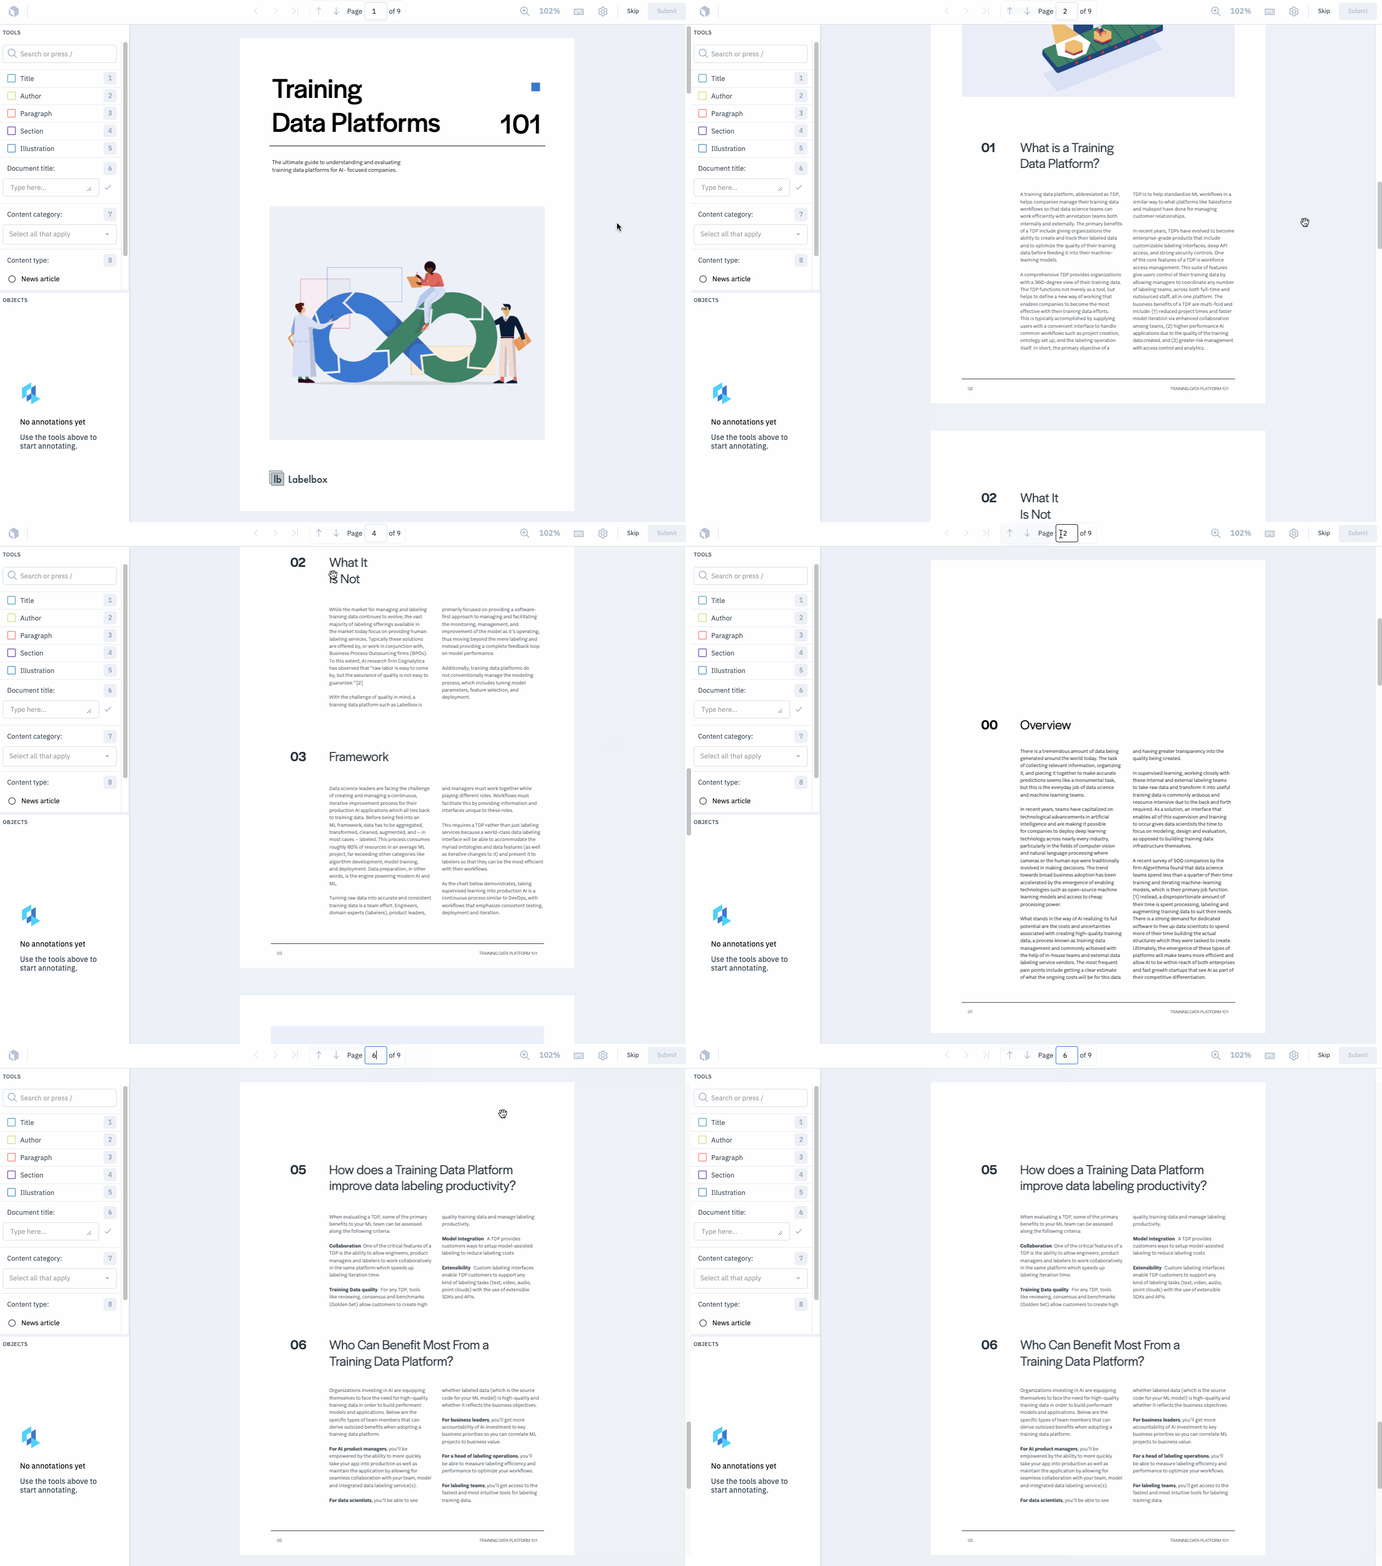
Z and click on the section of the page you want to zoom in on. To zoom out, press Opt + Z and click on the page, or press Shift + Z to return the page to its original zoom level.
Document-specific hotkeys
| Function | Hotkey | Description |
|---|---|---|
| Show Text Layer | Shift + T | Show or hide the text layer. |