Upload predictions to a model run
Learn how to upload your model predictions to a model run to enable model error analysis and active learning workflows.
Check out these end-to-end developer guides to learn how to upload predictions.
Developer Guides:
- Upload image predictions
- Upload video predictions
- Upload text predictions
- Upload geospatial predictions
- Upload HTML predictions
Overview
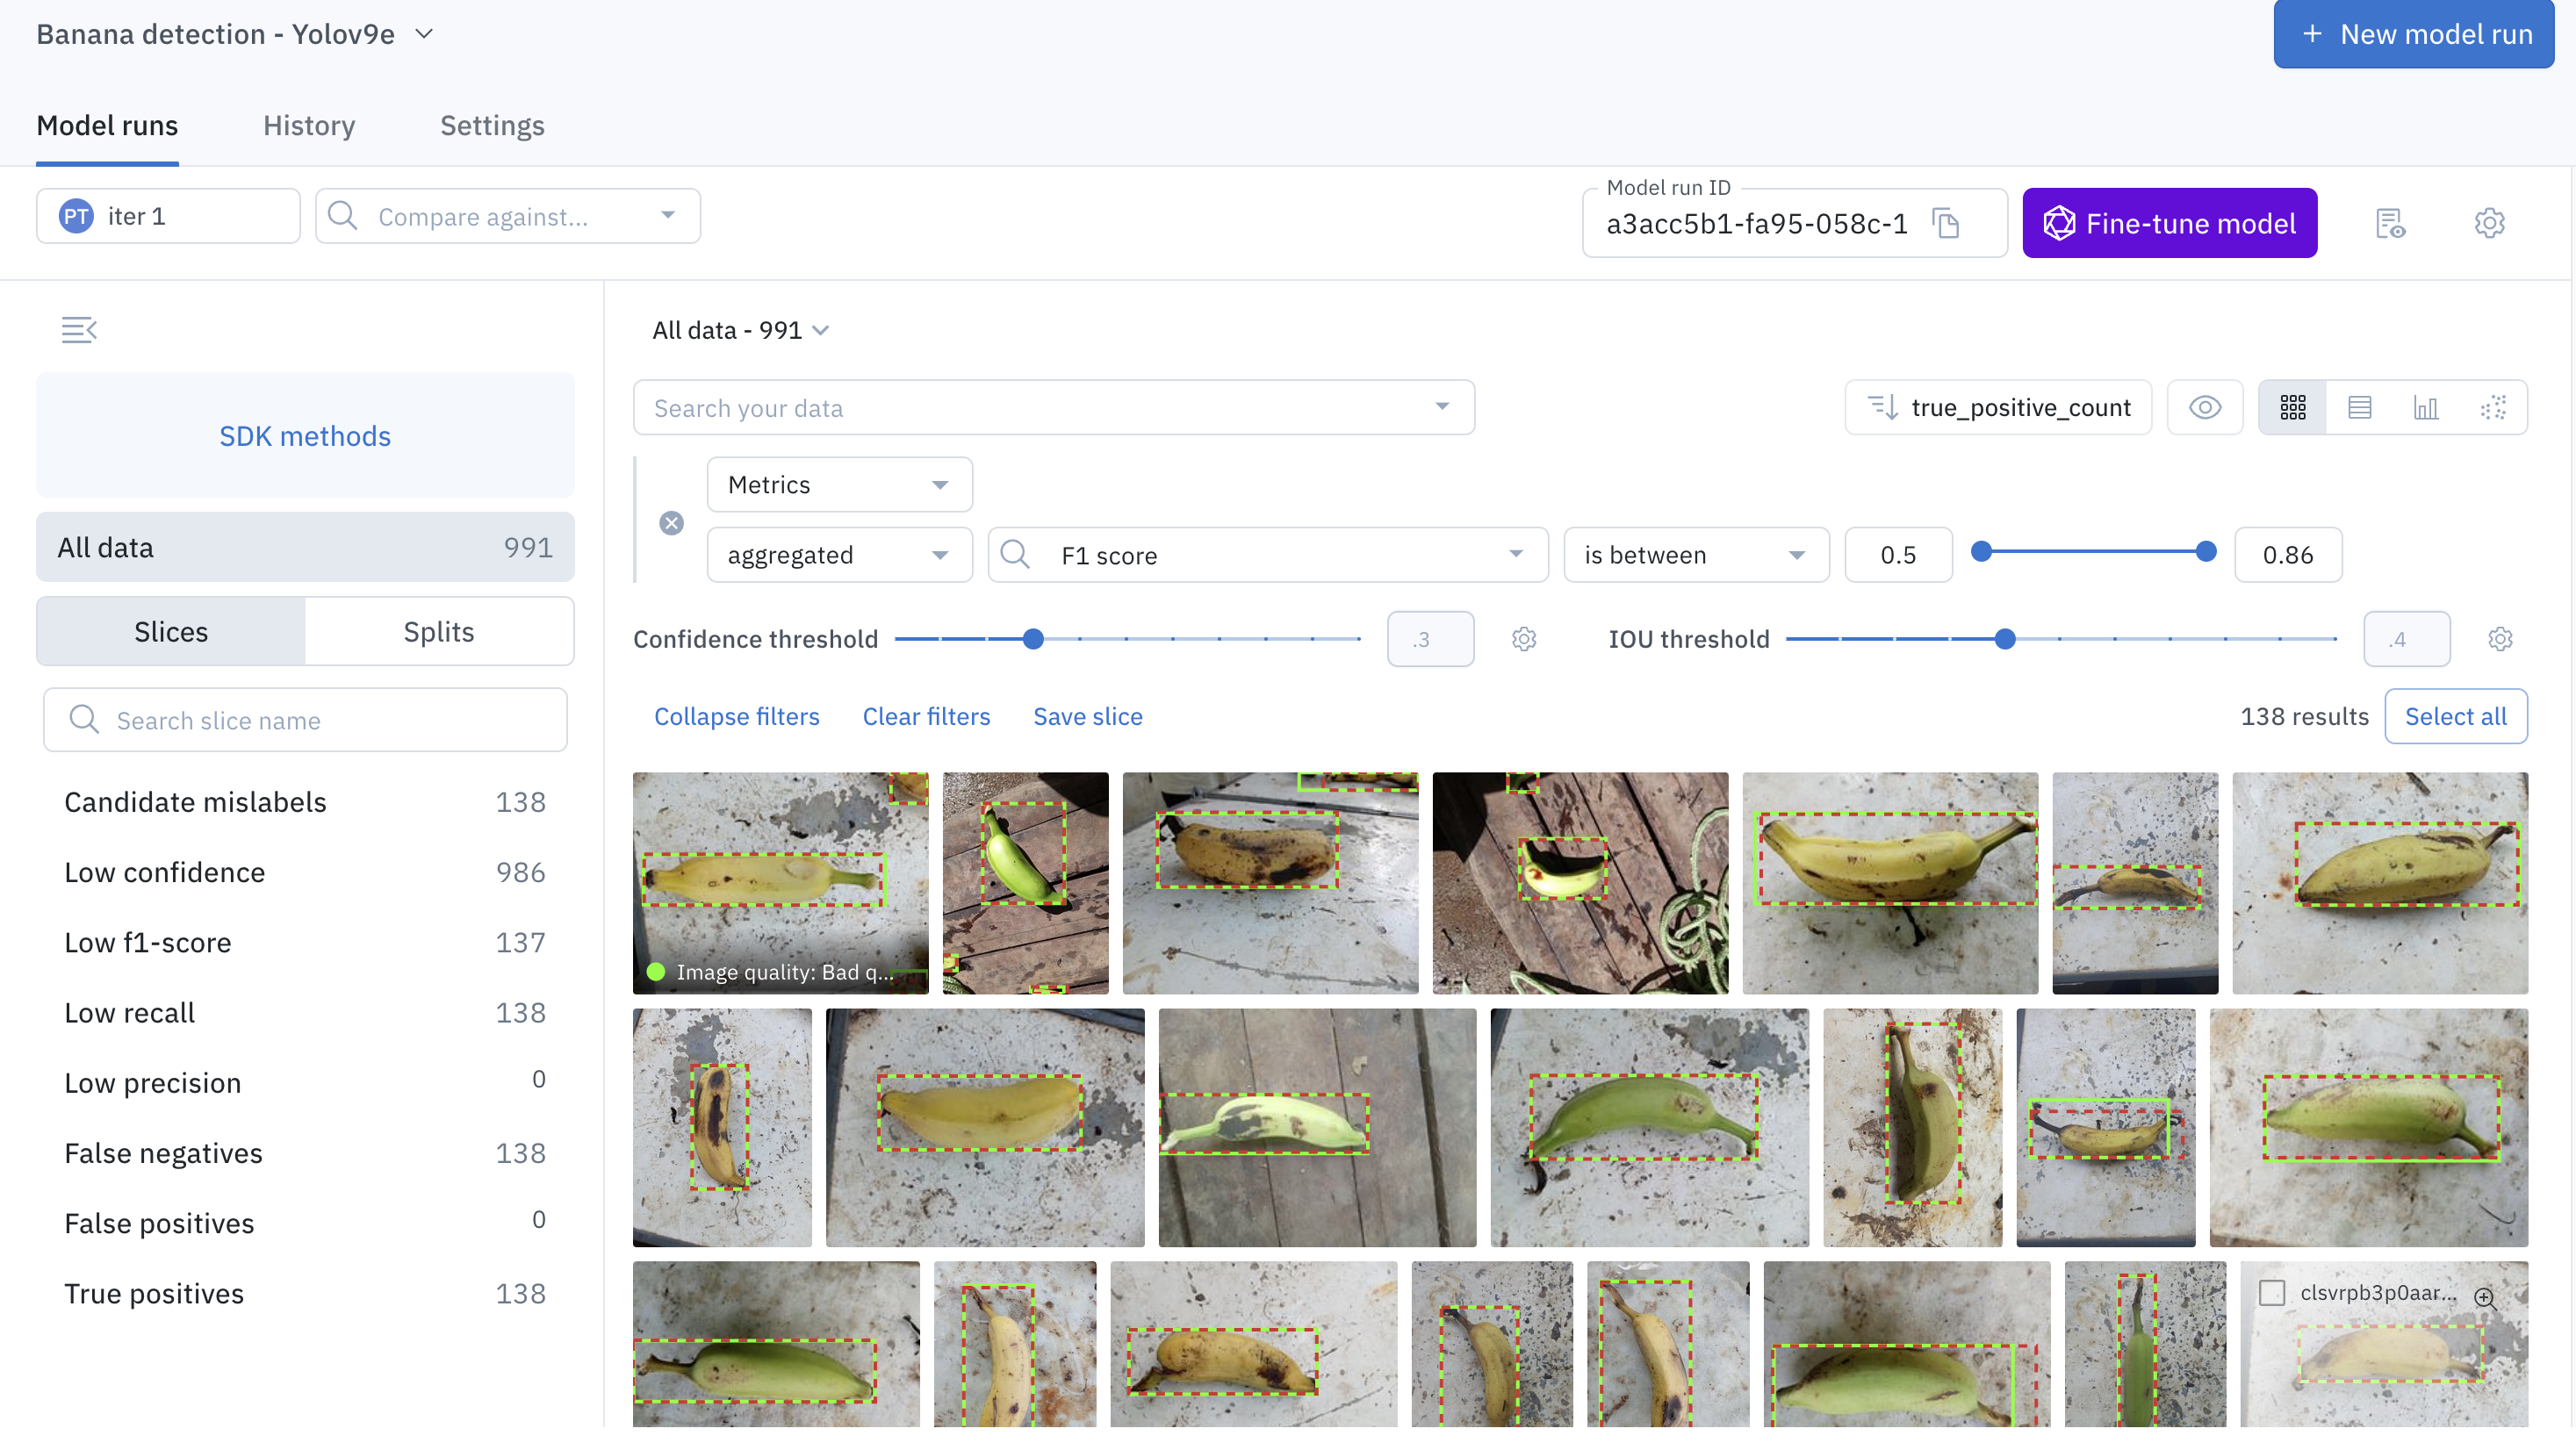
You will need to upload your model predictions to Labelbox to perform model error analysis, use model-assisted labeling, or set up active learning workflows. This page contains instructions for uploading model predictions to a model run, which is a container for the predictions, annotations, and metrics of a specific experiment in your ML model development cycle.
You can include confidence scores and custom metrics when you upload your model predictions to a model run. However, given the predictions and annotations in a model run, Labelbox will automatically calculate some auto-generated metrics upon upload.
How to upload predictions to a model run
Step 1: Import data rows
To upload predictions in a model run, you'll need to have a set of data rows to upload the predictions on. If you do not already have a set of data rows, you'll need to import data rows in a dataset in Catalog.
To learn how to import data rows via the Python SDK (Step 1), see this tutorial.
To learn more about creating data rows, see Create a dataset in Catalog.
Step 2: Create/select an ontology for your model predictions
When you create a Model - to upload a set of predictions - you'll need to specify the ontology (also called taxonomy) that corresponds to the set of predictions. You may want to re-use an ontology that already exists in Labelbox - e.g. an ontology already used for a labeling project. Or, you may want to use an ontology for your model predictions that does not exist in Labelbox yet. In the latter case, you'll need to create an ontology.
To learn how to create an ontology via the Python SDK (Step 2), see this tutorial.
To learn more about creating ontologies, see Create/modify ontologies.
Step 3: Create a Model and a model run
Before you can upload your predictions, you'll need to make sure you have a Model and a model run to contain them. You cannot simply upload predictions without specifying which Model and model run they'll be associated with. A Model is attached to an ontology: it defines the predictions that can be contained in it. A Model can contain any number of model runs. Each model run corresponds to an experiment in your ML model development cycle. If you do not already have a Model and a model run, you will need to create a Model, then attach the ontology that fits your predictions, and finally create a model run.
To learn how to set up a Model and model run via the Python SDK (step 3), see this tutorial.
To learn more about creating a Model, see Create a Model and Create a model run Create a project.
Step 4: Send a set of data rows to the model run
Now that you have your Model, model run, and ontology configured, you'll need to send a set of data rows to the model run.
To learn how to send data rows to a model run via the Python SDK (Step 4), see this tutorial.
Step 5: Optionally, send annotations to the model run
After you have successfully configured your model run with the correct ontology and sent data rows to the model run, you can optionally send annotations to the model run.
To learn how to send annotations to a model run via the Python SDK (Step 5), see this tutorial.
Step 6: Create the predictions payload
Uploading confidence scores with each model predictions
Labelbox now supports specifying the confidence score associated with every model prediction. It is optional.
After you have successfully configured your model run with the correct ontology and sent data rows (and optionally annotations) to the model run, you are ready to prepare the predictions payload. To do this, you will need to use our Python SDK. Each imported prediction will need to reference a feature class within the ontology (see step 2 above) and a specific data row ID. Labelbox support two formats for the predictions payload: NDJSON and Python Annotation types.
Use the table below to find a prediction payload sample for your asset type. The "-" symbol indicates that importing predictions to a model run is not supported for that prediction/asset type combination. To learn how to create a prediction payload (Step 6), see this tutorial.
| Image | Video | Text | Documents | Geospatial | Audio | Conversational text | DICOM | |
|---|---|---|---|---|---|---|---|---|
| Bounding box | Payload | Payload | N/A | Payload | Payload | N/A | N/A | - |
| Polygon | Payload | - | N/A | N/A | Payload | N/A | N/A | - |
| Point | Payload | Payload | N/A | N/A | Payload | N/A | N/A | - |
| Polyline | Payload | Payload | N/A | N/A | Payload | N/A | N/A | Payload |
| Segmentation mask | Payload | Payload | N/A | N/A | - | N/A | N/A | Payload |
| Text entity | N/A | N/A | Payload | Payload | N/A | N/A | Payload | N/A |
| Classification - Radio | Payload | Payload | Payload | Payload | Payload | Payload | Payload | - |
| Classification - Checklist | Payload | Payload | Payload | Payload | Payload | Payload | Payload | - |
| Classification - Free-form text | Payload | - | Payload | Payload | Payload | Payload | Payload | - |
| Relationship | Payload | - | Payload | Payload | - | N/A | Payload | - |
Step 7: Upload the predictions payload to the model run
After you have constructed your predictions payload, you are ready to upload it to the model run. To do this you will need to use our Python SDK. See the table in the next section to find the end-to-end tutorial that most closely fits your use case.
To learn how to upload a prediction payload via the SDK (Step 7), see this tutorial.
Updated 3 days ago