Multimodal chat evaluation
Learn how to use the multimodal chat evaluation editor to evaluate generative models across multiple data types, compare model outputs, and refine performance with supported annotation tasks.
The multimodal chat evaluation editor allows you to evaluate generative model responses across multiple data types, including text, images, videos, audio, and PDFs. You can select up to 10 different models, including common foundation models and your custom models, to rate and rank their responses for:
- Model comparison: Evaluate and compare model configurations for a given use case and decide which one to pick. You can also compare model outputs directly from prompts using predefined criteria to perform a ranking or selection.
- RLHF(reinforcement learning with human feedback): Create preference data for training a reward model for RLHF based on multiple outputs from a single model or different model.
The editor has the following modes:
- Live multimodal chat supports live, multi-turn conversations with models for evaluation. Unlike other editors, your team can type prompts to trigger inferencing on the given prompt and return model outputs without importing data into a dataset.
- Offline multimodal chat allows you to import existing conversations for annotating model responses.
Supported annotation types
| Feature | Description | Export format |
|---|---|---|
| Message ranking | Rank multiple model-generated responses to determine their relative quality or relevance. | Payload |
| Message selection | Select single or multiple responses that meet specific criteria. | Payload |
| Message step reasoning | Break responses into steps and evaluate the accuracy of each step by selecting from correct, neutral, and incorrect. Add your rewrite with justification for incorrect steps. (Optional, live editor only) Regenerate the rest of the conversation after each incorrect step. | Payload |
| Prompt rating | Flag prompt with issues and select an issue category. | Payload |
| Fact-checking | Verify the factual information in the response using these rating options: Accurate, Inaccurate, Disputed, Unsupported, Can’t confidently assess, or No factual information. For Accurate, Inaccurate, and Disputed, provide a justification explaining your choice. | Payload |
| Classification - Radio | Select one option from a predefined set. | Payload |
| Classification - Checklist | Choose multiple options from a list. | Payload |
| Classification - Free text | Add free text annotations. | Payload |
Classification tasks can apply globally to the entire conversation or individually to a message. They can also nest subclassification tasks.
Message step reasoning best practices
Message step reasoning is an experimental feature. For projects using ontologies with the step reasoning task, ensure that prompts lead to responses that can be easily broken down into clear steps.
AI critic
AI critic is a live multimodal chat evaluation feature that provides in-editor AI assistance to identify grammar issues and code inconsistencies. You can use this tool to refine your own responses to prompts to create more accurate and consistent multimodal chat evaluation labels.
Analytics view for annotations
The multimodal chat evaluation editor has some special metrics that provide insights into the project overview.
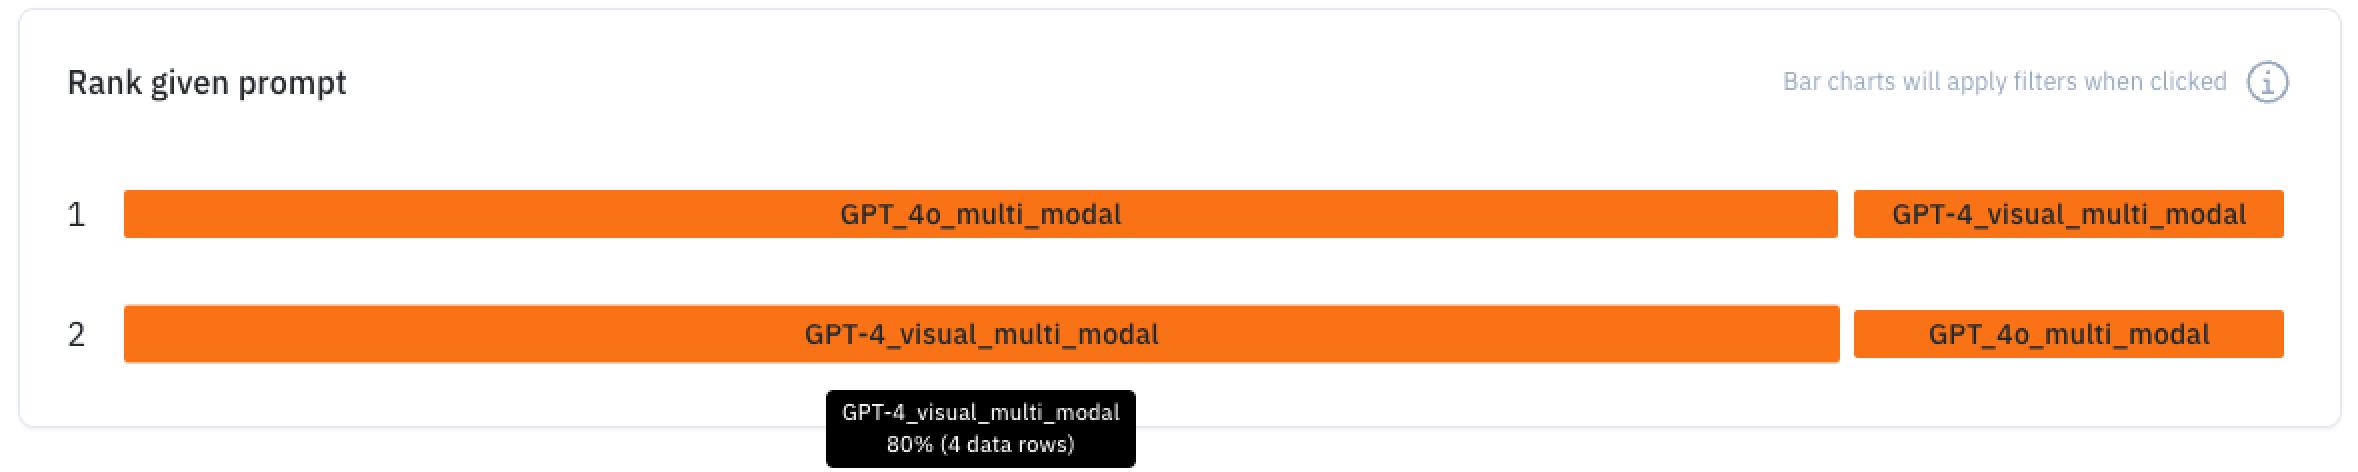
Ranking
Depending on the number of model outputs you have configured, a horizontal ranking graph will appear to provide a visual analysis of LLM (large language model) win rate.
For each position, how often a model output was chosen. A longer bar means it was chosen more often in that position.
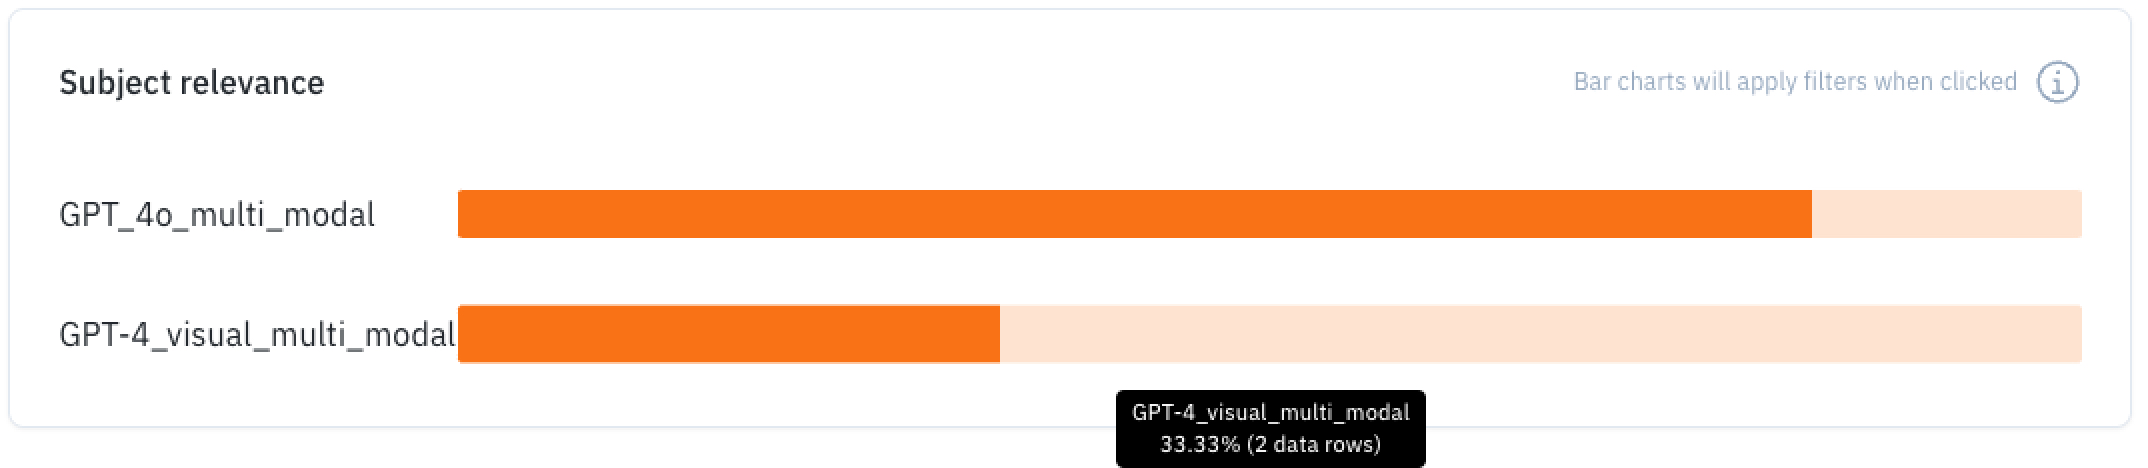
Selection
You can also have a selection with different defined topics to further your use case.
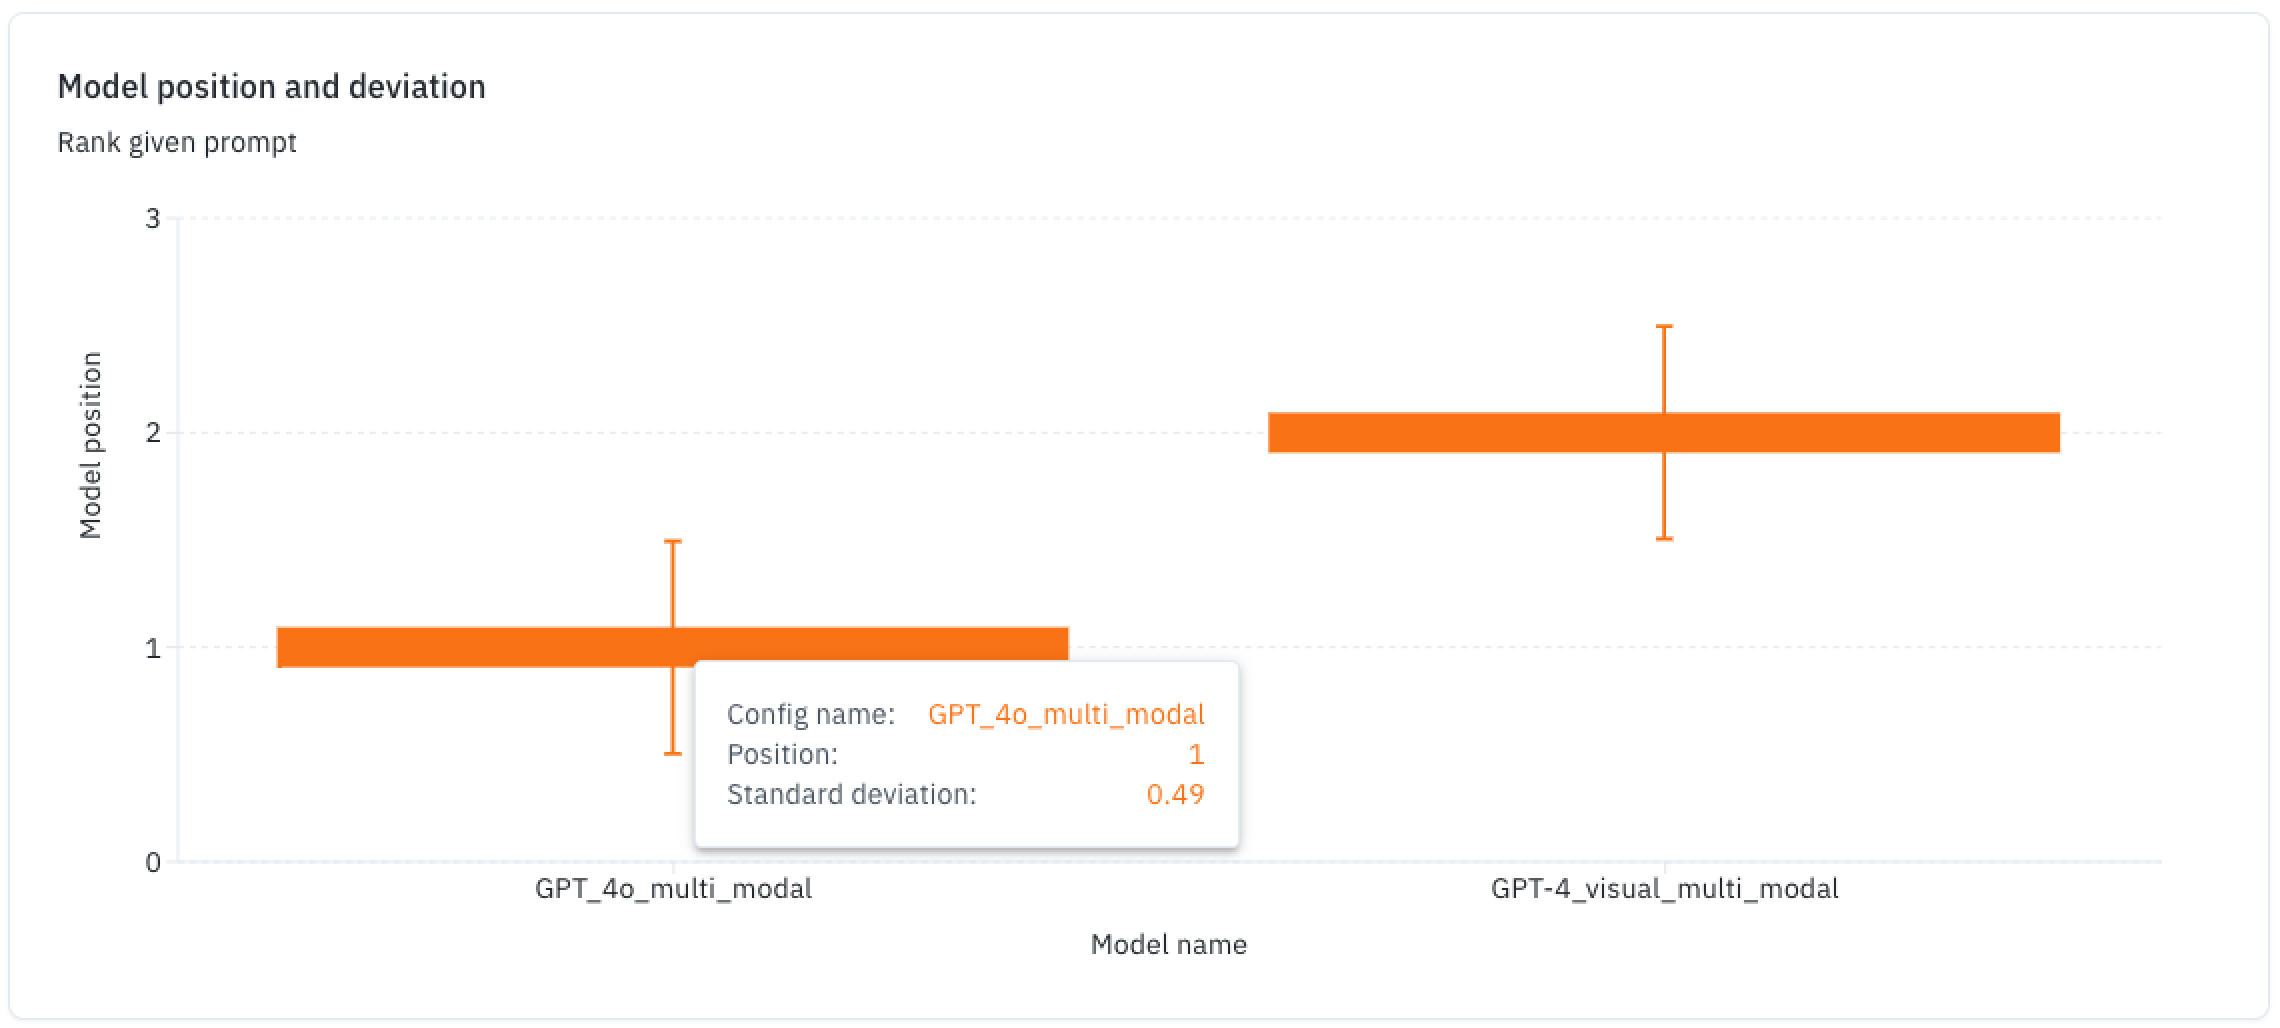
Model variance histograms
This chart shows a model's position in terms of how often it wins, with a variance chart showing how consistent it is in that position against other models.
Updated 3 months ago