Slices
Create, explore, and updates slices in Catalog.
Developer guide: Catalog slices
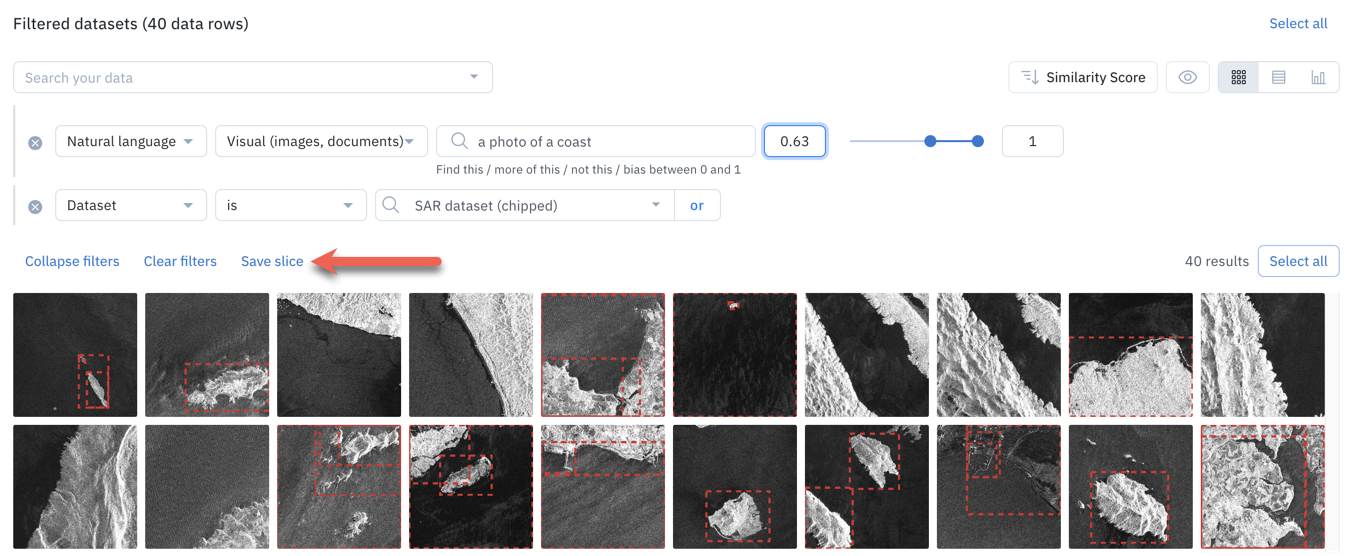
A slice is a subset of data rows that share a common characteristic. You can construct a slice by using one or more filters to curate a collection of data rows. Users often combine filters to surface high-impact data and then save the results as a slice.
Create a slice
Once you have narrowed down a subset of data rows using one or more filters, click Save slice to save the subset of data rows as a slice. You will be prompted to give a name (3 to 30 characters) and an optional description for your slice.
After you create a slice, the slice will show up in your list of Slices in the left side panel of Catalog.
Limits
See this page to learn the limits for creating slices.
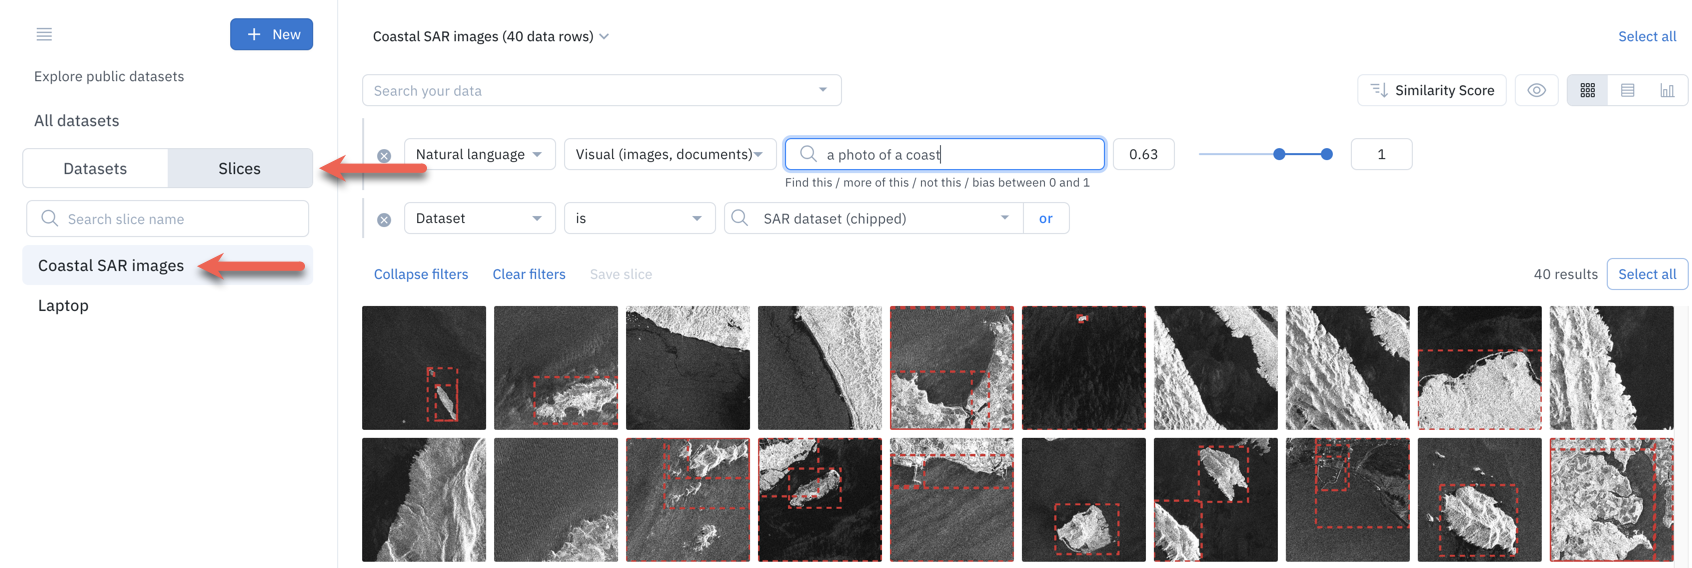
Explore a slice
To explore a slice, go to the left side panel of the Catalog, click on Slices, and click on the slice name you want to explore.
The filters associated with the slice will appear instantly. All data rows matching the filters will also appear, including data rows uploaded after the slice was created.
Once you are done exploring a slice, you can:
- Click on a different slice name to explore a different slice.
- Click on Datasets and a dataset name to explore a dataset.
- Click on All datasets to explore your complete Catalog.
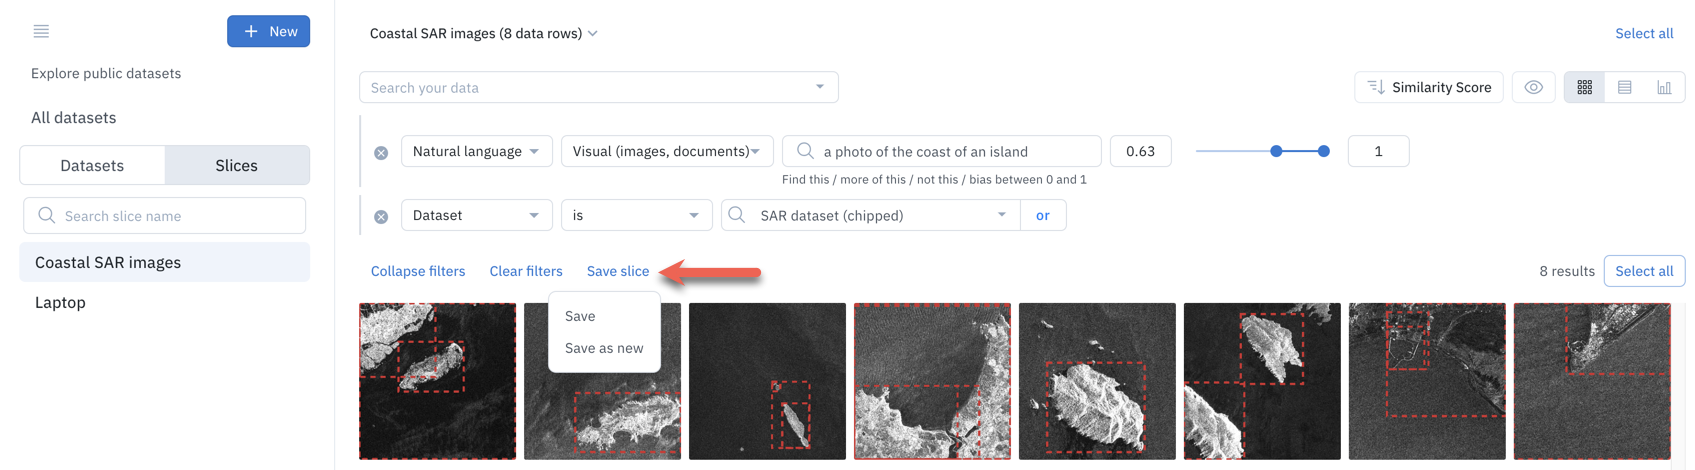
Update a slice
Over time, you might need to adjust the filters associated with a slice. Upon navigating to a slice, you can modify, add, or delete attributes of the filters. After you update the filters, save your changes by clicking on Update slice.
Labelbox will prompt you to choose between the following:
- Save the slice to update it with the newly configured filters.
- Save as new a distinct slice with the newly configured filters.
Automate data curation using slices
Slices are dynamic, meaning any data uploaded to Labelbox will automatically populate in relevant slices. Therefore, the data rows in a slice may change over time in two possible ways:
- New data rows appear in a slice: If you add new data rows to Catalog, they will appear in the slices whose filters they match. A data row can appear in many slices.
- Existing data rows disappear from a slice: If a data row is deleted from Catalog or no longer matches a slice filter, it will not appear in the slice.
You can use slices to enable automated data curation workflows. For example, a possible workflow for surfacing high-impact data in Catalog may be:
- Set up filters in Catalog and ensure the filters are surfacing the intended data rows.
- Save the filter by creating a slice.
- Create a pipeline with cloud functions to automatically create new data rows in Labelbox when data lands in your storage buckets.
- Take action at any desired interval on high-impact data rows that automatically land in certain slices.
Manage slices
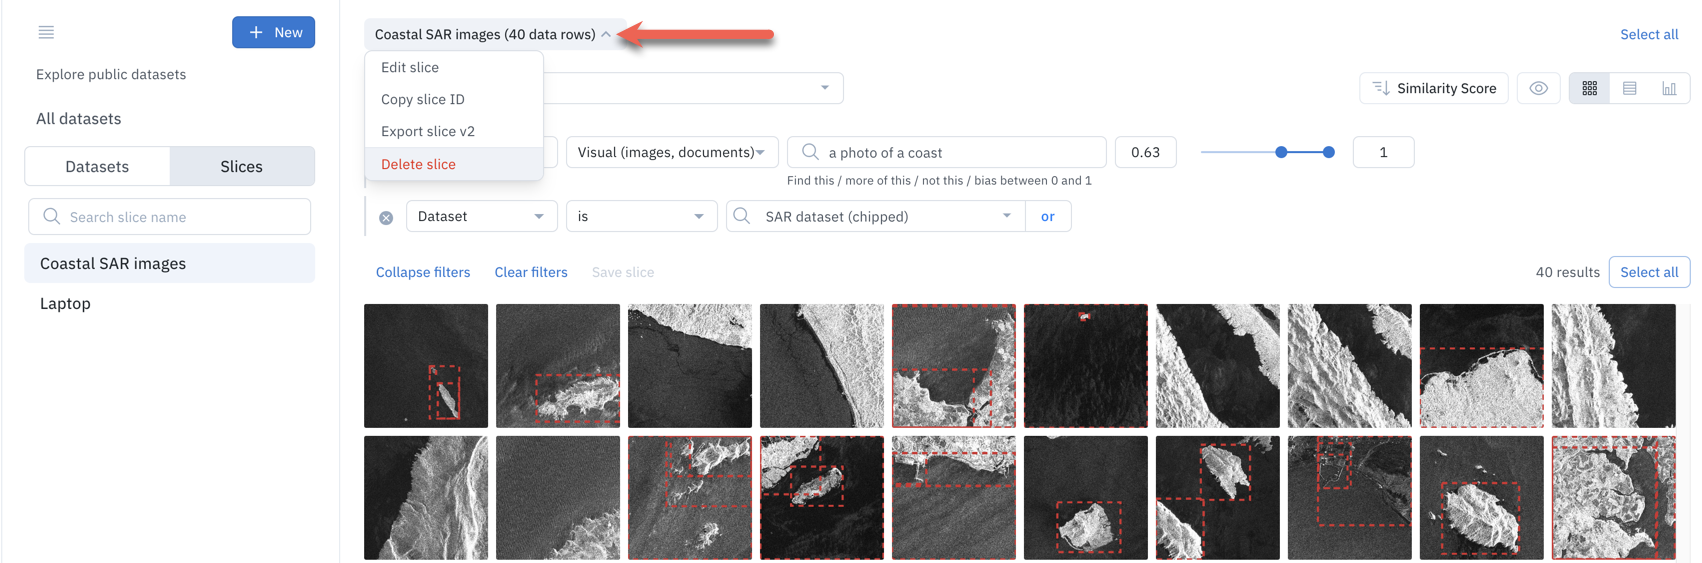
When you select a slice, you can access its dedicated menu to:
- Edit the slice (aka, change its name or description).
- Copy the slice ID that you can use with the Python SDK (see link.
- Export the slice (see Export data rows from Catalog.
- Delete the slice. Be careful. This can't be undone.
Updated 11 months ago